A colorful-section paper plate umbrella craft is made by cutting a plate in half, dividing the curved canopy into panels, decorating each panel, and attaching a curved handle beneath it. Use a plain uncoated plate so paint or glue adheres well, and mark the sections before children add color. A narrow strip of cardstock makes a sturdier handle than lightweight paper, while controlled amounts of glue reduce buckling. Let painted or glued panels dry flat before assembly, then trim shallow scallops along the lower edge if the child can use scissors safely.
Choose Materials That Keep the Canopy Flat
A plain, uncoated paper plate provides the most dependable base because its surface accepts washable paint, crayons, markers, and glued paper without the resistance of a glossy coating. A standard dinner-size plate creates enough room for several visible color panels while remaining manageable for small hands. Dessert plates work for cards or compact displays, but their narrow surface leaves less space for children to control paint within each section.
The decoration method should determine the rest of the supply choices. Crayons and broad washable markers require almost no drying time and place little moisture into the plate. Tempera paint produces stronger blocks of color, but a heavily loaded brush can soak the fibers and pull the canopy out of shape. Torn tissue paper gives each panel texture, although too much liquid glue creates the same warping problem. For a group activity, choosing one main coloring medium usually makes setup, drying, and cleanup more predictable.
Gather a pencil, ruler, child-safe scissors, glue stick or washable craft glue, and cardstock for the handle. A strip cut from a cereal box or similar clean paperboard can replace cardstock when a firmer handle is wanted. Pipe cleaners produce an easy curve, but their narrow attachment point may twist unless they are taped securely behind the plate. Paper strips are easier to decorate and offer a larger gluing surface, making them a practical choice for a wall-mounted umbrella.
Small additions should serve a visible purpose rather than crowd the panels. Cotton pieces can suggest clouds, short blue paper strips can become rain, and a single button or paper circle can cover the point where panel lines meet. Loose sequins, beads, and tiny foam shapes require closer supervision and are not suitable for children who may mouth small objects. Flat paper decorations are safer to manage and place less strain on the plate.
Before decorating, place the plate with its eating surface facing down and inspect the rim. Deeply fluted plates create attractive canopy texture, but lines drawn across their ridges may appear uneven. A smoother plate is better when clean geometric sections are the priority. For related material variations, the Paper plate umbrella craft with colorful sections collection can help compare painted, collaged, and marker-based finishes.
Divide and Decorate the Colorful Sections
Panel layout controls whether the umbrella looks balanced. Draw a light center mark at the midpoint of the plate’s straight edge, then extend lines from that point toward the curved rim. Four broad panels are easier for younger children to fill, while six or eight narrower panels create a more detailed rainbow effect. Equal measurements are optional; slightly uneven sections still read clearly as an umbrella once each area has a distinct color.
Mark the divisions before applying paint or collage pieces. Pencil lines can be adjusted without damaging the plate, and children can see exactly where one color should stop. Pressing hard with a marker at this stage may score the plate or create dark borders that compete with lighter colors. If crisp separation matters, trace the final divisions with a dark crayon after the colored areas dry. Crayon also forms a mild resist that can slow watery paint from crossing the boundary.
A simple repeating sequence works well when the available palette is limited. For example, alternate yellow, blue, and red across six panels rather than trying to mix six different shades. A rainbow order gives children a color-sequencing activity, but it does not need to be scientifically exact for the design to work. Another option is to contrast warm colors on one side with cool colors on the other. That arrangement makes the panel structure obvious even from across a classroom.
Apply color from the center outward so hands do not repeatedly drag across wet areas. With paint, use a brush that is broad enough to cover efficiently but small enough to stop at the pencil lines. Wipe excess paint against the cup edge instead of transferring a dripping brush to the plate. With tissue paper, spread a thin layer of glue over one panel at a time and overlap pieces only slightly. Thick stacks take longer to dry and can pull away at the corners.
Place the finished canopy flat on scrap paper until the surface no longer feels cool or tacky. Standing a wet plate upright encourages paint to run toward the rim, while drying it over a rack can leave bends. If the plate begins curling, set clean parchment or another nonstick sheet over the dry surface and place a light book on top for a short period. Do not flatten wet paint under a book because the design may transfer or stick.
The decoration is working when every panel remains identifiable and the plate still lies reasonably flat. It is failing when adjacent shades blend into mud, glue pools along the rim, or embellishments cause the plate to sag. Stop adding material at that point and allow the canopy to dry before deciding whether it needs another layer.
Cut and Assemble the Umbrella in 7 Steps
Assembly is easiest when the main cuts are completed before bulky decorations are attached. Adults can pre-cut plates for younger children, while children with established scissor control may cut along a clearly drawn line under supervision. The plate should become a semicircle with a straight upper cut edge and a rounded outer rim below. Depending on how the finished piece will hang, either half of the plate can be used.
- Cut the plate in half. Draw across the diameter first rather than estimating by eye. Save the unused half for a second umbrella or a color test.
- Mark the canopy panels. Place a small center point on the straight edge and draw lines from it to spaced locations along the curved rim.
- Add the colors. Paint, draw, or collage inside each section, keeping wet layers thin enough for the plate to retain its shape.
- Dry the canopy flat. Wait until glue and paint are no longer tacky before cutting the decorative lower edge or attaching the handle.
- Create the scallops. Draw two or three shallow arches along the straight edge and cut on those lines. Deep arches weaken the narrow points between panels.
- Make a J-shaped handle. Cut a cardstock strip, round one end into a hook, and leave a straight tab at the top for attachment.
- Join the pieces. Glue or tape the tab behind the center of the canopy, then press the joint flat until it holds.
The scalloped edge is decorative rather than structurally necessary. Skipping it gives preschoolers a simpler shape and preserves more material around the handle joint. Older children can align each shallow dip with a panel line, creating the familiar pointed umbrella edge. If the cuts become very deep, the tips bend easily and may tear when the craft is moved.
Glue sticks are tidy and sufficient for a lightweight cardstock handle, but they need broad surface contact. Liquid glue forms a stronger bond when used sparingly and given time to dry. Tape works immediately and is useful when the umbrella must be displayed the same day, although it remains visible from the back. A staple is strong but should be applied by an adult; cover exposed ends on the back with tape if children will handle the finished piece.
For a freestanding-looking display, position the handle directly beneath the canopy’s center. Moving it to one side may imitate an umbrella blowing in the wind, but the composition can appear accidental unless paper raindrops or tilted clouds reinforce the idea. More assembly variations for a Paper plate umbrella craft with colorful sections can use the same canopy while changing the handle material or weather scene.
Fix Uneven Panels, Warping, and Weak Handles
Uneven color boundaries are usually easier to define than erase. Once the surface is dry, trace the panel divisions with a dark crayon, narrow marker, or thin strip of paper. This creates intentional borders and covers minor overlaps. Adding more wet paint over a mistake often enlarges the problem, especially when two contrasting colors have already mixed. Treat small variations as part of the handmade design unless the panel structure has disappeared completely.
Warping occurs when one side of the plate absorbs substantially more moisture than the other. A thin, even paint layer dries more predictably than puddled color, and a glue stick introduces less moisture than poured craft glue. If curling appears during a group session, move the piece to a flat drying area rather than trying to bend it backward while damp. Gentle flattening is appropriate only after the surface has dried enough not to transfer.
A weak handle usually reflects a small attachment tab rather than inadequate adhesive. Increase the hidden tab to about the width of two fingers, place it behind the canopy, and tape across the full width. Doubling the top of a thin paper strip can also stiffen the joint. If a pipe cleaner rotates, anchor it with two separate pieces of tape positioned like a cross instead of wrapping one narrow piece around the stem.
Cracked scallop points can be reinforced from behind with small paper patches. Match the patch to the plate color if the back will be visible, or use clear tape for a faster repair. A tear extending into a decorated panel is harder to conceal; turning that area into a cloud, raindrop cluster, or paper bow can integrate the repair without repainting the entire canopy.
Children working at different skill levels do not need identical results. A beginner version can use four crayon-filled panels, a straight lower edge, and a pre-cut handle. A more advanced version can use narrower sections, painted patterns within each panel, layered raindrops, and carefully aligned scallops. The stronger approach is the one that matches the child’s cutting control and available drying time, not the version with the most additions.
Before displaying the umbrella, check that the surface is dry, the handle remains attached when the canopy is lifted, and no sharp staple ends or loose small pieces are exposed. Hang it from the canopy rather than the handle because the plate provides a wider, stronger support area. The Paper plate umbrella craft with colorful sections design can then become part of a spring weather board, color lesson, or rainy-day window display.
Frequently Asked Questions
Which side of the paper plate should face forward?
Use the raised underside as the front if you want the rim texture to resemble an umbrella canopy. The smoother eating surface can face forward when clean panel lines are more important.
How many colorful sections should the umbrella have?
Four broad sections suit younger children, while six to eight panels allow more color sequencing and pattern work. Choose fewer panels when brush or marker control is still developing.
Can the canopy be colored without paint?
Yes. Crayons, washable markers, colored paper, and tissue-paper pieces all work. Crayons create the driest, least warped result; collage adds texture but requires careful glue control.
What is the best material for the umbrella handle?
Cardstock is easy to curve and provides a broad attachment tab. Thin cardboard is sturdier, while a pipe cleaner is flexible but needs crossed tape strips to stop it from twisting.
How can paper plate warping be reduced?
Use thin paint layers, avoid glue puddles, and dry the plate flat. Once fully dry, place it beneath a light book with a nonstick sheet protecting the decorated surface.
Conclusion
A successful umbrella depends more on controlled moisture and sound assembly than on perfectly equal panels. Select an uncoated plate, draw the divisions before decorating, and use thin layers so the semicircle keeps its shape. Match the panel count and cutting work to the child’s control: broad sections and a straight edge are appropriate starting points, while scallops and narrow patterns add challenge without changing the basic construction.
Let the canopy dry flat before attaching a cardstock handle with a wide hidden tab. Check the joint, reinforce any delicate scallop points, and hang the finished piece from the plate rather than its handle. With those practical choices settled, color order, raindrops, clouds, and patterns can be adapted for a weather lesson, seasonal display, or individual art activity.
Now retrieving an image set.
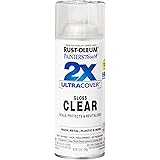
Rust-Oleum Painter's Touch 2X Ultra Cover Spray Paint, Gloss Clear | Indoor and Outdoor Surfaces (Metal, Wood, Plastic), Fast Dry, Durable, Sprays from Any Angle, Comfort Tip, Oil Based
$5.99 (as of October 21, 2026 23:20 GMT -04:00 - More infoProduct prices and availability are accurate as of the date/time indicated and are subject to change. Any price and availability information displayed on [relevant Amazon Site(s), as applicable] at the time of purchase will apply to the purchase of this product.)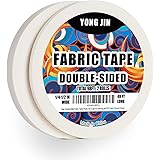
Now retrieving an image set.
Double-Sided Fabric Tape,Hem Tape No Sew No Iron,1/4"+1/2" (2 Rolls) | No Sewing or Ironing Required, Quick Clothing Repairs, Fabric Bonding, For Hemming and DIY Crafts
$7.99 (as of October 21, 2026 23:20 GMT -04:00 - More infoProduct prices and availability are accurate as of the date/time indicated and are subject to change. Any price and availability information displayed on [relevant Amazon Site(s), as applicable] at the time of purchase will apply to the purchase of this product.)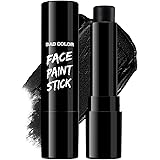
Now retrieving an image set.
BADCOLOR Black Cream-Blendable Face Body Paint Stick for Adults Children Eye Black Softball Football Baseball Sports , Non-Toxic Hypoallergenic for Halloween SFX Makeup Cosplay Joker Costume Parties
$5.99 (as of October 21, 2026 23:20 GMT -04:00 - More infoProduct prices and availability are accurate as of the date/time indicated and are subject to change. Any price and availability information displayed on [relevant Amazon Site(s), as applicable] at the time of purchase will apply to the purchase of this product.)
Now retrieving an image set.
Crayola Air Dry Clay 5lbs, Modeling Clay Kit for Kids, Holiday Gift | Classroom Must Haves, Teacher School Supplies, Natural White Modeling Clay for Kids, Sculpting Material
$13.58 (as of October 21, 2026 23:20 GMT -04:00 - More infoProduct prices and availability are accurate as of the date/time indicated and are subject to change. Any price and availability information displayed on [relevant Amazon Site(s), as applicable] at the time of purchase will apply to the purchase of this product.)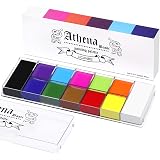
Now retrieving an image set.
UCANBE Athena Basic Face Body Paint Oil Palette, 12 Color Large Black White Professional Face Painting Makeup Kit, Facepaint Pallet for Halloween SFX Party Art Stage Costume Cosplay Clown Goth Make Up
$16.99 (as of October 21, 2026 23:20 GMT -04:00 - More infoProduct prices and availability are accurate as of the date/time indicated and are subject to change. Any price and availability information displayed on [relevant Amazon Site(s), as applicable] at the time of purchase will apply to the purchase of this product.)
Now retrieving an image set.