
Paper mache supplies for child-safe projects should include plain absorbent paper, a simple water-based paste, a stable form, washable coverings, and age-appropriate decorating tools. Flour-and-water paste is inexpensive but can spoil, while school glue diluted with a little water stores more predictably and usually dries harder. Use wide paper strips, shallow paste trays, blunt scissors when needed, and washable tempera paint for finishing. Check product labels for age guidance and allergens, supervise the activity, and keep paste, wet paper, balloons, and small decorations away from mouths. Thin, fully dried layers are safer and more dependable than a thick, soggy shell.
Choosing Paper, Paste, and a Supporting Form
The safest supply list is usually short and familiar: porous paper, water-based adhesive, a suitable form, and washable finishing products. Newspaper and plain packing paper absorb paste readily and bend around curves. Uncoated printer paper can work, but its stiffness makes it less cooperative on small balloons, bowls, and rounded cardboard forms. Glossy magazine pages resist moisture and tend to lift at the edges, so they are better saved for dry collage details.
Torn strips generally blend more smoothly than sharply cut strips because their feathered fibers overlap without forming hard ridges. Strips approximately two fingers wide are manageable for many children, although narrow pieces fit noses, ears, corners, and other tight contours more neatly. Oversized sheets hold too much paste, wrinkle easily, and encourage children to cover weak areas with one heavy patch rather than several controlled layers.
Paste choice affects handling, drying, storage, and cleanup. A basic mixture of all-purpose flour and water is low-cost and easy to mix for immediate use. It should be discarded after the session rather than treated as a shelf-stable product, and it may be inappropriate where wheat exposure is a concern. A paste made from washable, water-based school glue and a modest amount of water is smoother and often produces a firmer shell. Use only products whose labels identify them as suitable for the child’s age and intended craft use; “non-toxic” does not mean edible or safe for unsupervised tasting.
The supporting form must remain stable while wet paper is applied. An inflated balloon makes a light hollow shape, but balloon fragments can present a choking risk and latex may be unsuitable for some users. A crumpled-paper core secured with masking tape avoids popping, while an upside-down bowl covered with a release layer works well for open vessels. Do not apply wet paper directly to a child’s face or skin. Families comparing options for Paper mache supplies for child-safe projects should prioritize predictable handling over elaborate specialty products.
Matching Supplies to a Child’s Age and Abilities
Age guidance should shape the size of the materials, the complexity of the form, and which tasks an adult handles. A younger child may be successful pressing pre-torn strips onto a broad cardboard shape, yet become frustrated trying to wrap narrow legs or balance a wet balloon. Older children can usually manage smaller overlaps, more detailed forms, and independent paint application, but they still need supervision around balloons, cutting tools, and products that are not intended for skin or ingestion.
For preschool-age participation, adults can tear the paper, prepare the form, and portion a small amount of paste into a shallow tray. The child can drag one strip through the paste, remove excess between two fingers, and smooth it onto a large surface. A cardboard shield, flat animal silhouette, or taped paper mound is easier to control than a freestanding figure. Keep buttons, beads, sequins, and detachable eyes out of projects for children who still mouth objects.
Elementary-age makers often benefit from a clear division between structural and decorative supplies. Plain paper and paste build the shell; paint, large paper shapes, yarn, or broad markers add character only after the shell dries. Treating decoration as a separate stage prevents glitter, foam pieces, or fabric scraps from becoming embedded in soggy paste where they can detach later. If scissors are needed, choose a child-appropriate pair and match supervision to the user rather than assuming a rounded tip removes every cutting risk.
A compact supply check can prevent avoidable substitutions:
- Paper: uncoated, absorbent, and free from staples or plastic windows.
- Paste: water-based, clearly labeled, and compatible with known sensitivities.
- Form: stable on the table and free from sharp wire or exposed fasteners.
- Tools: washable, appropriately sized, and limited to what the current stage requires.
- Decorations: large enough for the child’s age and added only to a dry shell.
The common mistake is choosing a design first and forcing the child to use supplies beyond their current coordination. Reverse that decision: identify what the child can spread, press, smooth, and paint comfortably, then choose a form that rewards those movements.
Preparing a Cleaner, Safer Work Area
A controlled setup reduces both mess and unnecessary contact with paste. Cover the table with a washable cloth or several overlapping sheets of paper, then place the form on a rimmed tray. The rim catches drips and stops a round object from rolling. Give each child a small paste portion rather than setting out a deep communal bowl, which is easier to spill and more likely to collect scraps, paint, or debris.
Arrange the station in working order: dry strips on the dominant-hand side, paste in front, the form in the center, and a damp wiping cloth within reach. Paint and decorations should remain elsewhere until the structure is dry. This layout matters because paste-covered hands quickly transfer moisture to paint containers, chair backs, faucets, and unused supplies. A nearby handwashing route is more useful than a crowded table stocked with every possible tool.
Clothing protection should not create a new hazard. A properly fitted art smock or old short-sleeved shirt is preferable to loose plastic sheeting around the body. Tie back long hair and remove dangling sleeves from the work area. Keep food and drinks off the craft table so a paste cup cannot be mistaken for a beverage and paste-coated fingers do not move directly to snacks.
Adult preparation is especially valuable when a project uses a balloon or taped cardboard armature. Inflate and secure balloons away from very young children, collect fragments immediately if one bursts, and provide another form if latex exposure is a concern. Cover sharp cardboard corners with tape, place cut edges inward, and avoid staples where hands will press. Homemade paste should be mixed by an adult if preparation involves heated water; hot mixtures must cool completely before children approach them.
Cleanup begins before the paste dries. Scrape excess paste into household waste rather than forcing a thick mixture down a drain, follow the adhesive label for disposal, and wipe tools promptly. Wash hands with soap and water even when the product is labeled washable. A station built around Paper mache supplies for child-safe projects is working well when children can reach what they need without leaning across paste, swapping tools constantly, or leaving the table with coated hands.
Building Strong Layers Without Trapping Moisture
Strength comes from overlapping thin strips in multiple directions, not from soaking the form in a thick mass. Each strip needs enough paste to become flexible and adhere, but it should not drip when lifted. Pulling a strip lightly between two fingers removes excess adhesive and exposes wrinkles before the strip reaches the form. Lay the next piece across part of the previous one, then smooth out air pockets with fingertips or a flat craft brush.
Direction changes make the shell easier to inspect and reinforce. A first layer placed mostly across the form can be followed by strips running lengthwise or diagonally. Alternating papers—such as brown packing paper for one layer and newsprint for the next—also reveals missed areas. Color variation is a practical quality check, not merely a visual effect: a visible patch from the earlier layer signals thin coverage.
Two or three restrained layers are more reliable for a first drying cycle than one thick session. Exact needs vary with paper weight, paste, form size, humidity, and the purpose of the object. A decorative mask or bowl does not need the same reinforcement as a play prop that will be handled repeatedly. Add extra strips around rims, attachment points, and narrow joints rather than making the entire shell unnecessarily heavy.
Place the project in a ventilated indoor area on a surface that allows air to reach more than one side. Rotate it periodically if the bottom remains damp, but do not use an oven, open flame, or high heat to rush drying. A fan positioned at a safe distance may improve air movement, while intense heat can dry the outside first and leave moisture underneath. The piece is not ready for paint if it feels cool, soft, flexible, or noticeably heavier in one area.
A sour odor, persistent softness, dark spotting, or a layer that peels under light pressure indicates failure rather than a surface ready to decorate. Discard a moldy or spoiled project instead of asking a child to handle or paint over it. Cracking without dampness usually points to a shell that is too thin or a flexible form that shifted; once fully dry, reinforce the area with a few small pasted strips and dry it again.
Painting, Decorating, and Checking the Finished Piece
Finishing products belong on a completely dry, structurally sound shell. Washable tempera paint is easy to clean and appropriate for many supervised children’s activities, while acrylic craft paint may offer stronger coverage but can stain clothing and may not suit every age group. Product labels, age directions, ventilation instructions, and cleanup requirements should decide the choice—not the assumption that every water-based paint is interchangeable.
A thin base coat exposes weak seams more clearly than a heavy coat. If the brush pushes the surface inward or lifts paper fibers, stop and allow more drying time or repair the shell. Several light coats usually preserve details better than one thick layer, which can soften paper, pool in creases, and delay drying. Let each coat dry before adding another color or adhesive-backed decoration.
Large paper features, yarn, and lightweight cardboard details are easier to manage than tiny plastic embellishments. Attach projected parts, such as ears or fins, with tabs that spread the load across the shell. A heavy object glued to one small point is likely to tear away. Loose glitter creates difficult cleanup and can transfer to eyes and mouths; glitter paper, metallic paper shapes, or washable shimmer paint can provide a similar visual effect with better containment.
A clear finish is optional for indoor display pieces. If one is used, an adult should choose and apply a product according to its label, including any ventilation and age restrictions. A sealant does not make a paper object washable, weatherproof, food-safe, or suitable as a container for drinks. Paper mache bowls should be treated as decorative unless every material and the intended use have been independently established as appropriate for food contact.
Before handing over the finished piece, press gently around seams, rims, and attached parts. Check for exposed wire, staples, sharp dried paste points, balloon remnants, peeling paint, and decorations small enough to detach. The project is ready when it is dry throughout, holds its shape under normal handling, and has no loose components. These checks complete the practical selection and use of Paper mache supplies for child-safe projects rather than treating the shopping list as the end of the safety process.
Frequently Asked Questions
What is the simplest child-friendly paper mache paste?
A freshly mixed flour-and-water paste is simple and inexpensive, while diluted washable school glue is smoother and often dries firmer. Check for wheat sensitivity, follow glue label directions, supervise use, and discard homemade paste after the session.
Can children use newspaper for paper mache?
Yes. Newspaper bends easily and absorbs paste well. Remove staples, plastic wrapping, and glossy inserts first, and consider using plain packing paper for the outer layer if printed ink showing through light paint is a concern.
How many layers should a child’s project have?
Begin with two or three thin, overlapping layers and let them dry fully. Add targeted reinforcement after drying if the rim, joint, or handle remains flexible; thick wet buildup takes longer to dry and can conceal moisture.
How can I tell whether paper mache is fully dry?
A dry shell feels firm and evenly room-temperature rather than cool, soft, or heavy in isolated areas. Check the underside and thick seams before painting, because exposed outer surfaces often dry first.
Is finished paper mache safe for food or outdoor use?
Ordinary paper mache should be treated as an indoor decorative material. Paint or clear coating does not automatically make it food-safe, waterproof, weatherproof, or suitable for holding liquids.
Conclusion
A dependable project begins with absorbent paper, a clearly labeled water-based adhesive, and a form that stays stable under wet layers. Match strip size, tools, and decorations to the child’s coordination and tendency to mouth small objects, then keep food, sharp fasteners, balloon fragments, and excess paste outside the working area. Build with thin overlapping strips, pause for complete drying, and repair flexible spots before painting. The final inspection matters as much as the initial shopping decision: test seams, remove loose pieces, and reject any work showing persistent dampness, odor, or mold. For the next activity, choose a broad cardboard or crumpled-paper form, prepare only a small paste portion, and treat controlled layering and patient drying as part of the build rather than delays.
Now retrieving an image set.
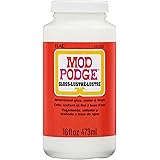
Mod Podge Gloss Sealer, Glue & Finish: All-in-One Craft Solution- Quick Dry, Easy Clean, for Wood, Paper, Fabric & More. Non-Toxic - Craft with Confidence, Made in USA, 16 oz., Pack of 1
$7.99 (as of October 21, 2026 23:20 GMT -04:00 - More infoProduct prices and availability are accurate as of the date/time indicated and are subject to change. Any price and availability information displayed on [relevant Amazon Site(s), as applicable] at the time of purchase will apply to the purchase of this product.)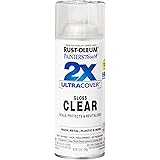
Now retrieving an image set.
Rust-Oleum Painter's Touch 2X Ultra Cover Spray Paint, Gloss Clear | Indoor and Outdoor Surfaces (Metal, Wood, Plastic), Fast Dry, Durable, Sprays from Any Angle, Comfort Tip, Oil Based
$5.99 (as of October 21, 2026 23:20 GMT -04:00 - More infoProduct prices and availability are accurate as of the date/time indicated and are subject to change. Any price and availability information displayed on [relevant Amazon Site(s), as applicable] at the time of purchase will apply to the purchase of this product.)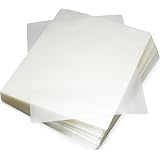
Now retrieving an image set.
Amazon Basics Clear Thermal Laminating Sheets for Documents and Photos, 9 x 11.5-Inch, 2.8 mil, 200-Pack
$17.99 (as of October 21, 2026 23:20 GMT -04:00 - More infoProduct prices and availability are accurate as of the date/time indicated and are subject to change. Any price and availability information displayed on [relevant Amazon Site(s), as applicable] at the time of purchase will apply to the purchase of this product.)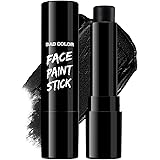
Now retrieving an image set.
BADCOLOR Black Cream-Blendable Face Body Paint Stick for Adults Children Eye Black Softball Football Baseball Sports , Non-Toxic Hypoallergenic for Halloween SFX Makeup Cosplay Joker Costume Parties
$5.99 (as of October 21, 2026 23:20 GMT -04:00 - More infoProduct prices and availability are accurate as of the date/time indicated and are subject to change. Any price and availability information displayed on [relevant Amazon Site(s), as applicable] at the time of purchase will apply to the purchase of this product.)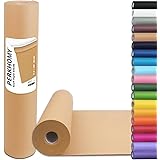
Now retrieving an image set.
PerkHomy Brown Kraft Paper Roll 17.5" x 1,200" (100') for Gift Wrapping Bulletin Board Craft Art Bouquet Flower Packing Valentines Easel Moving Shipping Floor Poster Covering Table 70GSM 50LB
$7.49 (as of October 21, 2026 23:20 GMT -04:00 - More infoProduct prices and availability are accurate as of the date/time indicated and are subject to change. Any price and availability information displayed on [relevant Amazon Site(s), as applicable] at the time of purchase will apply to the purchase of this product.)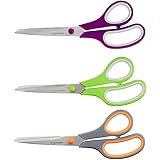
Now retrieving an image set.