
An easy paper snake craft without sharp tools can be made by tearing colored paper into short strips, folding each strip into a loop, and linking the loops with washable glue or child-safe tape. A wider strip becomes the snake’s head, while paper circles, a blunt-ended tongue, and drawn patterns add facial details without cutting. Short, evenly sized strips produce a flexible body that bends without collapsing; very long loops tend to flatten or separate. Adults should supervise glue use and prepare small decorative pieces when children are likely to mouth materials. Let glued joints set before play so the paper chain stays connected when the snake is lifted.
Choose Materials That Work Without Cutting
Construction paper is the most forgiving material for a tear-and-fold snake because it is easy to grip, holds a crease, and accepts common school glue. Standard printer paper also works, but its smooth, thin surface makes large loops more likely to flatten. Cardstock creates a firmer animal, yet many young children find it difficult to tear into controlled strips. For a first attempt, use medium-weight construction paper in two or three colors.
The basic supply set is small: colored paper, a glue stick or washable liquid glue, crayons or washable markers, and child-safe tape as an optional backup. Round paper stickers can become eyes or spots. If loose craft eyes are used, an adult should manage them because small pieces are unsuitable for children who still put objects in their mouths. Drawn eyes are the simplest option and cannot detach during play.
Tearing replaces scissors, but it still benefits from preparation. Fold a sheet back and forth into bands about the width of two adult fingers, press each crease firmly, and unfold it. Children can then tear along the weakened lines. The strips do not need perfectly straight edges. Slightly uneven sides make little difference once each band becomes a loop, whereas large changes in width can cause some links to twist and others to sag.
Glue sticks are cleaner and set faster than generous dots of liquid glue. Liquid glue can form a stronger paper-to-paper bond after drying, but too much moisture softens construction paper and makes ink run. Apply a thin line near one end of each strip rather than coating the whole overlap. Tape is useful when the snake needs to be handled immediately, although exposed tape tabs can catch on neighboring links.
Before starting, check the work area for staples, sharp pencils, torn plastic dispensers, and small decorations. A shallow tray keeps paper strips from drifting away and gives each child a visible supply. For more material choices connected with an Easy paper snake craft without sharp tools, prioritize items that can be folded, torn, drawn on, and attached with light pressure.
A common mistake is choosing thick decorative paper simply because it looks durable. Stiff paper resists the tight curve needed for small loops, placing extra force on every glued seam. If that is the only paper available, make broader, longer loops and hold each joint until it stays closed. The material should bend without cracking and remain closed after a gentle squeeze.
Make the Snake in Six Tear-and-Fold Steps
The easiest construction method is a paper chain with a separate head loop. This approach produces movement through the gaps between links rather than through complicated hinges. Set out eight to twelve body strips for a manageable tabletop project. More links create a longer snake, but they also increase drying time and make weak seams more noticeable.
- Crease and tear the strips. Fold the paper into equal bands, sharpen the folds with a fingertip, and pull gently in opposite directions along each crease.
- Form the first loop. Overlap the ends of one strip by about a fingertip width, add a thin layer of glue, and press the overlap closed.
- Link the body. Pass a second strip through the first loop before sealing it. Continue until the chain reaches the desired length.
- Make a larger head. Use a wider strip or join two torn strips end to end, then form an oval loop around the final body link.
- Add a rounded tongue and face. Tear a narrow paper strip, round its exposed end by pinching away tiny pieces, and glue the other end inside the head. Draw eyes and nostrils.
- Dry and test. Rest the snake flat, allow the adhesive to set, and lift it from the head while supporting the middle.
The sequence matters. Closing several loops before linking them creates a pile of unusable rings, while decorating every flat strip first can leave patterns hidden inside the chain. Add body markings after the links are assembled, when children can see which surfaces face outward. Dots, bands, scales, and repeating color sequences all remain visible on the curved paper.
Young makers often squeeze a newly glued loop while reaching for the next strip. That pressure slides the damp overlap apart. A practical rhythm is to build one link, count slowly while pressing the seam, and place it on the table before selecting another color. If immediate handling is expected, use a small tape tab across the inside of the overlap, where it is less visible.
The head should be visibly larger but not dramatically heavier than the body. A head built from several layers may pull the final link open when the snake is carried. One broad oval with a drawn face gives enough visual distinction. For a flatter head, fold a wide strip into a loose oval and pinch only the front edge; do not make a hard crease across the whole loop because it reduces interior space for the tongue.
Success is easy to recognize: every loop rotates slightly, seams stay closed when the chain is lifted, and the head faces outward rather than folding into the final body ring. If a joint opens, remove wet excess glue, flatten the overlap, and reseal it with a glue stick or tape. Adding more adhesive without realigning the ends usually leaves a bulky, weak patch.
Control the Shape, Movement, and Strength
A paper-chain snake moves because each loop can pivot inside the next one. Smaller links make tighter curves, while larger links produce a loose, floppy body. For a snake that can coil on a table, keep the body links close in size and avoid pulling them into narrow ovals. A chain with round openings changes direction more freely and is less likely to crease at the sides.
Strip proportions matter more than perfectly neat tearing. A very short strip may not overlap enough to hold; an excessively long strip creates a large ring that overwhelms neighboring links. Test one loop before tearing an entire stack. If its ends overlap securely and the loop leaves enough room for another strip to pass through, use it as the visual model for the remaining pieces.
Consider two common scenarios. A child making a short snake for a bulletin board can use thin printer paper because the finished piece will remain supported. A snake intended for pretend play needs construction paper, firm overlaps, and a modest body length. Extending the chain to floor length may look impressive, but the accumulated weight places strain on the first few links whenever the animal is carried by its head.
Alternating the orientation of the loops helps the chain lie in a more animated curve. If every ring is flattened in the same direction, the snake behaves like a straight ribbon. Turn each new link about a quarter turn before sealing it. The resulting body can bend from side to side and rise slightly from the table, creating movement without fasteners or cut joints.
Inspect the chain before decorating. A secure link has a flat overlap with both paper ends aligned. Warning signs include curled seams, translucent wet spots, torn corners at the overlap, and links that stretch into long ovals when lifted. Reinforce only the weak joints rather than wrapping every ring in tape. Heavy reinforcement reduces flexibility and can make one rigid section pull against a softer neighbor.
If the body repeatedly separates, shorten the project instead of continuing to add links. Remove the failed ring, connect the sound sections with a fresh strip, and allow that repair to dry flat. The planning notes in this Easy paper snake craft without sharp tools activity are especially useful when several children share materials: test the paper, demonstrate one link, and limit the first build to a length that can be supported with two hands.
Do not treat stiffness as proof of quality. A highly reinforced chain may survive pulling, but it loses the curling motion that makes the snake engaging. Aim for secure seams and free-moving openings. The best result bends under its own weight yet returns to a recognizable chain when placed on the table.
Add Safe Details and Adapt the Activity by Age
Decoration should preserve the snake’s flexibility rather than cover it with heavy attachments. Markers, crayons, paper stickers, and torn-paper patches add color without changing how the links move. Draw patterns on the exposed upper and side surfaces while the chain rests on the table. Coloring inside a loop is awkward and can crush a joint, so hidden areas can remain plain.
For toddlers and younger preschoolers, an adult can crease and tear the strips in advance, then let the child choose colors, draw marks, and help press pre-glued overlaps. The finished snake should stay within supervised play, particularly if it includes stickers or other detachable pieces. A large drawn face is more suitable than small craft eyes, sequins, beads, or buttons.
Older preschoolers can tear along prepared folds and assemble a short chain with guidance. School-age children can plan repeating patterns, compare link sizes, or make a snake that shifts from wide loops near the head to smaller loops near the tail. That gradual size change requires attention: shrinking too quickly creates a rigid transition, while small differences from one link to the next produce a smoother taper.
A tongue can be made without a sharp V-shaped cut. Tear a thin red strip, fold it lengthwise for firmness, and leave the end rounded. Children can draw a forked line on the paper to suggest the familiar shape. This gives the visual effect without a pointed paper tip. Attach the tongue inside the lower front of the head so the glued end is concealed.
Group settings benefit from dividing the task by function rather than expecting every child to complete an entire long snake. One child can tear strips, another can arrange a color sequence, and others can form links. The chain then becomes a shared build without requiring children to wait for a single glue bottle. Give each participant a defined section and connect those sections with fresh linking strips at the end.
Common decorative failures come from adding weight or moisture. Thick layers of liquid glue wrinkle the loops, and large glued-on shapes collide as the body bends. If a feature repeatedly falls off, draw it directly on the head instead of applying more glue. A face is working when it remains readable from the front and the head loop still holds its oval form.
Adapt expectations to the child’s hand control rather than a fixed age label. Tearing on a crease, aligning two paper ends, and holding a seam closed are separate actions. A child may manage one independently and need help with another. Offer assistance at the difficult point while leaving color choices and markings open; the result remains recognizably theirs without turning the activity into a test of precision.
Frequently Asked Questions
Can a paper snake be made without scissors?
Yes. Fold paper into bands, crease each fold firmly, and tear along the crease. Small pieces for eyes and spots can be drawn directly or replaced with paper stickers.
What paper is easiest for children to tear?
Medium-weight construction paper usually offers the best balance of easy tearing and durable loops. Printer paper tears more easily but makes a softer chain, while cardstock may be too stiff for small hands.
How many strips are needed for one snake?
Eight to twelve body strips plus one wider head strip make a manageable tabletop snake. Use fewer links for younger children or more only after confirming that the seams can support the added weight.
Why do the paper loops keep opening?
The overlap may be too narrow, too wet, or released before the adhesive sets. Realign the ends, use a thin glue layer, press the joint flat, and allow it to rest before adding another link.
What can replace small craft eyes?
Draw eyes with a crayon or washable marker, or use large paper stickers. Drawn features are the safest simple choice when detached decorations could create a mouthing or choking concern.
Conclusion
A successful no-cut snake depends on workable paper, consistent loops, and restrained decoration. Crease construction paper before tearing, test one ring before preparing the full set, and use narrow adhesive overlaps that can dry flat. Build a short chain first; length can be added after the joints prove strong enough to lift. Keep the head light, draw small facial features instead of attaching loose pieces, and preserve open spaces between links so the body can pivot and coil.
Set up the activity around the child’s current abilities. Pre-tear strips when alignment and gluing are the main goals, or let more experienced makers plan colors and tapered link sizes. Before play, check every seam, support the middle while lifting, and repair weak links rather than covering the whole snake with tape.
Now retrieving an image set.
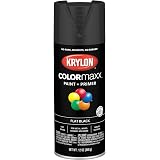
Krylon ColorMaxx 12 Oz. Flat Spray Paint, Black - 1 Each
$4.48 (as of October 21, 2026 23:20 GMT -04:00 - More infoProduct prices and availability are accurate as of the date/time indicated and are subject to change. Any price and availability information displayed on [relevant Amazon Site(s), as applicable] at the time of purchase will apply to the purchase of this product.)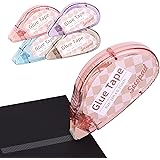
Now retrieving an image set.
Secopad Scrapbook Tape, Glue Tape for Crafts, 4 Pack, Light-Colored Shell | 0.3IN x 26FT, Sticky & Safe, Double Sided Tape for Crafts, Scrapbooking Junk Journaling Supplies, For School Office Teachers
$7.99 (as of October 21, 2026 23:20 GMT -04:00 - More infoProduct prices and availability are accurate as of the date/time indicated and are subject to change. Any price and availability information displayed on [relevant Amazon Site(s), as applicable] at the time of purchase will apply to the purchase of this product.)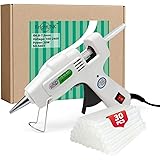
Now retrieving an image set.
Krightlink Mini Hot Glue Gun Kit with 30 Glue Sticks 20w Fast Preheating | 20w Hot Melt High Temp hot glue gun, Anti-Drop Precision Nozzle, for School Crafts DIY Arts, Quick Home Repairs-White
$8.54 (as of October 21, 2026 23:20 GMT -04:00 - More infoProduct prices and availability are accurate as of the date/time indicated and are subject to change. Any price and availability information displayed on [relevant Amazon Site(s), as applicable] at the time of purchase will apply to the purchase of this product.)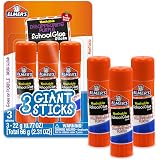
Now retrieving an image set.
Elmer's Disappearing Purple School Glue Sticks, Washable, 22 Grams, 3 Count - Poster, Vision Board, Back to School Supplies, #1 Teacher Brand
$3.99 (as of October 21, 2026 23:20 GMT -04:00 - More infoProduct prices and availability are accurate as of the date/time indicated and are subject to change. Any price and availability information displayed on [relevant Amazon Site(s), as applicable] at the time of purchase will apply to the purchase of this product.)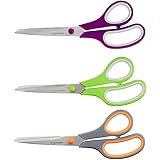
Now retrieving an image set.
Amazon Basics Multipurpose Stainless Steel Scissors for Office, Crafts, Right/Left Handed, Comfort Grip, PVD Coated, 3-Pack, Multicolor
$7.55 (as of October 21, 2026 23:20 GMT -04:00 - More infoProduct prices and availability are accurate as of the date/time indicated and are subject to change. Any price and availability information displayed on [relevant Amazon Site(s), as applicable] at the time of purchase will apply to the purchase of this product.)
Now retrieving an image set.