
Choosing Materials That Produce Strong, Movable Joints
Cardstock is usually the most practical body material because it holds its shape without making the finished snake rigid. Ordinary printer paper bends easily, but holes near its edges tend to stretch after repeated movement. Heavy cardboard has the opposite problem: it is durable, yet its thickness can make small paper fasteners difficult to open and may create stiff joints. Medium-weight cardstock provides a useful balance for a snake that will be handled, posed, or displayed in a curved position.
The connection hardware determines how freely the body moves. Small round-head paper fasteners, sometimes called split pins or brads, create pivot points between overlapping segments. Each fastener passes through one hole in the front segment and one in the segment behind it. The two prongs open on the back, but they should not be pressed completely flat. A tightly compressed fastener clamps the layers together and stops the pivot. A slightly loose fastener lets the sections rotate while still holding them in place.
For each snake, gather cardstock, a pencil, child-safe scissors, a glue stick, coloring supplies, a hole punch or adult-controlled piercing tool, and one paper fastener per joint. Adhesive is useful for eyes, patterns, and a tongue, but it should not replace the mechanical joints. A glued chain may curve while the adhesive is wet, then become fixed once dry. Stapled connections can pivot to a limited degree, although exposed points and crushed paper make them less suitable for a frequently handled children’s project.
Segment size should match the available fasteners and the child’s cutting ability. Ovals approximately the size of a child’s palm are easy to hold and leave enough room around each hole. Tiny pieces demand precise punching and create narrow margins that tear quickly. Very large pieces require wider overlaps and more support, or the body may sag under its own weight. For a first Paper snake craft with flexible body segments, six to eight body pieces plus a distinct head and tail provide noticeable movement without making assembly unnecessarily repetitive.
Check the suitability of every supply before setup. Paper fasteners are small parts and may not be appropriate for children who still mouth craft items; close adult supervision is necessary. An adult should also make holes when a pointed awl or similar tool is used. A handheld hole punch is preferable when it can reach the marked position because it produces a clean opening without leaving a sharp tool on the work surface.
The 6-Step Jointing Method
Consistent hole placement produces a smoother snake than perfectly uniform drawing or cutting. If one hole sits near an edge while the next is centered, the connected pieces will follow an uneven line and the weaker margin may split. Making one template first is more reliable than drawing every segment separately. Trace that template onto colored cardstock so the width, overlap area, and pivot position remain consistent along the body.
- Create the shapes. Cut a rounded head, several oval body sections, and a tapered tail. Avoid sharp inside corners, which can catch as adjacent pieces rotate.
- Mark the overlaps. Place one body section over another by roughly a fingertip’s width. Mark the center of the shared area rather than punching close to either outer edge.
- Make the joint holes. Punch through each marked end separately. The opening should be only large enough for the fastener shaft; an oversized hole creates a loose, drooping connection.
- Connect from head to tail. Insert a fastener through the front of the first piece and then through the next piece. Open the prongs on the back.
- Set the tension. Leave a fraction of space between the prongs and cardstock. Rotate the two pieces to confirm that they move without scraping or slipping apart.
- Add and test each section. Attach one piece at a time, bending the growing body after every joint so a misplaced hole can be corrected before assembly is complete.
A useful overlap covers enough paper to surround the hole while leaving most of each segment visible. Too little overlap places strain on a thin strip at the edge. Too much overlap shortens the snake and causes neighboring ovals to collide before they can form a pronounced curve. When the body is arranged in an S shape, adjacent pieces should overlap at their pivots but separate visibly along their sides.
Older children may measure and mark a common pivot distance on every section. Younger children often have better results with prepared pieces that already contain holes. Pre-punching changes the activity from precision cutting to sequencing and assembly, while still allowing children to choose colors and patterns. If fasteners are unsuitable, looped paper strips offer a small-parts-free alternative, but the result behaves like a chain rather than a flat articulated snake.
Do not attach every segment tightly and plan to loosen them later. Repeatedly folding fastener prongs can fatigue them, and pulling against a tight joint can enlarge the paper hole. Set and test tension as each connection is made. A successful joint holds its chosen angle when the snake rests on a table, yet turns with gentle finger pressure rather than requiring a hard tug.
Shaping and Decorating Without Restricting Movement
Decoration should reinforce the segmented design rather than cover the moving connections. Patterns placed near the center of each oval remain visible and do not interfere with rotation. Stripes, dots, scales, alternating colors, or repeating shapes can continue from the head toward the tail. Children can also arrange the sections in a color sequence before joining them, turning assembly into a simple patterning activity.
Flat coloring materials are easier on the joints than thick additions. Crayons, washable markers, colored pencils, and small paper shapes add little weight. Large foam pieces, heavy buttons, wet paint, or thick layers of glue can make one segment heavier than its neighbors. Uneven weight causes a long snake to twist when lifted and may pull against the holes. If dimensional details are wanted, reserve them for the head or use lightweight paper scraps.
Decorate the separate pieces before assembly whenever possible. A flat oval is easier to color than a completed body that shifts under the hand. More importantly, markers and glue can accidentally cross an assembled overlap. Glue that seeps between two sections turns a working pivot into a fixed joint. Paint can have a similar effect if it dries around the fastener head. Leave a clear circle around every marked hole so the paper surfaces can move independently.
The head needs enough visual distinction to establish direction. Two drawn eyes, nostrils, and a forked paper tongue are sufficient. Attach the tongue to the underside of the head rather than between the head and first body section. The tail should narrow gradually, but its final connection still needs a broad base around the hole. A needle-like tail tip looks dramatic on paper, yet it provides little room for a durable last joint.
The body can be designed for different uses. A short snake with broad sections is easier for preschool-aged children to manipulate under supervision. A longer version gives elementary-aged makers more room for repeating patterns, names, letters, or number sequences. For a classroom display, children might each decorate one segment before an adult assembles a shared snake. A frequently handled snake should use simple flat details, while a wall display can support delicate paper fringe that would otherwise snag.
Before choosing embellishments, bend the undecorated body into two or three curves. The visible areas will show where designs belong and which edges slide beneath neighboring pieces. That quick check prevents detailed artwork from disappearing under an overlap. The same planning principle applies to any Paper snake craft with flexible body segments: movable areas need clearance more than extra ornament.
Testing Weak Joints and Fixing Movement Problems
A finished snake should be tested on a flat surface before it is lifted or played with. Begin at the head and turn each joint gently in both directions. Smooth resistance is acceptable; grinding, buckling, or sudden spinning indicates a problem with tension, alignment, or hole size. Early testing limits damage because a weak connection can be repaired before repeated bending tears through the cardstock.
If a joint will not move, examine the fastener from the back. Prongs pressed firmly against the paper are the usual cause. Lift them slightly without repeatedly opening and closing them. Dried glue or paint between overlapping sections can also lock the joint. If the layers cannot be separated cleanly, replacing those two pieces is generally neater than forcing them apart and leaving rough, weakened surfaces.
A segment that spins too freely usually has an oversized hole or insufficient fastener tension. Press the prongs inward a little and test again. If the hole has stretched, reinforce the back with a small cardstock circle, allow any adhesive to dry fully, and repunch through the center. Reinforcement must stay on the individual segment rather than bridging both layers; otherwise, the repair will immobilize the connection it is meant to protect.
Tearing at an edge points to poor hole placement or too little overlap. Moving the fastener farther inward spreads the load across more paper. For a minor split, attach a cardstock patch to the back of the damaged piece and create a new hole beyond the torn area. Clear tape may work as a quick repair, but exposed tape edges can catch on the neighboring segment. Replacing the section gives a cleaner result when the tear reaches the outer edge.
Use a short inspection before declaring the project finished:
- Every hole has an intact paper margin around it.
- Fastener prongs are open, secure, and not protruding sideways.
- No glue, paint, yarn, or decoration crosses a pivot.
- The body forms an S curve without folding or separating.
- The head and tail remain secure when the snake is lifted gently.
Durability has limits even when assembly is sound. Cardstock joints tolerate posing and light play, but they are not designed for pulling, swinging, or wrapping tightly around objects. Store the snake flat or in a loose curve rather than folding all the joints back on themselves. When making another Paper snake craft with flexible body segments, use any failed joint as a placement clue: wider margins and cleaner holes matter more than adding thicker, harder-to-cut material.
Frequently Asked Questions
What paper is best for a flexible segmented snake?
Medium-weight cardstock is firm enough to hold each shape but thin enough for paper fasteners to pivot. Printer paper tears more readily, while thick cardboard can make the connections stiff.
How many body segments should the snake have?
Six to eight body sections are manageable for a first project. Add more for a longer snake only after confirming that the chosen cardstock and joints can support the extra weight.
Can the snake be made without paper fasteners?
Yes. Interlocking paper loops create a flexible chain-style snake, although it will not lie flat or form controlled side-to-side curves like pivoting cardstock segments.
Why do the body sections keep tearing at the holes?
The holes may be too close to the edges, too large, or subjected to tight fasteners. Move each pivot inward, punch a close-fitting opening, and leave the fastener slightly loose.
Should children decorate the snake before or after assembly?
Decorating before assembly is usually easier and keeps glue or paint out of the joints. Mark a clear area around each hole so embellishments do not restrict movement.
Conclusion
Reliable movement comes from accurate pivots, not from making the body pieces unusually thin or loose. Use medium-weight cardstock, keep every hole centered within a generous overlap, and open each paper fastener just enough to secure the layers without clamping them. Decorate the pieces while they are flat, leaving the connection areas clean and light.
Test the snake one joint at a time before using it for play or display. A stiff connection needs more clearance, a spinning joint needs slightly more tension, and a torn edge needs reinforcement or replacement rather than another hole in the same weak area. Once the body can hold an S curve and turn under gentle pressure, add the final facial details and store the snake flat or loosely curved to protect its articulated sections.

Now retrieving an image set.
Astrobrights/Neenah Bright White Cardstock, 8.5" x 11", 65 lb, 75 Sheets | 96 Brightness, Smooth Premium Finish
$5.79 (as of October 1, 2026 22:48 GMT -04:00 - More infoProduct prices and availability are accurate as of the date/time indicated and are subject to change. Any price and availability information displayed on [relevant Amazon Site(s), as applicable] at the time of purchase will apply to the purchase of this product.)
Now retrieving an image set.
100% Pure Rosemary Essential Oil for Skin & Diffuser - 4 Fl Oz | 100% Pure Rosemary Oil for Fuller Looking Hair & Clear Skin, made for Fine & Thinning Hair, Nightly Scalp Routine
$9.99 (as of October 1, 2026 22:48 GMT -04:00 - More infoProduct prices and availability are accurate as of the date/time indicated and are subject to change. Any price and availability information displayed on [relevant Amazon Site(s), as applicable] at the time of purchase will apply to the purchase of this product.)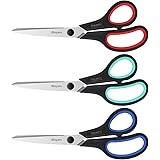
Now retrieving an image set.
iBayam 8.5" Heavy Duty Scissors All Purpose for Office School Crafts Sewing | 3-Pack, Ultra-Sharp 2.5mm Stainless Blades, Comfort Grip Handles, Left & Right Handed – Teacher Desk & Classroom Must-Have
$9.99 (as of October 1, 2026 22:48 GMT -04:00 - More infoProduct prices and availability are accurate as of the date/time indicated and are subject to change. Any price and availability information displayed on [relevant Amazon Site(s), as applicable] at the time of purchase will apply to the purchase of this product.)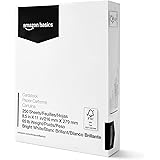
Now retrieving an image set.
Amazon Basics Cardstock Paper, 8.5" x 11", 65 lb/176 gsm, 96 Bright White, 250 Sheets
$10.63 (as of October 1, 2026 22:48 GMT -04:00 - More infoProduct prices and availability are accurate as of the date/time indicated and are subject to change. Any price and availability information displayed on [relevant Amazon Site(s), as applicable] at the time of purchase will apply to the purchase of this product.)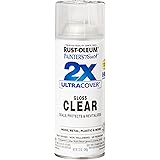
Now retrieving an image set.
Rust-Oleum Painter's Touch 2X Ultra Cover Spray Paint, Gloss Clear | Indoor and Outdoor Surfaces (Metal, Wood, Plastic), Fast Dry, Durable, Sprays from Any Angle, Comfort Tip, Oil Based
$5.98 (as of October 1, 2026 22:48 GMT -04:00 - More infoProduct prices and availability are accurate as of the date/time indicated and are subject to change. Any price and availability information displayed on [relevant Amazon Site(s), as applicable] at the time of purchase will apply to the purchase of this product.)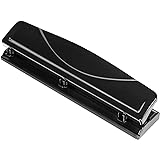
Now retrieving an image set.