
Foam sheet craft ideas with raised textures work best when children build relief through stacked cutouts, narrow strips, embossed lines, folded pieces, and contrasting surface details. Use a firm foam base, apply glue sparingly, and limit each feature to a few well-aligned layers so the design remains stable and readable. Large shapes suit younger children, while older children can combine scored patterns, mosaics, fringes, and dimensional edges. The strongest projects balance touchable height with secure attachment, avoiding tiny loose parts, overloaded glue joints, and thick stacks that curl or detach.
How Foam Produces Raised Texture
Craft foam creates relief through differences in height, edge shape, flexibility, and surface pattern. A single flat sheet offers little tactile contrast, but stacked shapes cast small shadows and give fingers a clear boundary to follow. Rolled strips produce rounded ridges, while shallow scored marks alter the surface without adding separate parts. Choosing among those effects matters more than simply adding as many decorations as possible.
Standard foam sheets are usually easier to cut and layer than very thick foam. A moderately firm base resists buckling, while thinner accent pieces bend around curves and remain light enough for ordinary craft adhesive. Adhesive-backed foam can simplify small accents, although repositioning is difficult once its sticky surface makes contact. Plain foam gives children more time to adjust placement, but wet glue requires controlled application and drying time.
Texture reads most clearly when neighboring areas feel different. A fish, for example, can have a smooth body, overlapping semicircle scales, a fringed tail, and a raised eye. Covering the entire fish with identical stacked pieces adds thickness but weakens the contrast. Leave quiet, flat areas around the tactile feature so the raised section has a distinct purpose rather than becoming surface clutter.
Relief depth should match how the finished item will be handled. A picture displayed upright can support curled petals or projecting tabs. A bookmark, card, mask, or object stored in a folder needs lower relief made from scored lines and one or two thin layers. Tall stacks catch on nearby surfaces and put leverage on glue joints, which is why a dramatic structure may look successful on the table yet lose pieces during storage.
Color contrast reinforces physical texture. Light pieces over a dark base make layer edges visible, while closely related colors create a subtler result that relies more heavily on touch. For a group activity, prepare one finished sample and one unassembled sample. The second shows how the layers are constructed without encouraging every child to copy the same color arrangement. Related foam sheet craft ideas with raised textures can then be adapted by changing the relief method rather than buying different supplies.
Eight Reliable Texture-Building Methods
Reliable raised effects come from controlling the size, spacing, and attachment area of each foam element. The following methods range from low-profile marks to clearly dimensional construction, allowing the technique to fit the child’s cutting ability and the intended use of the finished piece.
- Stacked silhouettes: Place a smaller version of a shape over a larger one. Two or three layers create a clean stepped edge suitable for flowers, faces, signs, and animal markings.
- Overlapping scales or feathers: Arrange rounded pieces in rows, beginning at the lower edge and working upward. Each new row should cover the glued end of the row beneath it.
- Narrow raised outlines: Cut slim strips and attach them around a large shape. Gentle curves are easier than sharp corners because wide strips may kink when forced around tight turns.
- Looped strips: Bend a short strip into an arch and secure both ends. Loops make petals, caterpillar segments, handles, or waves, but they need time to set before handling.
- Folded tabs: Crease a piece into a shallow zigzag or tent shape. A broad glued foot on each side gives the raised center better support than gluing only a narrow edge.
- Fringe: Cut repeated slits while leaving an uncut band along one edge. Fringe works for fur, grass, manes, and fins and remains attached as one manageable piece.
- Mosaic tiles: Space small squares, triangles, or irregular pieces so the base remains visible between them. Consistent gaps make the surface feel planned instead of crowded.
- Scored or pressed patterns: Draw shallow grooves with a blunt tool against a protected work surface. This produces texture without loose parts, although excessive pressure can tear or permanently dent thin foam.
Stacking and embossing solve different problems. Stacking gives obvious height and strong visual edges, but it increases weight and drying time. Scoring preserves a slim profile and is useful for cards or wearable pieces, yet the pattern can be hard to see on dark or heavily printed foam. Combining one high-relief method with one low-relief method often gives a better result than combining several bulky treatments.
Test one scrap before preparing an entire activity. Check whether the strip bends without cracking, whether the chosen glue holds after drying, and whether scored marks remain visible. A working test piece lies flat, keeps its edges attached, and can be touched gently without shifting. Curling corners, white glue puddles, or pieces that slide under light pressure indicate that the accents are too heavy, too densely placed, or insufficiently supported.
Project Ideas That Use Texture Purposefully
A strong foam project connects each texture to something the subject naturally contains. That link makes the design easier for children to plan and gives every cutting or layering choice a visible job. Rather than decorating an arbitrary rectangle, children can decide how a turtle shell, city skyline, garden, or weather scene should feel.
Layered Turtle Shell
Cut a large oval shell base, then add broad foam tiles with narrow gaps between them. Place a smaller tile on top of selected sections to create a second height. The head, legs, and tail can remain flat, keeping attention on the shell. Large tiles are easier for younger makers to position than tiny mosaic pieces. If the shell starts to arch, remove some upper layers or mount the oval on a larger foam backing before adding more weight.
Textured Garden Panel
Use flat stems, fringed grass, stacked flower centers, and looped petals on a rectangular base. This project demonstrates four tactile effects without requiring intricate drawing. Keep the loops short enough that they spring back after a gentle press. Long, narrow loops tend to collapse or pull free because their curved centers act as levers against the glued ends. A low-relief version can replace loops with two-layer petals when the picture must fit inside a folder.
Underwater Sensory Scene
Overlap semicircles for fish scales, score wavy lines into the water, and add narrow folded strips as seaweed. Limit the mosaic pieces to a few larger bubbles rather than scattering many tiny circles. The larger components are quicker to count, position, and retrieve during cleanup. This approach also avoids relying on beads or other hard embellishments to create touchable differences.
Robot Control Board
Squares, circles, strips, and folded tabs become switches, screens, and sliders. A robot panel is forgiving because uneven geometric pieces can still look intentional. Children can assign a function to each texture: a stacked circle is a start button, a ribbed strip controls speed, and a hinged foam flap hides a message. Functional storytelling gives the raised details more value than decoration alone.
When selecting among these foam sheet craft ideas with raised textures, consider the available session length. A garden with glued loops needs protected drying space, whereas a scored shell pattern can be completed and moved sooner. For mixed-age groups, supply precut bases and let children choose between large prepared accents and self-cut details. That preserves creative choice without making accurate base cutting the barrier to participation.
Assembly, Adhesive, and Safety Decisions
Successful assembly begins with a dry layout. Arrange every major component before opening the glue, then photograph the arrangement or mark light placement points if the design is complex. Dry fitting reveals whether overlapping rows face the correct direction and whether the base has enough uncovered space. It also prevents children from solving composition problems while adhesive is already drying.
Use the least glue that produces full contact across the attachment area. A thin spread near the center and edges is generally more controllable than a mound in one spot. Too much liquid adhesive makes lightweight foam skate out of position, seeps into mosaic gaps, and extends drying time. Too little leaves corners free to lift. Press the piece evenly, wipe away excess promptly, and let the work remain flat until the bond has set according to the adhesive label.
Adhesive choice depends on supervision, project shape, and required holding speed. A child-appropriate craft glue offers adjustment time for flat layers but may struggle with pieces that continually spring upward. Foam-compatible adhesive dots or adhesive-backed sheets provide immediate hold for selected accents, though mistakes are harder to correct. Hot glue may bond dimensional parts quickly, but the heated tool and fresh adhesive can burn skin; if it is used at all, it belongs in an adult-controlled step rather than a child-accessible supply station.
Check product labels rather than assuming every glue or marker behaves the same way on foam. Solvent-containing products can damage some foam surfaces or produce unsuitable fumes. Test unfamiliar materials on an offcut in a ventilated work area, and stop if the foam softens, wrinkles, becomes sticky, or develops a strong odor. Washable markers may also smear instead of absorbing, so allow a test mark to dry before adding details across the project.
Age appropriateness depends on the tools and component size, not merely on the softness of the foam. Small offcuts and removable decorations can present a choking concern for young children or children who mouth craft materials. Scissors, punches, staplers, pointed tools, and adhesive equipment require supervision suited to the individual child. Use blunt scoring tools and a sacrificial foam or cardboard mat beneath the work; never let a child score foam while holding it in a hand or lap.
A final inspection should be tactile as well as visual. Gently run a finger near each edge, lift the project upright, and watch for sagging strips or detached corners. The project is ready when layers stay aligned, no wet glue transfers, and projecting parts recover after light handling. If pieces fail, reduce their height, enlarge the glued foot, or substitute a flatter layered shape. More adhesive is not always the repair; a poorly balanced accent often needs redesigning. Further foam sheet craft ideas with raised textures should follow the same test-first approach when introducing unfamiliar surface treatments.
Frequently Asked Questions
What glue works for layering foam sheets?
A child-appropriate craft glue labeled for foam is suitable for many flat layers. Test it on a scrap first, spread it thinly, and allow the assembled piece to dry flat. Adhesive-backed foam is useful when immediate hold matters.
How many foam layers should a raised design have?
Two or three layers usually create visible relief without excessive weight. Taller stacks may curl the base or separate during handling, especially when the upper pieces are large.
Can texture be added without gluing extra pieces?
Yes. Press shallow lines, dots, waves, or crosshatching into the sheet with a blunt tool over a protected surface. Test pressure on an offcut so the tool marks the foam without puncturing it.
Why do raised foam pieces keep lifting?
The accent may be too curved, the glued area may be too narrow, or the adhesive may not have set. Flatten the piece, enlarge its attachment tabs, use less height, and hold it according to the glue label.
Which raised-texture method is easiest for younger children?
Large stacked shapes and wide fringe are easier to grasp and position than tiny tiles or narrow outlines. An adult can prepare the base and difficult cuts while the child chooses colors and arranges the main features.
Conclusion
Raised foam designs are most effective when height, surface contrast, and attachment strength are planned together. Begin with a firm base, select one prominent dimensional technique, and pair it with a quieter treatment such as scoring or flat color. Dry-fit the composition, test unfamiliar glue on scrap foam, and keep projecting elements short enough to survive handling. Large stacked shapes, fringe, and broad mosaics offer an accessible starting point; loops, folded tabs, and narrow outlines add complexity when cutting and placement skills are ready for it. Before displaying or storing the project, check every edge for lifting and confirm that the adhesive is fully dry. If a component repeatedly fails, reduce its height or widen its glued area instead of burying the joint under more adhesive.
Now retrieving an image set.
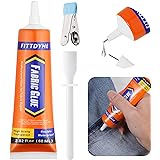
FITTDYHE Fabric Glue Permanent, 60 ML Washable Clear Clothing Glue, Super Fabric Glue for Rhinestones, Patches, Clothes, Denim, Leather, Polyester, Fabrics, Doll Repair, Flannel, Cotton
$9.99 (as of September 30, 2026 22:48 GMT -04:00 - More infoProduct prices and availability are accurate as of the date/time indicated and are subject to change. Any price and availability information displayed on [relevant Amazon Site(s), as applicable] at the time of purchase will apply to the purchase of this product.)
Now retrieving an image set.
Rust-Oleum Stops Rust Spray Paint, Semi-Gloss Black | Rust Resistant, Indoor and Outdoor, Beautiful Finish on Metal, Wood and More, Sprays from Any Angle, 12 oz
$6.48 (as of September 30, 2026 22:48 GMT -04:00 - More infoProduct prices and availability are accurate as of the date/time indicated and are subject to change. Any price and availability information displayed on [relevant Amazon Site(s), as applicable] at the time of purchase will apply to the purchase of this product.)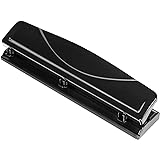
Now retrieving an image set.
Amazon Basics 3 Hole Punch, 10 Sheet Capacity, Black, Easy-Clean Tray
$9.51 (as of September 30, 2026 22:48 GMT -04:00 - More infoProduct prices and availability are accurate as of the date/time indicated and are subject to change. Any price and availability information displayed on [relevant Amazon Site(s), as applicable] at the time of purchase will apply to the purchase of this product.)
Now retrieving an image set.
Crayola Air Dry Clay (5lbs), Teacher Supplies, Natural White Modeling Clay for Kids, Sculpting Material, Bulk Craft Supplies for Art Classrooms
$13.58 (as of September 30, 2026 22:48 GMT -04:00 - More infoProduct prices and availability are accurate as of the date/time indicated and are subject to change. Any price and availability information displayed on [relevant Amazon Site(s), as applicable] at the time of purchase will apply to the purchase of this product.)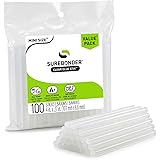
Now retrieving an image set.
Surebonder Clear All-Purpose All-Temperature Mini Size (0.27 inch Diameter) 4-Inch Length Hot Glue Sticks-100 Pack-for USE in MINI Size Glue Guns ONLY
$5.97 (as of September 30, 2026 22:48 GMT -04:00 - More infoProduct prices and availability are accurate as of the date/time indicated and are subject to change. Any price and availability information displayed on [relevant Amazon Site(s), as applicable] at the time of purchase will apply to the purchase of this product.)
Now retrieving an image set.