
Craft ideas with construction paper for classrooms work best when teachers match the cutting, folding, gluing, and design choices to students’ ages and the lesson goal. Younger groups can assemble shape animals, name mosaics, and patterned crowns from prepared pieces, while older students can build layered habitats, geometric quilts, or folded paper sculptures. Limit each activity to a controlled color selection and a few repeatable techniques so materials remain manageable without making every result identical. A successful classroom project fits the available period, lets children make visible decisions, and uses glue and small decorations sparingly enough for dependable drying and cleanup.
Choosing Projects by Age and Classroom Conditions
A workable classroom activity has to fit student dexterity, instructional time, and the room’s cleanup capacity. Construction paper is forgiving enough for quick cutting and layering, but it can tear under heavy glue, resist sharp folds when it is thick, and fade if displayed in strong sunlight. Those material behaviors should shape the project before the teacher chooses a theme.
For early elementary groups, favor large pieces, short cuts, broad glue areas, and assemblies with fewer than ten separate parts. A shape bird made from circles, triangles, and rectangles gives children meaningful choices without requiring them to cut tiny feet or feathers. Pre-cutting every piece may save time, but it turns the activity into matching and placement rather than cutting practice. A better compromise is to prepare difficult components while letting students cut the larger forms.
Students with steadier scissor control can work with tabs, repeated shapes, narrow strips, and layered scenes. A third-grade class might construct a pond habitat using overlapping paper for water, shoreline, plants, and animals. The layers reinforce foreground and background while the subject supports a science lesson. Older students can use measured strips, radial symmetry, or relief techniques that lift selected parts away from the base sheet.
Available time matters as much as age. A 30-minute period supports a flat collage with prepared trays; a folded sculpture with several attachment points may need one period for fabrication and another for assembly. Teachers should count distribution, name labeling, and cleanup within the scheduled time rather than treating them as separate tasks.
Before committing to any of the Craft ideas with construction paper for classrooms, check four practical conditions:
- Motor demand: Are the smallest cuts and folds realistic for the group?
- Decision space: Can students choose colors, arrangement, details, or meaning?
- Drying needs: Can wet pieces remain flat and undisturbed?
- Lesson fit: Does making the object reinforce the stated learning goal?
An activity is failing when adults must continually repair torn pieces, students wait for shared tools, or every assembly depends on an exact model. Simplifying the number of components usually works better than completing difficult steps for the class.
12 Construction Paper Activities With Clear Learning Goals
The strongest project menu includes several ways to manipulate paper rather than changing only the finished subject. Cutting, tearing, weaving, curling, folding, and layering produce different visual results and place different demands on students. The following examples can be adjusted through piece size and the amount of preparation.
Early Grades: Large Forms and Predictable Sequences
- Shape animals: Combine circles, rectangles, triangles, and semicircles to explore how basic geometry can represent a recognizable animal.
- Name mosaics: Fill large outlined letters with torn paper pieces, supporting name recognition, color sorting, and controlled placement.
- Pattern crowns: Repeat two or three shapes across a long band before fitting it around the student’s head.
- Weather wheels: Attach a rotating arrow to a circle divided into sunny, cloudy, rainy, and snowy sections; an adult should handle any tool needed to make the center hole.
A model should demonstrate the technique without dictating the final appearance. If every shape animal has a yellow circle body and two orange triangle feet, the task mainly tests copying. Offering limited trays of large shapes lets students decide whether pieces become wings, ears, scales, or scenery while keeping distribution orderly.
Middle Elementary: Layers, Systems, and Repetition
- Layered habitats: Build a forest, desert, pond, or ocean from background to foreground, then place organisms in suitable areas.
- Symmetry butterflies: Cut a folded silhouette and add mirrored markings to compare bilateral symmetry with decorative balance.
- Story sequence strips: Create three or four paper scenes showing a beginning, change, and ending, with captions added afterward.
- Woven color mats: Interlace contrasting strips through a slotted base to examine alternating patterns and over-under movement.
Weaving is more demanding than it first appears. Narrow strips buckle, closely spaced slots tear, and students can lose the alternating sequence. Wider strips and a contrasting base make the pattern easier to see. For a class trying the method for the first time, stop the slots short of every edge so the sheet remains a stable frame.
Upper Elementary: Structure and Visual Planning
- Geometric quilt panels: Arrange measured polygons inside equal squares, then combine the squares into a class display.
- Folded building façades: Use tabs and projecting windows to turn a flat streetscape into shallow relief.
- Paper coil organisms: Curl strips around a pencil to form shells, tentacles, petals, or invented biological features.
- Positive-and-negative silhouettes: Cut one planned form and display both the removed shape and the remaining opening as paired compositions.
These advanced options reward planning, but perfection should not become the hidden objective. A geometric panel can show accurate repetition without every edge aligning precisely. If measurement is the lesson, provide rulers and require dimensions; if composition is the lesson, allow free-cut polygons so calculation does not consume the period.
Preparing Materials Without Removing Student Choice
Efficient preparation separates logistical decisions from artistic decisions. Teachers can control paper size, tool access, and adhesive quantity while leaving color relationships, arrangement, subject details, and visual emphasis to students. That balance prevents supply congestion without producing a wall of nearly identical work.
Begin by making the activity once with the same materials students will use. This reveals whether folded paper is too thick to cut, whether a base sheet bends under several layers, and whether the planned pieces fit. Time the trial, then add room for instructions, distribution, and slower working speeds. A teacher sample made with premium tools or extra drying time can conceal problems the class will encounter.
Cut full sheets into standardized halves, quarters, strips, or squares before class when exact dimensions support the task. Sort them into shallow trays by function rather than handing every student a large stack. For a habitat scene, one tray might hold blue and brown base pieces, another plant colors, and a third small accent scraps. Controlled selection reduces waste, but a single prescribed palette may weaken lessons centered on expression or color mixing.
A concise preparation sequence keeps the work teachable:
- Build and time one sample using classroom scissors and adhesive.
- Identify the one technique students need to see demonstrated.
- Prepare only the pieces that exceed the group’s cutting ability.
- Place shared materials where students can reach them without crossing the room.
- Reserve labeled drying space before distributing glue.
Templates deserve selective use. They are useful when an outline must fit another component, as with a wheel inside a frame, or when the academic focus lies elsewhere. They are less useful when observation, proportion, or original shape design is the goal. A loosely drawn leaf often contributes more to a varied class tree than thirty traced leaves with the same contour.
Adaptation should change access rather than erase participation. Students who find cutting difficult can work with larger shapes, loop scissors, torn-paper textures, or a partner division in which one child cuts and the other arranges. Adhesive dots or pre-applied double-sided tape may suit students sensitive to wet glue, although tape offers less repositioning time. More planning options appear in this collection of Craft ideas with construction paper for classrooms.
Preparation has gone too far when students merely place numbered pieces in numbered locations. It has not gone far enough when half the period disappears into paper distribution or repeated clarification. The useful middle ground gives the class a common process and visibly different outcomes.
Managing Glue, Scraps, Drying, and Display
Material control determines whether a construction paper activity remains usable after the lesson. Excess liquid glue soaks fibers, causes curling, and creates long drying times. Glue sticks produce flatter work and cleaner tables, but weak coverage at corners can make layered pieces detach. The adhesive should match the structure rather than simply being whichever option is closest.
Use glue sticks for flat collages, mosaics, and light overlapping forms. Teach students to apply glue near the outer edge of the smaller piece, not across the entire base sheet. Liquid school glue is more suitable for coils, tabs, and dimensional joins that need a concentrated bond. Small cups with craft sticks can provide better quantity control than open bottles, especially when clogged nozzles encourage squeezing.
A useful test is the lift check: after pressing a piece briefly, the student gently checks one edge. If it rises, the answer is a small amount of adhesive at that point, not a heavy layer across the whole object. Work is going wrong when the base sheet shines with wet glue, slides when lifted, or develops puddles around attached parts.
Scraps should be managed by usable size. Broad offcuts can return to color trays, while tiny fragments belong in a limited collage bin or recycling stream accepted by the local program. Saving every sliver creates sorting work and crowded storage. For repeated classes, assign one shallow container to pieces large enough for eyes, scales, petals, or lettering and clear it when it becomes difficult to search.
Drying stations need flat support and identification. Place each work on a reusable tray, drying rack shelf, or labeled sheet of scrap cardboard. Names should be written on the back before assembly; adding them after gluing risks turning wet work over. Dimensional objects need more clearance than collages, so test rack height before students build tall coils or folded tabs.
Display choices can preserve the learning evidence. A geometric quilt benefits from equal spacing that reveals repeated units, while story sequences need captions kept in order. Avoid stapling through a moving wheel or projecting fold. Construction paper exposed to bright windows may lose color over time, so photograph temporary displays or rotate them rather than expecting permanent saturation.
The common mistake is treating cleanup as an announcement made during the final minute. Set a visible stopping point for new cutting, followed by separate collection periods for tools, reusable scraps, and wet work. Students can manage these jobs when each material has one obvious destination. A room that resets predictably makes ambitious paper activities far more practical to repeat.
Frequently Asked Questions
What is the easiest construction paper activity for a large class?
A shape collage using large prepared pieces is easy to distribute, adapt, and finish in one period. Give students a base sheet and limited shape trays while preserving choice over arrangement and subject.
How much construction paper should each student receive?
Issue the base sheet plus only the colors and sizes needed for the first stage. Shared refill trays reduce abandoned full sheets and still allow students to request additional colors.
Should teachers pre-cut pieces for classroom crafts?
Pre-cut parts that are too small, repetitive, or difficult for the age group, but leave manageable cuts to students when scissor control is part of the learning goal.
Is liquid glue or a glue stick better for construction paper?
Glue sticks suit flat layers and reduce wrinkling. Small amounts of liquid glue hold folded tabs, coils, and raised components more reliably, provided the work has enough drying time.
How can one activity work for students with different abilities?
Vary piece size, cutting complexity, and tool type while keeping the shared concept. Offer larger shapes, tearing, adapted scissors, or partner roles without prescribing one finished design.
Conclusion
Construction paper earns its place in a classroom when the activity uses its color, cut edges, folds, or layering to serve a clear lesson. Select a project by motor demand and available time first, then decide which components require teacher preparation. Demonstrate the hardest technique, distribute materials in stages, and protect student choice in color, arrangement, or meaning.
Before the next session, make one sample with classroom tools and identify the likely failure point: pieces that are too small, strips that tear, overloaded glue, or insufficient drying space. Adjust that constraint rather than simplifying every creative decision. A well-planned paper project should be manageable to distribute and reset, yet open enough that students’ work reflects their own observations and design choices.
Now retrieving an image set.
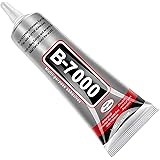
B7000 Jewelry Glue for Making, FITTDYHE 1PCS 50ML/1.69 fl oz Clear Adhesive for Rhinestone, Fabric, Multipurpose Super B-7000 for Phone Repair, Nail Art, Wood, Glass, Charms
$5.99 (as of September 25, 2026 22:42 GMT -04:00 - More infoProduct prices and availability are accurate as of the date/time indicated and are subject to change. Any price and availability information displayed on [relevant Amazon Site(s), as applicable] at the time of purchase will apply to the purchase of this product.)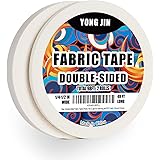
Now retrieving an image set.
Double-Sided Fabric Tape,Hem Tape No Sew No Iron,1/4"+1/2" (2 Rolls) | No Sewing or Ironing Required, Quick Clothing Repairs, Fabric Bonding, For Hemming and DIY Crafts
$7.99 (as of September 25, 2026 22:42 GMT -04:00 - More infoProduct prices and availability are accurate as of the date/time indicated and are subject to change. Any price and availability information displayed on [relevant Amazon Site(s), as applicable] at the time of purchase will apply to the purchase of this product.)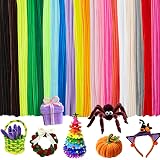
Now retrieving an image set.
200 Pcs Pipe Cleaners Craft Bulk, 20 Colors Pipe Cleaner, Chenille Stems | Kids Toys & Games Gifts for Ages 5-7, Craft Supplies for Projects Creative DIY Room Decor, Halloween Christmas Decorations
$5.99 (as of September 25, 2026 22:42 GMT -04:00 - More infoProduct prices and availability are accurate as of the date/time indicated and are subject to change. Any price and availability information displayed on [relevant Amazon Site(s), as applicable] at the time of purchase will apply to the purchase of this product.)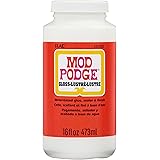
Now retrieving an image set.
Mod Podge Gloss Sealer, Glue & Finish: All-in-One Craft Solution- Quick Dry, Easy Clean, for Wood, Paper, Fabric & More. Non-Toxic - Craft with Confidence, Made in USA, 16 oz., Pack of 1
$7.99 (as of September 25, 2026 22:42 GMT -04:00 - More infoProduct prices and availability are accurate as of the date/time indicated and are subject to change. Any price and availability information displayed on [relevant Amazon Site(s), as applicable] at the time of purchase will apply to the purchase of this product.)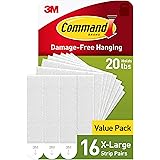
Now retrieving an image set.
Command 20 lb X-Large Picture Hanging Strips, 16 Pairs White Command Strips Heavy Duty Picture Hanger
$10.39 (as of September 25, 2026 22:42 GMT -04:00 - More infoProduct prices and availability are accurate as of the date/time indicated and are subject to change. Any price and availability information displayed on [relevant Amazon Site(s), as applicable] at the time of purchase will apply to the purchase of this product.)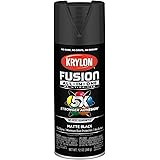
Now retrieving an image set.