
Mother’s Day crafts for elementary students work best when children can make meaningful design choices within a project that fits their cutting, writing, and assembly skills. Strong options include handwritten accordion books, painted flowerpots, woven paper hearts, portrait frames, and decorated coupon envelopes. Teachers should favor washable materials, short drying times, and templates that guide construction without making every gift look identical. Plan an inclusive dedication choice for students who honor a grandmother, guardian, aunt, or another caring adult, and test the project before class so glue, paint, and dimensional decorations can dry before the gifts go home.
How to Choose a Project Students Can Truly Make
A successful classroom gift should preserve visible evidence of the child’s work. Uneven lettering, individually chosen colors, and a personal message often carry more meaning than a perfectly matched set of teacher-assembled decorations. Templates can define a fold line or keep pieces within a workable size, but they should not predetermine every color, sentence, and embellishment.
Match the construction demands to the grade rather than choosing only by appearance. First and second graders generally benefit from broad cutting paths, large writing spaces, peel-and-stick details, and pieces that can be assembled in one obvious order. Older elementary students can manage measured folds, simple weaving, repeated patterns, layered tabs, and longer written reflections. A woven heart may be satisfying for fourth graders but frustrating for children who are still learning to turn scissors around corners.
Time is another design material. A 45-minute class does not provide 45 minutes of productive making once directions, material distribution, cleanup, and name labeling are included. Projects with wet paint or heavy glue also need a separate drying window. When only one period is available, flat projects such as accordion books, cards, or framed portraits are safer choices than containers covered in multiple glued layers.
Use a quick selection check before committing supplies:
- Student ownership: Can each child choose words, colors, or imagery?
- Independent steps: Can most students complete the central task with limited adult handling?
- Manageable finish: Will the item dry, fit in a backpack, and arrive home intact?
- Flexible dedication: Can the gift honor any caring person without awkward rewriting?
- Recoverable mistakes: Can a misspelled word, torn strip, or misplaced piece be repaired?
Testing one sample exposes problems that a supply list cannot. Write with the intended markers, fold the chosen cardstock, and apply the actual glue. Thin paper may buckle under liquid glue, metallic markers may smear, and thick decorations may prevent a card from closing. The strongest Mother’s Day crafts for elementary students are not necessarily the most elaborate; they are the ones children can finish with recognizable ownership and reasonable support.
Seven Mother’s Day Projects for Elementary Classrooms
Project choice should reflect the class’s strongest skills and the time available. The following seven options range from low-mess writing projects to longer constructions. Each can be addressed to “Mom,” but the wording can just as naturally recognize a grandmother, guardian, aunt, foster parent, or another important adult.
1. Accordion Appreciation Book
Fold a long strip of sturdy paper into four or six panels. Students place a short prompt on each panel, such as “You help me when…,” “I like doing this with you…,” or “I remember….” Younger children can draw and label their responses; older students can write complete memories. The accordion format offers more substance than a standard card without requiring complicated assembly. Pre-score the folds for younger grades, but let students control the content and cover design.
2. Painted Pinch Pot or Small Flowerpot
Air-dry clay pinch pots and purchased terracotta flowerpots both create useful keepsakes. Clay requires multiple sessions and careful drying, while a ready-made pot can be painted in one session. Use washable paint appropriate for the selected surface and avoid promising that classroom paint will make a container waterproof. A paper flower or wrapped seed packet can fill the pot when planting and ongoing care are impractical.
3. Woven Paper Heart Pocket
Students weave wide paper strips through a slotted heart or rectangular base, then attach the finished panel to a backing to form a pocket. Place a note, drawing, or set of paper “kindness coupons” inside. Wide strips suit developing hands; narrow strips produce a more detailed result for older students. If the strips wrinkle or repeatedly slip out, reduce the number of slots rather than completing the weaving for the child.
4. Illustrated Portrait Frame
Children draw a portrait of themselves with the recipient and mount it behind a cardstock frame. Border decorations can represent shared interests—books, garden flowers, cooking utensils, music notes, or family jokes—rather than defaulting to generic hearts. A folded cardstock easel on the back makes the piece displayable without requiring glass, magnets, or a purchased frame.
5. Handprint Flower Bouquet
Trace hands onto colored paper, cut out the shapes, and attach them to paper stems. Written qualities or thank-you messages turn each hand shape into a specific tribute. Tracing and cutting keeps the child involved more directly than an adult-painted handprint. Students who find tracing uncomfortable can use petal templates or draw flowers freehand.
6. Decorated Coupon Envelope
Students make an envelope or folder containing realistic acts of care, such as choosing a read-aloud, helping set the table, or sharing an uninterrupted conversation. Avoid promises that depend on money, transportation, or an adult’s schedule. The writing and follow-through matter more than ornate packaging, making this a useful low-cost choice for older elementary grades.
7. Memory Wheel
Two cardstock circles joined with a paper fastener form a rotating memory wheel. A window cut in the top circle reveals one drawing or sentence at a time. This option practices sequencing and careful assembly, but the fastener needs secure, supervised handling. If small hardware is unsuitable for the group, replace the rotating mechanism with a fold-out strip of memories.
Materials, Preparation, and Classroom Workflow
Efficient preparation separates student decisions from repetitive adult tasks. Teachers can cut heavy backing boards, score difficult folds, or portion paint before class while leaving the expressive work—writing, drawing, color selection, weaving, and arrangement—to students. Preassembling the entire gift may save minutes, but it converts the activity into decoration rather than construction.
Build a project kit around a dependable base material. Medium-weight cardstock works well for frames, books, pockets, and wheels because it holds a fold better than printer paper without becoming difficult to cut. Add child-appropriate scissors, washable markers or paint, glue sticks for flat pieces, and small amounts of liquid school glue where stronger attachment is needed. Dimensional decorations should be optional. Loose glitter spreads easily, sheds from finished gifts, and can create avoidable cleanup; paper confetti, metallic crayons, foil paper, or sequins secured with glue offer more controlled shine.
Set up materials by step rather than placing every supply on every table. For an accordion book, one station can hold folded blanks, another writing tools, and a third cover decorations. This reduces crowding and prevents students from gluing embellishments before completing the message. Demonstrate only the construction move that could block progress, such as starting a weave or aligning a rotating wheel. Showing a fully decorated “correct” model can unintentionally invite copying, so display two visibly different samples or use an unfinished demonstration piece.
A practical two-session workflow looks like this:
- First session: Label every piece, complete writing and drawing, and apply paint or wet glue.
- Between sessions: Dry projects flat on labeled trays and check for detached pieces.
- Second session: Assemble dry components, add restrained decoration, and prepare protective packaging.
- Before dismissal: Confirm the recipient name, student name, and transport method.
Signs that the workflow is working include students beginning the next step without waiting in a long help line, projects remaining identifiable, and wet items reaching the drying area before cleanup. Repeated torn pieces, reversed folds, or requests for adults to “fix it” usually indicate that the material is too delicate or the step was introduced too quickly. Adjust by enlarging parts, offering a practice strip, or removing one decorative stage. For more project options, compare Mother’s Day crafts for elementary students by drying time and independent work demands, not merely by the finished photograph.
Personalization, Inclusion, and Common Problems
Inclusive planning begins before the dedication line is printed. Children may live with a single parent, two parents, grandparents, foster caregivers, or other guardians; some may be separated from or grieving a mother. Present the activity as a chance to appreciate a caring person and provide neutral wording such as “For someone who cares for me.” Students can still choose “Mom” when that fits. This approach preserves the occasion without requiring a child to explain private family circumstances publicly.
Personalization should be concrete rather than dependent on stock praise. “Thank you for making pancakes with me on Saturdays” communicates a relationship more clearly than “You are the best.” Offer prompts about shared routines, helpful actions, favorite memories, and qualities the child notices. Do not correct a sincere message into adult language merely to make it sound polished. Teachers can quietly check spelling of names and clarify sentences while retaining the student’s voice.
Motor, sensory, and writing needs also shape a fair project. A child who struggles with cutting might choose from pre-cut base shapes but still arrange the composition, add details, and dictate or type a message. Pencil grips, larger pieces, adhesive dots, stampers, and picture choices can reduce a physical barrier without reducing authorship. Alternatives to scented markers, strong-smelling glue, messy finger paint, and highly textured decorations may help students with sensory sensitivities participate comfortably.
Several common failures have straightforward repairs. Warped paper usually results from too much liquid glue; switch to glue sticks for broad flat areas or apply small dots around the edge. A heavy flowerpot covered with thick paint may still be tacky at dismissal; apply thin coats and schedule overnight drying. If every piece looks alike, remove prescribed color combinations and ask students to add one symbol from a shared experience. If writing consumes the entire period, limit the project to three strong prompts instead of a page of generic sentences.
Privacy deserves attention as well. Avoid requiring photographs unless families have already supplied them for the intended classroom use. Illustrated portraits are easier to manage and often reveal more imagination. Skip assignments that ask children to publish private family details, promises of expensive gifts, or rankings such as “the world’s best mom.” A well-designed Mother’s Day activity creates room for affection without testing family resources or forcing disclosure. Those boundaries make Mother’s Day crafts for elementary students more workable across a real classroom, where family structures, abilities, and available time naturally differ.
Frequently Asked Questions
What is an easy Mother’s Day project for first graders?
An accordion appreciation book with pre-scored folds is manageable because children can draw, label, and decorate large panels without complicated assembly.
How long should a classroom Mother’s Day activity take?
Plan about 25 to 35 minutes of active work within a standard class period, leaving time for directions, distribution, labeling, and cleanup. Wet projects usually need another session.
What can students make without paint?
Accordion books, woven heart pockets, portrait frames, memory wheels, and coupon envelopes can all be completed with cardstock, markers, scissors, and glue.
How can a Mother’s Day activity include different family structures?
Let each student dedicate the gift to a caring adult and provide neutral cover wording. Avoid asking children to explain why they selected a particular recipient.
How do teachers keep handmade gifts from breaking on the way home?
Dry projects completely, secure loose parts, and send flat pieces home in labeled envelopes or folders. Use a paper bag with a stable base for pots or dimensional items.
Conclusion
Choose the project by student capability, available work time, drying needs, and the way finished gifts will travel home. Preserve the child’s authorship by preparing difficult base pieces while leaving messages, colors, imagery, and arrangement in student hands. A short trial run will reveal weak paper, slow-drying paint, confusing folds, or decorations that prevent the item from closing.
Before distributing supplies, decide how students can name any caring recipient, prepare adaptations without removing meaningful choices, and label every component. Then reduce the design to a few steps children can complete successfully. A thoughtfully written accordion book or portrait often becomes a stronger keepsake than a complex object assembled largely by an adult.
Now retrieving an image set.
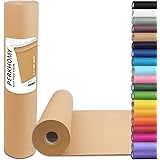
PerkHomy Brown Kraft Paper Roll 17.5" x 1,200" (100') for Gift Wrapping Bulletin Board Craft Art Bouquet Flower Packing Valentines Easel Moving Shipping Floor Poster Covering Table 70GSM 50LB
$7.49 (as of September 30, 2026 22:48 GMT -04:00 - More infoProduct prices and availability are accurate as of the date/time indicated and are subject to change. Any price and availability information displayed on [relevant Amazon Site(s), as applicable] at the time of purchase will apply to the purchase of this product.)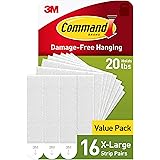
Now retrieving an image set.
Command 20 lb X-Large Picture Hanging Strips, 16 Pairs White Command Strips Heavy Duty Picture Hanger
$10.39 (as of September 30, 2026 22:48 GMT -04:00 - More infoProduct prices and availability are accurate as of the date/time indicated and are subject to change. Any price and availability information displayed on [relevant Amazon Site(s), as applicable] at the time of purchase will apply to the purchase of this product.)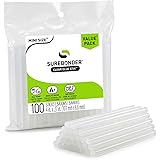
Now retrieving an image set.
Surebonder Clear All-Purpose All-Temperature Mini Size (0.27 inch Diameter) 4-Inch Length Hot Glue Sticks-100 Pack-for USE in MINI Size Glue Guns ONLY
$5.97 (as of September 30, 2026 22:48 GMT -04:00 - More infoProduct prices and availability are accurate as of the date/time indicated and are subject to change. Any price and availability information displayed on [relevant Amazon Site(s), as applicable] at the time of purchase will apply to the purchase of this product.)
Now retrieving an image set.
Amazon Basics Clear Thermal Laminating Sheets for Documents and Photos, 9 x 11.5-Inch, 2.8 mil, 200-Pack
$17.99 (as of September 30, 2026 22:48 GMT -04:00 - More infoProduct prices and availability are accurate as of the date/time indicated and are subject to change. Any price and availability information displayed on [relevant Amazon Site(s), as applicable] at the time of purchase will apply to the purchase of this product.)
Now retrieving an image set.
Astrobrights/Neenah Bright White Cardstock, 8.5" x 11", 65 lb, 75 Sheets | 96 Brightness, Smooth Premium Finish
$5.79 (as of September 30, 2026 22:48 GMT -04:00 - More infoProduct prices and availability are accurate as of the date/time indicated and are subject to change. Any price and availability information displayed on [relevant Amazon Site(s), as applicable] at the time of purchase will apply to the purchase of this product.)
Now retrieving an image set.