
Letter X craft supplies for preschool practice should include sturdy letter templates, washable markers, child-safe glue, blunt-tip scissors, and large collage pieces that preschoolers can grasp and place across two diagonal strokes. Prioritize a clear X shape over elaborate decoration, because crowded designs can hide the crossing lines children need to recognize. Prepare pieces in advance according to each child’s cutting ability, supervise all tool use, and avoid loose items that may pose a choking risk. X-ray pictures, xylophone strips, textured tape, and crossed craft sticks provide concrete ways to connect the letter’s shape, sound, and formation.
Core Supplies for a Clear Letter X
A useful Letter X activity keeps the two crossing diagonal lines visible from the beginning to the end. Preschoolers may enthusiastically cover a template with decorations, but the finished page has limited recognition value if the outline disappears. Begin with a large uppercase X printed or drawn on cardstock. A letter about the height of a standard sheet gives small hands enough room to place pieces without demanding precise finger control.
Cardstock is generally more dependable than thin printer paper for collage work. It resists curling when children apply glue and tolerates repeated handling during tracing or display. Construction paper is suitable for a simple marker activity, although wet glue can make it buckle. If only ordinary paper is available, use glue sticks or mount the completed letter on a firmer backing.
The basic supply group should include washable crayons or markers, a glue stick or child-safe liquid glue, blunt-tip preschool scissors, and large decorative pieces. Foam shapes, wide paper strips, yarn segments, tissue-paper squares, and pieces of painter’s tape are easier to control than tiny sequins or beads. Any loose component small enough to enter a child’s mouth requires close supervision and may be unsuitable for children who still mouth objects. Large pieces are not merely easier to clean up; they let children focus on the letter rather than struggle to pinch nearly invisible decorations.
Choose the adhesive according to the material. Glue sticks work well for paper and keep the outline relatively flat. A small amount of liquid glue holds craft sticks, yarn, or thicker foam more reliably, but too much creates sliding pieces and long drying times. Pouring glue freely is rarely useful at this stage. A teacher or caregiver can place small dots along each diagonal, or offer a shallow glue dish with a cotton swab for controlled application.
Color contrast matters as much as material choice. A dark X on pale cardstock, or a white X on dark construction paper, shows the crossed structure clearly. Similar shades can merge visually, especially after layered collage pieces are added. For a focused supply plan, see Letter X craft supplies for preschool practice and select only materials that preserve the intersection at the center.
Preparing Materials for Preschool Hands
Preparation should match the child’s current hand skills rather than an assumed preschool standard. Some children can cut short straight lines independently, while others are still learning how to open and close scissors. The same project can accommodate both levels: provide broad paper strips for independent cutters and precut strips for children whose goal is letter placement rather than cutting practice.
Set out one small tray per child or table group instead of placing every supply in a shared pile. A tray containing one template, several collage pieces, one drawing tool, and one adhesive reduces waiting and prevents attractive extras from distracting from the X. Limit the initial color selection if children tend to spend more time choosing than making. Additional colors can be offered after the two diagonal strokes are identifiable.
A compact setup checklist keeps the activity manageable:
- Make the model: Display one undecorated uppercase X and one completed example without requiring children to copy its colors.
- Test the attachment: Confirm that the chosen glue holds the paper, yarn, foam, or craft sticks.
- Size the pieces: Use components that are easy to grasp and appropriate for the children under supervision.
- Protect the work area: Add a washable mat or scrap paper beneath liquid-glue projects.
- Plan drying space: Label a flat area so wet letters are not stacked or carried immediately.
Demonstrate the movement before distributing the most tempting materials. Trace from the upper left to the lower right, then from the upper right to the lower left. Describing the paths as “slant down, then cross” keeps attention on formation without turning a craft session into a handwriting drill. Children can first trace the air with an index finger and then follow the printed letter.
A common preparation mistake is supplying too many unrelated decorations because variety appears more engaging. Excess choice can produce a sensory bin rather than a recognizable letter exercise. Three material types are usually enough for one sitting. If a child avoids sticky textures, offer self-adhesive foam or removable tape instead of insisting on liquid glue. If scissors cause frustration, separate cutting from the letter task and revisit it at another center. The activity works when the materials allow meaningful participation, not when every child completes identical steps.
Four Letter X Activities With Distinct Learning Goals
Each Letter X example should emphasize one main goal: seeing the shape, building it, connecting it to a word, or controlling a diagonal motion. Combining every goal in one crowded project can make it difficult to tell what a child understood. Rotating several short activities gives the letter repeated exposure while changing the hand movement and sensory experience.
Textured Tape X
Place two wide strips of painter’s tape across cardstock to form an X. A child can rub each strip from top to bottom, trace the edges with a crayon, or add marks along both diagonals. Painter’s tape offers immediate structure and usually lifts more easily than strong transparent tape. It suits children who are not ready to cut or glue. Pressing down the intersection also makes the crossing point physically noticeable.
Crossed Craft-Stick X
Two jumbo craft sticks make the letter’s construction explicit. Let the child arrange them first without adhesive, asking what changes when the sticks are parallel instead of crossed. Once the X is formed, an adult can add a small glue dot at the center. Jumbo sticks are easier to position than standard narrow ones, but the assembled letter needs flat drying time. Paint or marker can be added before assembly so the wet center joint is not disturbed.
Paper X-Ray Collage
Use a dark paper X and add broad white paper strips as pretend bones. A simple printed picture of an X-ray can provide context, but avoid presenting the collage as a realistic anatomy lesson. The useful connection is between the letter X and the familiar word “X-ray.” Keep the white pieces inside the outline so the silhouette remains legible. Cotton swabs may look bone-like, yet their small tips and rigid stems require closer supervision than paper strips.
Color-Strip Xylophone
Arrange short colored paper rectangles inside or beside a large X to represent xylophone bars. The word introduces an uncommon initial X sound, so say it clearly and acknowledge that X does not always sound the way children may expect. The objective is exposure, not perfect phonics recall. Precut bars work best when letter recognition is the priority; child-cut bars add scissor practice but may shift attention away from the X.
These projects use similar base materials but demand different actions. Tape provides the easiest entry point, craft sticks clarify construction, an X-ray collage strengthens word association, and xylophone strips combine ordering with vocabulary. Families or classrooms assembling Letter X craft supplies for preschool practice can choose one example based on the child’s immediate goal rather than buying a separate assortment for every design.
Checking Recognition, Formation, and Participation
A polished final product does not necessarily show that a preschooler recognizes X. Adult-cut pieces and a heavily guided layout can produce an attractive display even when the child has not noticed the letter’s structure. Check understanding during the process with brief actions: place an X beside a T or V and ask the child to point to X, invite the child to cross two strips, or ask where the lines meet.
Look for three practical signs of progress. The child notices that X contains two slanting lines, attempts to make the lines cross, and can identify the letter among a small group of visually different uppercase letters. Reversal is less relevant for X than for letters such as b and d, but diagonal control can still be difficult. A line that misses the center is not a failed attempt; it shows that the child understands the two-stroke idea but needs more experience coordinating direction and stopping points.
Signs that the activity is too demanding include abandoning tools repeatedly, covering the page without attending to the outline, or relying on an adult for every placement. Reduce the number of pieces, switch from liquid glue to a glue stick, or enlarge the template. If the task is too easy, remove the printed outline and ask the child to arrange two strips into an X before gluing. The next level should add one manageable decision, not several new requirements at once.
Language should remain accurate and light. Uppercase X and lowercase x share a similar crossed form in many print styles, making them useful to compare side by side. The sound is more complicated: X often represents sounds heard at the end of words such as “box,” while a word such as “xylophone” begins differently. Preschool practice can include both examples without demanding a rule the child is not ready to explain. Saying the word, emphasizing where X appears, and returning to the visible letter is enough.
Save one sample or photograph only if it is useful for observing change over time. Compare whether the child takes more ownership of tracing, crossing, placing, or identifying—not whether later work looks more decorative. Repeating Letter X craft supplies for preschool practice with a different material can reveal whether recognition transfers beyond a memorized project. If a child identifies only the tape version, return to plain printed letters before adding more embellishment.
Frequently Asked Questions
What are the most useful supplies for a preschool Letter X activity?
Use a large cardstock X, washable crayons or markers, child-safe glue, blunt-tip scissors, and graspable pieces such as paper strips, yarn, wide tape, foam shapes, or jumbo craft sticks.
Should preschoolers cut their own Letter X pieces?
Offer cutting when a child can operate preschool scissors with supervision. Precut pieces are a better choice when the main goal is recognizing and assembling X rather than practicing scissor control.
How can I keep decorations from hiding the letter?
Use a high-contrast template, limit the number of materials, and place decorations along the two diagonal strokes. Keep the central crossing point visible.
Which Letter X project is easiest for beginners?
A textured tape X is a low-complexity option because the two strips create the letter immediately and require no cutting or wet-glue control.
How do I know whether the activity is helping with letter recognition?
After crafting, show X with two or three different uppercase letters. Recognition is more meaningful when the child can select X without relying on the project’s colors or decorations.
Conclusion
Effective Letter X practice depends more on a visible crossed shape and a manageable task than on a large supply collection. Start with firm, contrasting paper and choose pieces that children can grasp, arrange, and attach under appropriate supervision. Match cutting and gluing demands to the child’s current control, then adapt the same basic materials for tape, craft-stick, X-ray, or xylophone activities.
Watch how the child forms and identifies X rather than judging the neatness of the finished page. If decorations obscure the outline or tools cause persistent frustration, simplify the setup. If the child readily builds and recognizes the letter, remove the template and invite an independent two-strip construction. That small progression keeps the focus on transferable letter knowledge instead of a single memorized project.
Now retrieving an image set.
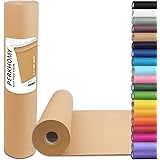
PerkHomy Brown Kraft Paper Roll 17.5" x 1,200" (100') for Gift Wrapping Bulletin Board Craft Art Bouquet Flower Packing Valentines Easel Moving Shipping Floor Poster Covering Table 70GSM 50LB
$7.49 (as of September 30, 2026 22:48 GMT -04:00 - More infoProduct prices and availability are accurate as of the date/time indicated and are subject to change. Any price and availability information displayed on [relevant Amazon Site(s), as applicable] at the time of purchase will apply to the purchase of this product.)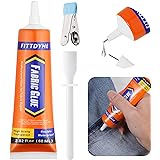
Now retrieving an image set.
FITTDYHE Fabric Glue Permanent, 60 ML Washable Clear Clothing Glue, Super Fabric Glue for Rhinestones, Patches, Clothes, Denim, Leather, Polyester, Fabrics, Doll Repair, Flannel, Cotton
$9.99 (as of September 30, 2026 22:48 GMT -04:00 - More infoProduct prices and availability are accurate as of the date/time indicated and are subject to change. Any price and availability information displayed on [relevant Amazon Site(s), as applicable] at the time of purchase will apply to the purchase of this product.)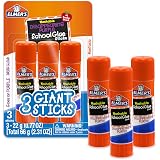
Now retrieving an image set.
Elmer's Disappearing Purple School Glue Sticks, Washable, 22 Grams, 3 Count - Poster, Vision Board, Back to School Supplies, #1 Teacher Brand
$3.99 (as of September 30, 2026 22:48 GMT -04:00 - More infoProduct prices and availability are accurate as of the date/time indicated and are subject to change. Any price and availability information displayed on [relevant Amazon Site(s), as applicable] at the time of purchase will apply to the purchase of this product.)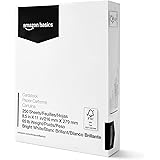
Now retrieving an image set.
Amazon Basics Cardstock Paper, 8.5" x 11", 65 lb/176 gsm, 96 Bright White, 250 Sheets
$10.63 (as of September 30, 2026 22:48 GMT -04:00 - More infoProduct prices and availability are accurate as of the date/time indicated and are subject to change. Any price and availability information displayed on [relevant Amazon Site(s), as applicable] at the time of purchase will apply to the purchase of this product.)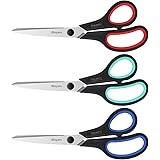
Now retrieving an image set.
iBayam 8.5" Heavy Duty Scissors All Purpose for Office School Crafts Sewing | 3-Pack, Ultra-Sharp 2.5mm Stainless Blades, Comfort Grip Handles, Left & Right Handed – Teacher Desk & Classroom Must-Have
$9.99 (as of September 30, 2026 22:48 GMT -04:00 - More infoProduct prices and availability are accurate as of the date/time indicated and are subject to change. Any price and availability information displayed on [relevant Amazon Site(s), as applicable] at the time of purchase will apply to the purchase of this product.)
Now retrieving an image set.