
A kindergarten Valentine craft with paper shapes works best as a heart card assembled from a large folded-paper heart, smaller decorative shapes, washable glue, and a short handwritten message. Adults can prepare templates or pre-cut difficult pieces, while children arrange circles, triangles, rectangles, and hearts before attaching them. A glue sponge or small dots of glue reduce wrinkling and shorten drying time. Keep the design open-ended enough for individual choices, but limit the number of pieces so young makers can finish independently without losing track of the assembly order.
Choose a Heart Card Design Kindergarteners Can Manage
A successful kindergarten design has one recognizable base and a small number of loose pieces. Use a large paper heart as the card body, then offer simple geometric shapes that children can turn into a face, animal, flower, or pattern. A pair of circles can become eyes, a triangle can become a nose or beak, and narrow rectangles can become arms, legs, or flower stems. The limited set gives children genuine design choices without presenting an unmanageable pile of parts.
A folded heart card is especially useful because it combines the picture and message in one project. Fold a sheet of construction paper in half and draw half a heart against the fold. An adult may cut the base ahead of time, or children who already handle scissors confidently can follow a thick cutting line. When opened, the heart provides a broad surface that is easier to decorate than a narrow strip or a complicated outline. The inside also leaves room for a name and a brief message.
Scale matters more than intricate detail. Shapes smaller than a child can comfortably pinch may stick to gluey fingers, disappear under other pieces, or become frustrating to position. For a heart roughly the size of an adult hand, circles and triangles about two finger-widths across are generally easier to manipulate than confetti-sized decorations. Larger pieces also make the finished image readable when displayed on a wall or carried home.
Choose between a guided character and an open collage according to the purpose of the session. A guided design is useful when children are practicing positional words such as above, below, beside, and inside. An open collage gives more room for color decisions and imaginative use of shapes. The strongest compromise is to require only a base heart and a message, while treating every other feature as optional. That approach keeps the Easy kindergarten Valentine craft with paper shapes recognizable without making every child’s work look identical.
A common mistake is selecting a model with so many tiny details that adults end up completing it. The project is appropriately challenging when children can identify the main pieces, move them into a planned arrangement, and explain what they made. If they repeatedly ask where every shape belongs, simplify the sample or remove a few options rather than supplying constant corrections.
Prepare Paper Shapes and Child-Friendly Supplies
Preparation should remove avoidable bottlenecks while preserving meaningful work for the child. Construction paper or medium-weight colored paper is sturdy enough to survive repositioning but still easy to cut. Very thin paper tends to curl after glue is applied, while cardstock can be tiring for beginners to cut. A practical palette includes red, pink, purple, white, and one or two contrasting colors, but Valentine colors do not need to limit a child’s design.
Plan a compact set of supplies: one large heart base, six to twelve assorted shapes, a glue stick or shallow glue sponge, child scissors, a dark crayon or washable marker, and a name label if the cards will be collected. Circles, squares, triangles, rectangles, and small hearts provide enough variety. Place each child’s pieces in a tray or envelope so the table does not become a shared heap. Sorting materials this way also reduces arguments over particular colors and makes missing pieces easy to spot.
Pre-cutting and child cutting serve different goals. Pre-cut shapes are the better choice for a short party station, a large class, or a group with mixed scissor experience. Child-cut shapes add fine-motor practice, but they require more time and leave less attention for arranging and writing. A balanced option is to pre-cut curved hearts and circles while letting children cut straight-sided squares, triangles, and strips. Straight cuts are easier to complete successfully and still give children ownership of the materials.
Use supplies according to their actual job rather than adding decoration for its own sake. Washable glue sticks offer tidy application, although children may miss the edges of larger shapes. Liquid school glue holds well but can soak paper when squeezed freely. A glue sponge—dampened with a modest layer of washable glue inside a lidded container—lets children tap the back of a shape against the surface. An adult should set it up and supervise its use. Loose glitter is usually a poor fit for this activity because it spreads beyond the card and does not improve the shape-building goal.
- Check before children begin: scissors open smoothly, markers are washable, glue is usable, and every tray contains a base plus several large shapes.
- Keep separate: finished examples, spare pieces, wet cards, and unused name labels.
- Avoid: sharp fasteners, tiny loose embellishments, and decorations unsuitable for children who may mouth objects.
Supply preparation is working when children can find, hold, and use each item with minimal adult retrieval. If the table quickly fills with glue puddles, scraps, and mixed-up pieces, reduce the number of materials and assign each tool a visible place. That simple reset is more effective than repeatedly reminding children to be careful.
Assemble the Valentine in a Clear Working Order
The most dependable working order is arrange, glue, add details, write, and dry. Begin by placing the large heart flat with the intended front facing up. Ask children to move the loose shapes around without glue. This temporary arrangement lets them test whether a triangle looks better as a beak, hat, nose, or corner decoration. It also prevents the disappointment of discovering that the first attached piece blocks space needed later.
Once the layout is chosen, children should glue one piece at a time rather than lifting the whole design. Apply glue to the back of the loose shape, especially near its edges, then turn it over and press briefly. Starting with the largest pieces keeps small details visible. For a heart creature, for example, attach two rectangle legs and two arms behind or near the edges of the base before adding circle eyes and a triangle beak. For a flower card, attach the long rectangle stem before layering a circle and several heart-shaped petals above it.
Add drawn details only after the glued paper pieces are stable. A dark crayon can make a mouth, eyelashes, spots, or a border without soaking the paper. Markers produce sharper lines, but a wet marker dragged across fresh glue may smear. Children who want to draw first can do so on separate shapes before attachment. This small change avoids reaching over damp components and makes the process easier for left-handed and right-handed makers alike.
Keep the message achievable. “To,” “From,” a recipient’s name, or “Happy Valentine’s Day” can be copied from a nearby card. Adults may write the message in light pencil for a child to trace, but the child should add at least a name, initial, mark, or dictated message according to ability. Perfect spelling is less important than connecting the handmade image to a real recipient. For more layout ideas, the Easy kindergarten Valentine craft with paper shapes activity can also be used with a blank folded rectangle and a heart-shaped centerpiece.
- Write the child’s name on the back before wet materials appear.
- Arrange the shapes without adhesive and identify the largest piece.
- Glue large components first, followed by facial or patterned details.
- Add crayon or marker lines after the attached pieces stop sliding.
- Write or dictate the inside message, then place the card flat to dry.
Too much glue is the most frequent assembly problem. It causes sliding pieces, buckled paper, long drying times, and cards that stick together in a stack. Small glue dots or a thin swipe are enough for lightweight paper. The design is ready for the drying area when parts remain in place after gentle pressing and no adhesive squeezes from the edges. Leave cards open and flat rather than folding them while damp.
Adapt the Activity for Classrooms and Different Skill Levels
Classroom success depends on matching the number of decisions to the time, space, and independence of the group. For a fifteen-minute station, provide pre-cut bases, sorted shapes, and one adhesive method. For a longer art period, children can cut selected shapes, test multiple layouts, and compose a longer message. Adding steps without adding time usually shifts the work from children to adults, so reduce the design before rushing the group.
A brief demonstration should show the process rather than prescribe an exact result. Model how to place pieces without glue, lift one shape, apply a small amount of adhesive, and return it to the same location. Displaying two different finished examples makes it clear that circles do not always have to be eyes and triangles do not always have to be noses. Avoid holding up one highly polished model as the standard; kindergarten work naturally includes uneven cuts, reversed shapes, and unexpected color combinations.
Children who are developing hand strength may use larger pre-cut pieces, loop scissors designed for supported use, or a glue sponge instead of a stiff glue stick. A child who is ready for more complexity can fold and cut the heart base, create symmetrical patterns, or build an image using a fixed allowance such as two circles, three rectangles, and four triangles. The extension should deepen the shape challenge, not simply add tiny decorations.
Group management improves when the room has separate zones for materials, active work, and drying. Put spare pieces at one supply point rather than carrying extras to every seat. Use a tray, sheet of wax-free scrap paper, or labeled shelf for drying, with cards kept open and names visible. If the project is intended for classmates, confirm recipient names beforehand and avoid turning distribution into a popularity contest. A shared card for a family member, classroom helper, or community display can be a more comfortable format.
Watch for signs that the plan needs adjustment. Repeated torn bases suggest the paper is too thin or children are erasing and repositioning aggressively. Shapes that continually fall off point to missed edges, dried glue sticks, or insufficient pressing. Long waiting lines indicate that too many children depend on one adult-controlled tool. Simplify that point of dependence first. The activity is going well when children spend most of the period arranging, attaching, drawing, and talking about their own design rather than waiting for an adult to fix it.
Finished cards can support a short shape conversation without turning the art into a test. Invite each maker to identify one shape, describe its new purpose, and name the recipient. That reflection connects geometric vocabulary with a concrete object while respecting the Valentine as a personal creation. Save assessment of precise cutting or shape recognition for observation notes rather than correcting the appearance of the finished gift.
Frequently Asked Questions
What paper is best for a kindergarten Valentine shape craft?
Medium-weight construction paper is easy to cut, sturdy enough for repositioning, and less likely than thin copy paper to wrinkle under glue.
Should the paper shapes be pre-cut?
Pre-cut curved or detailed pieces for short sessions and mixed-skill groups. Let children cut larger squares, rectangles, and triangles when scissor practice is part of the activity.
How many shapes should each child receive?
About six to twelve large shapes provide useful choice without overwhelming the workspace. Offer spare pieces separately instead of filling every tray with extras.
How can children use less glue?
Model a thin swipe or several small dots on the back of each shape. A supervised glue sponge can also control the amount applied to lightweight paper.
What can a child write inside the Valentine?
A recipient’s name, the child’s name, and a short greeting are enough. Children may copy a visible model, trace light pencil writing, or dictate a message.
Conclusion
Keep the project centered on a sturdy heart base, a manageable selection of large shapes, controlled glue application, and a message the child can help create. Prepare difficult cuts when time or hand skills require it, but leave the arrangement, color choices, drawn details, and personal marks to the maker. Have children test their layout before gluing, attach large pieces first, and dry cards open and flat.
Before the session, make one sample to check scale and material behavior rather than to establish a required appearance. If pieces are hard to grasp, glue wrinkles the base, or the process depends heavily on adult help, simplify the supplies. A finished Valentine should show the child’s decisions—even when its heart is uneven or its shapes become something unexpected.
Now retrieving an image set.
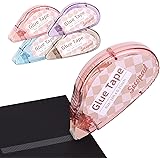
Secopad Scrapbook Tape, Glue Tape for Crafts, 4 Pack, Light-Colored Shell | 0.3IN x 26FT, Sticky & Safe, Double Sided Tape for Crafts, Scrapbooking Junk Journaling Supplies, For School Office Teachers
$6.99 (as of September 18, 2026 22:40 GMT -04:00 - More infoProduct prices and availability are accurate as of the date/time indicated and are subject to change. Any price and availability information displayed on [relevant Amazon Site(s), as applicable] at the time of purchase will apply to the purchase of this product.)
Now retrieving an image set.
Rust-Oleum Stops Rust Spray Paint, Semi-Gloss Black | Rust Resistant, Indoor and Outdoor, Beautiful Finish on Metal, Wood and More, Sprays from Any Angle, 12 oz
$6.48 (as of September 18, 2026 22:40 GMT -04:00 - More infoProduct prices and availability are accurate as of the date/time indicated and are subject to change. Any price and availability information displayed on [relevant Amazon Site(s), as applicable] at the time of purchase will apply to the purchase of this product.)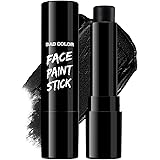
Now retrieving an image set.
BADCOLOR Black Cream-Blendable Face Body Paint Stick for Adults Children Eye Black Softball Football Baseball Sports , Non-Toxic Hypoallergenic for Halloween SFX Makeup Cosplay Joker Costume Parties
$5.99 (as of September 18, 2026 22:40 GMT -04:00 - More infoProduct prices and availability are accurate as of the date/time indicated and are subject to change. Any price and availability information displayed on [relevant Amazon Site(s), as applicable] at the time of purchase will apply to the purchase of this product.)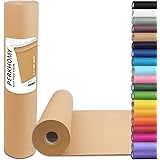
Now retrieving an image set.
PerkHomy Brown Kraft Paper Roll 17.5" x 1,200" (100') for Gift Wrapping Bulletin Board Craft Art Bouquet Flower Packing Valentines Easel Moving Shipping Floor Poster Covering Table 70GSM 50LB
$7.49 (as of September 18, 2026 22:40 GMT -04:00 - More infoProduct prices and availability are accurate as of the date/time indicated and are subject to change. Any price and availability information displayed on [relevant Amazon Site(s), as applicable] at the time of purchase will apply to the purchase of this product.)
Now retrieving an image set.
Handcraft Blends Peppermint Essential Oil - Huge 4 Fl Oz | Steam Distilled, Premium Grade for Diffuser, Aromatherapy, Skin, Massage, Candle & Soap Making Fragrance
$9.99 (as of September 18, 2026 22:40 GMT -04:00 - More infoProduct prices and availability are accurate as of the date/time indicated and are subject to change. Any price and availability information displayed on [relevant Amazon Site(s), as applicable] at the time of purchase will apply to the purchase of this product.)
Now retrieving an image set.