
A St. Patrick’s Day kindergarten craft with paper works well when children build a four-leaf shamrock from folded green shapes, a short stem, and a contrasting background. Prepare child-size templates, model one fold-and-cut cycle, and let students arrange every leaf before gluing so misplaced pieces remain easy to correct. Lightweight construction paper is easier to cut than cardstock, while glue sticks limit wrinkling and long drying times. Keep the sequence manageable by pre-cutting only the parts beyond the class’s current scissor ability, and watch for crushed folds, oversized glue marks, or leaves extending past the background as signs that the design needs adjustment.
Choose Paper and Tools for Kindergarten Hands
Construction paper offers the most useful balance of color, flexibility, and cutting resistance for this project. A kindergarten student can usually turn it with one hand while opening and closing scissors with the other. Heavy cardstock makes a durable finished shamrock, but its stiffness can cause a beginning cutter to push the scissors forward instead of making controlled snips. Thin printer paper cuts easily yet tends to curl when covered with glue.
Use two shades of green for the leaves and stem, then place them on white, pale yellow, or light blue paper. The contrast makes each leaf boundary visible, which matters while children decide whether the pieces overlap correctly. A dark green shamrock on black paper may look dramatic to an adult, but the low contrast makes positioning harder for young children. Glitter paper can be reserved for one small accent; its coated surface may resist some glue sticks and is harder to fold cleanly.
Rounded-tip school scissors should fit the child’s hand rather than simply carrying a child label. The thumb should sit in the smaller opening, with two or more fingers in the larger opening. If the handles slide down the fingers or require the whole hand to stretch, the student loses turning control. Left-handed scissors are worth providing because reversing ordinary scissors does not reverse the blades’ cutting action or improve the child’s view of the line.
A glue stick is generally more manageable than liquid school glue for flat paper pieces. It creates less moisture, leaves fewer puddles, and allows the work to be handled sooner. Liquid glue remains useful when a leaf includes yarn, tissue, or another textured accent, but an adult may need to portion it into a shallow cup and provide a small applicator.
Before class, assemble one supply set and make the shamrock yourself. This quick test reveals whether the template fits the background and whether four leaves leave enough room for a stem. For a classroom version of the St. Patrick’s Day kindergarten craft with paper, prepare one tray or envelope per child containing green rectangles, a background sheet, and a name label. Individual sets reduce time spent searching through a shared pile without taking the creative decisions away from students.
Prepare the Four-Leaf Shamrock Pieces
A successful template uses broad curves and a limited number of direction changes. Tiny notches may produce a botanically detailed leaf, but they ask kindergarten cutters to rotate paper and redirect the blades at the same moment. A rounded heart shape creates a recognizable shamrock leaf while keeping the cutting path continuous. Each finished leaf can be about the size of a child’s palm, giving students enough material to hold safely away from the blades.
For a fold-and-cut method, give each child four small green rectangles. Fold each rectangle once, draw half of a heart against the folded edge, and cut along the outer curve while leaving the fold intact. Opening the paper reveals a symmetrical leaf. The method combines folding, line tracking, and a simple surprise, but it should not be treated as the only acceptable approach. Students who are still learning to stop at an endpoint can cut complete heart outlines instead.
Demonstrate the fold with a large sample held above table height. Match the short edges, pinch the center, and press outward along the crease. That order reduces skewed folds. If children rub repeatedly across a loose fold, the layers shift and the cutting line no longer stays aligned. A craft stick can flatten the crease, although a fingertip is sufficient for ordinary construction paper.
The preparation level should reflect the instructional purpose. If the lesson centers on recognizing a four-leaf shamrock and composing a picture, adults can pre-draw the cutting lines. If scissor practice is the priority, children can trace a sturdy half-heart template. Asking beginners to draw, fold, trace, cut, arrange, and glue in one sitting creates several failure points that have little to do with the intended skill.
- Test the scale: Place four sample leaves on the background with space for a stem.
- Mark the fold: Add a small dot or arrow where the straight folded edge must remain uncut.
- Limit loose pieces: Provide four leaf rectangles and one stem strip rather than a large mixed pile.
- Keep a backup: Set aside a few extra rectangles for torn folds or accidental cuts.
A narrow green strip makes the simplest stem. Children may keep it straight, bend it slightly, or trim one end diagonally. Avoid making the stem so thin that glue saturates it or so long that it forces the leaves to the top edge. Preparing compatible proportions is more useful than insisting that every shamrock have identical leaves.
Teach the Cut, Arrange, and Glue Sequence
Separating cutting, arranging, and gluing gives children a clear checkpoint after each task. When glue is introduced too early, students often attach the first leaf before seeing how the remaining three will fit. The result may be crowded edges, a hidden stem, or a shamrock extending beyond the background. Keep glue sticks closed until all four leaves have been opened and counted.
Model cutting with the blades pointing away from the holding hand. The scissors should open, move a short distance along the curve, and close; meanwhile, the paper-holding hand gradually turns the rectangle. “Turn the paper, not your cutting arm” is a more concrete cue than asking for greater neatness. Small, connected cuts handle a curve better than one long squeeze, but very tiny snips can create a jagged edge. The goal is a controllable rhythm rather than a perfectly smooth factory-cut shape.
After cutting, place the stem near the lower center of the background without adhesive. Arrange the pointed ends of the four heart-shaped leaves so they meet above the stem. Two leaves can sit side by side, with one above and one below. Slight gaps or overlaps are acceptable if the cluster remains readable. Ask the child to rotate the paper and inspect whether every piece stays within the background border.
Glue one piece at a time by turning it face down on scrap paper. Apply adhesive around the perimeter and once through the center, then return the piece to its planned location. Rubbing glue while the leaf rests on the final background can mark the surrounding area. Press with a flat palm for several seconds rather than scrubbing with fingertips, which may wrinkle the leaf or shift its point away from the center.
A practical classroom pace is to demonstrate one stage, let the group complete it, and then show the next stage. Displaying the entire process at once can overload children who are still managing scissors and loose pieces. A three-picture cue card—scissors, four arranged leaves, and glue—lets students check what comes next without waiting for repeated verbal directions.
The work is progressing well when children can identify four separate leaves, reposition them before attachment, and use enough adhesive to hold the edges down without softening the sheet. Uneven leaves do not indicate failure; they show that the student performed the cutting. The more relevant concern is whether the child understands the sequence and handles the tools safely. That distinction keeps a St. Patrick’s Day kindergarten craft with paper focused on age-appropriate process rather than adult-looking uniformity.
Adjust the Project for Different Skill Levels
Differentiation works best when the finished subject remains the same while the difficult action changes. A child who cannot yet follow a curved line can receive pre-cut hearts and concentrate on counting, orientation, and gluing. A student with steady scissor control can trace and cut the folded halves independently. Both children still make a four-leaf shamrock and can discuss the same shapes, colors, and arrangement.
For an entry-level version, pre-fold the rectangles and draw thick cutting lines. Make the leaves slightly larger, because broad curves require fewer redirections. A small sticker placed on the holding side can remind the child where fingers belong. Hand-over-hand cutting should be used cautiously: it can obscure the child’s view and make control less clear. Demonstrating beside the student or stabilizing the far edge of the paper may preserve more independence.
For a middle level, children fold their own rectangles and trace a half-heart stencil. They can count four leaves, compare light and dark green options, and choose the stem angle. This level provides meaningful choices without adding decorations that compete with the main sequence. Students ready for an extension can add a paper rainbow made from curved strips, write their name on a small pot shape, or create a second shamrock with smaller leaves.
Extra details create a time tradeoff. A rainbow increases color sequencing and strip placement, but it can turn a short cutting activity into a longer collage session. A pot adds another recognizable St. Patrick’s Day symbol, though dark paper may make pencil names difficult to read. Choose one extension based on the available time rather than placing every option on the table.
Adapt the workspace as well as the template. A non-slip mat can keep the background from moving during arrangement. Larger glue sticks may be easier to grasp than narrow ones, while spring-assisted scissors may reduce the effort needed to reopen blades for some children. Tool substitutions should match the individual need and follow the classroom’s established supervision practices.
Fast finishers need a task connected to the design, not simply more glitter or loose decorations. They can count the heart shapes, compare leaf sizes, add a drawn border, or dictate one sentence about their picture. Children needing more time can finish with fewer optional details. Keeping the central four-leaf form consistent allows a display to look cohesive without pretending that every student has the same fine-motor readiness.
Prevent Common Cutting and Gluing Problems
Most repairable problems become obvious before adhesive touches the background. A leaf cut into two pieces usually means the child cut through the folded edge. Show the marked fold again and offer a new rectangle rather than trying to tape a tiny center seam. If several students make the same cut, the template cue is unclear; darken the cutting line and place a stop symbol beside the fold.
Leaves that remain joined by an unwanted strip come from stopping before the curve reaches the paper edge. The child can reopen the folded shape and make one final cut. Jagged edges often appear when the paper is held still and the scissors are twisted around the curve. Encourage the holding hand to rotate the rectangle slowly. Replacing the scissors may be appropriate if they bend or chew the paper even during an adult test cut.
Wrinkling usually points to excessive liquid glue, repeated repositioning, or pressing with wet fingertips. Blot a fresh puddle with scrap paper, then place a clean sheet over the project and press gently. Do not rub the damp area. If glue sticks are producing detached corners, check whether the adhesive reached the perimeter and whether the stick has dried out before telling children to press harder.
A cramped composition can be fixed during the dry arrangement. Move the stem lower, reduce overlap at the center, or switch to a larger background. Cutting all four leaves smaller after they are finished is rarely worth the frustration. Conversely, tiny leaves on a large sheet can be grouped in the center and surrounded with a child-drawn frame, dots, or a simple rainbow.
Adults sometimes correct every uneven curve, rotate leaves into perfect symmetry, or replace a child-cut piece with a cleaner one. Those changes improve display uniformity while removing evidence of the student’s decisions. Intervene for safe tool use, an unreadable arrangement, or a structural problem such as missing adhesive. Leave harmless variation intact.
Before displaying the work, write the child’s name on the back, allow adhesive to set flat, and lift each piece by the background rather than by a leaf. If edges repeatedly release, add a small amount of glue beneath only those areas. A final check of leaf count, secure corners, and dry surfaces is more effective than adding heavy embellishments that may pull the construction paper forward.
Frequently Asked Questions
What type of paper is easiest for kindergarten children to cut?
Standard construction paper is usually easier to control than cardstock and sturdier than printer paper. Test it with the actual classroom scissors because dull blades can make even suitable paper tear.
Should the shamrock leaves be pre-cut?
Pre-cut them when shape arrangement and gluing are the lesson goals. If children are practicing scissors, provide folded rectangles with broad, clearly drawn curves and keep spare pieces nearby.
How long should the activity take?
Allow roughly one short class period for a prepared cut-and-glue version, with extra time for tracing or extensions. Dry-arranging every piece first prevents corrections from consuming the session.
Can children make a three-leaf shamrock instead?
Yes. Three leaves create a simpler composition and may suit a shorter session. Use four leaves when the project specifically calls for a four-leaf shamrock.
How can the craft be made with less mess?
Use glue sticks, place scrap paper under each piece during adhesive application, and keep decorations limited to paper. Close glue sticks before distributing optional accents.
Conclusion
Plan the shamrock around the skill children are meant to practice. Construction paper, well-fitting scissors, broad heart-shaped curves, and a background with strong color contrast create manageable working conditions. Keep cutting separate from gluing, and require a dry arrangement so students can solve spacing problems while every piece still moves.
Test the proportions before preparing a class set, then adapt only the demanding step for children who need more or less support. Pre-cut shapes preserve counting and composition practice; tracing folded shapes adds fine-motor challenge without changing the final subject. During the activity, correct unsafe handling and structural failures, but leave uneven curves and individual placement choices alone. The next practical step is to make one sample with the exact paper, template, scissors, and glue students will use, then revise any part that feels cramped or unnecessarily difficult.
Now retrieving an image set.
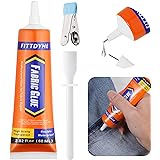
FITTDYHE Fabric Glue Permanent, 60 ML Washable Clear Clothing Glue, Super Fabric Glue for Rhinestones, Patches, Clothes, Denim, Leather, Polyester, Fabrics, Doll Repair, Flannel, Cotton
$9.99 (as of September 18, 2026 22:40 GMT -04:00 - More infoProduct prices and availability are accurate as of the date/time indicated and are subject to change. Any price and availability information displayed on [relevant Amazon Site(s), as applicable] at the time of purchase will apply to the purchase of this product.)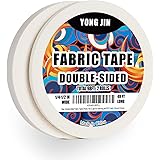
Now retrieving an image set.
Double-Sided Fabric Tape,Hem Tape No Sew No Iron,1/4"+1/2" (2 Rolls) | No Sewing or Ironing Required, Quick Clothing Repairs, Fabric Bonding, For Hemming and DIY Crafts
$7.99 (as of September 18, 2026 22:40 GMT -04:00 - More infoProduct prices and availability are accurate as of the date/time indicated and are subject to change. Any price and availability information displayed on [relevant Amazon Site(s), as applicable] at the time of purchase will apply to the purchase of this product.)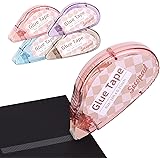
Now retrieving an image set.
Secopad Scrapbook Tape, Glue Tape for Crafts, 4 Pack, Light-Colored Shell | 0.3IN x 26FT, Sticky & Safe, Double Sided Tape for Crafts, Scrapbooking Junk Journaling Supplies, For School Office Teachers
$6.99 (as of September 18, 2026 22:40 GMT -04:00 - More infoProduct prices and availability are accurate as of the date/time indicated and are subject to change. Any price and availability information displayed on [relevant Amazon Site(s), as applicable] at the time of purchase will apply to the purchase of this product.)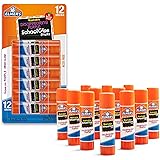
Now retrieving an image set.
Elmer's Disappearing Purple School Glue Sticks, Washable, 6 Grams, 12 Count - Arts & Crafts, Poster, Projects, Back to School, #1 Teacher Brand
$4.59 (as of September 18, 2026 22:40 GMT -04:00 - More infoProduct prices and availability are accurate as of the date/time indicated and are subject to change. Any price and availability information displayed on [relevant Amazon Site(s), as applicable] at the time of purchase will apply to the purchase of this product.)
Now retrieving an image set.
Amazon Basics Clear Thermal Laminating Sheets for Documents and Photos, 9 x 11.5-Inch, 2.8 mil, 200-Pack
$17.99 (as of September 18, 2026 22:40 GMT -04:00 - More infoProduct prices and availability are accurate as of the date/time indicated and are subject to change. Any price and availability information displayed on [relevant Amazon Site(s), as applicable] at the time of purchase will apply to the purchase of this product.)
Now retrieving an image set.