
A paper plate sun craft with layered rays is made by painting the plate, cutting rays in several lengths or shapes, arranging them in overlapping rings, and gluing each ring behind the rim. Place the longest rays first, fill the gaps with shorter contrasting rays, and rotate adjoining pieces slightly so every layer remains visible. Cardstock holds crisp points, while construction paper is easier for young children to cut. Test the complete arrangement before adding glue, because uneven spacing becomes harder to correct once the plate is attached. A thin glue line and adequate drying time help prevent buckling, sliding rays, and a warped center.
Choose Materials That Hold the Layers
The plate and ray paper need enough stiffness to support several overlapping pieces without making the finished sun heavy or difficult to hang. A plain, uncoated paper plate is usually the most workable center because paint and glue grip its surface readily. Plates with glossy coatings may resist washable paint, while very thin plates can curl as wet color dries. If only thin plates are available, use a light coat of paint and let it dry flat before attaching anything.
Cardstock produces defined triangular or flame-shaped rays and is a sound choice when the sun will be displayed on a wall or classroom board. Construction paper bends more easily and is generally less demanding for children who are still developing scissor control. Mixing the two is practical: use cardstock for the long back rays and construction paper for the shorter front layer. Tissue paper can add translucent accents, but it does not provide enough structure for the main points and may wrinkle under liquid glue.
Yellow, orange, gold, and warm red create visible separation between layers. Two shades are sufficient, although three colors make the overlap easier to read from across a room. The colors do not need to follow a strict pattern. Alternating colors around each ring looks orderly; grouping several warm shades together creates a more irregular, energetic edge. The better choice depends on whether the activity emphasizes pattern recognition or individual decoration.
A useful working set includes a paper plate, ray paper, washable paint or crayons, child-appropriate scissors, a pencil, and either a glue stick or washable liquid school glue. A glue stick gives children more control and adds little moisture. Liquid glue forms a stronger bond on heavy cardstock, but too much can soften the plate and allow rays to drift. Adults should select and supervise tools according to the child’s abilities, especially if a hole punch, stapler, or sharper scissors will be used for display preparation.
Before decorating, check that the plate lies reasonably flat and that the paper does not tear during a sample cut. That small test prevents a common mismatch: intricate narrow rays cut from soft paper. For a dependable Paper plate sun craft with layered rays, broad bases and moderate-weight paper matter more than adding numerous decorative supplies.
Plan Ray Shapes, Lengths, and Colors
Layered rays remain readable when each ring differs in length, color, angle, or silhouette. If every piece has the same dimensions and lines up directly behind the next, the front pieces conceal much of the back ring. A simple plan uses long triangles at the back and shorter triangles between them. A more textured version combines broad triangles, narrow points, and rounded flame shapes while keeping their bases wide enough for glue.
Start by measuring visually rather than aiming for engineering precision. A ray with roughly one quarter of its length hidden behind the plate usually leaves enough bonding area while preserving a visible point. Young makers can trace one long ray and one short ray as reusable templates. Older children may cut folded strips into repeated shapes, but thick stacks can shift and produce ragged edges. Folding one strip once or twice is easier to control than cutting many layers together.
Spacing should be tested with the plate face down and the rays placed around its back edge. Set four long rays at the top, bottom, left, and right first. Those pieces act as visual anchors. Add four more between them, then fill the remaining gaps. This method limits the lopsided cluster that often appears when assembly begins at one point and continues around the circle without checking the opposite side.
The second ring can sit between the long anchors rather than directly over them. Turn each short ray a few degrees so its point occupies an open space. If children want a dense corona, add narrow accent strips between the two main rings instead of stacking a third full set. Extra layers increase color and depth, but they also add weight and consume gluing space along the plate rim.
Patterned paper, hand-drawn lines, dots, or small paper scraps can distinguish the front layer without demanding more ray shapes. Glitter and bulky gems are less suitable near the hidden bases because they interfere with adhesion. Loose embellishments also require closer supervision around younger children. Drawing texture with crayons before assembly offers a cleaner alternative and avoids pressing hard on rays after they have been attached.
A successful dry layout should show the color changes and at least part of every ray when viewed from the front. If one layer disappears, shorten the pieces in front, extend the pieces behind, or offset their angles. Do not solve the problem by moving every ray farther from the plate; reducing the glued overlap makes the edge fragile.
Assemble the Sun in 6 Controlled Steps
Assembly works best when surface decoration, ray placement, and final bonding happen as separate stages. Painting after the rays are attached can soak the joints and stain contrasting papers. Gluing while the plate is still damp creates the same problem, even if the painted surface feels dry at the edges. The center should feel dry and room-temperature across its full surface before the layout begins.
- Decorate the plate face. Apply a thin layer of yellow or mixed warm colors, leaving heavy wet paint and pooled glue out of the rim. Add a face only if it suits the intended design.
- Cut two ray groups. Make longer pieces for the back ring and shorter or narrower pieces for the front ring. Keep a generous flat base on every shape.
- Build a dry arrangement. Turn the plate over, position four anchor rays, and distribute the remaining long pieces evenly. Place shorter rays over the gaps.
- Attach the back ring. Lift and glue one piece at a time without clearing the rest of the layout. Press each base to the back rim while keeping glue away from the visible point.
- Add the front ring. Offset these pieces so the long rays remain visible. Check the front after every few additions and adjust before the adhesive sets.
- Dry the sun flat. Rest it face down only if the painted face will not stick to the work surface; otherwise, support the center face up and gently weight the glued bases with clean craft sticks or small paper scraps.
Keeping most pieces in place while gluing preserves the tested spacing. Removing all the rays after planning forces the maker to reconstruct the arrangement from memory. For group activities, place completed ray sets in separate trays and mark a small starting point on the back of each plate. Children can still choose the color sequence and angle while working from a manageable quantity of pieces.
Glue choice changes the pace. A glue stick permits immediate handling but needs full contact across the paper base. Liquid glue allows slight repositioning and bonds heavier stock well, yet the rays may slide before drying. Use small dots or a narrow line rather than coating the entire back of the plate. If the project must be completed within a short session, glue sticks and lighter paper reduce waiting; if durability matters more, allow liquid-glued pieces to dry undisturbed.
Check progress by lifting the sun upright without shaking it. Rays that remain aligned and do not droop at their bases are bonding correctly. A piece that pivots or lifts needs pressure at the joint, not more glue on its visible section. The assembly approach used in this Paper plate sun craft with layered rays project protects the overlap while leaving room for different colors and child-designed shapes.
Fix Uneven Rays, Warping, and Loose Pieces
Uneven rays are easiest to correct before the adhesive dries, but small irregularities do not automatically indicate a failed project. Hand-cut points naturally vary, and that variation can make the sun look animated. Correction is worthwhile when several rays overlap completely, one side is visibly heavier, or gaps expose large sections of the plate rim. Rotate the plate during the dry layout rather than judging it from one fixed position.
If the spacing becomes lopsided after gluing, add one or two narrow accent rays to the open area. Do not crowd an entire new ring around the sun just to repair a single gap. When a ray is too long, trim its point carefully instead of pulling at a firmly attached base. When it is too short, place a longer piece behind it so the original becomes part of the front layer.
Warping usually comes from excess moisture or uneven drying. A plate painted heavily on one side may curve before the rays are added, and liquid glue around only part of the rim can exaggerate the bend. Let painted plates dry completely on a flat, protected surface. If a mild curve remains, place the dry plate beneath a light book with clean paper above and below it. Do not flatten wet paint or wet glue, because pressure can transfer color and bond the project to the protective sheet.
Loose rays often reveal too little overlap, dust or paint on the bonding area, or inadequate pressure during drying. Reattach a loose piece with a small amount of glue at its base and hold it against bare plate material. A paper patch glued across the base on the back can reinforce a heavy cardstock ray without changing the front. Staples provide fast reinforcement, but exposed metal and sharp ends make them a poor default for child-led assembly. If used by an adult, they should remain inaccessible on the back and be evaluated for the display location.
Hanging introduces another constraint. A hole punched directly through the top ray may tear because that piece carries the project’s weight. Punch the plate itself near the rim before gluing, or attach a paper loop securely to the back. For a window, lightweight construction-paper rays and a glue-stick bond may be adequate. A frequently handled classroom prop benefits from cardstock rays, reinforced bases, and a sturdier hanging loop.
The finished sun is ready when the center lies reasonably flat, every ring can be seen, and gentle upright handling does not shift the points. Perfect symmetry is optional; secure attachment and visible layering are the meaningful checks. If those checks fail, repair the affected joint or spacing problem rather than adding decoration that hides it.
Frequently Asked Questions
How many rays should a layered paper plate sun have?
About 12 to 20 total rays usually provide a full edge without overcrowding the plate. Use fewer broad rays for younger children and more narrow rays for a denser design.
What paper works best for the sun rays?
Construction paper is easy to cut, while light cardstock keeps pointed rays crisp. Combining long cardstock rays with shorter construction-paper rays balances strength and manageable cutting.
Should the rays be glued to the front or back of the plate?
Glue them to the back so their bases are hidden and the plate forms a clean sun center. Attach the longest ring first, followed by shorter offset pieces.
How can children space the rays evenly?
Place four anchor rays at the top, bottom, left, and right, then fill each gap. Arrange every piece without glue before attaching them one at a time.
Why is the paper plate curling?
Heavy paint or excess liquid glue introduces uneven moisture. Use thin applications, dry the plate flat between stages, and press a fully dry plate beneath a light book if needed.
Conclusion
A strong layered sun depends on visible differences between the ray rings and secure, low-moisture joints at the plate rim. Choose paper that matches the child’s cutting ability, preserve wide bases for adhesion, and test the entire arrangement before gluing. Four anchor points make spacing easier to judge, while offsetting the shorter pieces keeps the longer layer from disappearing. Let paint dry before assembly and use only enough adhesive to cover each hidden base. If the plate bends or a ray loosens, repair that specific area instead of covering the problem with another layer. Prepare two ray templates, arrange the colors face down around the plate, and check the design from the front before committing to the final bond.
Now retrieving an image set.
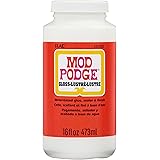
Mod Podge Gloss Sealer, Glue & Finish: All-in-One Craft Solution- Quick Dry, Easy Clean, for Wood, Paper, Fabric & More. Non-Toxic - Craft with Confidence, Made in USA, 16 oz., Pack of 1
$7.99 (as of September 27, 2026 22:43 GMT -04:00 - More infoProduct prices and availability are accurate as of the date/time indicated and are subject to change. Any price and availability information displayed on [relevant Amazon Site(s), as applicable] at the time of purchase will apply to the purchase of this product.)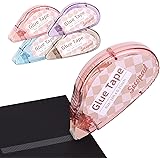
Now retrieving an image set.
Secopad Scrapbook Tape, Glue Tape for Crafts, 4 Pack, Light-Colored Shell | 0.3IN x 26FT, Sticky & Safe, Double Sided Tape for Crafts, Scrapbooking Junk Journaling Supplies, For School Office Teachers
$6.99 (as of September 27, 2026 22:43 GMT -04:00 - More infoProduct prices and availability are accurate as of the date/time indicated and are subject to change. Any price and availability information displayed on [relevant Amazon Site(s), as applicable] at the time of purchase will apply to the purchase of this product.)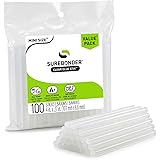
Now retrieving an image set.
Surebonder Clear, All Purpose, All Temp., Mini Size Hot Glue Sticks 0.27 in. Diameter, 4 in. Length -100 Pack
$5.97 (as of September 27, 2026 22:43 GMT -04:00 - More infoProduct prices and availability are accurate as of the date/time indicated and are subject to change. Any price and availability information displayed on [relevant Amazon Site(s), as applicable] at the time of purchase will apply to the purchase of this product.)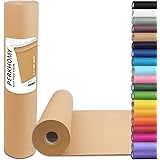
Now retrieving an image set.
PerkHomy Brown Kraft Paper Roll 17.5" x 1,200" (100') for Gift Wrapping Bulletin Board Craft Art Bouquet Flower Packing Valentines Easel Moving Shipping Floor Poster Covering Table 70GSM 50LB
$7.49 (as of September 27, 2026 22:43 GMT -04:00 - More infoProduct prices and availability are accurate as of the date/time indicated and are subject to change. Any price and availability information displayed on [relevant Amazon Site(s), as applicable] at the time of purchase will apply to the purchase of this product.)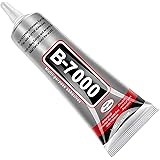
Now retrieving an image set.
B7000 Jewelry Glue for Making, FITTDYHE 1PCS 50ML/1.69 fl oz Clear Adhesive for Rhinestone, Fabric, Multipurpose Super B-7000 for Phone Repair, Nail Art, Wood, Glass, Charms
$5.99 (as of September 27, 2026 22:43 GMT -04:00 - More infoProduct prices and availability are accurate as of the date/time indicated and are subject to change. Any price and availability information displayed on [relevant Amazon Site(s), as applicable] at the time of purchase will apply to the purchase of this product.)
Now retrieving an image set.