
A paper plate bats craft turns Halloween learning into a hands-on lesson by combining plate painting, symmetrical wing cutting, shape assembly, and age-appropriate bat observations. Children can identify circles, triangles, curved lines, body parts, and bilateral symmetry while practicing brush control, scissor use, gluing, and sequencing. Prepare one plate per child, washable black paint, cardstock details, child-safe scissors, and glue, then adjust the cutting demands to the group’s abilities. The strongest projects preserve children’s decisions instead of relying on adult-perfect samples; uneven wings and varied expressions provide useful opportunities to discuss design, movement, and how real bats differ from Halloween characters.
Materials That Match the Child and Setting
The material choices determine whether children can complete meaningful parts of the bat themselves. A plain, uncoated paper plate accepts tempera paint more predictably than a glossy or wax-coated plate. Coated plates may repel watery paint, remain tacky, or require several coats that wrinkle the surface. A sturdy plate is easier to cut and hang, but an especially thick plate can frustrate a young child using safety scissors. Test one plate before preparing an entire group set.
For each bat, provide one plate, washable black or dark purple tempera paint, a broad brush or sponge, child-safe scissors, glue, and paper for eyes, ears, fangs, or other facial details. White crayons, paint markers used by an adult, or small pieces of white cardstock can add features after the dark base dries. Loose glitter and tiny decorative pieces are poor choices for children who still mouth materials, and glitter can obscure rather than strengthen the intended shape lesson.
Choose glue according to the parts being attached. A glue stick handles lightweight paper eyes and teeth with little drying time. Liquid school glue holds heavier cardstock ears more reliably but invites puddles that soften the plate. A small glue tray with cotton swabs gives children more control than an open bottle. Googly eyes are optional rather than necessary; paper eyes let children cut circles, compare sizes, and decide where a bat’s face should sit.
A compact preparation checklist keeps the activity manageable:
- Test: Paint and cut one sample plate using the same supplies children will receive.
- Protect: Cover the work surface and provide paint shirts or smocks.
- Separate: Keep painting materials apart from clean paper facial pieces.
- Label: Mark names on the back before paint is applied.
- Plan: Set aside a flat drying location where plates will not overlap.
Precutting every component produces tidy bats but removes much of the learning. A better compromise is to prepare only the parts beyond a child’s current control. A three-year-old might paint the body, choose the eye placement, and glue prepared wings. An older child can divide the plate, draw wing curves, and cut the details. The material plan for Paper plate bats craft for Halloween learning should preserve at least two genuine child decisions, even when an adult handles the difficult cuts.
How to Make the Bat From One Plate
A one-plate construction works by reserving the center for the body and turning the outer sections into wings. Begin by writing the child’s name on the back. Paint the front surface and allow it to dry flat. Painting before cutting gives children a broad, stable surface; cutting first creates narrow pieces that curl, slide, and become difficult to coat evenly.
Once dry, draw two roughly vertical cutting lines to separate a wide center panel from the left and right sides. The center does not need to be measured precisely. Each outer piece becomes a wing. Cut shallow scallops along the straight inner edge or outer rim, depending on the orientation that looks clearest when the pieces are placed beside the body. Before gluing, turn and test both wing pieces. This dry arrangement prevents the common mistake of attaching two wings that point downward or expose unpainted surfaces.
Glue or staple the wings behind the central body section. Staples provide an immediate hold for a classroom display, but only an adult should operate a standard stapler, and the metal ends should remain on the back. Glue preserves an all-paper construction but needs drying time under light pressure. For a moving version, an adult can connect each wing with a paper fastener after making the holes. Fasteners introduce a simple joint mechanism, although they are unsuitable where small loose parts present a concern.
Add two triangular ears near the top, followed by eyes and a mouth. Facial pieces should come after wing assembly so children can judge which end is the head. Fangs can support triangle recognition, but they are a Halloween design choice rather than an accurate feature of every bat. That distinction creates a useful conversation about the difference between a festive character and an animal observation.
Watch for structural clues while the bat is being assembled. Wings that slide away indicate too much liquid glue or insufficient contact area. A plate that bends sharply may have absorbed excess paint. Tiny facial parts that will not stay in place are often too heavy, too wet, or being attached before the base is dry. Rather than adding more glue automatically, blot a puddle, replace a heavy component with thin paper, or let the surface dry longer. These adjustments teach children that construction problems can be diagnosed instead of covered up.
Building Halloween Learning Into the Activity
The learning value comes from the decisions and conversation embedded in the construction, not from displaying identical finished bats. Shape language fits naturally: the plate begins as a circle, ears and optional fangs resemble triangles, and the wing edges form repeated curves. Children can count scallops, compare the sizes of two eyes, or locate features above, below, beside, and between other parts.
Symmetry is especially visible when the plate’s side pieces become paired wings. Place the pieces side by side and ask what is alike and what is different. Folding or stacking them briefly can reveal mismatched curves without treating variation as a defect. For younger children, “one wing on each side” is enough. Older children can examine whether the wings have matching outlines and decide whether to revise them. Perfect symmetry is not required; the comparison itself carries the lesson.
Sequencing can be made explicit without turning the project into a memory test. Ask children to recall whether paint, cutting, or gluing happened first and why the paint needed time to dry. A simple three-image sequence placed near the worktable can support children who are not yet reading. If every stage is demonstrated at once, younger makers may rush ahead or forget the immediate action. Show one stage, allow completion, and then introduce the next.
Bat facts should remain accurate and limited enough to fit the activity. Bats are mammals, have wings, and are generally active at night, though species and behavior vary. They are not blind, and they should not be described as flying mice. Some bats use echolocation, while the craft’s oversized eyes, smiles, or fangs belong to imaginative Halloween design. A useful prompt is, “Which details make this look like a real animal, and which details make it a Halloween character?”
That comparison is stronger than asking children to copy an adult model. One child may create wide wings for gliding, another may make deep scallops, and another may omit fangs after discussing real bats. Documenting the explanation beside the display preserves evidence of observation and vocabulary. For a related extension to Paper plate bats craft for Halloween learning, children can sort pictures into real bat features and invented costume features, then revise one element of their plate design.
Managing Drying, Cutting, and Group Participation
Group success depends on separating wet work from assembly work. Paint rarely dries at the same pace as a short activity period, especially when children apply thick layers. For a single session, offer sponge painting at the beginning, use a thin coat, and prepare a separate dry plate for demonstrating the later stages. For the most child-led result, divide the project across two sessions: paint first, then cut and assemble after the plates have dried completely.
Scissor demands should match hand strength and experience. Cutting straight dividing lines through a plate is harder than cutting ordinary paper because the rim resists the blades. Young beginners can snip scallops into cardstock wings rather than the plate itself. Children with developing motor control may use a plate body with two prepared wings, then complete the painting and placement. Adaptive scissors or adult-assisted cutting may be appropriate, but hand-over-hand control should not be forced if it removes the child’s ability to pause.
A small-group station often works better than distributing paint, scissors, and glue simultaneously to a full class. Four children can paint while another group listens to a bat-themed read-aloud or examines bat photographs. Later, the stations switch. This reduces accidental paint transfer and lets an adult observe grip, cutting direction, and glue use without taking over. In a home setting, the same principle means clearing paint before introducing facial pieces.
The most common management failure is expecting the finished sample to define success. Children then receive repeated corrections about wing angle, eye spacing, or color, even though those choices do not affect construction. Set only the constraints that matter: the pieces need enough overlap to stay attached, wet plates need drying space, and cutting must follow the established safety rules. Expression, asymmetry, and color variation can remain open.
Signs that the setup is working include children identifying the next stage, asking for a tool rather than grabbing across wet work, and explaining a design choice. Warning signs include a long line for adult cutting, glue bottles becoming the main focus, or adults assembling while children wait. If those problems appear, simplify the remaining pieces, create an extra cutting station, or let children draw details directly on the dry plate. Completing fewer independent steps is more valuable than watching an adult produce a polished bat.
How to Tell Whether the Activity Worked
Evaluate the process through observable actions rather than judging which bat looks most recognizable. A child who controlled the brush, attempted a curved cut, matched one wing to each side, and explained that ears sit above the eyes has demonstrated several kinds of learning. The product may still be uneven. Unevenness often records the child’s actual motor planning and is more informative than an adult-corrected result.
Look for evidence in three areas: construction, language, and decision-making. Construction evidence includes joining pieces securely and adjusting a part that slips. Language may include circle, triangle, wing, edge, beside, first, or dry. Decision-making appears when a child chooses eye size, changes wing placement after testing it, or distinguishes a real feature from a Halloween invention. Not every child needs to show every outcome during one project.
Compare the result with the child’s starting point rather than with peers. A beginner who makes controlled snips has achieved something different from an experienced cutter who creates matching scallops. If the intended focus is animal knowledge, ask the child to name one accurate bat characteristic. If the intended focus is sequencing, invite the child to arrange photos of the stages. The assessment should follow the stated purpose instead of collecting unrelated skills because they happened to appear.
A failed attachment or torn wing is not automatically a failed activity. Ask what happened and offer limited repair options: add a paper patch behind the tear, increase the overlap, or replace the wing. Children see how material properties affect an object when they repair it themselves. By contrast, quietly swapping in an adult-made piece removes the opportunity to reason about the problem.
Display choices can reinforce authorship. Hang bats at the child’s eye level, add dictated captions, or group them by a feature the children select, such as wing shape or expression. Avoid ranking them by neatness. If the bats will hang from string, an adult should punch the hole through a reinforced area near the top; a hole placed too close to the rim may tear. The finished display should make children’s observations visible, not erase variation in pursuit of uniform decorations.
Frequently Asked Questions
What age is a paper plate bat activity suitable for?
Children around preschool age can paint and place prepared pieces with supervision, while older children can divide the plate, shape paired wings, and assemble the bat more independently.
Should the plate be painted before or after cutting?
Paint before cutting for a stable surface and easier coverage. Let it dry fully before dividing the plate so damp fibers do not bend or tear under the scissors.
What can replace black paint?
Dark crayons, washable markers, tempera sticks, or glued tissue pieces can work. Crayons and tempera sticks reduce drying time, while tissue collage adds more gluing and texture work.
How can the activity include accurate bat learning?
Discuss bats as winged mammals, explain that bats are not blind, and compare real features with invented Halloween details such as exaggerated fangs or smiling faces.
How do I stop the wings from falling off?
Increase the overlap behind the body, use less glue, and press the joint while it dries. An adult may staple the hidden joint when immediate strength is needed.
Conclusion
A strong paper plate bat activity gives children control over painting, placement, shape choices, and age-appropriate assembly while adults manage only the difficult or unsafe parts. Test the plate, plan a real drying interval, and decide whether cutting, symmetry, sequencing, or bat observation is the main learning goal before setting out materials. During the work, treat slipping wings, torn edges, and mismatched curves as construction questions rather than reasons to replace a child’s work. Finish by inviting each maker to identify a shape, recount a stage, or separate a real bat characteristic from a Halloween invention. Those short explanations reveal more than a row of uniform decorations. Save a photograph or dictated caption if documentation matters, then display the bats in a way that keeps each child’s design choices visible.
Now retrieving an image set.
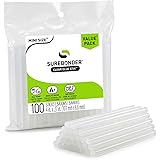
Surebonder Clear, All Purpose, All Temp., Mini Size Hot Glue Sticks 0.27 in. Diameter, 4 in. Length -100 Pack
$5.97 (as of September 25, 2026 22:42 GMT -04:00 - More infoProduct prices and availability are accurate as of the date/time indicated and are subject to change. Any price and availability information displayed on [relevant Amazon Site(s), as applicable] at the time of purchase will apply to the purchase of this product.)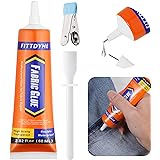
Now retrieving an image set.
FITTDYHE Fabric Glue Permanent, 60 ML Washable Clear Clothing Glue, Super Fabric Glue for Rhinestones, Patches, Clothes, Denim, Leather, Polyester, Fabrics, Doll Repair, Flannel, Cotton
$9.99 (as of September 25, 2026 22:42 GMT -04:00 - More infoProduct prices and availability are accurate as of the date/time indicated and are subject to change. Any price and availability information displayed on [relevant Amazon Site(s), as applicable] at the time of purchase will apply to the purchase of this product.)
Now retrieving an image set.
Crayola Air Dry Clay (5lbs), Teacher Supplies, Natural White Modeling Clay for Kids, Sculpting Material, Bulk Craft Supplies for Art Classrooms
$13.58 (as of September 25, 2026 22:42 GMT -04:00 - More infoProduct prices and availability are accurate as of the date/time indicated and are subject to change. Any price and availability information displayed on [relevant Amazon Site(s), as applicable] at the time of purchase will apply to the purchase of this product.)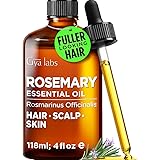
Now retrieving an image set.
100% Pure Rosemary Essential Oil for Skin & Diffuser - 4 Fl Oz | 100% Pure Rosemary Oil for Fuller Looking Hair & Clear Skin, made for Fine & Thinning Hair, Nightly Scalp Routine
$9.99 (as of September 25, 2026 22:42 GMT -04:00 - More infoProduct prices and availability are accurate as of the date/time indicated and are subject to change. Any price and availability information displayed on [relevant Amazon Site(s), as applicable] at the time of purchase will apply to the purchase of this product.)
Now retrieving an image set.
Handcraft Blends Peppermint Essential Oil - Huge 4 Fl Oz | Steam Distilled, Premium Grade for Diffuser, Aromatherapy, Skin, Massage, Candle & Soap Making Fragrance
$9.99 (as of September 25, 2026 22:42 GMT -04:00 - More infoProduct prices and availability are accurate as of the date/time indicated and are subject to change. Any price and availability information displayed on [relevant Amazon Site(s), as applicable] at the time of purchase will apply to the purchase of this product.)
Now retrieving an image set.