
Match Paper Weight to the Project
Paper weight determines whether a project folds easily, keeps its shape, or survives handling after assembly. Thin paper bends with little force and supports repeated folds, while heavier stock provides stiffness for standing figures, masks, signs, and structural parts. The mistake is treating weight as a simple quality scale. Heavier does not automatically mean better: a dense sheet can make a folded project bulky, difficult to crease, and frustrating to cut with child-safe scissors.
Lightweight sheets are useful for fans, paper chains, snowflakes, woven strips, and projects that require several layers to be cut at once. They compress neatly at each crease, so the folded stack stays manageable. Their limitation appears when wet glue, paint, or repeated handling is involved. Too much liquid can wrinkle the surface, soften narrow tabs, or cause a hanging decoration to sag. Using a glue stick or small dots of liquid adhesive reduces that problem.
Medium-weight construction or drawing paper is a practical middle choice for silhouettes, folded cards, simple animals, crowns, and cut-and-assemble scenes. It offers enough body for a finished form while remaining workable with ordinary school scissors. For example, a child making a folded house can crease the walls, cut windows, and attach a roof without the entire form collapsing. Intricate accordion folds or tiny interior cutouts may still be difficult, particularly for younger hands.
Card stock suits bases, templates, wheels, puppets, and pieces that must stay flat or stand upright. It is less suitable for tightly folded stars, layered snowflakes, or forms with many intersecting creases. Scoring a fold line can help, but scoring should be done by an adult or under close supervision with a blunt tool rather than a sharp blade. A crease that exposes pale fibers or splits at the edge signals that the stock is too rigid for the fold radius.
A useful selection order is to decide whether folding or structural strength matters more, then consider the amount of glue and handling. For a mixed project, combine papers rather than forcing one sheet to perform every job. Use flexible colored paper for folded components and firmer stock for the backing. That approach often produces a cleaner result than buying the thickest available Craft project paper for folding and cutting and expecting it to handle every task.
Check Grain, Flexibility, and Fold Quality
Paper fibers tend to align more strongly in one direction during manufacture, creating a grain that affects folding behavior. A fold running parallel to the grain generally closes more smoothly and with less surface disruption than a fold running across it. Grain is easy to ignore on casual projects, but it becomes noticeable on long card folds, repeated accordion pleats, and shapes expected to sit squarely.
To estimate grain direction, gently bend—not crease—the sheet in both directions. One direction will usually offer less resistance and form a smoother arc. A second check is to tear a narrow scrap in each direction: the tear that follows the grain is often straighter. The bend test is preferable when the full sheet must remain usable. Grain may be difficult to detect in small, inexpensive craft sheets, so the result should be treated as a practical clue rather than a laboratory measurement.
Flexibility also depends on fiber composition, coating, moisture, and storage. Two sheets that feel equally thick may behave differently when creased. A soft, uncoated sheet may accept a sharp fold, while a hard, heavily finished sheet may spring open. Paper stored in a damp room can become limp or wavy; very dry paper may feel brittle and show cracking. Keeping sheets flat in a folder or shallow box protects corners and produces more predictable folds.
Consider a folded greeting card with a cut window. If the main fold fights the paper grain, the spine may bow and the card may not close evenly. Turning the layout 90 degrees can solve the problem without changing materials. By contrast, a free-form folded animal may include creases in several directions, making overall pliability more valuable than perfect grain alignment. Thin origami-style paper is effective for that form, although its lightness may not tolerate generous glue or vigorous decorating.
Watch the first completed crease rather than waiting until every piece has been prepared. A successful fold lies flat, keeps its intended angle, and does not shed surface color. A failing fold shows branching cracks, white stress marks, or strong spring-back. Reverse-folding harder rarely fixes unsuitable paper and can weaken the hinge. Try a lighter sheet, enlarge the folded feature, or use a separate flexible hinge attached to a sturdier body. Those adjustments preserve the project design while respecting the material’s limits.
Choose a Surface That Cuts, Colors, and Glues Cleanly
Surface finish changes how scissors travel, how marks appear, and how adhesive holds. Uncoated matte paper provides slight friction, which helps children control a cut and gives crayons, colored pencils, washable markers, and glue something to grip. Smooth or coated paper can produce bright colors and sharp printed details, but it may slide under a scissor blade or release glued parts after drying.
For cutting practice, select paper that is easy to see against the work surface and firm enough not to flop around the blades. Very soft tissue paper tends to bunch or pull unless held between supporting layers. Thick card may require hand strength beyond a beginner’s comfortable range. Medium-weight matte sheets allow children to practice straight lines, gentle curves, and corners without needing to squeeze excessively. If the scissors chew rather than slice, first check blade condition and hand position before blaming the paper.
Decoration methods impose different demands. Crayon needs some tooth, while fine pencils show more clearly on a relatively smooth sheet. Water-based paint and broad marker coverage can buckle thin stock because one side absorbs moisture and expands. A heavier mixed-media sheet may be a better choice when painting is central, although it will not fold as tightly. Printed papers also deserve a test: some home-printer inks can smear when handled immediately or when brushed with wet glue.
Adhesive performance depends on both finish and quantity. Glue sticks work well for broad, light paper-to-paper bonds and add little moisture. Small dots of liquid school glue can secure tabs, layered shapes, or heavier decorations, but oversized puddles lengthen drying time and distort the sheet. Tape creates an immediate bond, though it may remain visible and can make later cutting awkward. Glossy decorative paper may need double-sided tape or a folded tab because ordinary glue has limited surface grip.
Color-through construction paper is helpful when cut edges will remain visible, whereas white-core stock may reveal a pale line after cutting or folding. That line is not a defect when the design benefits from contrast, but it can look unintended on dark silhouettes. Before preparing a classroom-sized batch, make one decorated sample with the actual crayons, markers, and adhesive. A surface that looks attractive in the package may behave quite differently once it is folded and handled. A focused review of Craft project paper for folding and cutting should therefore include tool compatibility, not color alone.
Test the Paper Before Children Begin
A small material test prevents wasted sheets and exposes difficulties before they become part of the activity. Use an offcut or one full sample sheet with the same dimensions planned for the project. Adult hands can overpower resistant paper, so the meaningful test is whether the intended child can fold, rotate, and cut it with reasonable control under appropriate supervision.
Run the test in the order the project will be completed. Draw a line with the planned tool, make the longest fold, cut a straight edge and a curve, then attach a scrap with the selected adhesive. Let the bond dry before judging it. Immediate strength can be misleading because wet glue may allow parts to slide, while a glue stick bond can feel secure before pressure has been applied across the full surface.
- Fold: Look for a clean hinge without splitting, flaking, or excessive spring-back.
- Cut: Confirm that the sheet turns around curves without buckling or hiding the cutting line.
- Mark: Check whether pencil lines remain visible and whether markers bleed through.
- Attach: Verify that tabs stay down and the surrounding area does not wrinkle severely.
- Handle: Lift and move the sample as the finished object will be used.
Testing should reflect the youngest or least experienced participant, not only the fastest maker. A detailed paper lantern might be manageable for an older child who can stop at a boundary line, while a younger child may cut through the frame. The better response is not necessarily thicker paper. Wider uncut borders, fewer slits, a larger template, or pre-folded guide lines can preserve independence without making the scissors harder to operate.
Signs of success include folds that stay aligned, cut edges that follow the line, and assembled parts that remain attached after gentle movement. Repeated hand fatigue, torn corners, hidden guide marks, and unfinished cuts point to a mismatch among paper, tools, and design. Simplifying the geometry often works better than asking children to force the material. Rounded corners are easier than tight inward angles, broad tabs are stronger than narrow ones, and fewer stacked layers reduce cutting resistance.
Prepare extra sheets, but do not pre-cut every component unless the activity’s goal excludes cutting practice. A model made from the chosen material helps children understand the finished scale and reveals whether openings, tabs, and folds are realistically sized. Store successful samples with notes about the paper type and tools used. That record makes future Craft project paper for folding and cutting choices more reliable than relying on package labels or memory alone.
Frequently Asked Questions
What paper is easiest for children to fold and cut?
Light to medium-weight, uncoated paper is usually the easiest because it creases without heavy pressure and remains stable enough to guide through child-safe scissors.
Is construction paper suitable for detailed folding?
Construction paper works for broad folds and simple forms, but its thickness and soft fibers can make tiny pleats or precise layered folds bulky. Thinner folding paper is better for intricate designs.
Why does colored paper turn white along a fold?
The outer surface is stretching or cracking and exposing lighter fibers beneath it. Use a thinner sheet, fold with the grain, enlarge the fold, or choose paper colored throughout.
Should paper be folded before or after cutting?
Follow the design’s purpose. Fold first for mirrored shapes, snowflakes, and aligned slots; cut first when folds would hide guide lines or create a stack too thick for safe cutting.
How can paper projects be kept from wrinkling under glue?
Use a glue stick or small, evenly spaced dots of liquid glue, press the bond gently, and let it dry flat. Excess moisture is the usual cause of rippling.
Conclusion
Select paper by the hardest action in the project rather than by color or thickness alone. Repeated folds call for flexible sheets with cooperative grain; standing parts need more body; painted or heavily glued pieces require enough weight to resist buckling. Surface finish must also suit the actual scissors, drawing tools, and adhesive children will use.
Before preparing multiple copies, make a complete sample and let an intended user try the longest fold, tightest curve, and smallest tab. Stress whitening, tiring cuts, springing folds, and lifting joints identify a material mismatch early. If one sheet cannot meet every requirement, combine a flexible paper component with a firmer base. That simple division usually gives children more control and produces a finished project that holds together without unnecessary cutting resistance.
Now retrieving an image set.
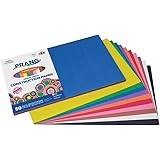
Prang (Formerly SunWorks) Construction Paper, 10 Assorted Colors, 12" x 18", 50 Sheets
$2.69 (as of September 26, 2026 22:43 GMT -04:00 - More infoProduct prices and availability are accurate as of the date/time indicated and are subject to change. Any price and availability information displayed on [relevant Amazon Site(s), as applicable] at the time of purchase will apply to the purchase of this product.)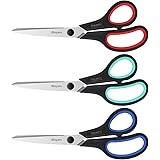
Now retrieving an image set.
iBayam 8.5" Heavy Duty Scissors All Purpose for Office School Crafts Sewing | 3-Pack, Ultra-Sharp 2.5mm Stainless Blades, Comfort Grip Handles, Left & Right Handed – Teacher Desk & Classroom Must-Have
$9.99 (as of September 26, 2026 22:43 GMT -04:00 - More infoProduct prices and availability are accurate as of the date/time indicated and are subject to change. Any price and availability information displayed on [relevant Amazon Site(s), as applicable] at the time of purchase will apply to the purchase of this product.)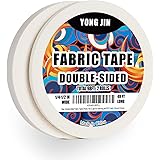
Now retrieving an image set.
Double-Sided Fabric Tape,Hem Tape No Sew No Iron,1/4"+1/2" (2 Rolls) | No Sewing or Ironing Required, Quick Clothing Repairs, Fabric Bonding, For Hemming and DIY Crafts
$7.99 (as of September 26, 2026 22:43 GMT -04:00 - More infoProduct prices and availability are accurate as of the date/time indicated and are subject to change. Any price and availability information displayed on [relevant Amazon Site(s), as applicable] at the time of purchase will apply to the purchase of this product.)
Now retrieving an image set.
Astrobrights/Neenah Bright White Cardstock, 8.5" x 11", 65 lb, 75 Sheets | 96 Brightness, Smooth Premium Finish
$5.79 (as of September 26, 2026 22:43 GMT -04:00 - More infoProduct prices and availability are accurate as of the date/time indicated and are subject to change. Any price and availability information displayed on [relevant Amazon Site(s), as applicable] at the time of purchase will apply to the purchase of this product.)
Now retrieving an image set.
Command 20 lb X-Large Picture Hanging Strips, 16 Pairs White Command Strips Heavy Duty Picture Hanger
$10.39 (as of September 26, 2026 22:43 GMT -04:00 - More infoProduct prices and availability are accurate as of the date/time indicated and are subject to change. Any price and availability information displayed on [relevant Amazon Site(s), as applicable] at the time of purchase will apply to the purchase of this product.)
Now retrieving an image set.