
Materials That Produce Reliable Moving Joints
The joint material determines whether the spider’s legs rotate smoothly or pull through the paper. Small paper fasteners, also called split pins or brads, form effective pivots because their round heads stay on the front while the two prongs spread across the back. The connection needs enough space to turn, so the prongs should be opened without pressing the joint completely flat.
Use a plain, uncoated paper plate for the body and medium-weight cardstock for the legs. Construction paper is easy to cut, but a narrow strip may crease near the fastener after repeated movement. Corrugated cardboard creates stronger legs, yet its thickness can make small fasteners difficult to open. Cardstock offers a useful middle ground: it accepts paint or marker, holds a punched hole, and remains light enough to pivot.
Gather black or dark paint, a brush, cardstock, child-safe scissors, glue, a pencil, a single-hole punch or awl, and eight paper fasteners. Decorations can include paper eyes, pom-poms, chalk marks, or painted spots. Adhesive-backed plastic eyes are convenient, but paper circles are flatter and eliminate another loose plastic component. Small parts require close adult control, especially around children who may place craft pieces in their mouths.
A standard office hole punch may not reach far enough into a plate to make the body holes. Because the holes belong close to the rim, it often works if the plate edge is gently flattened before punching. An adult can use a pointed tool on a protected work surface when a punch will not reach. Children should not hold the plate during that step.
Before beginning, test one fastener through a scrap of the chosen cardstock. The head must be wider than the hole, and the shaft must pass through without forcing it. A hole that is too tight restricts rotation; an oversized hole allows the leg to wobble and may tear outward. This small test prevents the most common mismatch in a Paper plate spider craft with movable legs.
Prepare the Spider Body and Eight Legs
Painting and cutting should be completed before the moving parts are attached. Wet paint can glue a fastener to the plate, while paint added after assembly may fill the small gap needed for rotation. Place the plate with its eating surface facing down and paint the raised underside. That orientation produces a rounded spider body and leaves the hollow side available for the fastener prongs.
Apply a thin coat rather than saturating the plate. Heavy paint softens paper fibers and can cause the rim to buckle. If stronger color is needed, let the first coat dry before adding another. A plate is ready for assembly when it feels dry and firm at the edge, not merely dry on the visible surface. While it dries, cut the legs.
For evenly matched legs, cut one cardstock strip and use it as a template for the other seven. Each strip can be gently folded into a shallow zigzag, with one bend suggesting a knee and another forming a foot. Keep the attachment end flat. A crease placed directly beside the pivot acts as a weak hinge and encourages the hole to split.
The legs do not need to be anatomically detailed, but all eight should have enough width around their attachment holes. A very narrow point leaves little paper between the hole and the edge. Round the attachment end and maintain a visible border around the planned hole. If the cardstock feels thin, glue a small cardstock circle to the back of each attachment end and allow it to dry before punching. Reinforcement adds durability without making the entire leg bulky.
Arrange four legs along each side of the dry plate before making holes. The upper and lower joints should sit far enough apart that their fastener heads do not overlap, while the middle legs need clearance to rotate past one another. Mark the plate and matching leg ends with pencil. Numbering each pair from one through eight is useful when the spacing is customized, because every leg can return to the position tested for it.
A common shortcut is to stack all eight legs and punch them at once. Stacking may produce aligned holes, but the lower strips can shift and emerge with openings too close to an edge. Punching each marked leg separately takes longer and preserves the paper border that resists tearing. Decorations should be glued onto the body only after the hole locations are established so eyes or spots do not obstruct the joints.
Assemble the Pin Joints in Eight Steps
Controlled movement comes from aligning each leg hole with its body hole and preserving a tiny amount of play in the connection. Complete one joint first and test it before punching or fastening every remaining position. That sample shows whether the hole size, cardstock thickness, and fastener tension work together.
- Position the legs: Place four marked legs on each side of the painted plate and confirm that their paths do not collide excessively.
- Mark the pivots: Draw one dot near the rounded end of every leg and a corresponding dot near the plate rim.
- Punch the leg holes: Make centered openings while preserving paper around each side of the hole.
- Create the body holes: Have an adult punch or pierce the eight marked points on a protected surface.
- Insert each fastener: Push it from the decorated front of the plate through the plate and then through the matching leg behind it.
- Open the prongs: Spread the two prongs on the hollow back side without crushing them tightly against the cardstock.
- Test the range: Swing every leg forward and backward, loosening any joint that drags or tightening one that hangs excessively.
- Add the face: Attach paper eyes, fangs, spots, or other flat details after the movement has been verified.
Putting the leg behind the plate keeps the fastener head visible on the front and the prongs away from the decorated surface. It also lets the plate rim partially conceal each attachment end. If the leg is placed on top, the joint still functions, but the construction looks busier and the leg can scrape across painted details.
Fastener tension deserves more attention than force. When the prongs are flattened firmly, the plate and leg become clamped together and friction stops the pivot. Open the prongs only far enough to prevent withdrawal. If a joint remains stiff, rotate the fastener itself a few times or enlarge the hole very slightly with adult help. Do not pull the leg repeatedly against a tight pin; that action stretches the hole into a tear.
Signs of a sound joint are easy to see. The leg stays attached when the spider is lifted, changes position with light finger pressure, and remains near the selected angle when released. A leg that spins freely downward may need a gentler squeeze at the back. A leg that bends instead of rotating indicates excessive joint friction or a crease too close to the hole. Testing after every two attachments keeps errors from being repeated across all eight legs.
Fix Legs That Stick, Tear, or Droop
A failed movable leg usually points to hole placement, fastener tension, or weak paper rather than an unsuitable spider design. Inspect the connection before replacing the entire plate. Early warning signs include a white stress line extending from the hole, a fastener head sinking into damp paper, or a leg that twists sideways instead of sweeping around its pivot.
For a sticking leg, first check the back of the joint. Fastener prongs pressed hard against the cardstock should be lifted slightly by an adult. Dried glue or paint around the shaft must be removed carefully because it acts like an adhesive washer. If the opening grips the shaft tightly, a small circular motion with the punching tool can create clearance, but enlarging it too much will exchange stiffness for wobble.
A torn leg can often be repaired with a cardstock patch. Remove the fastener, glue a small circle over the damaged area, let it dry completely, and punch a fresh centered hole through both layers. Tape provides a quicker repair, but a punch can split or wrap thin tape around its cutter. A glued paper patch distributes the pulling force more evenly and produces a cleaner pivot.
If the plate itself tears, move the joint slightly inward and reinforce the back with cardstock. Avoid placing the replacement hole directly beside the damaged opening; the thin bridge between two holes will fail quickly. For widespread softness caused by excessive paint, transferring the decorated body onto a second plate may be more dependable than patching all eight positions.
Drooping has two distinct forms. A straight leg that swings downward needs slightly more friction at the fastener. A leg that folds near its attachment point needs stronger paper or a wider attachment end. Tightening the joint will not correct weak cardstock and may accelerate the crease. Recognizing that difference prevents an ineffective repair.
Yarn loops, pipe cleaners, and glued accordion-folded strips are possible alternatives, but they behave differently. Yarn creates floppy motion rather than a positionable pivot. Pipe cleaners bend anywhere along their length and may have sharp wire ends that require secure covering and adult inspection. Glued strips flex but cannot rotate around the plate. Choose those options for texture or simpler assembly, not as exact substitutes for the pin-joint action described in this Paper plate spider craft with movable legs.
Safe Display and Play Options
The finished spider is a lightweight movable model, not a durable toy. Paper fasteners and detached decorations are small components, and repeated vigorous pulling can expose or release them. An adult should inspect the prongs before and after active use, checking that both remain spread and that no sharp end projects beyond the paper.
For supervised tabletop play, children can reposition the legs to explore symmetry, counting, and directional words. Ask them to place two front legs forward, match the angles on both sides, or count how many legs point upward. Movement should happen near the pivot with gentle pressure. Pulling from the foot places more leverage on the hole and shortens the craft’s useful life.
A wall display reduces handling but requires deliberate placement. Use a loop attached to the plate body rather than hanging the spider from one movable leg. Keep the loop clear of the fastener prongs, and position the spider where the legs can rotate without catching on adjacent artwork. Removable adhesive on the body may work for a flatter display, though it limits access to the rear joints.
A pull-string version can be made by linking selected legs with yarn behind the plate, but that is a more advanced mechanism. The string needs balanced attachment points and enough clearance to avoid snagging on eight fastener prongs. It may move several legs together, yet individual positioning becomes less precise. Build and test the basic independent joints before adding linked motion.
Storage matters if the spider will be reused for a seasonal display. Rotate the legs inward so they remain within the plate’s width, place the craft flat, and avoid stacking heavy objects on it. Bent cardstock can sometimes be straightened, but a crushed pivot area rarely regains its original strength. Before bringing a stored spider back into use, confirm that every fastener remains secure and that repaired holes show no fresh splitting.
The project is working as intended when children can reposition the legs without the plate flexing, the fasteners remain seated, and the attachment ends show no lengthening tears. Stop active handling if a head begins pulling through the front or a prong works loose. That is the point to patch, replace the fastener, or convert the piece into a fixed display rather than continuing to stress a weakened joint.
Frequently Asked Questions
How do you make paper plate spider legs move?
Attach each separate cardstock leg with a paper fastener through aligned holes in the plate and leg. Spread the fastener prongs loosely enough to retain the pieces while allowing rotation.
What can replace paper fasteners?
An adult can tie yarn loosely through aligned holes, but the legs will flop rather than hold precise positions. Glued or stapled legs are suitable for a fixed spider, not a rotating one.
Why are the movable legs difficult to turn?
The prongs may be pressed too tightly, the hole may grip the fastener shaft, or dried paint may be creating friction. Loosen the joint slightly instead of pulling harder on the leg.
Should the legs go in front of or behind the plate?
Placing them behind the plate hides their attachment ends and leaves the fastener heads on the decorated front. Front-mounted legs still rotate but can cover facial details.
How can torn fastener holes be repaired?
Remove the fastener, glue a small cardstock patch over the damaged area, and let it dry. Punch a new centered hole through the reinforced section before reassembling the joint.
Conclusion
Successful movement depends on three details: firm cardstock around each hole, accurately aligned pivots, and paper fasteners that are secure without being clamped flat. Paint the plate before assembly, preserve a broad attachment end on every leg, and test the first joint before duplicating it. When a leg resists movement, adjust the connection rather than forcing the paper; stiffness, drooping, and tearing each require a different correction. Adult handling of punching tools and regular inspection of small metal fasteners keep the activity appropriate for supervised crafting. Once all eight joints pass a gentle movement test, add lightweight decorations and choose either tabletop interaction or a low-stress wall display.
Now retrieving an image set.
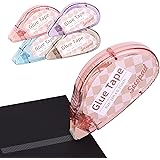
Secopad Scrapbook Tape, Glue Tape for Crafts, 4 Pack, Light-Colored Shell | 0.3IN x 26FT, Sticky & Safe, Double Sided Tape for Crafts, Scrapbooking Junk Journaling Supplies, For School Office Teachers
$7.99 (as of October 22, 2026 23:20 GMT -04:00 - More infoProduct prices and availability are accurate as of the date/time indicated and are subject to change. Any price and availability information displayed on [relevant Amazon Site(s), as applicable] at the time of purchase will apply to the purchase of this product.)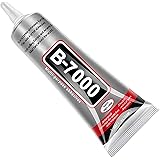
Now retrieving an image set.
B7000 Jewelry Glue for Making, FITTDYHE 1PCS 50ML/1.69 fl oz Clear Adhesive for Rhinestone, Fabric, Multipurpose Super B-7000 for Phone Repair, Nail Art, Wood, Glass, Charms
$5.99 (as of October 22, 2026 23:20 GMT -04:00 - More infoProduct prices and availability are accurate as of the date/time indicated and are subject to change. Any price and availability information displayed on [relevant Amazon Site(s), as applicable] at the time of purchase will apply to the purchase of this product.)
Now retrieving an image set.
Crayola Air Dry Clay 5lbs, Modeling Clay Kit for Kids, Holiday Gift | Classroom Must Haves, Teacher School Supplies, Natural White Modeling Clay for Kids, Sculpting Material
$13.58 (as of October 22, 2026 23:20 GMT -04:00 - More infoProduct prices and availability are accurate as of the date/time indicated and are subject to change. Any price and availability information displayed on [relevant Amazon Site(s), as applicable] at the time of purchase will apply to the purchase of this product.)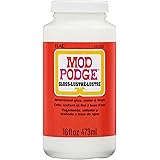
Now retrieving an image set.
Mod Podge Gloss Sealer, Glue & Finish: All-in-One Craft Solution- Quick Dry, Easy Clean, for Wood, Paper, Fabric & More. Non-Toxic - Craft with Confidence, Made in USA, 16 oz., Pack of 1
$7.99 (as of October 22, 2026 23:20 GMT -04:00 - More infoProduct prices and availability are accurate as of the date/time indicated and are subject to change. Any price and availability information displayed on [relevant Amazon Site(s), as applicable] at the time of purchase will apply to the purchase of this product.)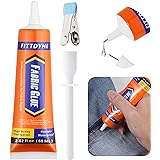
Now retrieving an image set.
FITTDYHE Fabric Glue Permanent, 60 ML Washable Clear Clothing Glue, Super Fabric Glue for Rhinestones, Patches, Clothes, Denim, Leather, Polyester, Fabrics, Doll Repair, Flannel, Cotton
$9.99 (as of October 22, 2026 23:20 GMT -04:00 - More infoProduct prices and availability are accurate as of the date/time indicated and are subject to change. Any price and availability information displayed on [relevant Amazon Site(s), as applicable] at the time of purchase will apply to the purchase of this product.)
Now retrieving an image set.