
A paper umbrella craft turns rainy-day learning into a focused activity by combining a folded canopy, curved handle, weather vocabulary, and fine-motor practice in one manageable project. Children cut or arrange canopy sections, trace rain paths, and describe conditions such as drizzle, downpour, clouds, and wind. Adults should match the cutting demands to the child’s ability, use cardstock when the umbrella must hold its shape, and apply glue sparingly to prevent curling. The strongest learning comes from asking children to explain how an umbrella redirects water rather than treating the finished piece as decoration alone.
Choose a Design That Matches the Child’s Skills
The best umbrella format is one the child can assemble with meaningful independence. A flat umbrella made from a semicircle is appropriate for beginners because its shape is easy to recognize, decorate, and attach to a handle. A pleated or segmented canopy adds folding, symmetry, and spatial reasoning, but it also demands more accurate alignment. Choosing the more elaborate version simply because it looks impressive can leave an adult doing most of the work.
For a basic design, cut a large circle in half or trace a bowl onto colored paper and draw a straight line through the center. The child can cut along the curved outline and trim shallow scallops into the straight edge. A pipe cleaner, narrow paper strip, or drawn line can form the shaft and hooked handle. This version keeps attention on controlled cutting, placement, and weather discussion rather than difficult construction.
A three-dimensional canopy works well for children who can make repeated folds. Fold several matching paper circles in half, glue one folded side to the next, and open the joined layers into a fan. The repeated sections resemble the fabric panels of a real umbrella. Thin construction paper folds more easily than heavy cardstock, while cardstock makes a sturdier flat canopy. Ordinary printer paper is workable for testing the method but may wrinkle under wet glue or heavy marker coloring.
Decide whether the learning priority is tool control, creative design, or weather observation before selecting the format. A child practicing scissors benefits from a broad semicircle and thick cutting line. A child exploring patterns can divide the canopy into alternating colors or repeat symbols across equal panels. For a group weather lesson, a simple shared template keeps assembly time predictable and leaves more time for discussion.
A useful sign that the design is well matched is that the child can complete most actions after one demonstration. Frequent requests for an adult to hold, realign, recut, and glue every component indicate that the project is too demanding. Simplify the canopy before removing the child’s ownership of the activity. The related Paper umbrella craft for rainy-day learning can remain visually engaging without requiring complex folds.
Prepare Safe, Workable Supplies
Supply choices determine whether the umbrella stays flat, folds cleanly, and survives handling. Construction paper is a balanced choice for most children: it is colorful, easy to cut, and firm enough for a wall display. Lightweight cardstock is better for a freestanding or hanging piece, but young children may struggle to cut its curves. Tissue paper adds translucent color yet tears easily and works better as a decorative layer than as the main canopy.
Gather paper, child-appropriate scissors, a glue stick, a pencil, and coloring tools before beginning. Add a round object for tracing if no template is being used. A pipe cleaner makes a quick curved handle, although a paper handle is easier to recycle with the finished project and avoids a wire-centered material. If children are likely to put supplies near their mouths, select washable, age-appropriate products and supervise their use according to the manufacturer’s labeling.
Liquid glue is not automatically stronger for this project. A heavy bead soaks into lightweight paper, causes ripples, and lengthens drying time. A glue stick gives better control for flat components. If a pleated canopy needs liquid adhesive, place small dots near the edges, press briefly, and let the joined sections rest before opening them. Pulling the folds apart while the glue is wet is a common reason layered umbrellas separate.
Use this compact preparation check before inviting children to the table:
- Test the paper: Fold and cut one scrap to confirm that it does not crack or tear unexpectedly.
- Mark cutting lines: Make them dark and wide enough for the intended age group.
- Limit loose pieces: Pre-sort handles, raindrops, and canopy shapes into trays for group use.
- Protect the surface: Place scrap paper beneath glue and washable markers.
- Plan drying space: Keep damp pieces flat and separated rather than stacking them.
Pre-cutting every item saves time but removes much of the fine-motor value. A better compromise is to prepare the demanding pieces while leaving achievable tasks to the child. An adult might cut the outer circle while the child trims the scalloped edge, draws panel lines, and attaches raindrops. The supplies are working well when cuts remain controlled, glued areas lie mostly flat, and children can manipulate the components without constant repair.
Build the Umbrella in a Reliable Sequence
A clear assembly order prevents the handle, canopy, and decorations from competing for space. Begin by tracing and cutting the canopy. Add panel lines, patterns, or weather symbols while the piece is still loose and flat. Attach the shaft and handle behind the canopy next, then add clouds, raindrops, labels, or a background scene. Decorating after gluing the umbrella to a page makes the edges harder to reach and can loosen newly attached parts.
For a flat version, place the semicircle with its straight edge at the bottom. Draw several lines from a point near the top center toward the lower edge to suggest fabric panels. Trim two or three shallow curves along the bottom; deep cuts weaken the canopy and may make it look more like a crown. Glue a narrow strip behind the center, leaving enough length below the canopy to form the shaft. Curve the lower end into a hook or attach a separate J-shaped handle.
Children making a folded canopy can start with three to six equal circles, depending on paper thickness and patience. Fold each circle precisely in half and crease it with a fingertip. Stack the folded pieces so their curved edges align, joining adjacent outer faces rather than gluing the folded interiors shut. Once dry, spread the layers gently and secure the end faces to the background. Unequal circles can still be used, but their edges will not create an even fan.
Raindrops provide a useful extension rather than mere filler. Children can cut blue teardrops, draw straight and slanted rain lines, or suspend drops on short threads beneath a cloud. Straight lines may represent rain falling with little wind, while diagonal lines invite a discussion about moving air. Cotton clouds are visually appealing, but paper clouds are less bulky and easier to label with weather words.
Check the project at three points: after cutting, before final gluing, and after drying. A canopy that does not sit evenly can usually be repositioned before adhesive is applied. A handle that disappears beneath the canopy needs to extend farther downward. If the paper buckles after drying, reduce adhesive on the next attempt rather than placing the finished piece under heavy objects while it is still damp; trapped moisture can cause sticking or surface damage. Photographs accompanying a Paper umbrella craft for rainy-day learning activity can document the sequence, but the child’s ability to explain the order is a stronger sign of understanding.
Connect the Project to Weather Learning
The umbrella becomes a learning tool when children connect its shape to what happens during rain. Ask where water lands first, where it travels next, and why the canopy extends beyond the person holding it. The curved surface directs drops outward and toward the edge, while the handle allows the canopy to be held above the body. A paper model does not demonstrate waterproofing, so avoid implying that paper performs exactly like umbrella fabric.
Introduce weather words through visible features of the scene. A few widely spaced drops can represent a light shower; dense lines suggest heavier rain. Slanted drops can show wind, and dark clouds can lead to discussion of what children notice before rainfall begins. Vocabulary should remain connected to observable details. Asking “What did you add to show wind?” produces more specific language than asking only whether the picture looks rainy.
Simple counting and pattern work fit naturally into the canopy. Divide it into four panels, place two dots in each section, or alternate yellow and green areas. Children can compare the number of drops above and below the umbrella or order paper clouds from smallest to largest. These additions should not crowd out construction. If counting dozens of tiny pieces causes frustration, use larger drops and a smaller number range.
A practical observation can follow the activity on an actual rainy day. From a safe indoor location, children can watch drops move down a window and compare vertical paths with wind-driven diagonal paths. They might notice puddles, roof runoff, or people tilting umbrellas. The purpose is to connect the model to evidence, not to conduct an outdoor test in unsafe weather. Thunder, lightning, strong wind, or limited visibility are reasons to keep observation indoors.
Common questions make the lesson more precise: “Would a flat canopy cover the same area?” “What happens if the handle is off-center?” and “Why might rain reach your shoes even when you use an umbrella?” Children need not provide technical explanations. Pointing to direction, coverage, and moving water shows that they are reasoning from the model. A successful session ends with the child describing at least one weather condition and one functional feature of the umbrella, rather than only naming colors.
Adapt the Activity for Different Ages and Settings
Adaptation should change the task demand without removing the central idea. Toddlers and young preschoolers can decorate a pre-cut canopy with large paper shapes, crayons, or washable dot markers. Older preschoolers can cut a bold semicircle and attach a prepared handle. Early elementary children can measure equal panels, create folded layers, write weather terms, or design a scene showing wind direction.
Mixed-age groups work better when every child contributes a distinct, achievable element. A younger child might choose colors and place large raindrops while an older child cuts the canopy, checks symmetry, or writes labels. Assigning the older child to “fix” the younger child’s work undermines both participants. Shared decisions about patterns, cloud placement, and the number of drops create cooperation without making precision the only valued result.
For classrooms, prepare one finished sample and one partially assembled example. The complete piece clarifies the goal, while the unfinished example reveals where the handle sits and how folded panels join. Avoid requiring every umbrella to match the sample. Identical results often indicate that adults controlled too many choices, and they make it harder to discuss why children represented rain differently.
At home, the project can fit a short weather break by using a flat design and limiting the palette to a few materials already on hand. A paper grocery bag provides sturdy brown paper for a canopy, magazine pages supply patterns, and clean packaging card can become a handle. Reused material should be clean, free of sharp edges, and easy for the child to cut. Glossy coated paper may resist some glues and should be tested before assembly.
Watch for signs that the adaptation needs revision. Ragged cuts alone are not a failure; they may reflect developing scissor control. Repeated tearing, hand fatigue, or an inability to follow the marked path suggests that the paper is too thick or the shape too detailed. Excess waiting in a group signals that supplies need to be portioned in advance. When the child can make choices, complete several core actions, and describe the weather scene afterward, the activity is appropriately pitched.
Frequently Asked Questions
What paper works best for a child’s umbrella project?
Construction paper suits most flat designs because it cuts easily and holds its shape. Use lightweight cardstock for extra stiffness and thinner paper for folded, layered canopies.
How can I make the activity suitable for preschoolers?
Provide a large canopy with a bold cutting line, limit the number of loose pieces, and pre-cut only the parts beyond the child’s current ability. Keep decoration choices child-led.
Can the umbrella be made without a template?
Yes. Trace a bowl or plate, cut out the circle, and divide it in half. One semicircle creates a simple canopy, while several folded circles produce a layered version.
Which weather concepts fit this activity?
Useful concepts include rainfall intensity, wind direction, cloud observations, water movement, and canopy coverage. Connect each idea to something the child can draw, build, or observe.
Why does the finished canopy curl or buckle?
Too much liquid glue or uneven moisture usually causes curling. Apply a thin layer, use a glue stick for flat parts, and allow joined pieces to dry on a level surface.
Conclusion
A successful umbrella activity balances construction demands with a clear weather connection. Choose a flat canopy for developing cutters or folded panels for children ready to manage alignment and repeated creases. Test the paper first, control the amount of adhesive, and preserve child-led choices instead of preparing every component. During and after assembly, ask specific questions about rain direction, canopy coverage, clouds, and wind so the model carries meaning beyond decoration. If the child is struggling, simplify the shape or material rather than completing the difficult steps for them. The next practical move is to gather a small set of workable supplies, build one test canopy, and adjust the cutting lines and folding demands before presenting the project to a child or group.
Now retrieving an image set.
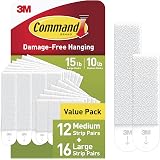
Command 15 & 10 lb Assorted Picture Hanging Strips, 28 Pairs, SIOC | White Picture Hanging Strips, Damage-Free Wall Hangers for Frames, No Tools Required, Ideal for Decorating Apartments, Dorms
$13.99 (as of September 28, 2026 22:47 GMT -04:00 - More infoProduct prices and availability are accurate as of the date/time indicated and are subject to change. Any price and availability information displayed on [relevant Amazon Site(s), as applicable] at the time of purchase will apply to the purchase of this product.)
Now retrieving an image set.
Handcraft Blends Peppermint Essential Oil - Huge 4 Fl Oz | Steam Distilled, Premium Grade for Diffuser, Aromatherapy, Skin, Massage, Candle & Soap Making Fragrance
$9.99 (as of September 28, 2026 22:47 GMT -04:00 - More infoProduct prices and availability are accurate as of the date/time indicated and are subject to change. Any price and availability information displayed on [relevant Amazon Site(s), as applicable] at the time of purchase will apply to the purchase of this product.)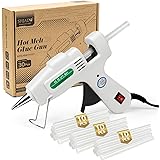
Now retrieving an image set.
SHJADE Hot Glue Gun with 30 Glue Sticks, 20W Mini Hot Melt Gun Kit(White) | Fast Preheating, Ideal for School Crafts, DIY Arts, and Quick Home Repairs, Compact, Suitable for 0.27" Glue Sticks
$8.53 (as of September 28, 2026 22:47 GMT -04:00 - More infoProduct prices and availability are accurate as of the date/time indicated and are subject to change. Any price and availability information displayed on [relevant Amazon Site(s), as applicable] at the time of purchase will apply to the purchase of this product.)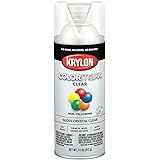
Now retrieving an image set.
Krylon K05515007 COLORmaxx Acrylic Clear Finish for Indoor/Outdoor Use, Gloss Crystal Clear , 11 Ounce (Pack of 1)
$4.48 (as of September 28, 2026 22:47 GMT -04:00 - More infoProduct prices and availability are accurate as of the date/time indicated and are subject to change. Any price and availability information displayed on [relevant Amazon Site(s), as applicable] at the time of purchase will apply to the purchase of this product.)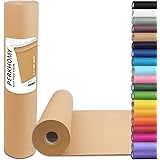
Now retrieving an image set.
PerkHomy Brown Kraft Paper Roll 17.5" x 1,200" (100') for Gift Wrapping Bulletin Board Craft Art Bouquet Flower Packing Valentines Easel Moving Shipping Floor Poster Covering Table 70GSM 50LB
$7.49 (as of September 28, 2026 22:47 GMT -04:00 - More infoProduct prices and availability are accurate as of the date/time indicated and are subject to change. Any price and availability information displayed on [relevant Amazon Site(s), as applicable] at the time of purchase will apply to the purchase of this product.)
Now retrieving an image set.