
Paper plates for children’s arts and crafts work best when the plate type, joining method, and design match the child’s age and motor skills. Uncoated plates accept crayons, tempera paint, glue, and folded details, while glossy or wax-coated plates may resist color and cause glued pieces to detach. Young children benefit from large shapes and pre-cut components; older children can add slots, tabs, brads, yarn, and layered construction. Keep food-use plates separate from crafting stock, supervise cutting and stapling, and allow painted plates to dry flat before assembling masks, animals, scenery, or movable models.
Choosing Plates That Accept Paint and Glue
The surface of a plate determines which decorating materials will stay attached. Plain, uncoated white plates are the most adaptable choice because their slightly absorbent surface accepts crayons, washable markers, tempera paint, and school glue. A sturdy rim also gives children a defined border to hold while they work without touching wet paint in the center.
Glossy, laminated, or wax-coated plates behave differently. Their smooth surfaces may cause watery paint to bead, marker ink to smear, and glued paper features to lift after drying. These plates can still work for projects assembled mainly with tape, staples, slots, or brads, but they are less dependable for painted designs. Before preparing an activity for a group, test one plate with the actual paint and adhesive. A useful test should dry fully rather than being judged while wet.
Thickness matters when a design includes added weight. A thin plate is adequate for flat collages and simple faces, but it may sag under modeling dough, heavy buttons, multiple craft-stick supports, or thick layers of wet glue. Two thin plates can be glued back to back for reinforcement, although a single heavier plate usually dries flatter. Foam plates resist moisture but are easily punctured and are a poor match for activities involving sharp tools or fine cut edges.
Size should follow the intended use rather than the assumption that larger is always better. Small plates suit handheld animals, flowers, and color wheels. Standard dinner-size plates provide room for masks, clocks, weaving, and scenes with several parts. Oversized plates can be useful for collaborative work, but young children may struggle to rotate them or reach the center without dragging sleeves through paint.
Keep plates reserved for artwork in a clearly labeled container. Used plates should not be repurposed if they contain grease, food residue, or allergens. Readers planning several Paper plates for children’s arts and crafts can sort clean plates by coating, size, and stiffness so the construction method can be chosen before decorating begins.
Matching Designs to Age and Motor Skills
A successful plate activity gives the child meaningful choices without making every construction task dependent on adult intervention. Preschool-age children generally manage broad coloring areas, large stickers, torn paper, sponge painting, and pre-cut features more comfortably than narrow slots or precisely aligned parts. A fish made from one plate with a triangular mouth removed, for example, offers a recognizable result without requiring many small components.
Pre-cutting should remove genuine tool barriers, not all creative decisions. An adult might cut eye openings for a wearable mask while leaving the child to select colors, arrange ears, and draw expressions. If every piece is positioned in advance, the activity becomes an assembly exercise. If no support is provided, the plate may tear before the child reaches the decorating stage. The useful middle ground changes with hand strength, attention span, and familiarity with scissors.
Children developing scissor control can work from the rim toward the center using short, clearly marked lines. Cutting around the corrugated rim is harder than cutting the flatter middle, so a project with repeated fringe—such as a lion’s mane or jellyfish edge—may require starter cuts. Blunt-tip children’s scissors still require supervision and may not cut thick plates cleanly. For a mixed-age group, prepare several difficulty levels instead of expecting everyone to complete identical steps.
Older children can use plate geometry as part of the engineering challenge. They can divide a circle into measured sections, create matching slots, attach rotating pointers with paper fasteners, or connect curved pieces into a standing form. These details develop planning and spatial reasoning because alignment affects whether the finished object moves or balances. A rotating weather dial, for instance, only works when the fastener passes through the center without being tightened so firmly that the pointer locks.
Watch the child’s process for signs that the difficulty is appropriate. Productive effort includes testing placement, correcting an uneven line, and asking for help with one restricted step. Repeated tearing, abandoned pieces, or an adult completing most of the work indicate that the design or materials need simplifying. The better adjustment is often a larger component, a scored fold, or a stronger plate—not more verbal instruction.
Twelve Designs With Practical Construction Options
Plate designs become more useful when they teach different ways to transform a circle rather than merely changing the painted character. The following options cover flat composition, subtraction, folding, layering, movement, and three-dimensional assembly. Each can be simplified with pre-cut parts or extended with child-made templates and measured joins.
- Animal face: Add folded ears, drawn features, and yarn whiskers while leaving the rim visible as a frame.
- Fish: Remove a triangle for the mouth and attach that piece at the opposite side as a tail.
- Turtle: Use the center as a patterned shell and fasten broad paper legs beneath the rim.
- Sunflower: Glue repeated petals behind the edge and add seeds with fingerprints or paper dots.
- Weather dial: Divide the plate into weather sections and attach a rotating arrow with a paper fastener.
- Moon phases wheel: Layer two plates, cut a viewing window in the top plate, and rotate the lower plate.
- Woven circle: Cut an odd number of rim notches and wrap yarn across the center before weaving around the spokes.
- Jellyfish: Cut the plate in half, decorate the curved body, and attach ribbon or paper-strip tentacles.
- Standing dinosaur: Fold a plate in half for the body, then add balanced legs, a head, and a tail.
- Mini garden scene: turn the plate into a background for layered soil, stems, leaves, and insects.
- Handheld puppet: Reinforce a craft-stick handle between two decorated plates or behind one heavy plate.
- Emotion spinner: Place interchangeable facial features around a plate and use a windowed top layer to reveal one expression.
Flat designs are forgiving because pieces can be repositioned before glue sets. Moving and standing designs demand more accurate construction. A brad should pass through holes made by an adult or with an age-appropriate supervised tool; forcing it through thick layers can buckle the plate. Standing models need their added pieces balanced on both sides of the fold. If a dinosaur falls toward its head, reducing the head size or lengthening the tail often works better than adding heavier feet.
Choose one main technique per session when working with beginners. Painting, cutting, weaving, and joint-making in a single project can create long waits and competing instructions. A child who has already made a flat animal might next try a folded form, followed later by a rotating model. That progression makes Paper plates for children’s arts and crafts a practical way to introduce new construction methods without requiring expensive base materials.
Assembly, Drying, and Display Methods
The strongest assembly sequence separates wet decoration from structural joining. Paint the plate first, dry it flat, and then add tabs, handles, moving parts, or dimensional features. Wet plates temporarily soften and may curl if held upright or weighted unevenly. Attaching components too early can trap moisture under glued areas, leaving weak joints even when the exposed paint feels dry.
Use less liquid than the plate can absorb. A thin coat of tempera paint dries more evenly than a flooded surface, while glue applied in dots or narrow lines usually holds lightweight paper without soaking the base. If a plate curls, allow both sides to become fully dry and place it beneath a flat, clean weight only after the surface no longer feels cool or damp. Pressing wet paint can transfer color and permanently flatten raised details.
Different joins solve different problems. School glue suits porous paper-to-paper contact but needs drying time. Glue sticks are cleaner for light shapes, although corners may lift from a curved rim. Clear tape provides immediate support on the back of a project. Staples hold handles and thick layered pieces, but an adult should operate the stapler and cover exposed legs when the item will be worn or handled. Paper fasteners are preferable when parts must rotate rather than remain rigid.
Before committing to adhesive, conduct a dry fit. Set every feature in place, check that eye openings align, confirm that a puppet handle is comfortable, and rotate any moving part through its full path. Marking small placement dots can preserve the arrangement while pieces are removed for gluing. This simple check prevents common errors such as ears hidden behind a folded edge or a pointer blocked by decoration.
Display method should influence construction from the start. A wall piece needs a light hanging loop taped securely to the back, while a window display should look intentional from both sides. Wearable masks need smooth edges, generous visibility, and a handle or properly fitted elastic that does not obstruct breathing. Three-dimensional forms display best on a level shelf and may require small internal tabs. A finished piece is ready when joints remain closed during gentle handling, paint no longer transfers, and the plate holds its planned shape.
Safety, Setup, and Common Failure Points
A controlled workspace reduces avoidable problems without limiting children’s design choices. Cover the table, provide a drying area away from active elbows, and distribute only the materials needed for the current stage. Shared bowls of tiny decorations often spill or encourage overloading; shallow individual trays make quantities visible and keep loose pieces from rolling under plates.
Age labeling on a package does not replace supervision. Small beads, sequins, pom-poms, buttons, brads, and short yarn pieces may be unsuitable for children who still mouth objects. Adults should handle craft knives, hot glue, hole punches that require substantial force, and heavy-duty staplers. Elastic mask straps need particular care because poor fit can snap, tangle, or pull the plate tightly against the face. A handheld mask is often the simpler option.
Several failure points can be diagnosed before a project is discarded. Paint that separates or wipes away usually signals a coated plate; switch to a mechanical attachment method or replace the plate rather than adding thicker paint. Features that slide downward were probably attached while the base was wet or with excessive glue. Tears near a brad indicate that the hole is too close to an edge, the plate is too thin, or the fastener was tightened excessively. Reinforcing the hole with a small paper circle on the hidden side may rescue the design.
Mess control should not rely on restricting every choice. Offer two or three compatible media at once, such as crayons, paper shapes, and glue, instead of combining paint, glitter, yarn, and loose collage items in one crowded session. Pour paint into shallow amounts and add more only when needed. For group activities, write names on the back before decorating because wet fronts are difficult to label later.
A compact preparation check keeps the session workable:
- Confirm that the plate surface accepts the chosen color and adhesive.
- Prepare adult-only cuts, holes, and staples before children gather.
- Separate small parts according to the youngest participant’s needs.
- Reserve flat space for drying and another area for finished assembly.
- Test handles, hanging loops, and moving joints before display or play.
Good preparation is visible in the child’s independence: materials remain within reach, components stay attached, and adult help is limited to genuine safety barriers. If frustration centers on tools rather than design decisions, simplify the construction method while preserving the child’s control over color, arrangement, and character.
Frequently Asked Questions
What kind of paper plate is best for children’s art?
A sturdy, uncoated white plate is the most versatile choice because it accepts crayons, tempera paint, markers, and school glue without the resistance common on glossy coatings.
Can children paint wax-coated paper plates?
They can, but water-based paint may bead or flake after drying. Test the surface first, or use tape, staples, paper fasteners, and glued paper on an uncoated alternative.
How can a painted plate be kept from curling?
Apply thin paint layers and dry the plate flat. Avoid soaking the surface, and do not attach heavy components until both the paint and plate are fully dry.
What adhesive works best on paper plates?
School glue works well for porous paper pieces, while glue sticks suit lightweight shapes. Tape, staples, or brads are more dependable for coated surfaces, handles, or moving parts.
How can a paper plate activity be adapted for younger children?
Use large pre-cut pieces, broad coloring areas, simple placement choices, and one decorating medium at a time. Keep small parts and adult-only tools outside the child’s work area.
Conclusion
Reliable plate activities begin with a material check, not an elaborate design. Choose an uncoated plate for paint and glue, increase stiffness when the model carries weight, and match cutting or joining demands to the child’s current control. Separate wet decorating from final assembly so softened plates have time to dry flat. For a first session, select one of the flat designs and prepare only the cuts that present a genuine barrier. Later activities can introduce folds, yarn weaving, rotating brads, or balanced standing forms one technique at a time. Before the finished work is worn, displayed, or used for play, inspect the edges, attachment points, visibility, and dryness. That final check turns an attractive plate into a piece sturdy enough for its intended use.

Now retrieving an image set.
Soarer White Craft Feathers Bulk for Crafting Supplies,300Pcs,3-5inch | Soft Natural Rooster Feathers for DIY School Crafts,Dream Catcher,Christmas,Thanksgiving,Wedding Home Party and Costume Decor
$6.99 (as of October 21, 2026 23:20 GMT -04:00 - More infoProduct prices and availability are accurate as of the date/time indicated and are subject to change. Any price and availability information displayed on [relevant Amazon Site(s), as applicable] at the time of purchase will apply to the purchase of this product.)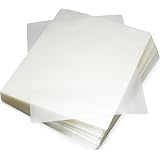
Now retrieving an image set.
Amazon Basics Clear Thermal Laminating Sheets for Documents and Photos, 9 x 11.5-Inch, 2.8 mil, 200-Pack
$17.99 (as of October 21, 2026 23:20 GMT -04:00 - More infoProduct prices and availability are accurate as of the date/time indicated and are subject to change. Any price and availability information displayed on [relevant Amazon Site(s), as applicable] at the time of purchase will apply to the purchase of this product.)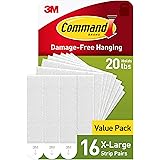
Now retrieving an image set.
Command 20 lb X-Large Picture Hanging Strips, 16 Pairs White Command Strips Heavy Duty Picture Hanger
$10.39 (as of October 21, 2026 23:20 GMT -04:00 - More infoProduct prices and availability are accurate as of the date/time indicated and are subject to change. Any price and availability information displayed on [relevant Amazon Site(s), as applicable] at the time of purchase will apply to the purchase of this product.)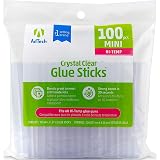
Now retrieving an image set.
AdTech Hi-Temp Mini Hot Glue Sticks, Clear (100 Sticks) | Quick Bonding for Crafting & DIY Projects | Compatible with Mini Glue Guns | Non-Toxic
$6.82 (as of October 21, 2026 23:20 GMT -04:00 - More infoProduct prices and availability are accurate as of the date/time indicated and are subject to change. Any price and availability information displayed on [relevant Amazon Site(s), as applicable] at the time of purchase will apply to the purchase of this product.)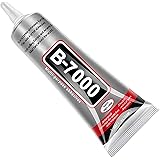
Now retrieving an image set.
B7000 Jewelry Glue for Making, FITTDYHE 1PCS 50ML/1.69 fl oz Clear Adhesive for Rhinestone, Fabric, Multipurpose Super B-7000 for Phone Repair, Nail Art, Wood, Glass, Charms
$5.99 (as of October 21, 2026 23:20 GMT -04:00 - More infoProduct prices and availability are accurate as of the date/time indicated and are subject to change. Any price and availability information displayed on [relevant Amazon Site(s), as applicable] at the time of purchase will apply to the purchase of this product.)
Now retrieving an image set.