
Paper plate craft ideas for group projects work best when the build uses shared materials, repeatable assembly steps, and a manageable drying schedule. Reliable choices include collaborative murals, animal masks, flower gardens, emotion faces, woven plates, and hanging mobiles because participants can personalize individual pieces before combining them. Match cutting difficulty to the age group, portion paint and glue before the session, and keep wet work separate from decoration stations. Avoid designs with numerous tiny parts or long drying intervals; they create bottlenecks, lost pieces, and unfinished projects when several children need help at once.
Choose a Project That Fits the Group
A successful group project has fewer decision points than an individual craft but still leaves room for personal choices. Children should be able to recognize the basic goal, complete most actions without waiting for an adult, and contribute something visibly their own. A paper plate lion, for example, can use the same prepared ears and face shape for everyone while allowing each child to choose mane colors, facial details, and collage textures.
Age affects more than the apparent difficulty of the finished design. Younger children may handle broad paint strokes and large adhesive shapes comfortably but struggle to cut a plate rim into narrow sections. Older children can manage weaving, measured cuts, folded components, and multi-part construction, although an overly prescribed sample may make the activity feel restrictive. For a mixed-age group, give younger participants prepared structural pieces and offer older participants optional details rather than assigning entirely separate projects.
Group size changes which idea is practical. With six children and two adults, a mask requiring eye-hole placement and elastic attachment may be manageable. With twenty children and one leader, the same design creates a queue at the cutting and fitting stage. A wall garden made from painted plate flowers scales more easily because each participant works independently before the flowers are assembled into one display. The collection becomes the group project without requiring everyone to work on the same object simultaneously.
Use these criteria before selecting from Paper plate craft ideas for group projects:
- Independent work: Can most participants complete the central task with limited adult intervention?
- Part count: Are the pieces large enough to sort, distribute, and recover if dropped?
- Shared outcome: Will the separate plates form a mural, mobile, scene, or coordinated display?
- Finish time: Can the work be completed, dried, labeled, and moved within the available session?
A common mistake is choosing by appearance alone. A project that looks simple in a photograph may depend on precise cuts, hot glue, or several drying stages. Make one sample under the same time and material limits the group will face. That trial reveals hidden delays and shows which components should be cut or sorted beforehand.
10 Paper Plate Builds for Shared Sessions
The strongest group builds use a common visual theme while giving each plate a clear role. The following options vary in space, motor demands, and assembly time, so the best choice depends on whether the finished work will be worn, displayed flat, or suspended.
Low-Mess Projects for Tables and Small Rooms
Emotion faces use crayons, paper features, yarn, and glue sticks. Children can represent different expressions, then arrange the plates as a feelings wall. This suits short sessions because it does not depend on wet paint. Avoid treating one facial arrangement as the only correct answer; eyebrows, mouths, colors, and added symbols can communicate feelings in different ways.
Animal masks work well when adults prepare eye openings and attachment points. Cats, owls, frogs, and woodland animals can share the same base while using different ears, noses, or markings. Handheld craft-stick masks are easier to fit and share than elastic masks, which require individual sizing and closer supervision.
Collage pizzas turn plate circles into pretend meals with paper toppings. They are useful for younger groups because the pieces can be large and glue sticks limit moisture. For a shared result, place the finished plates on a paper tablecloth as a pretend restaurant display rather than asking children to combine loose toppings on one crowded plate.
Story-scene plates divide the surface into sky and ground. Each child depicts a setting, character, or event from a shared story, and the plates are displayed in sequence. This option favors drawing and collage over complicated construction, but the leader should assign broad story moments so several children do not unknowingly make the same scene.
Projects That Create a Larger Display
A flower garden combines painted or collaged plate blossoms with paper stems and leaves. It scales well for classrooms, clubs, and parties because plates can dry flat before mounting. An ocean mural uses plates as fish, jellyfish, turtles, or portholes against a shared blue background. Assigning habitat zones—surface, reef, and deep water—adds structure without forcing identical results.
A community quilt arranges trimmed or whole plates in a grid. Participants decorate repeated bands, dots, lines, or personal symbols, then connect the pieces visually by using a limited shared palette. A solar-system display works better for older children who can compare sizes, colors, rings, and surface details. Treat it as a creative model rather than promising exact scale on standard plates.
A seasonal mobile suspends decorated plates or half-plates from a hoop or sturdy branch. Adults should handle hanging height, hole punching near fragile edges, and final balancing. A caterpillar or long creature joins many plate segments across a wall; each child decorates one body section, while the first and last pieces establish the head and tail. This is among the easiest options when every participant needs an equally visible contribution.
The weakest assumption is that collaboration requires several children to manipulate one plate. Parallel construction followed by deliberate assembly is usually less frustrating and produces a clearer shared result.
Set Up Materials and Activity Stations
Material organization determines how smoothly a group craft moves. A single supply pile encourages reaching, spills, and competition for popular colors. Divide frequently used items among tables, but keep controlled tools—such as hole punches, staplers, and sharp scissors—at an adult-managed station. Paper plates intended for crafts are preferable to plates that previously held food, since grease and moisture can interfere with paint and adhesive.
Match adhesive to the material. Glue sticks suit lightweight paper, tissue, and thin card pieces, and they allow finished work to move sooner. White craft glue holds yarn, pom-poms, and heavier collage elements more reliably, but excessive amounts soften plates and extend drying time. Pouring glue into small cups often leads to saturation; shallow dots on scrap card, applied with craft sticks or brushes, provide better control. Self-adhesive shapes are useful when the schedule does not allow wet glue, though they offer less flexibility after placement.
Paint should be portioned into shallow containers rather than passed around in large bottles. Give each color its own brush or place rinse water at a separate wet station so muddy spills do not spread across every table. Washable, child-appropriate supplies simplify cleanup, but labels and age guidance still need to be checked. Small decorations can be unsuitable for children who may put objects in their mouths, and adult supervision remains necessary around scissors, cords, staples, and punched holes.
A practical room arrangement uses four zones:
- Pick-up: Each child receives a plate, name label, and prepared structural pieces.
- Wet work: Paint or liquid glue stays on covered tables with drying trays nearby.
- Detail work: Markers, crayons, paper pieces, and glue sticks remain away from wet surfaces.
- Assembly: An adult joins plates, adds hanging components, or mounts finished pieces.
Prepare kits only as far as the group needs. Fully preassembled packs save time but can reduce choice and create waste when children use pieces differently. Table bins containing a controlled variety of shapes and textures preserve creative decisions without turning the session into a search through loose supplies. For more variations, organize Paper plate craft ideas for group projects by wet, dry, and adult-assisted materials before choosing the final activity.
Manage Timing, Drying, and Common Problems
A group session needs a schedule based on bottlenecks rather than the number of decorative steps. Cutting eye holes, distributing liquid glue, writing names, and attaching a shared display may each require adult attention. If every child reaches the same assisted step at once, a ten-minute action can consume most of the activity period.
Begin with the task that needs the longest drying time. Paint the plate base first, then move participants to a dry activity such as preparing paper features, drawing a display background, or choosing collage pieces. Thick paint is not an effective shortcut to richer color because it can warp the plate and remain tacky. Two thin layers are more predictable when time permits; otherwise, accept visible brush texture as part of the design or substitute crayons and paper collage.
Label every plate before materials cover the surface. Names written on separate sticky notes can detach, while names placed on the back in pencil or permanent adult-applied marker stay with the work. If the plate will be cut into sections, label both the plate and its drying tray. Photographing each table layout before cleanup can also help reconstruct a mural when pieces are moved.
Signs that the plan is working include children moving between stages without long queues, plates remaining firm enough to lift, and the shared display having an obvious place for every contribution. Warning signs include curling rims, decorations sliding through wet glue, repeated requests for precision cutting, and completed plates piling up without labels. Respond by removing nonessential details, switching from liquid glue to adhesive paper or tape where appropriate, and letting adults complete only the structural connections.
Do not rush a mobile or wall installation while components are damp. Hanging weight can tear softened holes, and stacked plates may stick together. If the venue must be cleared immediately, transport plates in a single layer on trays or sheets of cardboard and assemble the display later. Conversely, a dry drawing-based project can be mounted during the session, giving participants a chance to see how their separate pieces form one scene.
The final shared assembly deserves planned time rather than being treated as cleanup. Invite children to suggest order, spacing, or grouping while an adult handles secure attachment. The result will feel collaborative even when safety or time constraints prevent everyone from using the fastening tools.
Frequently Asked Questions
What is the easiest paper plate group project for young children?
A collaborative flower garden or long caterpillar is usually manageable because each child decorates one plate with broad marks and large pieces before an adult assembles the display.
How many supplies should be prepared per child?
Provide one plate plus a few spares for the group, individual name labels, and enough large decorative pieces to offer choice. Divide shared crayons, glue sticks, and paint among tables to prevent queues.
How can a paper plate project be completed without drying time?
Use crayons, markers, glue sticks, stickers, and pre-cut paper instead of paint and liquid glue. Handheld masks, emotion faces, collage pizzas, and story scenes all adapt well to dry materials.
Should every child make the same paper plate design?
No. A common base or theme makes the display coherent, while choices in color, texture, character, or pattern preserve individual ownership. Identical samples can discourage experimentation.
How do you transport wet paper plate crafts?
Write names on the backs, place plates in a single layer on cardboard sheets or trays, and keep heavy decorations facing upward. Do not stack the work until paint and glue are fully dry.
Conclusion
Choose the build by group size, available adult help, room layout, and drying window—not simply by how appealing the sample looks. Projects made as individual components of a mural, garden, creature, or mobile give children creative control while preventing crowding around one shared object. Test the design once, remove unnecessary small parts, label plates before decorating, and separate wet work from detail stations. During the session, watch for queues, softened plates, sliding decorations, and unlabeled pieces; each signals that the process needs simplifying. Reserve time for children to help decide how their contributions will be arranged, then let an adult manage structural fastening and elevated displays. A modest design with dependable assembly will serve a group better than an elaborate project that cannot dry or be completed safely.
Now retrieving an image set.
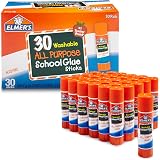
Elmer's All Purpose School Glue Sticks, Acid-Free and Washable, Clear, 7 Grams, 30 Count - Craft Projects, Poster, Classroom Supplies, #1 Teacher Brand
$10.99 (as of September 18, 2026 22:40 GMT -04:00 - More infoProduct prices and availability are accurate as of the date/time indicated and are subject to change. Any price and availability information displayed on [relevant Amazon Site(s), as applicable] at the time of purchase will apply to the purchase of this product.)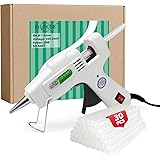
Now retrieving an image set.
Krightlink Mini Hot Glue Gun Kit with 30 Glue Sticks 20w Fast Preheating | 20w Hot Melt High Temp hot glue gun, Anti-Drop Precision Nozzle, for School Crafts DIY Arts, Quick Home Repairs-White
$8.54 (as of September 18, 2026 22:40 GMT -04:00 - More infoProduct prices and availability are accurate as of the date/time indicated and are subject to change. Any price and availability information displayed on [relevant Amazon Site(s), as applicable] at the time of purchase will apply to the purchase of this product.)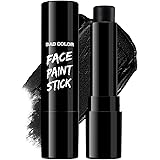
Now retrieving an image set.
BADCOLOR Black Cream-Blendable Face Body Paint Stick for Adults Children Eye Black Softball Football Baseball Sports , Non-Toxic Hypoallergenic for Halloween SFX Makeup Cosplay Joker Costume Parties
$5.99 (as of September 18, 2026 22:40 GMT -04:00 - More infoProduct prices and availability are accurate as of the date/time indicated and are subject to change. Any price and availability information displayed on [relevant Amazon Site(s), as applicable] at the time of purchase will apply to the purchase of this product.)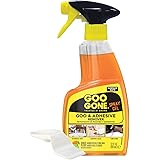
Now retrieving an image set.
Goo Gone Adhesive Remover Spray Gel 12 Oz with Scraper, Surface Safe | Citrus Cleaning Power for Hard Surfaces, Carpet & Fabric, Removes Glue, Stickers, Tape Residue, Grease, Gum & Wax, Drip Free
$17.98 (as of September 18, 2026 22:40 GMT -04:00 - More infoProduct prices and availability are accurate as of the date/time indicated and are subject to change. Any price and availability information displayed on [relevant Amazon Site(s), as applicable] at the time of purchase will apply to the purchase of this product.)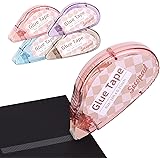
Now retrieving an image set.
Secopad Scrapbook Tape, Glue Tape for Crafts, 4 Pack, Light-Colored Shell | 0.3IN x 26FT, Sticky & Safe, Double Sided Tape for Crafts, Scrapbooking Junk Journaling Supplies, For School Office Teachers
$6.99 (as of September 18, 2026 22:40 GMT -04:00 - More infoProduct prices and availability are accurate as of the date/time indicated and are subject to change. Any price and availability information displayed on [relevant Amazon Site(s), as applicable] at the time of purchase will apply to the purchase of this product.)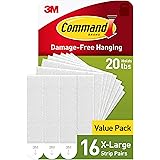
Now retrieving an image set.