
Fall crafts for kids with simple paper supplies work best when construction paper, paper plates, lunch bags, and tissue paper are turned into recognizable leaves, pumpkins, apples, owls, and trees. Choose one project that matches the child’s cutting ability, prepare only the shapes younger children cannot safely make, and leave room for individual color and placement choices. Glue sticks control moisture better than liquid glue on lightweight paper, while blunt-tip scissors and large pieces make handling easier. A compact tray for scraps, adhesive, and finished pieces keeps the activity manageable without limiting creativity.
Choose Paper and Tools That Fit the Child
The best paper is the one a child can manipulate without constant adult correction. Construction paper holds its shape for crowns, animals, and layered collages, but it can be tiring for very young hands to cut. Printer paper is easier to fold and fringe, although too much liquid glue makes it buckle. Tissue paper creates translucent color and useful texture, yet it tears quickly when handled with wet fingers. Paper plates and lunch bags provide sturdy bases that eliminate several measuring and assembly steps.
Match the material to the action rather than buying a large assortment. Use construction paper when a project needs defined silhouettes, such as an owl body or pumpkin segments. Choose thin paper for accordion folds, curled strips, and torn-paper mosaics. A paper plate is especially useful for a preschool wreath because its round form is already established; an adult only needs to remove the center. Recycled brown packing paper can become a tree trunk, but glossy catalog pages are less dependable because some adhesives do not grip their coated surface well.
A small working set is usually sufficient: fall-colored paper, a glue stick, crayons or washable markers, child-appropriate scissors, and a pencil. Standard craft scissors still require active supervision, and an adult should cut thick stacks, tight interior openings, or any shape beyond the child’s control. Small decorations can pose a choking risk, so large paper shapes are a better choice for children who still put objects in their mouths. Check the age guidance and safety information supplied with scissors, adhesives, markers, and decorative products.
Preparation should remove frustration without removing the child’s decisions. For an early cutter, draw wide leaf outlines and let the child cut outside or inside the line. For a child not yet using scissors, offer paper that can be torn and pressed onto a glue-covered outline. Older children can trace real leaves, compare their shapes, and add veins with folded creases or marker lines. The common mistake is pre-cutting every component until the activity becomes an assembly kit. Instead, prepare only the hazardous or genuinely difficult parts.
A useful readiness check is whether the child can complete the main motion—tearing, folding, gluing, or cutting—with occasional help rather than continuous rescue. Ragged edges, uneven folds, and unexpected colors are not signs of failure. A failing setup looks different: the paper repeatedly rips at attachment points, glue soaks through, or the child spends more time waiting for adult fixes than making choices. Adjust the paper weight or simplify the shape before abandoning the idea. These material decisions underpin successful Fall crafts for kids with simple paper supplies.
Make Leaves, Trees, and Woodland Animals
Leaf and tree projects offer the most flexibility because imperfect shapes still look natural. A torn-paper tree suits children who cannot cut confidently: draw or glue down a brown trunk, then layer torn red, orange, yellow, and brown pieces above it. Keep some pieces on the ground line to suggest fallen leaves. Compared with a traced-hand tree, the torn version gives children more repeated fine-motor practice and fewer awkward cutting turns. The handprint version is faster when a recognizable keepsake matters more than independent cutting.
For a paper leaf garland, fold construction paper once, draw half a leaf from the fold, and cut through both layers. Opening the paper reveals a symmetrical leaf. Add veins with crayons, then attach the leaves to a long folded paper strip. Tape may hold a hanging garland more reliably than a glue stick, particularly where each leaf meets the narrow strip. Display it away from heaters, candles, and cooking surfaces; paper decorations should not be placed near heat or open flame.
A paper plate owl turns one sturdy circle into several features. Fold or cut two side sections toward the center to suggest wings, fold the top down for the head, and cover the surface with torn brown paper. Add large paper eyes, a triangle beak, and feet. Younger children can receive the plate with the major folds marked. Older children can design feather patterns or compare how rounded and pointed shapes change the owl’s expression. Avoid relying on loose plastic eyes for small children when layered paper circles create the same visual effect without tiny detachable parts.
An accordion-fold hedgehog adds a different mechanism. Fold a rectangular sheet back and forth in wide pleats, pinch or secure one end, and spread the opposite edge into a fan. Attach a simple paper face to one side. Wide pleats are easier than narrow ones, and lightweight paper folds more cleanly than heavy construction paper. If the fan will not open, the usual cause is inconsistent fold direction or adhesive placed too close to the expanding edge. Practice the fold on scrap paper before using the final color.
Children can combine these methods into a single woodland scene rather than producing several unrelated objects. A torn canopy, folded hedgehog, and plate owl can share one large paper background. That option works well for siblings or a small group because each child controls a separate element. A compact project sequence is:
- Build the largest background shape first.
- Add animals and other focal shapes next.
- Use small leaves, veins, and facial details last.
This order prevents tiny details from being covered and gives wet adhesive on the background time to settle. Stop adding layers when pieces begin sliding or the base bends. More decoration does not necessarily produce a stronger composition.
Create Pumpkins, Apples, and Harvest Decorations
Harvest subjects become more interesting when the paper technique reflects the object’s form. A pumpkin made from overlapping orange ovals looks rounded because each segment partially covers the next. Cut three to seven ovals, place the largest in the center, and add a brown stem and green curling strip. Preschoolers can arrange prepared ovals from left to right; confident cutters can draw their own and experiment with narrow or broad segments. The project succeeds when the layers remain attached and the maker recognizes the form, not when every oval matches.
A three-dimensional paper pumpkin uses strips instead of flat segments. Cut several equal orange strips, stack and fasten or glue them at one end, bow them outward, and join the opposite ends. A paper stem covers the connection. Cardstock holds a rounded shape longer, while construction paper is easier for children to bend. Glue needs time to grip under tension, so paper fasteners may be more dependable for older children when used under close adult supervision; they contain small parts and pointed ends. For younger children, make a flat accordion pumpkin or have an adult manage the connection.
An apple collage provides a useful alternative when orange paper is limited. Draw a large apple outline, tear red, yellow, or green paper into pieces, and fill the shape from the edges inward. Starting along the boundary helps the silhouette remain readable. A white opening at the center can represent a cut apple, with black marker marks for seeds. Do not use real seeds if the goal is an all-paper activity or if small loose pieces are unsuitable for the child. Paper seed shapes are larger, easier to position, and simpler to clean up.
Lunch-bag scarecrows combine drawing, layering, and pretend play. Keep the bag closed and place the face on the flat bottom panel so it becomes the puppet’s head when a hand enters the opening. Add a paper hat, hair strips, patches, and a drawn mouth. Test the orientation before gluing; the most common mistake is placing the face upside down relative to the puppet opening. Long hair fringes also tear at the roots, so leave an uncut band where the hair attaches.
For a shared table or classroom display, connect individual work through one simple constraint, such as a common background size or one limited palette. Do not require identical templates. A row of differently segmented pumpkins reveals more decision-making than a row of adult-corrected copies. Readers planning several Fall crafts for kids with simple paper supplies can rotate techniques—tearing, folding, strip building, and collage—rather than repeating the same cut-and-glue task with different outlines.
Set Up a Low-Mess Paper Craft Session
A controlled setup keeps paper crafting focused without making the workspace rigid. Cover the table with reusable paper or a wipeable mat, place one shallow tray in the center for scraps, and give each child a defined work area. Put out only the colors and tools needed for the current project. An overflowing supply bin looks inviting, but it increases sorting, spills, and abandoned choices. Extra paper can remain nearby for children who deliberately change their plan.
Glue choice has a direct effect on both appearance and cleanup. Glue sticks apply a thin layer and suit most flat construction-paper projects. Liquid school glue is useful for thicker folded joins, but children often apply more than paper can absorb. Pouring a small amount into a cup and applying it with a cotton swab or scrap-paper spreader offers better control than handing over a full bottle. A few dots or a thin line generally hold paper better than a puddle, which delays drying and causes pieces to drift.
Arrange the session so each stage is visible. Show one finished sample only if the mechanism is difficult to understand, then demonstrate the specific action—such as alternating accordion folds—on spare paper. A sample can clarify construction, but treating it as the required appearance encourages copying and adult intervention. For open-ended collages, skip the finished model and place a real leaf, apple, or pumpkin nearby as visual reference instead.
Use a brief setup checklist before inviting children to the table:
- Prepare: Protect the surface and mark any adult-only cuts.
- Limit: Set out one adhesive and a manageable paper palette.
- Contain: Add a scrap tray and a separate place for finished work.
- Test: Make one difficult fold or joint to confirm the materials cooperate.
- Supervise: Keep scissors and any small components within active adult view.
Drying space matters when several children are working. Lay damp pieces flat and write names on the backing paper rather than the artwork’s front. If edges curl, wait until the adhesive is dry before placing the project beneath a light, flat book; pressing wet work can glue it to another surface. A sign the routine is working is that children can find scraps, return tools, and move completed work without crossing wet areas. Frequent torn joins or sliding layers signal that the activity needs less glue, stronger paper, or a pause between assembly stages.
Cleanup can remain part of the process without becoming the project’s final burden. Sort clean, usable offcuts by color and recycle or discard tiny scraps according to local options. Cap markers, close glue sticks, and wipe adhesive before it dries. Save broad strips and half sheets rather than every fragment; an overfilled scrap box makes future sessions harder to use. A consistent setup also makes the next round of Fall crafts for kids with simple paper supplies quicker to begin.
Frequently Asked Questions
What paper is easiest for young children to use?
Construction paper is sturdy for gluing and tearing, while lightweight printer paper is easier to fold. Choose large pieces and avoid slippery coated paper when children are still developing control.
Which fall paper craft requires the least preparation?
A torn-paper autumn tree needs only a trunk shape, colored paper, and a glue stick. Children can tear the canopy pieces, so an adult does not need to pre-cut leaves.
How can paper crafts be adapted for children who cannot use scissors?
Use tearing, crumpling, stamping with folded paper edges, or arranging adult-prepared large shapes. The child should still control color, placement, and composition.
How do you stop construction paper from curling after gluing?
Apply a thin adhesive layer, avoid saturating the paper, and let the project dry flat. Once fully dry, gentle pressure beneath a light book can flatten remaining curl.
Can recycled paper be used for fall projects?
Yes. Brown packing paper, paper bags, clean cardboard, and uncoated mail can provide useful colors and structure. Check that reused material is clean and free of staples, sharp edges, and personal information.
Conclusion
Successful autumn paper projects depend less on an elaborate supply collection than on matching one clear technique to a child’s current abilities. Begin with sturdy bases and large shapes, then choose tearing for beginners, broad cutting lines for developing users, or folding and layered construction for children ready for more precision. Limit adhesive, prepare only the difficult cuts, and preserve meaningful choices about color, arrangement, and detail. Before starting, test any folded joint or hanging connection with the actual paper being used. Then organize a scrap tray, drying area, and supervised tool station. A leaf tree, segmented pumpkin, paper plate owl, or bag scarecrow can be expanded or simplified without losing its recognizable fall theme.
Now retrieving an image set.
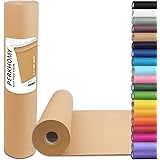
PerkHomy Brown Kraft Paper Roll 17.5" x 1,200" (100') for Gift Wrapping Bulletin Board Craft Art Bouquet Flower Packing Valentines Easel Moving Shipping Floor Poster Covering Table 70GSM 50LB
$7.49 (as of September 18, 2026 22:40 GMT -04:00 - More infoProduct prices and availability are accurate as of the date/time indicated and are subject to change. Any price and availability information displayed on [relevant Amazon Site(s), as applicable] at the time of purchase will apply to the purchase of this product.)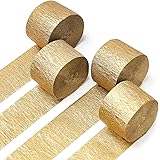
Now retrieving an image set.
PartyWoo Gold Crepe Paper Streamers 4pcs 328 FT Gold Streamers | Wedding Birthday Baby Shower Engagement Anniversary New Year Eve Graduation Bridal Shower Party Decorations
$6.99 (as of September 18, 2026 22:40 GMT -04:00 - More infoProduct prices and availability are accurate as of the date/time indicated and are subject to change. Any price and availability information displayed on [relevant Amazon Site(s), as applicable] at the time of purchase will apply to the purchase of this product.)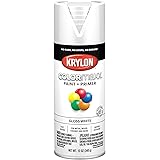
Now retrieving an image set.
Krylon ColorMaxx 12 Oz. Gloss Spray Paint, White - 1 Each
$4.48 (as of September 18, 2026 22:40 GMT -04:00 - More infoProduct prices and availability are accurate as of the date/time indicated and are subject to change. Any price and availability information displayed on [relevant Amazon Site(s), as applicable] at the time of purchase will apply to the purchase of this product.)
Now retrieving an image set.
Amazon Basics Clear Thermal Laminating Sheets for Documents and Photos, 9 x 11.5-Inch, 2.8 mil, 200-Pack
$17.99 (as of September 18, 2026 22:40 GMT -04:00 - More infoProduct prices and availability are accurate as of the date/time indicated and are subject to change. Any price and availability information displayed on [relevant Amazon Site(s), as applicable] at the time of purchase will apply to the purchase of this product.)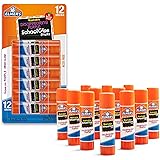
Now retrieving an image set.
Elmer's Disappearing Purple School Glue Sticks, Washable, 6 Grams, 12 Count - Arts & Crafts, Poster, Projects, Back to School, #1 Teacher Brand
$4.59 (as of September 18, 2026 22:40 GMT -04:00 - More infoProduct prices and availability are accurate as of the date/time indicated and are subject to change. Any price and availability information displayed on [relevant Amazon Site(s), as applicable] at the time of purchase will apply to the purchase of this product.)
Now retrieving an image set.