
Choose Cutouts Preschoolers Can Handle
Large cutouts should fit comfortably in a preschooler’s hand while leaving enough exposed edge for turning and repositioning. A practical starting point is a main body shape about the size of an adult palm, with attached pieces no narrower than two or three fingers. Exact measurements are less useful than a handling test: place the pieces on a table and check whether a child can pick each one up without pinching a tiny corner.
Broad geometric forms work because their edges remain visible under small hands. An oval can become an animal body, a wide triangle can serve as a roof or beak, and short rectangles can form legs, windows, or tree trunks. Narrow strips, tiny eyes, and deeply scalloped shapes tend to curl, disappear under fingers, or become saturated with glue. Those details may look appealing in an adult-made sample, but they often shift the activity from child-led assembly to adult correction.
Paper weight changes how well a shape behaves. Construction paper or lightweight cardstock usually stays flatter than thin printer paper after glue is applied. Cardstock is especially useful for a base sheet or a piece that children will handle repeatedly, although several layers of cardstock can make the finished picture bulky. For most projects, combine a firm base with construction-paper cutouts. Tissue paper is better reserved for crumpling or layering because a flat tissue shape tears easily when a child tries to move it.
Keep the picture visually readable with a limited number of main pieces. A fish might use one large oval, one tail triangle, two fins, and one eye drawn with a crayon after gluing. A flower could use a circle, five broad petals, and a wide stem. The goal is not an exact count but a workload a child can understand at a glance. If pieces are repeatedly lost, stacked accidentally, or abandoned, simplify the design rather than prompting the child through every placement.
A useful preparation check is to build the design once with a child-sized range of motion in mind. Confirm that overlapping pieces still leave visible areas to press, that left-facing and right-facing parts are not needlessly confusing, and that the finished image fits the base. Readers planning several related activities can use the same shape-selection principles for Paper craft for preschool with large cutouts while changing the subject from animals to vehicles, faces, plants, or buildings.
Match the Adhesive to the Paper
Washable school glue is suitable for most large paper shapes, but the dispensing method matters more than the amount in the bottle. Preschoolers commonly apply a thick puddle because squeezing and stopping require coordinated hand pressure. Excess glue softens the paper, extends drying time, and lets pieces slide after they appear correctly placed. A small dish of glue with a cotton swab or short-handled brush gives children a clearer way to spread a thin layer.
Glue sticks create less mess and allow quick repositioning, making them useful for flat construction-paper shapes. Their weakness is edge coverage: young children may color the center of a piece while leaving the perimeter dry. The shape then lifts as the paper relaxes. Show children how to place the cutout face down on a washable mat and move the glue stick around the outside edge before adding a few strokes through the center. Replace the cap promptly because a dry glue stick drags and can crease the paper.
Liquid glue is the better option when the cutouts are thick, textured, or layered. Instead of telling a child to use “a little,” provide a visible rule: add small dots around the edge and one in the middle. For a very large oval, short glue lines may give more reliable contact than isolated dots. Pressing should happen with a flat hand or clean scrap of paper over the shape. Rubbing directly over wet edges can force glue outward and stain the visible surface.
Double-sided tape can produce a clean result, but it removes much of the spreading and pressing work that makes the project useful. It is a reasonable accommodation for a child who dislikes wet textures or for a display that must be assembled quickly. Self-adhesive foam shapes are similarly convenient, though peeling small backing sheets may be harder than gluing the cutout itself. Adhesive choice should reflect the intended experience: choose glue for process practice, or tape when sensory comfort and immediate attachment take priority.
Signs of a good adhesive setup appear during the activity. Pieces stay where placed, the base does not buckle sharply, and children can continue without waiting for an adult to repair each joint. Sliding shapes, translucent wet patches, and glue squeezing from every edge indicate overapplication. Add less adhesive to the next piece and move completed work to a flat drying area rather than layering more glue on a weak bond.
Prepare and Assemble the Project
A successful setup separates choosing, arranging, and gluing into visible stages. Put one project’s pieces in a shallow tray, place the base sheet beside it, and keep adhesive closed until the child has explored a possible arrangement. This dry layout lets children rotate shapes and notice relationships without fighting sticky fingers. It also reveals missing pieces before assembly begins.
Use a completed model to explain the subject, not to demand identical placement. For example, show that a house needs its roof near the top and its door connected to the building, while accepting an off-center window or a sideways chimney. A rigid copy task can turn every difference into an error. A completely open collage, by contrast, may not provide enough structure for a child who is still learning how separate forms create a recognizable image. One model plus flexible placement offers a useful middle ground.
A compact assembly order keeps the work manageable:
- Name and sort the pieces. Find the largest foundation shape first, then identify attached details.
- Arrange without glue. Move the forms until the picture fits within the base sheet.
- Attach from back to front. Glue the large foundation before adding pieces that overlap it.
- Press and inspect. Check lifting edges while the adhesive is still workable.
- Add drawn details last. Use crayons or washable markers only after wet glue is contained.
Consider a large-cutout turtle. The child places a broad oval shell first, slides four rounded legs partly underneath it, and adds a head and tail. If every part is glued independently before the layout is tested, the shell may cover the legs completely or end up too close to the edge of the page. Dry arranging exposes that problem while it is still easy to solve. The same back-to-front reasoning works for a lion’s mane behind its face, wheels beneath a vehicle body, or petals around a flower center.
Adult preparation should match the purpose of the session. Pre-cut every shape when the focus is arrangement, color choice, vocabulary, or gluing. If cutting practice is intended, provide one or two broad shapes with thick straight or gently curved outlines and use age-appropriate scissors under close supervision. Asking beginners to cut an entire detailed set and then assemble it can exhaust attention before the main design begins.
Set finished work on a flat, protected surface and label the drying location rather than the wet picture. Writing a name across fresh glue can drag pieces out of place. A project is progressing well when the child can identify the main shape, make several placement decisions, and attach pieces with decreasing adult intervention. Constant requests for help may signal that the cutouts are too similar, the sequence is unclear, or too many materials are available at once.
Adapt the Activity Without Losing Its Purpose
Adaptations should remove an unnecessary barrier while preserving a meaningful choice for the child. If grasping thin paper is difficult, use heavier stock or add a temporary folded-paper tab to the top of a shape. If wet glue is uncomfortable, offer a glue stick, tape tabs, or an adult-held piece while the child indicates placement. Completing the entire assembly for the child may produce a neat display, but it removes the decisions that give the activity value.
For younger preschoolers, offer high-contrast colors and clearly different forms, such as one large blue circle, two yellow rectangles, and a red triangle. Older or more experienced children can work with repeated pieces, overlapping layers, or a simple symmetrical arrangement. Difficulty should come from a purposeful decision—such as choosing where six petals belong—not from fragile paper, tiny decorations, or an overcrowded workspace.
Large cutouts can also support group work when each child controls a distinct component. On a shared garden scene, one child may assemble a flower, another a butterfly, and another a broad-leaf plant. This avoids the conflict that occurs when several hands try to position the same piece. A mural-sized base needs firmer paper or poster board; ordinary construction paper may tear when moved while wet. Assemble individual elements on separate sheets first if the final display must travel.
Safety depends on the complete material set, not simply the large size of the main shapes. Avoid loose sequins, beads, plastic eyes, and other small embellishments when children may mouth objects or when the group cannot be watched closely. Draw facial features instead, or create eyes from generously sized paper circles that are attached securely. Scissors and liquid adhesives should be selected for the children’s ages and used with active adult supervision. Check product labels for intended use rather than assuming every item sold near children’s art materials is suitable for every age.
A common misconception is that a larger project automatically makes an easier project. A huge base can require long reaches, and oversized floppy pieces may fold when lifted. Scale the design to the work surface and to the child’s reach. At a small table, several palm-sized pieces on a standard sheet are often more manageable than a poster-sized animal. If the child must stand, stretch across wet glue, or ask an adult to move every shape, reduce the format.
Reuse the preparation method rather than forcing one template to meet every need. Keep envelopes of broad circles, rectangles, ovals, and triangles sorted by color, then combine a limited selection for each subject. This makes future Paper craft for preschool with large cutouts sessions faster to set up while retaining control over piece count, contrast, paper weight, and the level of challenge.
Frequently Asked Questions
How large should preschool paper cutouts be?
Main shapes should be roughly adult-palm sized, while supporting pieces should be broad enough for a child to pick up without pinching a tiny edge. Test handling before the activity.
Should preschoolers cut the shapes themselves?
Pre-cut the set when assembly and gluing are the focus. For supervised cutting practice, add one or two broad shapes with thick, simple outlines rather than requiring the child to cut every component.
Is liquid glue or a glue stick better for large cutouts?
Glue sticks suit flat construction paper and create less mess. Washable liquid glue holds thick or layered pieces more reliably, especially when applied as small dots or short lines.
How many pieces should a preschool craft include?
Begin with about five or six main pieces. Add complexity only when the child can sort, arrange, and attach that set without repeatedly losing track of the design.
How can I stop paper shapes from sliding after gluing?
Use less glue, attach the largest shape first, and press each piece briefly with a flat hand. Keep the work horizontal until dry rather than lifting it immediately for display.
Conclusion
Good large-cutout projects are built around handling, not decorative complexity. Choose sturdy paper, broad shapes, a limited piece count, and an image children can recognize before gluing begins. Let each child test the arrangement dry, attach the foundation first, and add overlapping parts in a clear order. Change the adhesive or paper weight when sliding, curling, sensory discomfort, or weak grasp interferes with participation instead of completing the task for the child. Before the next session, assemble one sample, test whether every piece fits the base, and remove details that require constant adult correction. A manageable design gives preschoolers room to make genuine choices while keeping setup, supervision, and drying practical for adults.

Now retrieving an image set.
Crayola Construction Paper Bulk Pack (480 Sheets) – 10 Assorted Colors, 9x12, Teacher School Supplies & Classroom Must Haves, Card Making Craft Supplies, Art Paper
$11.76 (as of September 18, 2026 22:40 GMT -04:00 - More infoProduct prices and availability are accurate as of the date/time indicated and are subject to change. Any price and availability information displayed on [relevant Amazon Site(s), as applicable] at the time of purchase will apply to the purchase of this product.)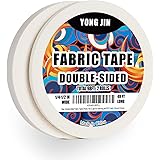
Now retrieving an image set.
Double-Sided Fabric Tape,Hem Tape No Sew No Iron,1/4"+1/2" (2 Rolls) | No Sewing or Ironing Required, Quick Clothing Repairs, Fabric Bonding, For Hemming and DIY Crafts
$7.99 (as of September 18, 2026 22:40 GMT -04:00 - More infoProduct prices and availability are accurate as of the date/time indicated and are subject to change. Any price and availability information displayed on [relevant Amazon Site(s), as applicable] at the time of purchase will apply to the purchase of this product.)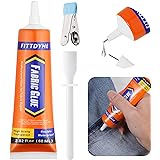
Now retrieving an image set.
FITTDYHE Fabric Glue Permanent, 60 ML Washable Clear Clothing Glue, Super Fabric Glue for Rhinestones, Patches, Clothes, Denim, Leather, Polyester, Fabrics, Doll Repair, Flannel, Cotton
$9.99 (as of September 18, 2026 22:40 GMT -04:00 - More infoProduct prices and availability are accurate as of the date/time indicated and are subject to change. Any price and availability information displayed on [relevant Amazon Site(s), as applicable] at the time of purchase will apply to the purchase of this product.)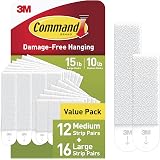
Now retrieving an image set.
Command 15 & 10 lb Assorted Picture Hanging Strips, 28 Pairs, SIOC | White Picture Hanging Strips, Damage-Free Wall Hangers for Frames, No Tools Required, Ideal for Decorating Apartments, Dorms
$13.99 (as of September 18, 2026 22:40 GMT -04:00 - More infoProduct prices and availability are accurate as of the date/time indicated and are subject to change. Any price and availability information displayed on [relevant Amazon Site(s), as applicable] at the time of purchase will apply to the purchase of this product.)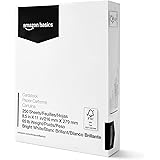
Now retrieving an image set.
Amazon Basics Cardstock Paper, 8.5" x 11", 65 lb/176 gsm, 96 Bright White, 250 Sheets
$10.63 (as of September 18, 2026 22:40 GMT -04:00 - More infoProduct prices and availability are accurate as of the date/time indicated and are subject to change. Any price and availability information displayed on [relevant Amazon Site(s), as applicable] at the time of purchase will apply to the purchase of this product.)
Now retrieving an image set.