
A paper plate scarecrow craft turns fall learning into a hands-on activity by combining shape recognition, counting, sequencing, and storytelling in one manageable project. Children can Use washable paint, child-safe scissors, nontoxic glue, and wide paper strips suited to the child’s cutting ability. Adults should prepare difficult pieces without completing every decision for the child. The strongest learning comes from discussing harvest roles, testing feature placement, and letting each scarecrow look different rather than requiring an identical model.
Materials That Match the Child’s Skill Level
The most useful supply list is not necessarily the longest one. A sturdy uncoated paper plate, construction paper, washable coloring materials, nontoxic school glue, and a few short lengths of paper “straw” are enough to create a recognizable scarecrow. Limiting the choices keeps the work area understandable and gives children more time to make meaningful decisions about shapes, colors, quantities, and placement.
Use a plain plate without a waxy or glossy finish when children will paint the face. Washable tempera paint adheres more reliably to absorbent paper than to coated party plates. Yellow, tan, or light brown can suggest straw or burlap, but there is no need to prescribe a single skin or face color. Crayons and washable markers are a faster alternative when drying time is limited. Paint offers broad arm movement and color mixing; drawing materials offer greater control and allow the project to continue without a drying break.
Construction paper works well for the hat, nose, patches, and hair. Tissue paper is easier to crumple but tears during gluing, while cardstock holds a hat shape but may be difficult for young children to cut. A practical compromise is construction paper for child-cut pieces and cardstock only for a hat that must remain upright. Cut yellow paper into wide strips for beginning scissor users. More experienced children can draw and cut their own uneven straw fringe.
Choose tools according to demonstrated ability rather than age alone. Rounded child scissors still require supervision, and pre-cut shapes may be appropriate for a child who is learning how glue works or who becomes tired by extensive cutting. Children ready for more independence can trace a triangle nose, rectangular hat band, and square patches. The goal is not to make every task difficult at once.
- Core base: one sturdy paper plate
- Face and hat: construction paper, crayons or washable paint, and a black marker
- Assembly: nontoxic school glue or a glue stick
- Texture: wide yellow paper strips, yarn, or raffia used with close supervision
- Optional details: large paper circles, fabric scraps, or oversized buttons
Small loose decorations can create avoidable problems for children who still put objects in their mouths. Paper circles can provide the visual effect of buttons without adding hard, detachable pieces. Natural straw may shed, scratch, or poke, so paper fringe is usually easier to control indoors. For related supply variations, keep the materials in this Paper plate scarecrow craft for fall learning activity visible and limited to what children can use successfully.
How to Assemble the Scarecrow
A reliable assembly order separates wet work from detail work. Color or paint the plate first, prepare the paper features while it dries, arrange every feature without adhesive, and glue only after the child approves the face. This sequence prevents wet paint from transferring to hands and stops a misplaced hat or eye from forcing an unnecessary restart.
Begin by placing the plate with its eating surface facing up. Children can cover the center with paint, crayon, or marker while leaving the ridged rim visible as a face border. If paint pools in the ridges, use a thinner layer rather than adding more. A plate that feels cool or bends easily is probably still damp. Move it to a flat drying area instead of attempting to attach paper to the wet surface.
While the plate dries, prepare a hat from a large rectangle and a narrower strip for the brim. A one-piece hat is quicker, but two pieces create a useful comparison between long and short rectangles. Add one or two square patches if the child wants them. For the face, cut two eye shapes and one triangular nose. The mouth can be drawn as a curved line, assembled from short black paper segments, or represented by yarn. Short paper segments make counting and pattern work easier than a single line.
- Color the plate and allow wet media to dry.
- Cut or select the hat, eyes, nose, mouth, and straw strips.
- Place the hat at the upper edge and tuck straw pieces beneath it.
- Arrange the eyes and nose before checking their spacing.
- Glue large pieces first, then add small facial details.
- Leave the finished plate flat until the adhesive becomes clear and firm.
A child who puts the eyes close together may be experimenting with expression rather than making an error. Ask, “How does that face look?” before correcting it. Intervention is more useful when a construction choice will cause failure—for example, when the hat touches only a narrow section of the plate and is likely to fall off. Increase the overlap or add a hidden paper tab rather than taking over the design.
Glue sticks produce less warping and work well for flat paper. Liquid school glue provides a stronger bond for yarn, layered fringe, or fabric, but children often apply far more than needed. Pouring glue into a shallow reusable lid and applying it with a craft stick gives better control. A finished scarecrow that remains flat during drying will usually hold together better than one displayed immediately.
Adding Fall Learning to Each Step
The learning value comes from the choices and conversation built into construction, not from adding a worksheet after the scarecrow is finished. Shape names, position words, counting, fine-motor actions, and oral language fit naturally into the project. Selecting a triangular nose or placing straw beneath the brim connects a word to a visible action, making the idea easier to understand than an isolated prompt.
For shape recognition, place several prepared features on the table and ask the child to find the triangle for the nose or the long rectangle for the hat brim. Compare pieces rather than testing for a memorized answer: Which rectangle is longer? Are both eyes the same shape? A child can also turn a square patch and notice that its identity does not change. Avoid correcting every informal word immediately; model the precise term within a useful sentence.
Counting works best with a small set of movable pieces. Ask the child to select six paper straw strips, divide them between the two sides of the hat, and check whether each side has the same number. If the sets are unequal, the child can move one strip and count again. Older children may create a repeating yellow-orange-yellow pattern along the brim. The physical pieces make errors visible and correctable without turning the activity into a quiz.
Scarecrow construction also introduces sequence and spatial vocabulary. Words such as above, below, beside, under, and between describe real placement decisions. Ask the child to explain which piece should be attached next or retell the build order after completion. A photo of the unglued arrangement can help a child reconstruct it if pieces shift.
The fall context deserves accurate, simple language. Scarecrows are human-shaped figures placed in fields or gardens in an attempt to discourage birds or other animals from disturbing crops. They do not guarantee that animals will stay away, and not every farm uses them. Pair the activity with photographs of fields, harvested corn, pumpkins, or farm equipment so children can distinguish a decorative autumn character from actual agricultural work.
Storytelling extends the project without adding supplies. Invite the child to name the figure, choose a crop for its field, describe the weather, and invent a problem that happens during its day. A child who is reluctant to tell a full story can complete a focused prompt such as, “The bird landed beside the scarecrow because…” Displaying several finished faces also creates an opportunity to compare expressions and design choices without ranking them. More prompts can be adapted around the same Paper plate scarecrow craft for fall learning rather than introducing unrelated decorations.
Preventing Mess, Frustration, and Weak Construction
Most project difficulties can be traced to too many materials, poorly timed glue, or adult expectations that exceed the child’s current control. Preparing the workspace around those pressure points is more effective than repeatedly telling children to be careful. Cover the table, provide one tool tray, keep completed pieces in a shallow container, and designate a flat drying location before anyone opens paint or glue.
A common mistake is showing a polished sample and expecting close imitation. The sample can clarify that the plate becomes a face, but it may also suggest that an unusual eye position or mismatched patch is wrong. Demonstrate only the unfamiliar technique—such as spreading a thin glue layer—then let the child decide where features belong. If a precise display piece is required, separate that adult-made decoration from the child’s learning project.
Watch for signs that the task needs adjustment. Paper that folds under the scissors, repeated requests for an adult to finish, or glue squeezed across the table signal that the current materials demand too much control. Widen the cutting strips, switch liquid glue to a glue stick, or offer two pre-cut choices. These changes preserve decision-making while reducing the motor load. By contrast, steady cutting, deliberate placement, and a child explaining the next step show that the difficulty is manageable.
Construction problems need specific fixes. A curling plate usually contains too much moisture; let it dry under light, even pressure between clean sheets of paper once the paint is no longer tacky. A loose hat needs more overlap with the plate, not simply a larger puddle of glue. Heavy yarn hair may pull away from the rim, so shorten the strands or replace them with paper fringe. If pieces slide after placement, the adhesive layer is probably too thick.
Group settings benefit from staged access. Put out coloring supplies first, paper shapes second, and adhesive last. Passing every item at once encourages children to glue before planning and makes missing pieces harder to spot. Labeling trays with a sample shape helps children return unused parts independently. For a mixed-skill group, offer one tray of pre-cut features and another with tracing templates; both routes can produce an individual result without labeling one version as easier.
Before displaying the work, check that the glue has dried, loose decorations are secure, and the child’s name is on the back. A loop for hanging should be attached by an adult only after the plate is dry and firm. If the project will travel home the same day, a flat paper bag or shallow box protects raised details better than carrying the scarecrow upright. Reusing these setup choices makes a future Paper plate scarecrow craft for fall learning session calmer without standardizing the children’s designs.
Frequently Asked Questions
What age is a paper plate scarecrow activity suitable for?
Preschool and early elementary children can participate when cutting and loose materials match their abilities. Adults can pre-cut complex pieces while leaving color, arrangement, counting, and storytelling decisions to the child.
Can children make the scarecrow without paint?
Yes. Washable markers, crayons, or torn paper reduce drying time and simplify cleanup. Crayons are especially useful when the plate has a slightly coated surface that does not accept watery paint evenly.
What can replace real straw?
Wide strips of yellow construction paper are easy to cut, count, and glue. Short yarn pieces also work, although they usually need liquid school glue and more drying time.
How can this activity include math practice?
Children can identify feature shapes, compare long and short rectangles, count paper straw pieces, divide them into two groups, or build a simple color pattern along the hat brim.
Why are the pieces falling off the plate?
The surface may still be wet, the glue layer may be too thick, or the pieces may not overlap the plate enough. Let painted plates dry flat, use a thin adhesive layer, and increase the contact area.
Conclusion
A successful scarecrow activity balances sturdy materials with genuine room for children to choose. Begin with an absorbent plate, manageable paper shapes, supervised cutting tools, and an adhesive suited to the decorations. Separate painting from assembly, test the arrangement before gluing, and let the work dry flat.
Use the building process to discuss circles, triangles, rectangles, quantities, position words, and the order of steps. A short conversation about crops and the limited role of real field scarecrows gives the seasonal image useful context. If cutting, glue control, or waiting causes frustration, simplify that single demand rather than completing the entire project for the child. Prepare the workspace and drying area first, then focus attention on the child’s reasoning, language, and construction choices rather than whether the finished face matches a model.
Now retrieving an image set.
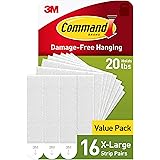
Command 20 lb X-Large Picture Hanging Strips, 16 Pairs White Command Strips Heavy Duty Picture Hanger
$9.75 (as of September 18, 2026 22:40 GMT -04:00 - More infoProduct prices and availability are accurate as of the date/time indicated and are subject to change. Any price and availability information displayed on [relevant Amazon Site(s), as applicable] at the time of purchase will apply to the purchase of this product.)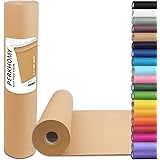
Now retrieving an image set.
PerkHomy Brown Kraft Paper Roll 17.5" x 1,200" (100') for Gift Wrapping Bulletin Board Craft Art Bouquet Flower Packing Valentines Easel Moving Shipping Floor Poster Covering Table 70GSM 50LB
$7.49 (as of September 18, 2026 22:40 GMT -04:00 - More infoProduct prices and availability are accurate as of the date/time indicated and are subject to change. Any price and availability information displayed on [relevant Amazon Site(s), as applicable] at the time of purchase will apply to the purchase of this product.)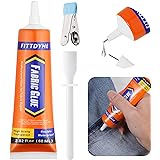
Now retrieving an image set.
FITTDYHE Fabric Glue Permanent, 60 ML Washable Clear Clothing Glue, Super Fabric Glue for Rhinestones, Patches, Clothes, Denim, Leather, Polyester, Fabrics, Doll Repair, Flannel, Cotton
$9.99 (as of September 18, 2026 22:40 GMT -04:00 - More infoProduct prices and availability are accurate as of the date/time indicated and are subject to change. Any price and availability information displayed on [relevant Amazon Site(s), as applicable] at the time of purchase will apply to the purchase of this product.)
Now retrieving an image set.
Crayola Construction Paper Bulk Pack (480 Sheets) – 10 Assorted Colors, 9x12, Teacher School Supplies & Classroom Must Haves, Card Making Craft Supplies, Art Paper
$11.76 (as of September 18, 2026 22:40 GMT -04:00 - More infoProduct prices and availability are accurate as of the date/time indicated and are subject to change. Any price and availability information displayed on [relevant Amazon Site(s), as applicable] at the time of purchase will apply to the purchase of this product.)
Now retrieving an image set.
Crayola Air Dry Clay (5lbs), Teacher Supplies, Natural White Modeling Clay for Kids, Sculpting Material, Bulk Craft Supplies for Art Classrooms
$11.24 (as of September 18, 2026 22:40 GMT -04:00 - More infoProduct prices and availability are accurate as of the date/time indicated and are subject to change. Any price and availability information displayed on [relevant Amazon Site(s), as applicable] at the time of purchase will apply to the purchase of this product.)
Now retrieving an image set.