
An easy Halloween craft preschoolers can finish independently is a paper plate ghost made with washable glue, large paper shapes, and a pre-punched hanging hole. Give each child one plate, two eyes, one mouth, three tissue-paper streamers, and a glue sponge or low-flow glue bottle so the sequence remains visible and manageable. Adults should prepare any cutting, stapling, or hole-punching beforehand, then let the child arrange the face, attach the streamers, and add a yarn loop. Independence is more likely when pieces are large enough to grip, choices are limited, and the finished ghost does not depend on precise placement.
Why a Paper Plate Ghost Works for Independent Crafting
A preschool-friendly project works best when its construction matches what young hands can reliably do. A paper plate ghost uses broad surfaces, lightweight pieces, and forgiving placement. Eyes can sit high, low, close together, or far apart without making the result look unfinished. Tissue streamers can overlap or hang at different lengths. That flexibility lets children make visible decisions without needing an adult to correct their work.
The plate also gives the activity a clear physical boundary. Preschoolers do not have to judge where a body begins or draw a recognizable outline before decorating it. They can concentrate on picking up a piece, applying adhesive, turning it over, and pressing it onto the plate. Those are manageable actions with an obvious cause and effect: the glue holds the eye, and the eye changes the ghost’s expression.
Compare this with a folded paper bat that requires matching corners, cutting curves, and keeping both wings symmetrical. The bat may look simple in a finished photograph, but its success depends on accuracy and several hidden adult tasks. The ghost is more suitable for independent work because unevenness becomes part of the design rather than evidence of a mistake. A child who places the mouth sideways still has a complete Halloween character.
Independence does not mean leaving a preschooler alone with unrestricted equipment. It means moving unsafe or developmentally demanding work into the setup stage while preserving the meaningful choices for the child. An adult can punch the hanging hole and cut the facial pieces without assembling the artwork. The child still controls the face, streamer arrangement, glue placement, and final appearance.
Keep the expected result equally flexible. Showing one sample can clarify that the streamers belong along the lower edge, but asking children to copy the sample exactly turns a simple project into a visual-matching test. For an easy Halloween craft preschoolers can finish independently, completion should mean that the pieces are attached and the child recognizes the creation as a ghost—not that every ghost looks alike.
Materials and Adult Preparation
The best supply set removes bottlenecks before the child sits down. For each ghost, prepare one plain white paper plate, two large paper eyes, one paper mouth, three or four strips of white tissue paper or crepe paper, a short length of yarn, and a child-manageable adhesive. Black construction paper works for the facial pieces, although children can also choose among several pre-cut mouth shapes to create different expressions.
Choose materials according to how the activity will be supervised. A washable glue stick offers controlled application and minimal dripping, but a child must press firmly enough to transfer adhesive. A low-flow bottle of washable school glue is easier to see but can release a large puddle when squeezed. A shallow glue sponge lets children tap the back of each shape onto adhesive, reducing the squeezing step. Whichever option you use, test it with the actual paper: tissue can tear when saturated, while heavy cardstock may lift if only a faint layer is applied.
Complete tasks involving sharp or hard-to-control tools in advance. Cut the face shapes and streamers, punch a hole near the top of the plate, and thread or loosely tie the yarn if knotting is beyond the child’s current ability. Avoid loose craft eyes, sequins, buttons, pom-poms, and other small decorations when children may mouth materials or when close monitoring is not possible. Flat paper pieces provide the same visual function with fewer handling concerns.
A compact preparation checklist keeps the project independent without making it overly prescribed:
- Use large pieces: Eyes and mouths should be easy to pinch and turn over.
- Separate each child’s set: A tray or shallow bin prevents pieces from mixing or falling.
- Limit adhesive: Supply one tested method rather than several competing options.
- Protect the table: Use a reusable mat or scrap paper without covering the workspace in distracting extras.
- Keep a damp cloth nearby: Sticky fingers can stop a child from handling the next piece comfortably.
Do not pre-glue the components merely to guarantee a neat result. Peel-and-stick pieces can be useful for children who cannot yet manage glue, but removing every practical challenge also removes part of the activity. A better adjustment is to place a small glue dot on each component and let the child decide where it goes. The preparation for this easy Halloween craft preschoolers can finish independently should remove frustration, not ownership.
The 5-Move Assembly Sequence
A visible five-move sequence gives preschoolers a route through the project without requiring repeated verbal directions. Place the materials in working order from left to right or arrange them on a tray with the plate in the center. Demonstrate only the unfamiliar action, such as touching a shape to a glue sponge. Building an entire sample while the child watches can encourage imitation instead of independent decision-making.
- Add the eyes. Put adhesive on the backs of both eye shapes, turn them over, and press them anywhere on the front of the plate.
- Choose the expression. Attach one mouth below or beside the eyes. Offer two or three shapes rather than a large pile.
- Attach the streamers. Turn the plate over and glue the tissue strips along the lower back edge so they hang below it.
- Press and check. Turn the ghost face-up, press loose pieces gently, and wipe sticky fingertips if needed.
- Add the hanger. Thread or pull the prepared yarn loop through the punched hole; an adult may secure the final knot if necessary.
The order matters less than the visibility of progress. Facial pieces provide a fast reward because the plate becomes a character almost immediately. Streamers involve thinner material and may demand more care, so they come after the child understands the glue action. Turning the plate over is often the hardest spatial step. If that causes confusion, mark the lower back edge with three small pencil lines showing possible streamer positions. The marks guide placement without determining the exact arrangement.
Use short prompts that identify the next physical action. “Which face piece comes next?” or “Where will your first streamer go?” preserves choice better than taking the plate and fixing it. If a piece curls or slides, encourage the child to press and count slowly to five. When tissue sticks to a gluey finger, peeling it away for the child may be appropriate; replacing the streamer or repositioning it automatically is usually unnecessary.
A child may finish in a different order, use only two streamers, or place the face upside down relative to the hanging hole. Those variations do not prevent completion. The adult can rotate the hanging loop later if the child wants the ghost displayed another way. By contrast, torn wet tissue, glue that will not hold, or facial pieces too small to grasp signal a supply problem rather than a lack of effort. Adjust the materials before adding more instructions.
For a group, set out one completed material tray per seat and release children to the table in small numbers. Waiting for shared glue or searching through a communal pile interrupts the sequence and invites adult intervention. Individual trays cost a few minutes of preparation but allow each child to move at a comfortable pace.
How to Tell Whether the Activity Is Truly Independent
Independence is visible in the child’s control of the process, not in a perfectly tidy finished ghost. A successful setup allows the preschooler to identify the available pieces, use the adhesive with little or no physical help, make placement choices, and recognize when the project is complete. Occasional reminders are compatible with independence; continuous hand-over-hand guidance is not.
Watch what happens after the first direction. If the child selects a face piece and begins attaching it, the visual arrangement is doing its job. If the child repeatedly asks what to do despite having the ability to glue, reduce the number of loose items and place them in sequence. If glue spills dominate the activity, switch from a squeeze bottle to a glue stick or sponge. If pieces keep falling off after pressing, test the adhesive and paper combination rather than asking the child to press harder indefinitely.
Adult language can either protect or undermine ownership. Comments such as “Your ghost has three long streamers” describe what the child made. Directions such as “Move that eye higher so it looks right” impose an appearance standard unrelated to whether the construction works. Intervene when a material is unsafe, when adhesive is about to reach clothing or eyes, or when the child explicitly requests help. A crooked feature, extra glue under a shape, or mismatched eyes generally does not require correction.
Age labels alone are a weak way to predict readiness. One preschooler may handle a glue stick confidently but struggle to peel stickers; another may arrange shapes thoughtfully yet need help turning them over. Offer a scaled alternative instead of taking over. Larger shapes, stiffer paper streamers, pre-applied glue dots, or a plate stabilized with a small loop of removable tape can preserve the child’s decision-making while reducing the difficult motor step.
Drying and display also reveal whether the design was practical. A working ghost stays assembled when lifted after the adhesive dries, and its streamers move without pulling free. Lay wet projects flat rather than hanging them immediately. Write the child’s name on the back before the activity or invite the child to add a recognizable mark there; writing across the finished front without permission can alter work the child considers complete.
The strongest version of an easy Halloween craft preschoolers can finish independently leaves room for a second attempt. Save a few extra paper shapes and plates rather than extra decorative clutter. A child who chooses to make another ghost can experiment with a new expression, different streamer spacing, or fewer prompts—the clearest sign that the process has become understandable and manageable.
Frequently Asked Questions
What age is the paper plate ghost suitable for?
Many preschoolers can assemble it, but readiness depends more on handling glue and large paper shapes than on a specific age. Prepare all cutting and hole-punching in advance.
What is the least messy adhesive for this project?
A washable glue stick is usually the least drippy option. A glue sponge may be easier for children who have trouble pressing or twisting a glue stick.
Can preschoolers cut the ghost pieces themselves?
Children with established scissor skills may cut wide tissue strips under close supervision. Pre-cut facial features are better when the goal is independent assembly rather than cutting practice.
How long should the ghost dry before hanging?
Leave it flat until the facial pieces and streamers no longer slide when the plate is lifted. Drying time varies with the amount and type of glue used.
What can replace tissue-paper streamers?
Wide strips of lightweight white paper are sturdier and easier to handle. Avoid heavy strips that may pull away from the plate before the adhesive dries.
Conclusion
A manageable paper plate ghost depends more on thoughtful preparation than elaborate decoration. Cut and punch anything that requires adult-controlled tools, then reserve the visible design decisions for the child. Large facial shapes, a tested washable adhesive, a small number of streamers, and an orderly tray reduce the points where frustration usually interrupts the work.
During assembly, respond to material failures rather than correcting harmless creative differences. Replace tissue that has become saturated, change an unsuitable glue method, or enlarge a hard-to-grip piece, but leave the ghost’s expression and arrangement to its maker. Set the finished plate flat to dry before adding it to a wall, window, or classroom display. If the child can explain the sequence or begin a second ghost with fewer prompts, the setup has achieved its purpose: a recognizable Halloween project completed with genuine preschool-level control.
Now retrieving an image set.
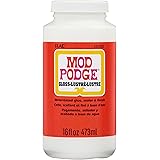
Mod Podge Gloss Sealer, Glue & Finish: All-in-One Craft Solution- Quick Dry, Easy Clean, for Wood, Paper, Fabric & More. Non-Toxic - Craft with Confidence, Made in USA, 16 oz., Pack of 1
$7.99 (as of September 18, 2026 22:40 GMT -04:00 - More infoProduct prices and availability are accurate as of the date/time indicated and are subject to change. Any price and availability information displayed on [relevant Amazon Site(s), as applicable] at the time of purchase will apply to the purchase of this product.)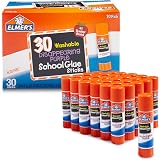
Now retrieving an image set.
Elmer's Disappearing Purple School Glue Sticks, Washable, 7 Grams, 30 Count - Posters, Back to School, Bulk Pack for Classrooms, #1 Teacher Brand
$7.49 (as of September 18, 2026 22:40 GMT -04:00 - More infoProduct prices and availability are accurate as of the date/time indicated and are subject to change. Any price and availability information displayed on [relevant Amazon Site(s), as applicable] at the time of purchase will apply to the purchase of this product.)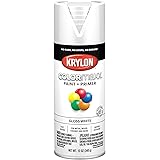
Now retrieving an image set.
Krylon ColorMaxx 12 Oz. Gloss Spray Paint, White - 1 Each
$4.48 (as of September 18, 2026 22:40 GMT -04:00 - More infoProduct prices and availability are accurate as of the date/time indicated and are subject to change. Any price and availability information displayed on [relevant Amazon Site(s), as applicable] at the time of purchase will apply to the purchase of this product.)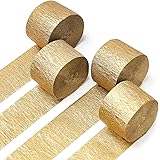
Now retrieving an image set.
PartyWoo Gold Crepe Paper Streamers 4pcs 328 FT Gold Streamers | Wedding Birthday Baby Shower Engagement Anniversary New Year Eve Graduation Bridal Shower Party Decorations
$6.99 (as of September 18, 2026 22:40 GMT -04:00 - More infoProduct prices and availability are accurate as of the date/time indicated and are subject to change. Any price and availability information displayed on [relevant Amazon Site(s), as applicable] at the time of purchase will apply to the purchase of this product.)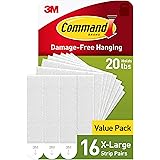
Now retrieving an image set.
Command 20 lb X-Large Picture Hanging Strips, 16 Pairs White Command Strips Heavy Duty Picture Hanger
$9.75 (as of September 18, 2026 22:40 GMT -04:00 - More infoProduct prices and availability are accurate as of the date/time indicated and are subject to change. Any price and availability information displayed on [relevant Amazon Site(s), as applicable] at the time of purchase will apply to the purchase of this product.)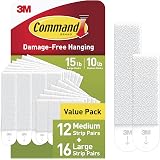
Now retrieving an image set.