
A paper craft recipe for child-friendly paste can be made by gradually stirring about 1/2 cup of cool water into 1/2 cup of plain flour until the mixture resembles smooth yogurt. Apply a thin layer with a brush or craft stick, press the paper flat, and allow it to dry uncovered. The flour-and-water paste works well for collages, paper chains, and papier-mâché, but excess paste can wrinkle lightweight sheets and lengthen drying time. Adult supervision is still appropriate because the mixture is not intended as food, wheat allergies matter, and homemade paste should be refrigerated briefly or discarded when the activity ends.
The Basic Flour-and-Water Formula
Plain flour and cool water make a simple temporary adhesive for porous materials. Flour contains starch and proteins that remain suspended in water; as the moisture leaves the mixture, the paste firms and holds overlapping paper fibers together. It is suitable for casual projects that will be displayed for a short time, rather than keepsakes expected to remain unchanged for years.
For a small activity, place 1/2 cup of plain all-purpose flour in a bowl and prepare about 1/2 cup of cool water. Begin with less than the full amount of water because flour absorbs moisture differently depending on storage conditions and how tightly it was measured. The finished paste should fall slowly from a spoon and spread without tearing the paper. If it pours like milk, it is too thin; if it pulls into a stiff ball, it needs more water.
This formula intentionally leaves out salt, sugar, coloring, and fragrance. Salt is sometimes added to homemade mixtures in an attempt to extend storage, but it does not make a perishable flour paste shelf-stable. Sugar can leave a sticky residue, while food coloring may stain hands, tables, and pale paper. A two-ingredient batch is easier to assess, easier to clean, and less likely to introduce an unnecessary irritant.
The word “child-friendly” should not be interpreted as edible or allergen-free. Children with a wheat allergy or sensitivity should not handle flour paste unless a caregiver has confirmed that it is appropriate. Flour can also create airborne dust while being poured, so an adult should measure it gently rather than letting children scoop or shake it. For groups where wheat exposure is unsuitable, use a clearly labeled washable school glue that meets the household’s or classroom’s needs instead of improvising another food-based adhesive.
A basic Paper craft recipe for child-friendly paste is most useful when low cost, easy spreading, and short-term display matter more than water resistance or archival quality. It is not the right adhesive for coated card, plastic decorations, photographs, or objects that will be handled frequently. Those smooth or heavy materials need a purpose-made craft adhesive with stronger bonding performance.
How to Mix Paste Without Lumps
Gradual hydration produces a smoother paste than pouring all the water into the flour at once. Add roughly half the prepared water and stir from the center outward, collecting dry flour from the sides of the bowl. Once the mixture becomes a thick, uniform batter, add the remaining water a tablespoon at a time. This sequence breaks down dry pockets before the mixture becomes too fluid to work them out.
A fork or small whisk is effective for adult mixing, while a wide craft stick gives a child more control and creates less splashing. Press stubborn lumps against the bowl rather than adding extra water immediately. A few tiny soft specks will usually spread out during application, but dry flour pellets can remain visible under thin tissue paper. If a very smooth finish matters, let the paste rest for five minutes and stir it again after the flour has absorbed more water.
Use the following compact mixing check before bringing paper to the table:
- Stir: The paste should move easily without sloshing.
- Lift: It should drop from the tool in a slow ribbon rather than a watery stream.
- Spread: A thin swipe on scrap paper should remain in place without forming a puddle.
- Test: Press a second scrap over it and wait several minutes to see whether the edges stay down.
Temperature affects both handling and safety. Cool or room-temperature water keeps this a no-cook activity that children can help mix under supervision. Warm water may cause portions of the flour to thicken before the rest is evenly hydrated, producing gummy lumps. Boiling a starch mixture can create a smoother cooked paste, but hot liquid and a hot pan add burn risks and unnecessary preparation for a basic children’s activity. If an adult chooses a cooked formula for papier-mâché, it should be prepared and cooled completely away from the child’s work area.
The common mistake is judging consistency only inside the bowl. A mixture may appear pleasantly thick yet soak through tissue or fail to spread across card. Always test the current batch on the same paper planned for the project. Add water in teaspoon-sized amounts if the tool drags; stir in a small spoonful of flour if a test swipe runs beyond its edges. Make one adjustment at a time so the paste does not alternate between overly thick and overly thin.
Matching Paste Thickness to the Project
Paste consistency should follow the paper’s weight and the amount of shaping involved. Thin copy paper and tissue absorb water rapidly, so they need a light coating. Construction paper tolerates a slightly fuller layer, although saturated sheets can still buckle. Papier-mâché strips need enough fluidity to coat both sides while allowing excess paste to be pulled away between two fingers.
For a flat collage, brush paste onto the back of each piece rather than covering the entire background. Place the piece, smooth from its center toward the edges, and remove paste that squeezes out with a damp cloth. A child making a construction-paper animal, for example, may need only a small dot spread thinly beneath each ear, foot, or spot. A thick mound does not make the bond stronger; it leaves more water trapped between layers and encourages sliding.
Paper chains present a different constraint. The narrow overlap at the end of each strip needs paste thick enough to stay where it is placed. Hold the join for a short period or secure it temporarily with a clothespin while it begins to set. If the chain must be lifted immediately, a glue stick is the more practical choice because flour paste develops its hold as water evaporates. Selecting the adhesive according to handling time is more useful than expecting one recipe to suit every activity.
For papier-mâché, dilute the base mixture with a little water until a strip can pass through it without tearing. Slide each strip through the bowl, then remove surplus paste before laying it over the form. Overloaded strips create a wet outer skin while deeper layers remain damp. Two or three light layers with thorough drying between sessions are easier to manage than one heavy mass. Never cover a balloon, bowl, or cardboard form so densely that air cannot reach the wet paper.
Signs of a suitable application include pieces that remain where positioned, edges that can be smoothed flat, and a surface that feels damp rather than flooded. Warning signs include translucent wet patches on ordinary paper, curling corners, paste pooling around shapes, or pieces drifting after placement. The practical response is usually to remove excess with the applicator, not to add more flour directly on the project.
Readers comparing materials can use the Paper craft recipe for child-friendly paste for absorbent paper and short-lived displays. Choose washable school glue for faster tack, mixed-material work, or projects that will be handled. Use an archival adhesive specifically labeled for paper when preserving photographs, artwork, or memory-book pages; flour paste can discolor, attract pests, or deteriorate during long storage.
Safe Setup, Storage, and Cleanup
A controlled workspace prevents more problems than changing the recipe. Cover the table with a washable mat or reusable tray, provide each child with a shallow portion of paste, and keep the main batch away from active elbows. Small portions limit spills and prevent used brushes, paper fragments, or dirty fingers from contaminating all of the mixture.
Children should wash and dry their hands before and after the activity. Supervision remains necessary for toddlers and for any child likely to taste materials, rub paste into the eyes, or spread it beyond the project area. Although the ingredients are familiar foods, raw flour is not a ready-to-eat product, and a craft bowl or brush is not food-service equipment. Do not encourage licking fingers or tasting the mixture. If paste enters the eyes, rinse with clean water and follow the child’s usual care guidance if irritation continues.
Check the surrounding materials as carefully as the paste. Age-appropriate scissors, large paper pieces that do not present a mouthing hazard, washable coverings, and stable water containers make the activity easier to supervise. A child with broken skin or eczema on the hands may find wet flour mixture irritating; gloves or a different adhesive may be more suitable. Household allergy requirements take priority over the appeal of a homemade recipe.
Make only the amount expected to be used that day. Flour and water create a moist food mixture without a reliable preservative system. The safest practical routine is to discard leftovers after the session. If an adult keeps a clean, uncontaminated portion, place it promptly in a sealed, labeled container in the refrigerator and use it within a day or two. Separation alone may be corrected by stirring, but sour odor, discoloration, visible growth, bubbles, or an unexpected texture means the entire batch should be discarded without handling it further.
Never pour a large quantity down a drain, where thick paste can settle and contribute to a blockage. Scrape leftovers into household waste or compost only if local practices accept flour mixtures, then wipe the bowl before washing it with warm soapy water. Soak brushes promptly because dried flour paste stiffens around the bristles. Wipe tables while residue is damp; scraping hardened paste can damage painted or laminated surfaces.
Drying Problems and Practical Fixes
Drying depends on evaporation, so airflow, layer thickness, paper absorbency, and room humidity all affect the result. Lay finished work flat in a ventilated indoor area and leave it uncovered. A cooling rack can allow air beneath sturdy pieces, while delicate collages should remain on a clean flat surface to avoid rack marks. Direct heat from an oven, heater, or hair dryer is unsuitable for children’s projects because it can warp paper and introduces avoidable heat hazards.
Wrinkling usually indicates that the paper absorbed more water than it could distribute evenly. Blot visible excess, smooth the piece gently, and allow it to dry before deciding whether it has failed. Some waviness is normal with water-based paste, especially on lightweight sheets. For the next piece, use less adhesive, switch to heavier paper, or spread paste over a smaller area. Pressing a fully dried collage beneath clean heavy books may flatten mild curling, but protect the work with plain paper and confirm that no moisture remains first.
Edges that lift can result from too little contact, paste that was too dry to spread, or a bond disturbed before setting. Lift the loose edge carefully, brush a thin fresh layer beneath it, press outward, and leave the project flat. If every piece releases after drying, the paper may be coated or glossy rather than absorbent. Adding more homemade paste will not correct an incompatible surface; washable craft glue is the better alternative.
A tacky project has usually been coated too heavily or left where air cannot circulate. Separate stacked pieces, open folded areas, and move the work to a dry ventilated location. Papier-mâché deserves extra patience because its overlapping strips trap moisture. Do not paint or seal it while cool, soft, or damp to the touch. A hard exterior can conceal moisture inside, leading to odor or deterioration later.
A successful bond should feel dry, show no sour smell, and hold during gentle handling without leaving powdery residue. Flour paste will not become waterproof, and finished work should stay away from damp rooms, outdoor exposure, and food-storage areas. The central tradeoff is straightforward: homemade paste offers inexpensive, brushable adhesion for immediate paper activities, while commercial products provide more predictable tack, durability, and storage. Use the Paper craft recipe for child-friendly paste where its temporary nature is an advantage rather than a hidden limitation.
Frequently Asked Questions
Can children make flour paste without cooking?
Yes. An adult can measure the flour, and children can stir in cool water gradually under supervision. No-cook paste avoids hot pans and should be tested on scrap paper before use.
How thick should homemade paper paste be?
A general-purpose batch should resemble smooth yogurt and drop slowly from a spoon. Use a thinner coating for tissue and a slightly looser mixture for papier-mâché strips.
Why is the paste making paper wrinkle?
Wrinkles usually mean the sheet received too much moisture. Spread a thinner layer, choose heavier paper, and keep the project flat with open airflow while it dries.
How long can flour-and-water paste be stored?
Same-day use is preferable. A clean leftover portion may be sealed, labeled, refrigerated, and used within a day or two, but any odor, growth, discoloration, or bubbling requires disposal.
Is homemade paste suitable for every paper project?
No. It suits absorbent paper and temporary displays. Select washable craft glue for glossy materials or faster handling, and an archival adhesive for photographs and long-term keepsakes.
Conclusion
Good flour paste depends more on controlled water and light application than on extra ingredients. Mix cool water into plain flour gradually, test the texture on the project paper, and give wet layers enough exposed air to dry. Keep the batch small, supervise handling, account for wheat allergies, and treat the mixture as a perishable craft material rather than food.
Match expectations to the adhesive. Homemade paste is economical and easy to brush across absorbent paper, but it dries slowly, can wrinkle thin sheets, and is unsuitable for waterproof, archival, or heavily handled work. Begin with scrap-paper testing, remove excess paste before it soaks in, and switch to a labeled commercial adhesive when the surface or required durability exceeds what flour and water can provide.
Now retrieving an image set.
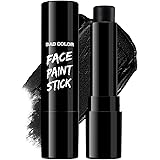
BADCOLOR Black Cream-Blendable Face Body Paint Stick for Adults Children Eye Black Softball Football Baseball Sports , Non-Toxic Hypoallergenic for Halloween SFX Makeup Cosplay Joker Costume Parties
$5.99 (as of September 18, 2026 22:40 GMT -04:00 - More infoProduct prices and availability are accurate as of the date/time indicated and are subject to change. Any price and availability information displayed on [relevant Amazon Site(s), as applicable] at the time of purchase will apply to the purchase of this product.)
Now retrieving an image set.
Crayola Air Dry Clay (5lbs), Teacher Supplies, Natural White Modeling Clay for Kids, Sculpting Material, Bulk Craft Supplies for Art Classrooms
$11.24 (as of September 18, 2026 22:40 GMT -04:00 - More infoProduct prices and availability are accurate as of the date/time indicated and are subject to change. Any price and availability information displayed on [relevant Amazon Site(s), as applicable] at the time of purchase will apply to the purchase of this product.)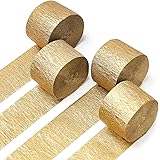
Now retrieving an image set.
PartyWoo Gold Crepe Paper Streamers 4pcs 328 FT Gold Streamers | Wedding Birthday Baby Shower Engagement Anniversary New Year Eve Graduation Bridal Shower Party Decorations
$6.99 (as of September 18, 2026 22:40 GMT -04:00 - More infoProduct prices and availability are accurate as of the date/time indicated and are subject to change. Any price and availability information displayed on [relevant Amazon Site(s), as applicable] at the time of purchase will apply to the purchase of this product.)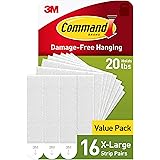
Now retrieving an image set.
Command 20 lb X-Large Picture Hanging Strips, 16 Pairs White Command Strips Heavy Duty Picture Hanger
$9.75 (as of September 18, 2026 22:40 GMT -04:00 - More infoProduct prices and availability are accurate as of the date/time indicated and are subject to change. Any price and availability information displayed on [relevant Amazon Site(s), as applicable] at the time of purchase will apply to the purchase of this product.)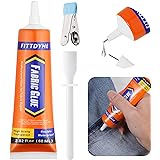
Now retrieving an image set.
FITTDYHE Fabric Glue Permanent, 60 ML Washable Clear Clothing Glue, Super Fabric Glue for Rhinestones, Patches, Clothes, Denim, Leather, Polyester, Fabrics, Doll Repair, Flannel, Cotton
$9.99 (as of September 18, 2026 22:40 GMT -04:00 - More infoProduct prices and availability are accurate as of the date/time indicated and are subject to change. Any price and availability information displayed on [relevant Amazon Site(s), as applicable] at the time of purchase will apply to the purchase of this product.)
Now retrieving an image set.