
Choosing Paper That Makes Folds Easier to See
The most useful beginner sheet is square, easy to crease, large enough for small hands, and visually different on its two sides. A square measuring roughly 6 to 8 inches gives a child room to align corners without requiring the fingertip precision of a miniature model. Standard origami sheets are suitable, but neatly cut lightweight copy paper can work for early practice. Construction paper is usually less cooperative because its thickness produces bulky layers and creases that tend to spring open.
Two-colored paper makes instructions easier to follow. When a model says to turn the colored side down or reveal the white side, the child receives an immediate visual clue about orientation. Single-color sheets still work, but an adult may need to mark one side with a small pencil dot during practice. Avoid heavily patterned designs at first. Busy prints can hide diagonal lines, edges, and pockets precisely when a learner needs to inspect them.
Paper thickness becomes more consequential as layers accumulate. A simple house may tolerate ordinary printer paper because most areas contain only one or two layers. A model with several flaps can become stiff and difficult to flatten in the same material. Very thin tissue paper presents the opposite problem: it tears easily and does not hold a dependable edge. Medium-light paper offers the most forgiving balance between durability and foldability.
Preparation matters as much as the sheet itself. Work on a hard, clean table rather than carpet, a lap, or a padded surface. The table supports an even crease, while the flat background makes shifted edges easier to notice. Dry hands reduce wrinkling and color transfer. Scissors are needed only when square sheets must be prepared in advance; children should not be asked to trim paper while simultaneously trying to understand a new fold.
A useful material check is to fold one sample sheet in half, press it once, and release it. The paper should stay mostly closed without cracking along the line. If it resists, choose a lighter sheet. If it tears under normal fingertip pressure, choose a sturdier one. For additional project planning, the collection on Origami paper craft for children learning folds can be used to match sheet size with model difficulty.
Four Foundational Creases to Practice First
Four crease patterns give beginners enough vocabulary to complete many recognizable models: the book fold, cupboard fold, diagonal fold, and kite fold. Teaching them separately reduces the mental load of decoding a model while also controlling corners, direction, and pressure. A child who can reproduce these creases on fresh squares is better prepared to understand diagrams and spoken instructions.
The Book and Cupboard Folds
A book fold brings one edge directly onto its opposite edge, creating two equal rectangles. Ask the child to hold the matching corners together first, check that both open edges are aligned, and then anchor the midpoint with one finger. The crease can be pressed from the midpoint toward each end. This method limits sliding better than rubbing across the entire sheet immediately.
The cupboard fold builds on that result. After opening the book fold, both outside edges are brought to the center line. The original crease acts as a visible target, so children can judge spacing without a ruler. Small gaps at the center are usually less troublesome than overlapping edges, which add bulk and distort later steps. A paper door or simple window offers a clear use for this fold.
The Diagonal and Kite Folds
A diagonal fold joins opposite corners and turns a square into a triangle. Corners are less stable than long edges, so the child should pinch the two points together before flattening the center. If the triangle shows a narrow strip of paper along one side, the corners shifted before the crease was secured. Reopen the sheet rather than stacking a corrective crease beside the first one.
For a kite fold, open a diagonal crease and bring two neighboring edges to that center line. The resulting shape resembles a kite and introduces controlled symmetry. Children often watch the pointed tip while ignoring the long edges; the better check is whether each folded edge follows the center crease without crossing it. A tiny space is acceptable during first attempts, particularly if forcing perfect contact would wrinkle the tip.
Valley and mountain folds describe direction rather than entirely different shapes. A valley sinks toward the table like a trough; a mountain rises like a ridge. Turning the paper over changes how the same crease appears. Teach these terms after children can produce the four basic patterns, because adding vocabulary too soon can distract from alignment. The practical goal is recognition: the learner should know whether to fold toward the visible side or away from it.
A Child-Friendly Practice Sequence
A productive practice session moves from loose rehearsal to one short finished model. Ten careful folds are more informative than rushing through several objects. Children need time to compare edges, reopen a mistaken step, and see how an earlier crease becomes a reference for a later one. The adult’s role is to make each action visible without taking control of the child’s sheet.
Begin with a demonstration square that is larger than the learner’s paper. Place both sheets in the same orientation, such as colored side down with one corner pointing upward. Perform only one action, pause, and let the child copy it. Directional language should refer to visible features—“bring the bottom corner to the top corner”—rather than relying only on left and right, which reverse when people sit opposite each other.
- Warm up: Make and reopen one book fold and one diagonal fold.
- Check alignment: Compare matching corners and look for exposed strips along the edges.
- Add a reference fold: Use the opened center line to form a cupboard or kite.
- Build one model: Choose a house, fish, or animal face with fewer than about ten actions.
- Repeat selectively: Redo the one step that caused the model to become uneven.
A house is particularly forgiving because a horizontal rectangle can become walls and two diagonal corner folds can suggest a roof. A simple dog face uses a diagonal triangle with two downward corner flaps for ears. These models remain recognizable even when the folds are not perfectly symmetrical. That visible payoff is more suitable for a first session than a model whose final shape depends on several tightly nested layers.
Signs of useful progress include pausing to align points, finding a previous center line without prompting, and pressing a crease only after checking placement. Speed is a poor measure. A child who completes a model quickly by copying hand movements may not yet understand how the folds relate. Ask the learner to point to the next target edge or predict which color will show after turning the sheet; those responses reveal more than a fast finished object.
Keep the adult sample separate. Folding the child’s paper may rescue the model, but it removes the exact hand practice the activity is meant to provide. If frustration rises, substitute a fresh, larger square or return to the preceding crease. A simpler project from the Origami paper craft for children learning folds topic is preferable to repeatedly forcing a model that demands finer control than the learner currently has.
Fixing Uneven Creases and Other Common Problems
Uneven results usually come from alignment, paper movement, or an unclear orientation—not from a child being “bad at origami.” Identifying which moment caused the error is more useful than flattening the finished model harder. Creases establish the geometry for later steps, so a small shift near the beginning can become a noticeably crooked wing, roof, or face after several layers are added.
If corners will not meet, check whether the original sheet is truly square. Fold it diagonally; all outside edges should match. A hand-cut sheet that is slightly rectangular will create persistent misalignment no matter how carefully the child works. Replace it rather than asking the learner to compensate. If the square is accurate, encourage pinching the target corners together before lowering the rest of the paper.
Double or fuzzy crease lines appear when a fold is pressed before its position has been checked. Repeatedly bending the paper back and forth rarely removes the first line and may weaken the sheet. Open the fold gently, align it again, and commit to one corrected crease. For practice sheets, marking the intended line lightly with a pencil can clarify the difference between a placement problem and a pressing problem.
Wrinkled points often result from pushing thick layers toward a narrow tip. Flatten from the broad area toward the point, allowing trapped paper to settle rather than bunch. If a model already contains several layers, a fingernail or smooth craft stick can sharpen a crease, but excessive pressure may tear coated or thin paper. Young children generally gain more from fingertip pressing than from tools because they can feel whether layers are slipping.
Confusion after turning the model is an orientation problem. Before each rotation or flip, name a landmark: a pointed corner, open pocket, colored triangle, or center seam. After the movement, ask the child to locate that same landmark. This prevents accidental quarter-turns that make the next instruction seem impossible. Placing a small removable note above the workspace can also establish which direction counts as the top.
Stop and simplify when the child can no longer hold a flap in place, cannot distinguish the active layer, or must use enough force to crush the model. Those signs indicate that the paper is too small, too thick, or too layered for the current task. Choose a larger square or a model based on book and diagonal folds. Return to reverse folds, pockets, and narrow tucks after the learner can orient and crease a flat model independently.
Frequently Asked Questions
What age can children begin simple origami?
Many preschool-age children can copy a single half-fold with help, while independent multi-step models usually require more hand control and sequencing. Choose by demonstrated ability rather than age alone.
Is regular printer paper suitable for beginner origami?
Yes, especially for flat models with few layers. Cut it into an accurate square first, and switch to lighter origami sheets if the design becomes bulky or difficult to press.
Should adults correct every uneven fold?
No. Correct errors that block the next step, but allow small gaps or asymmetry when the model still works. Constant correction can shift attention away from understanding the fold.
Which origami models are easiest for learning folds?
Flat houses, fish, boats, and simple animal faces are useful because they rely on visible book or diagonal creases and remain recognizable despite minor misalignment.
How can a child make a sharper crease?
Align the edges first, hold the midpoint, and press outward in both directions on a hard surface. Sharpening a misplaced fold only makes the error more permanent.
Conclusion
Strong early origami sessions depend on visible alignment and manageable paper rather than complicated finished designs. Prepare accurate squares, use contrasting sides, and teach book, cupboard, diagonal, and kite creases before introducing layered maneuvers. Demonstrate beside the child, pause after each action, and describe destinations using corners, edges, and center lines.
When a model becomes crooked, inspect the earliest crease that controls the affected area. Replace an inaccurate square, enlarge a design that demands tiny movements, or choose a flatter model when layers become difficult to hold. The next useful step is a short session combining two rehearsal folds with one forgiving object. Progress is evident when the child checks alignment before pressing and can use an existing crease as the target for a new one.
Now retrieving an image set.
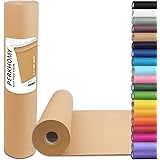
PerkHomy Brown Kraft Paper Roll 17.5" x 1,200" (100') for Gift Wrapping Bulletin Board Craft Art Bouquet Flower Packing Valentines Easel Moving Shipping Floor Poster Covering Table 70GSM 50LB
$7.49 (as of September 19, 2026 22:40 GMT -04:00 - More infoProduct prices and availability are accurate as of the date/time indicated and are subject to change. Any price and availability information displayed on [relevant Amazon Site(s), as applicable] at the time of purchase will apply to the purchase of this product.)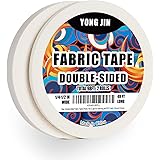
Now retrieving an image set.
Double-Sided Fabric Tape,Hem Tape No Sew No Iron,1/4"+1/2" (2 Rolls) | No Sewing or Ironing Required, Quick Clothing Repairs, Fabric Bonding, For Hemming and DIY Crafts
$7.99 (as of September 19, 2026 22:40 GMT -04:00 - More infoProduct prices and availability are accurate as of the date/time indicated and are subject to change. Any price and availability information displayed on [relevant Amazon Site(s), as applicable] at the time of purchase will apply to the purchase of this product.)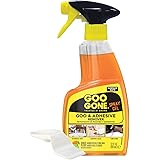
Now retrieving an image set.
Goo Gone Adhesive Remover Spray Gel 12 Oz with Scraper, Surface Safe | Citrus Cleaning Power for Hard Surfaces, Carpet & Fabric, Removes Glue, Stickers, Tape Residue, Grease, Gum & Wax, Drip Free
$17.98 (as of September 19, 2026 22:40 GMT -04:00 - More infoProduct prices and availability are accurate as of the date/time indicated and are subject to change. Any price and availability information displayed on [relevant Amazon Site(s), as applicable] at the time of purchase will apply to the purchase of this product.)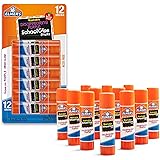
Now retrieving an image set.
Elmer's Disappearing Purple School Glue Sticks, Washable, 6 Grams, 12 Count - Arts & Crafts, Poster, Projects, Back to School, #1 Teacher Brand
$5.49 (as of September 19, 2026 22:40 GMT -04:00 - More infoProduct prices and availability are accurate as of the date/time indicated and are subject to change. Any price and availability information displayed on [relevant Amazon Site(s), as applicable] at the time of purchase will apply to the purchase of this product.)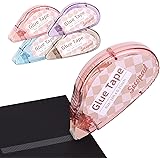
Now retrieving an image set.
Secopad Scrapbook Tape, Glue Tape for Crafts, 4 Pack, Light-Colored Shell | 0.3IN x 26FT, Sticky & Safe, Double Sided Tape for Crafts, Scrapbooking Junk Journaling Supplies, For School Office Teachers
$6.99 (as of September 19, 2026 22:40 GMT -04:00 - More infoProduct prices and availability are accurate as of the date/time indicated and are subject to change. Any price and availability information displayed on [relevant Amazon Site(s), as applicable] at the time of purchase will apply to the purchase of this product.)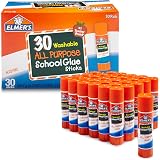
Now retrieving an image set.