
Paper craft ideas for short creative sessions work best when each project uses a small material set, has one clear construction task, and can reach a satisfying stopping point within 10 to 30 minutes. Folded animals, torn-paper pictures, shape collages, paper weaving, and simple puppets minimize setup while practicing cutting, folding, gluing, and design choices. Match the activity to the child’s scissor control and attention span, then prepare only the pieces they cannot safely make themselves. Favor glue sticks over liquid glue for fast drying, and avoid projects with intricate templates or multiple drying stages when the available session is brief.
Choose a Project That Fits the Available Minutes
A short paper activity needs a finish line children can see. “Make a collage” is open-ended and may expand beyond the available time, while “build a garden from five paper shapes” gives the child enough freedom within a manageable boundary. A visible outcome reduces time spent wondering what to make and leaves more of the session for cutting, arranging, folding, and decorating.
Count setup and cleanup as part of the session rather than treating them as invisible work. A 15-minute window may provide only eight or nine active making minutes once paper is selected, tools are distributed, and scraps are collected. Projects that depend on paint drying, repeated measuring, or many tiny components are poor matches unless an adult completes preparation beforehand. Glue sticks, paper fasteners, removable tape, and folded tabs produce faster joins than wet glue.
Skill fit matters as much as duration. A child who is still learning to use scissors may spend the entire session cutting one detailed outline. Large rectangles, strips, circles, and free-cut organic shapes provide more success than narrow curves or small notches. Older children may find those same shapes too prescribed, so give them a construction challenge such as making a standing paper creature or a woven pattern with alternating colors.
Use three checks before choosing from Paper craft ideas for short creative sessions:
- Completion: Can the main structure be finished before the final five minutes?
- Independence: Can the child perform most steps with the tools and skills currently available?
- Recovery: Can a crooked cut, misplaced fold, or torn edge become part of the design?
The recovery check is especially useful. Precise template projects can stall when one mistake prevents assembly. Collage, weaving, puppets, and folded scenes tolerate variation, making them better for a classroom transition, an after-school pause, or a quick activity before dinner. A session is working when the child begins making choices within the first few minutes and can identify what remains to be done. Repeated requests for adult cutting, unclear assembly, or a growing queue of wet pieces signal that the project is too complicated for the time.
12 Paper Projects Organized by Time and Skill
The strongest quick projects combine a simple physical action with one meaningful design choice. Cutting strips alone can feel like practice; turning those strips into a woven mat gives the action a purpose. The following options are grouped by realistic working time, though younger children may need longer and experienced makers may finish sooner.
About 10 Minutes
Torn-paper landscape: Tear colored paper into a sky, ground, trees, clouds, or buildings, then overlap the pieces on a backing sheet. Tearing removes the scissor barrier and creates textured edges. Limit the palette to four or five sheets so selection does not consume the session.
Shape character: Combine circles, rectangles, triangles, and strips to make a person, robot, animal, or imaginary creature. Adults can provide large shapes for beginners; children with reliable scissor control can cut their own. The activity works because there is no single correct arrangement.
Folded bookmark: Fold a sturdy paper strip, round or angle the top, and add a face, pattern, or cut-paper feature. Avoid bulky decorations where the bookmark will sit between pages. Cardstock lasts longer, but ordinary construction paper is easier for small hands to cut.
Paper-strip bracelet: Decorate a measured strip and join the ends with tape. Leave enough room to slide it over the hand, or wrap it loosely around the wrist and have an adult secure it. Treat bracelets as temporary decorations rather than durable wear, especially if the paper becomes wet or torn.
About 15 to 20 Minutes
Accordion animal: Fold a long strip back and forth, then attach a head and legs. Wide folds are easier than narrow ones and produce a body that compresses and expands. A pre-cut strip keeps the activity within 15 minutes.
Paper-bag puppet: Use the bag flap as a mouth and add broad paper features. Flat pieces adhere faster than yarn, pom-poms, or thick objects. If bags are unavailable, fold a sheet into a simple hand-held character instead.
Window collage: Cut one large opening in a folded card and glue colored scraps behind it. Translucent tissue creates a light-catching effect, while construction paper gives stronger blocks of color. An adult should cut the opening for children who cannot safely pierce or rotate paper with scissors.
Standing paper scene: Fold the bottom of trees, figures, or buildings into tabs and attach them to a base. Large tabs stand more reliably than narrow ones. This is a useful bridge from flat collage to simple three-dimensional construction.
About 25 to 30 Minutes
Beginner paper weaving: Fold a base sheet, make several evenly spaced cuts that stop before the edge, open it, and weave contrasting strips over and under. Beginners need wide strips and fewer rows. If alternating the pattern becomes frustrating, use two colors to make the sequence easier to track.
Fold-and-cut mask: Fold paper lightly, draw half of a large mask shape, cut it, reopen it, and decorate both sides. Eye openings require careful adult supervision and may be prepared ahead. A craft-stick handle is usually quicker to fit than string.
Mini folded book: Fold several small sheets together and add one drawing, word, or collage element per page. A narrow strip of tape can bind the spine without staples. Set a page limit so storytelling does not outgrow the session.
Layered habitat picture: Build an ocean, forest, pond, or space scene by placing foreground pieces over a background. Use three depth layers rather than many tiny details. Compared with a single flat picture, layering introduces composition while remaining forgiving about exact placement.
Prepare a Small Supply Set Without Limiting Creativity
A compact supply set speeds decisions and keeps the work surface usable. For most quick paper sessions, provide colored paper, a heavier backing sheet, child-appropriate scissors, glue sticks, pencils, and washable markers or crayons. Add only one special component—such as paper fasteners, tissue paper, or a paper bag—when the chosen construction needs it.
More colors and decorations do not automatically create better choices. A crowded table encourages children to sort, compare, and handle supplies instead of building. Place a modest range of paper in a shallow tray and keep backup sheets nearby. Scraps larger than a child’s palm are useful for shapes and features; very small fragments tend to scatter, stick to sleeves, and lengthen cleanup.
Paper weight changes how a project behaves. Printer paper folds crisply and suits mini books or simple folded forms, but it may buckle under heavy glue. Construction paper is forgiving for cutting and collage, although thick folds may spring open. Cardstock provides firm bases, puppet handles, and standing structures, yet it demands more hand strength. Rather than using one paper for every component, pair a cardstock base with lighter decorative pieces.
Prepare selectively. Pre-cutting every shape can turn creative work into matching and assembly, while expecting a beginner to cut every component may consume the entire session. Cut only difficult structural parts, such as a mask opening or the parallel slits in a weaving base. Let the child control expressive parts such as ears, leaves, windows, patterns, and facial features. This balance preserves ownership without allowing one demanding step to block completion.
Safety and supervision should reflect the child and the tool rather than a broad age label. Check that scissors fit the child’s hand, keep sharp adult tools outside the activity area, and supervise any step involving pierced paper, staples, or small detachable pieces. Small components are not suitable around children who may place them in their mouths. Tape can replace staples, and drawn details can replace loose decorations.
A reusable tray makes Paper craft ideas for short creative sessions easier to begin without collecting a roomful of products. Restock glue, remove dried markers, and sort reusable scraps after the activity. When paper tears during normal cutting, glue fails to hold, or children wait for a shared tool, the supply set—not the child’s effort—may be the part that needs adjustment.
Keep Short Sessions Moving From Start to Cleanup
A clear sequence prevents a quick activity from becoming a rushed one. Show the finished mechanism rather than presenting a model that children are expected to copy exactly. For a puppet, demonstrate how the flap becomes a mouth. For weaving, show one over-under row. Once the structural idea is visible, put the sample aside so children can make their own color, shape, and character decisions.
Give instructions in small batches. Children often lose track when five steps are explained before they touch the paper. State the first action, pause while it is completed, and introduce the next step when most participants are ready. In a mixed-skill group, place an optional detail task—adding texture marks, a border, or a background—at the end. Fast finishers remain engaged without changing the minimum finish line for everyone else.
A practical 20-minute session can use this rhythm:
- Minutes 1–3: Name the project boundary and demonstrate the central fold, join, or cutting action.
- Minutes 4–14: Build the main form while an adult assists only with genuine tool or structural barriers.
- Minutes 15–17: Add a limited number of chosen details.
- Minutes 18–20: Label or display the work, return tools, and sweep scraps into a collection tray.
Do not announce cleanup only when time has expired. Give a brief warning while children still have enough time to complete one final feature. A defined last step—attach the eyes, finish the final woven strip, or draw the book cover—creates a more satisfying pause than abruptly removing supplies. Unfinished work can be stored in a labeled folder, but projects designed for short sessions should not routinely depend on another day.
Adult correction is a common source of delay. Recutting uneven shapes or repositioning pieces may make the result look more polished, but it replaces the child’s decisions and suggests that variation is an error. Step in when a join will not hold, a tool is unsafe, or the structure cannot function. Leave cosmetic differences alone. A lopsided robot, irregular leaf, or uneven accordion still demonstrates cutting, planning, and construction.
Evaluate the activity by engagement and workable independence, not by identical finished products. Signs of a good fit include sustained handling of the paper, recoverable mistakes, personal choices, and enough time to tidy the area. If several children abandon the same step, simplify that mechanism next time by widening strips, enlarging tabs, reducing pieces, or preparing one technical cut. Those adjustments preserve the creative decision while removing a bottleneck.
Frequently Asked Questions
What is the quickest paper craft for children?
A torn-paper picture or shape character can be completed in about 10 minutes because both use flat pieces, simple glue joins, and no drying stage.
How can I reduce preparation time?
Store paper, scissors, glue sticks, and drawing tools in one tray. Pre-cut only structural pieces that are unsafe or too difficult for the child to make independently.
Which paper is best for quick projects?
Construction paper suits most cutting and collage activities. Use printer paper for crisp folds and cardstock where a firm base, tab, or standing shape is needed.
What should I do if a child finishes early?
Offer an optional extension tied to the project, such as adding a setting, patterned border, movable feature, or second character, rather than introducing unrelated supplies.
How do I keep a short craft from becoming adult-led?
Demonstrate the construction method, then let the child choose colors, shapes, placement, and details. Assist with safety and structural problems without correcting harmless differences.
Conclusion
Successful short paper sessions rely on a realistic finish line, forgiving construction, and fewer materials than a long-form project. Choose broad shapes and fast joins for beginners, then add folding, weaving, tabs, or layered composition as skills grow. Reserve adult preparation for unsafe or unusually demanding cuts; children should retain control over the features that make the work their own.
For the next session, select one project based on the actual minutes available, place its core supplies in a single tray, and identify the minimum completed form before beginning. Watch where progress slows. If cutting detail, wet adhesive, shared tools, or excessive choices create delays, adjust that specific constraint rather than abandoning the activity. A compact project should feel complete without requiring every edge to be precise or every available decoration to be used.
Now retrieving an image set.
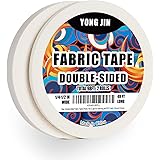
Double-Sided Fabric Tape,Hem Tape No Sew No Iron,1/4"+1/2" (2 Rolls) | No Sewing or Ironing Required, Quick Clothing Repairs, Fabric Bonding, For Hemming and DIY Crafts
$7.99 (as of September 18, 2026 22:40 GMT -04:00 - More infoProduct prices and availability are accurate as of the date/time indicated and are subject to change. Any price and availability information displayed on [relevant Amazon Site(s), as applicable] at the time of purchase will apply to the purchase of this product.)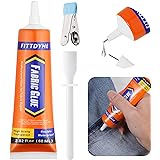
Now retrieving an image set.
FITTDYHE Fabric Glue Permanent, 60 ML Washable Clear Clothing Glue, Super Fabric Glue for Rhinestones, Patches, Clothes, Denim, Leather, Polyester, Fabrics, Doll Repair, Flannel, Cotton
$9.99 (as of September 18, 2026 22:40 GMT -04:00 - More infoProduct prices and availability are accurate as of the date/time indicated and are subject to change. Any price and availability information displayed on [relevant Amazon Site(s), as applicable] at the time of purchase will apply to the purchase of this product.)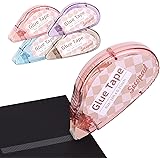
Now retrieving an image set.
Secopad Scrapbook Tape, Glue Tape for Crafts, 4 Pack, Light-Colored Shell | 0.3IN x 26FT, Sticky & Safe, Double Sided Tape for Crafts, Scrapbooking Junk Journaling Supplies, For School Office Teachers
$6.99 (as of September 18, 2026 22:40 GMT -04:00 - More infoProduct prices and availability are accurate as of the date/time indicated and are subject to change. Any price and availability information displayed on [relevant Amazon Site(s), as applicable] at the time of purchase will apply to the purchase of this product.)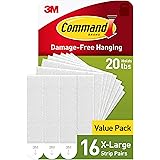
Now retrieving an image set.
Command 20 lb X-Large Picture Hanging Strips, 16 Pairs White Command Strips Heavy Duty Picture Hanger
$9.75 (as of September 18, 2026 22:40 GMT -04:00 - More infoProduct prices and availability are accurate as of the date/time indicated and are subject to change. Any price and availability information displayed on [relevant Amazon Site(s), as applicable] at the time of purchase will apply to the purchase of this product.)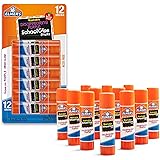
Now retrieving an image set.
Elmer's Disappearing Purple School Glue Sticks, Washable, 6 Grams, 12 Count - Arts & Crafts, Poster, Projects, Back to School, #1 Teacher Brand
$4.59 (as of September 18, 2026 22:40 GMT -04:00 - More infoProduct prices and availability are accurate as of the date/time indicated and are subject to change. Any price and availability information displayed on [relevant Amazon Site(s), as applicable] at the time of purchase will apply to the purchase of this product.)
Now retrieving an image set.