
Easy children’s craft ideas for rainy days work best when cardboard, tape, and washable paint are matched to a child’s age, attention span, and ability to cut or glue safely. Turn boxes into buildings, assemble tape-resist paintings, construct cardboard creatures, or make movable scenery for indoor play. Prepare only the materials needed for one stage at a time, protect the work surface, and choose child-safe supplies with labels you can verify. Favor open-ended designs over complicated models: children can make more decisions, adults need to correct less, and the finished creation is more likely to become part of the afternoon’s play.
Choose a Project That Fits the Child and the Afternoon
A workable rainy-day activity fits the child’s current skills before it fits an attractive picture of the finished result. A preschooler who enjoys covering large surfaces may stay engaged with a painted cardboard animal, while an older child may prefer designing rooms inside a box. Projects become frustrating when they require more precision, drying time, or adult intervention than the child expects.
Start by checking three practical limits: how long the child usually concentrates, which tools can be used independently, and where wet work can dry undisturbed. A short attention span calls for an activity with a visible result in the first few minutes. Coloring a box before adding ears and a tail provides immediate progress; constructing a detailed miniature building may not. If the table must be cleared for lunch, choose tape, crayons, or markers rather than several layers of paint.
Age labels alone do not settle the decision. Two children of the same age may have very different cutting strength, tolerance for sticky glue, or interest in following a model. Watch how the child handles the first task. Clean, controlled snips suggest that simple paper details are suitable. Repeatedly bending the material instead of cutting it signals that an adult should prepare the shapes or substitute tearable paper and tape.
A compact project check prevents the most common mismatches:
- For quick success: decorate a pre-cut cardboard shape with paint, crayons, or tape.
- For sustained building: offer a shallow box, cardboard scraps, and removable tape for redesigning.
- For siblings: give each child a separate base while keeping shared decorations in the center.
- For limited cleanup: avoid glitter and runny paint; use paper tape, stickers, or washable markers.
Check product labels rather than assuming every brightly packaged supply is intended for children. Use age-appropriate scissors, supervise small loose parts around children who may mouth objects, and keep utility knives and heavy-duty cutting tools under adult control. An adult can cut thick cardboard away from the activity area, then return the prepared pieces for assembly.
The weak approach is to place every available material on the table at once. Too many choices compete with the actual build, encourage waste, and make spills harder to contain. Present a base, one joining material, and two or three decorating options. Additional supplies can appear when the child has a reason for them. This selection method also makes Easy children’s craft ideas for rainy days easier to adapt when energy, space, and supervision change unexpectedly.
Build Cardboard Creations That Survive Play
Cardboard is most useful when its thickness matches the job. Thin food-package board bends easily for fins, crowns, wings, and decorative panels. Corrugated shipping cardboard holds its shape better for houses, ramps, masks, and standing figures. Asking thin board to support a structure leads to sagging; asking a young child to fold thick corrugated material often turns a simple build into an adult task.
A box can become a setting without complicated measuring. Place a small shipping box on its side, tape open flaps out of the way, and let the child paint or draw an interior. It might become a pet clinic, cave, kitchen, garage, or room for toy figures. Add a cardboard rectangle as a shelf or ramp only after the main setting is usable. Building in stages means the project still succeeds if interest fades before every planned detail is attached.
For a freestanding creature, cut two identical body shapes and a pair of wide feet. Join the body pieces with short loops of tape or folded tabs, then attach the feet so they extend on both sides. Wide contact points matter more than adding extra adhesive: a narrow foot concentrates the figure’s weight and tips easily, while a broad foot creates a stable base. If the creature falls repeatedly, enlarge the feet or lower heavy decorations instead of covering every seam with more tape.
Folded cardboard tabs provide a useful alternative to wet glue. Bend a small flap at the end of a tail, ear, sign, or wall, then tape the flap flat against the larger surface. The fold increases the contact area and controls the angle. White school glue can create a neater-looking bond on lightweight board, but it needs time to set and may cause thin material to curl when too much is applied. Tape is faster and better for immediate play, even though visible strips become part of the appearance.
Pre-punching holes can support movable parts when an adult has an appropriate tool and controls it. Paper fasteners may connect an arm, wheel, or cardboard clock hand, but they are small components and are unsuitable where mouthing is a concern. A lower-risk alternative is to hinge a piece with a flexible strip of tape. Leave a tiny gap between the two cardboard edges so the joint can bend rather than fighting against a tightly taped seam.
Decorate after testing the structure. Children understandably want to paint first, but wet painted panels can smear during assembly, and heavy decorations may alter the balance. Make the form stand, roll, or open as intended; then add color. A successful build should tolerate gentle handling without seams lifting immediately. If it cannot, reinforce the specific load-bearing joint rather than wrapping the entire object. That keeps the creation lighter, easier to modify, and more recognizably the child’s work.
Use Tape and Washable Paint Without Spreading the Mess
Controlled painting depends more on setup and paint quantity than on repeated reminders to be careful. Cover the working zone with a reusable mat, opened paper bag, or several sheets of scrap paper. Put a damp cloth within adult reach before opening paint. A washable label makes cleanup more manageable, but it does not mean every pigment will release equally from every fabric, porous tabletop, or unfinished wood surface.
Tape-resist painting creates a clear effect with few steps. Apply strips of low-tack painter’s tape or child-appropriate paper tape across sturdy cardboard. The child paints over and around the strips, using two or three colors rather than a crowded palette. Once the surface is touch-dry, an adult or older child peels the tape back slowly at a low angle. The covered lines remain visible and divide the painting into bold sections.
Test the tape on a scrap first. Strong tape can pull off the cardboard’s top paper layer, while very weak tape may lift as a brush passes over it. Pressing every edge aggressively is unnecessary; smooth the strip enough to keep it in place. Paint that is heavily diluted may seep underneath and soften the cardboard, so use a modest amount straight from the container unless its instructions say otherwise. Imperfect edges are normal and often suit the handmade design.
Pour small portions into a washable palette, jar lid, or shallow tray rather than placing full containers beside active elbows. A wide brush covers boxes quickly and is easier for small hands to control. Cotton swabs or a narrow brush can add dots and lines later, but beginning with tiny tools makes a large surface feel endless. When children want new colors, provide them one at a time; this limits muddy mixtures without preventing experimentation.
Paint placement can control both cleanup and waiting. Decorate one side of a box while the other side rests on the table, or paint separate flat pieces that can dry before assembly. Standing a wet, freshly painted structure upright often creates drips and fingerprints. Signs that the process is failing include cardboard becoming soft, paint pooling at edges, or the child spending more time wiping hands than making marks. Pause, remove excess paint with a dry brush, and switch to crayons or collage pieces for the remaining details.
For households where spills would create conflict, dry media are a sensible choice rather than a lesser activity. Colored masking tape can form roads, windows, stripes, and geometric patterns directly on cardboard. Washable markers offer finer details with almost no drying delay. The best version of Easy children’s craft ideas for rainy days is the one adults can supervise calmly in the available room, not the one using the largest number of materials.
Turn Finished Artwork Into Longer Indoor Play
A creation gains more value when it becomes a usable prop rather than an object that must immediately be displayed or discarded. Cardboard scenery, creatures, vehicles, and signs can extend naturally into storytelling, sorting, movement games, or toy play. This shift is especially helpful on a long wet afternoon because it replaces the pressure to begin a second elaborate activity as soon as the first one ends.
A painted box room can host toy animals, dolls, or handmade cardboard figures. Ask the child what the space needs for play rather than directing how it should look. A veterinarian’s office may need a waiting area and a bed; a cave may need a removable rock door; a garage may need numbered parking spaces. Each requested feature gives the next making task a clear purpose and lets the design respond to the child’s story.
Cardboard roads offer another flexible option. Cut broad strips from a box and let children join them with tape across the floor or table. Add painted or drawn lane markings, tunnels made from curved card, and signs attached to folded bases. Removable joins allow the route to change. A permanently glued layout can look tidier, but a modular road supports rebuilding and is easier to store flat after the weather clears.
Collaborative projects need boundaries as well as shared materials. Assigning one child the building and another the decoration sounds efficient, yet it can create ownership disputes if both want the same role. Separate modules work better: each child creates one shop for a shared street or one creature for a cardboard habitat. The pieces connect at the end, preserving individual control while producing a common play scene.
Avoid taking over to make the result resemble an adult example. Straightening every line, correcting unusual color choices, or rebuilding an unstable figure without discussion removes the decisions that sustain interest. If a feature fails, describe what happened in concrete terms: the sign tips because its base is narrow, or the door cannot swing because tape crosses the hinge. Offer two possible fixes and let the child select one. That approach keeps troubleshooting inside the creative process.
Storage should be decided before the structure grows. Flat figures can go into a labeled envelope or folder; modular walls can be untaped and stacked; a box scene can hold its own loose parts. Photographing a large creation before recycling it can make limited storage easier to accept, particularly when the child chooses the viewpoint and arranges the scene. Keep only sturdy pieces that still invite play. Crushed, damp, or paint-saturated cardboard is unlikely to improve with storage and may transfer color or residue to nearby items.
When repeating Easy children’s craft ideas for rainy days, change the play problem rather than buying a new set of supplies. The same cardboard, tape, and paint can produce a puppet stage one week and a tabletop neighborhood the next. A project is working when children make independent additions, test the object, and return to it after a break. Constant requests for adult assembly usually signal that the design needs fewer parts or a simpler joining method.
Frequently Asked Questions
What can children make on a rainy day with only a cardboard box?
A box can become a toy room, cave, garage, animal bed, puppet stage, or tabletop shop. Keep the first version simple and add features only when play creates a need for them.
How can I reduce cleanup when children use washable paint?
Cover a defined work area, pour small paint portions, use wide brushes, and keep a damp cloth nearby. Check the label and protect porous or delicate surfaces even when paint is described as washable.
Is tape or glue better for cardboard projects?
Tape is better for quick assembly and immediate play. Glue can produce less visible joins on lightweight card, but it requires drying time and may curl thin pieces when applied heavily.
How do I adapt the same activity for children of different ages?
Give everyone a separate cardboard base, then vary the tools and construction demands. Younger children can decorate pre-cut pieces, while older children plan openings, tabs, hinges, or movable components.
What should I do if a child loses interest halfway through?
Stop at the nearest usable stage instead of insisting on every planned detail. A partly decorated box can already support play, and unused materials can be saved for another day.
Conclusion
A satisfying wet-weather activity begins with realistic limits: the child’s current abilities, the available work surface, the acceptable mess, and the time before the room must be cleared. Cardboard provides the form, tape offers immediate joins, and washable paint adds broad color when the space can handle drying and cleanup. Test structures before decorating, use wide bases and folded tabs where support matters, and substitute dry materials when paint would create more tension than enjoyment.
Set out a small selection rather than the entire supply cabinet, then let the child’s play determine which feature comes next. Prepare one box or several sturdy offcuts, choose a joining method, and reserve a safe drying or storage spot before starting. The strongest result is not the most polished object; it is a manageable creation the child can alter, test, and use after the making stage ends.

Now retrieving an image set.
Amazon Basics Clear Thermal Laminating Sheets for Documents and Photos, 9 x 11.5-Inch, 2.8 mil, 200-Pack
$17.99 (as of September 18, 2026 22:40 GMT -04:00 - More infoProduct prices and availability are accurate as of the date/time indicated and are subject to change. Any price and availability information displayed on [relevant Amazon Site(s), as applicable] at the time of purchase will apply to the purchase of this product.)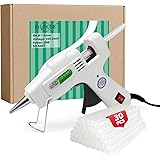
Now retrieving an image set.
Krightlink Mini Hot Glue Gun Kit with 30 Glue Sticks 20w Fast Preheating | 20w Hot Melt High Temp hot glue gun, Anti-Drop Precision Nozzle, for School Crafts DIY Arts, Quick Home Repairs-White
$8.54 (as of September 18, 2026 22:40 GMT -04:00 - More infoProduct prices and availability are accurate as of the date/time indicated and are subject to change. Any price and availability information displayed on [relevant Amazon Site(s), as applicable] at the time of purchase will apply to the purchase of this product.)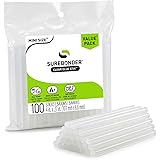
Now retrieving an image set.
Surebonder Clear, All Purpose, All Temp., Mini Size Hot Glue Sticks 0.27 in. Diameter, 4 in. Length -100 Pack
$5.97 (as of September 18, 2026 22:40 GMT -04:00 - More infoProduct prices and availability are accurate as of the date/time indicated and are subject to change. Any price and availability information displayed on [relevant Amazon Site(s), as applicable] at the time of purchase will apply to the purchase of this product.)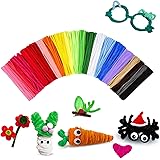
Now retrieving an image set.
200 Pcs Pipe Cleaners Craft Bulk, 20 Colors Pipe Cleaner, Chenille Stems | Kids Toys & Games Gifts for Ages 5-7, Craft Supplies for Projects Creative DIY Room Decor, Halloween Christmas Decorations
$5.99 (as of September 18, 2026 22:40 GMT -04:00 - More infoProduct prices and availability are accurate as of the date/time indicated and are subject to change. Any price and availability information displayed on [relevant Amazon Site(s), as applicable] at the time of purchase will apply to the purchase of this product.)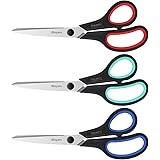
Now retrieving an image set.
iBayam 8.5" Heavy Duty Scissors All Purpose for Office School Crafts Sewing | 3-Pack, Ultra-Sharp 2.5mm Stainless Blades, Comfort Grip Handles, Left & Right Handed – Teacher Desk & Classroom Must-Have
$9.99 (as of September 18, 2026 22:40 GMT -04:00 - More infoProduct prices and availability are accurate as of the date/time indicated and are subject to change. Any price and availability information displayed on [relevant Amazon Site(s), as applicable] at the time of purchase will apply to the purchase of this product.)
Now retrieving an image set.