
A paper pumpkin craft without complicated cutting is easiest to make by folding orange paper strips, gluing their ends into loops, and arranging the loops around a short paper stem. Straight cuts replace curved templates, while folded strips create the rounded pumpkin shape and visible ribs. Cardstock produces a sturdy standing decoration, but construction paper is easier for young children to bend and press. Use washable glue or a glue stick sparingly so the loops hold without becoming soggy. An adult should prepare the strips when children are not ready to use scissors independently.
Why Paper Loops Remove the Difficult Cutting
Loop construction turns a rounded pumpkin into a series of manageable straight strips. Instead of tracing a curved outline and trying to keep scissors on a narrow line, the child bends each strip so its ends meet. Several loops placed side by side suggest the pumpkin’s ribs, giving the finished piece dimension without requiring precise cutting.
The method works because repetition creates the recognizable form. One orange loop looks like a ring, but six or more loops radiating around a shared center produce a squat, rounded silhouette. Wider strips make broad ribs, while narrower strips create a more finely divided pumpkin. Equal strip lengths give a regular shape; slight differences can make the result look more organic, provided none of the strips is dramatically shorter than the others.
This approach is more forgiving than folded silhouette cutting. A folded silhouette can produce a flat, symmetrical pumpkin quickly, but a misplaced cut may remove part of the stem or create an uneven edge. With strip assembly, a damaged piece can simply be replaced. It is also easier to divide the work between an adult and a child: the adult can make straight strips with a paper cutter or scissors, and the child can fold, glue, arrange, and decorate.
A tabletop pumpkin and a flat pumpkin card need slightly different construction. For a standing decoration, the loops should surround a small central support and touch the table evenly. For a card or bulletin-board piece, half-loops can be attached to a backing sheet. The backed version uses less paper and is easier to store, while the freestanding version offers more opportunities to explore spacing and balance.
Choose the format according to the child’s tolerance for waiting. Liquid glue may need time to grip, especially on springy cardstock. A glue stick gives faster, cleaner handling on construction paper, although the joins may not be as durable. The central idea behind a Paper pumpkin craft without complicated cutting is to shift the demanding work away from curved scissor control and toward visible, adjustable assembly.
Materials and Preparation Choices
Paper weight determines how easily the pumpkin bends and how well it keeps its shape. Standard construction paper is a practical choice for preschool and early elementary use because children can crease it with their fingers. Medium-weight cardstock makes firmer ribs and a longer-lasting display, but its ends tend to spring apart until the adhesive sets. Very thin printer paper bends readily yet may collapse when decorations or excess glue add weight.
For one small pumpkin, prepare several orange strips of equal width and length, one short brown rectangle for the stem, and a narrow green strip for a leaf or vine. Exact measurements are optional. Strips about the length of a child’s hand create a compact pumpkin; longer pieces make taller loops that can become unstable. Consistency matters more than a particular ruler measurement.
Keep the supply setup limited and purposeful:
- Orange paper: construction paper for easy bending or cardstock for greater structure.
- Adhesive: a glue stick for low mess, washable liquid glue for stronger joins, or paper-safe tape for immediate holding.
- Stem and vine paper: brown and green scraps prevent unnecessary use of full sheets.
- Optional tools: a ruler, blunt-tip scissors, crayons, and clothespins for holding glued ends.
Preparation should match the child’s actual cutting ability rather than an assumed age level. Children who can make controlled straight cuts may cut along bold guide lines. Those still learning how to open and close scissors can receive prepared strips and take responsibility for folding and placement. This preserves meaningful participation without turning the activity into an extended cutting exercise.
A common preparation mistake is making the strips too narrow. Narrow cardstock twists easily, exposes glue at the joints, and can be frustrating to align. Strips roughly two or three finger-widths across are easier for small hands to press. Another mistake is setting out too many decorative items before the basic form is stable. Sequins, pom-poms, and thick foam pieces add weight, so crayons or paper shapes are better when the pumpkin needs to stand.
Before beginning, make one test loop from the chosen paper. Press its ends together, release it, and observe whether it stays joined. If it opens immediately, use less springy paper, overlap the ends more, or hold the joint with a clothespin while it dries. That quick check prevents children from assembling multiple ribs with an adhesive-paper combination that will not hold.
Fold, Glue, and Shape the Pumpkin
Build the pumpkin from matching folded strips before adding any facial features or decorations. Lay the orange strips in a stack, check that their lengths are reasonably even, and fold each strip gently in half. The fold marks the bottom center; it does not need to become a sharp crease. A hard crease produces a pointed base, while a soft bend preserves the rounded appearance.
Apply adhesive to one short end of a strip, overlap the other end, and press to form a loop. Repeat with the remaining strips. If using liquid glue, a small dot spread across the overlap is enough. Saturated paper wrinkles and slides apart. Glue sticks work best when adhesive covers the full overlap rather than only its edge.
Arrange the finished loops so their folded centers meet at the bottom. For a simple freestanding pumpkin, place one loop front to back, a second side to side, and the remaining loops in the spaces between them. Glue the loops together where their lower folds touch. Gather the upper joins around a rolled brown-paper stem, then secure them to the stem or to one another.
- Prepare six to eight orange strips with straight ends.
- Mark each midpoint with a gentle fold.
- Join the short ends to make separate loops.
- Cross the loops around a shared bottom center.
- Add the stem only after the pumpkin sits evenly.
- Attach a paper leaf or curl a green strip around a pencil for a vine.
The order matters because the stem should not be asked to correct an uneven base. Set the unfinished pumpkin on the table and rotate it. A stable form touches the surface at several evenly spaced folds and does not lean strongly in one direction. If one side looks empty, spread the loops before the glue sets or add one more strip opposite the gap.
For group settings, separate the work into short stages. Children can decorate flat strips first, but leave the overlap zones free of crayon wax because wax can weaken glue contact. Names, dots, short lines, or leaf rubbings add detail without burdening the finished form. Then assemble the loops at a second station where an adult can monitor adhesive use.
A flat-backed alternative follows the same Paper pumpkin craft without complicated cutting method but attaches each strip’s midpoint and ends to a sheet of paper. The raised arches create dimension while the backing prevents rolling or tipping. Choose this version for classroom walls, greeting cards, or younger makers who may find radial assembly difficult.
Fixing Shape, Glue, and Balance Problems
An uneven pumpkin usually reflects strip spacing rather than poor workmanship. When several loops crowd one side, the form tilts and the opposite side looks flat. Before the adhesive dries, view the pumpkin from above and move the ribs until the gaps appear similar. The loops do not need mathematical precision, but each one needs enough room to keep its curve.
If the joins keep opening, check three likely causes: springy paper, too little overlap, or glue placed on a waxy decorated area. Increase the overlap slightly and hold it with a clothespin. Tape can rescue a joint from inside the loop where it is less visible. Adding more liquid glue is rarely the best first response because wet fibers soften and the pieces begin to slide.
A pumpkin that collapses inward may have strips that are too long or paper that is too thin. Shortening every strip is more effective than trimming only one rib, which creates an obvious mismatch. For a project already assembled, insert a small rolled-paper cylinder through the center as hidden support. This trades a completely open interior for improved durability, a sensible choice for decorations that will be handled repeatedly.
Pointed bottoms come from pressing the midpoint folds too firmly. Gently open each crease and round it over a finger. If the pumpkin still tips, attach a small orange paper circle underneath. A base circle is less visually delicate than free-standing loops, but it makes the object reliable for a shelf or classroom table.
Children sometimes expect every rib to align perfectly and become frustrated by small variations. Show how real pumpkins have uneven grooves and nonuniform shapes, while still distinguishing harmless irregularity from a structural problem. A slightly lopsided outline can look convincing; loose joints, a stem carrying the full weight, or a base touching at only one point needs correction.
Signs that the method is working include loops that retain an open curve, joints that stay closed after pressure is released, and a base that rests without being held. Warning signs include paper turning translucent from glue, ribs twisting across one another, or the stem pulling upward when the pumpkin is moved. Pause at those signals rather than decorating over them. Correcting the structure first makes the Paper pumpkin craft without complicated cutting easier to finish and less likely to fall apart during display.
Frequently Asked Questions
Can this pumpkin be made without scissors?
Yes. Use precut paper strips, tear a brown stem from scrap paper, and draw the leaf or vine. An adult or paper trimmer can prepare the straight strips beforehand.
How many paper strips does one pumpkin need?
Six to eight strips usually create a clear rounded form. Fewer strips produce an open shape, while additional strips make the pumpkin denser and may require stronger joins.
Is construction paper or cardstock better?
Construction paper is easier for young children to bend and glue. Cardstock holds a firmer shape but may need longer overlaps, clips, or extra drying time.
What adhesive creates the least mess?
A glue stick is the cleanest option for lightweight paper. Paper-safe tape holds immediately, while small amounts of washable liquid glue provide stronger joints when drying time is available.
How can the pumpkin be turned into a flat classroom display?
Glue the midpoint and both ends of each orange strip to a backing sheet, leaving the middle raised as an arch. Arrange the arches side by side and add a flat stem above them.
Conclusion
Successful paper pumpkins depend more on strip proportion, controlled adhesive, and even spacing than on precise scissor work. Select paper that the child can bend comfortably, prepare straight strips at an appropriate skill level, and test one glued loop before assembling the full form. Keep the midpoint folds soft for a rounded base, distribute the ribs before the glue dries, and attach the stem after the pumpkin can stand on its own. If the loops open or collapse, adjust the overlap, paper weight, or internal support instead of adding excessive glue. Choose a freestanding version for a dimensional seasonal decoration or attach half-loops to backing paper when easy storage and classroom display matter more than a complete three-dimensional shape.
Now retrieving an image set.
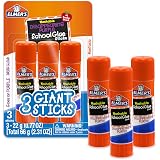
Elmer's Disappearing Purple School Glue Sticks, Washable, 22 Grams, 3 Count - Poster, Vision Board, Back to School Supplies, #1 Teacher Brand
$2.89 (as of September 18, 2026 22:40 GMT -04:00 - More infoProduct prices and availability are accurate as of the date/time indicated and are subject to change. Any price and availability information displayed on [relevant Amazon Site(s), as applicable] at the time of purchase will apply to the purchase of this product.)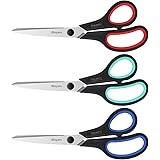
Now retrieving an image set.
iBayam 8.5" Heavy Duty Scissors All Purpose for Office School Crafts Sewing | 3-Pack, Ultra-Sharp 2.5mm Stainless Blades, Comfort Grip Handles, Left & Right Handed – Teacher Desk & Classroom Must-Have
$9.99 (as of September 18, 2026 22:40 GMT -04:00 - More infoProduct prices and availability are accurate as of the date/time indicated and are subject to change. Any price and availability information displayed on [relevant Amazon Site(s), as applicable] at the time of purchase will apply to the purchase of this product.)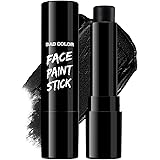
Now retrieving an image set.
BADCOLOR Black Cream-Blendable Face Body Paint Stick for Adults Children Eye Black Softball Football Baseball Sports , Non-Toxic Hypoallergenic for Halloween SFX Makeup Cosplay Joker Costume Parties
$5.99 (as of September 18, 2026 22:40 GMT -04:00 - More infoProduct prices and availability are accurate as of the date/time indicated and are subject to change. Any price and availability information displayed on [relevant Amazon Site(s), as applicable] at the time of purchase will apply to the purchase of this product.)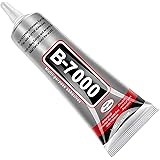
Now retrieving an image set.
B7000 Jewelry Glue for Making, FITTDYHE 1PCS 50ML/1.69 fl oz Clear Adhesive for Rhinestone, Fabric, Multipurpose Super B-7000 for Phone Repair, Nail Art, Wood, Glass, Charms
$5.99 (as of September 18, 2026 22:40 GMT -04:00 - More infoProduct prices and availability are accurate as of the date/time indicated and are subject to change. Any price and availability information displayed on [relevant Amazon Site(s), as applicable] at the time of purchase will apply to the purchase of this product.)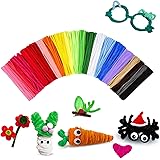
Now retrieving an image set.
200 Pcs Pipe Cleaners Craft Bulk, 20 Colors Pipe Cleaner, Chenille Stems | Kids Toys & Games Gifts for Ages 5-7, Craft Supplies for Projects Creative DIY Room Decor, Halloween Christmas Decorations
$5.99 (as of September 18, 2026 22:40 GMT -04:00 - More infoProduct prices and availability are accurate as of the date/time indicated and are subject to change. Any price and availability information displayed on [relevant Amazon Site(s), as applicable] at the time of purchase will apply to the purchase of this product.)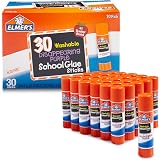
Now retrieving an image set.