
Choose Paper and Plan the Moving Parts
The paper must be stiff enough to hold a cat shape but flexible enough to crease without splitting. Medium-weight construction paper suits a simple version that will be folded only a few times. Lightweight cardstock provides a sturdier body for a standing cat or a project intended for repeated play, although very thick cardstock can make small ears and paws difficult to bend.
A useful compromise is to make the head and body from cardstock while cutting the moving pieces from construction paper. The firm base resists sagging, and the lighter appendages place less strain on their folded tabs. Printer paper folds easily but tends to curl under wet glue and can tear where a narrow hinge meets a larger piece. It is better for a practice model than for the finished cat.
Plan the movements before cutting. A cat with every edge folded can become crowded and hard to operate, so select two or three actions that remain visually clear. Upright ears that fold forward can change the expression. Front paws can cover the face, hold a paper fish, or open to reveal a message. A side-mounted tail can swing, while a tail folded into an accordion spring can extend outward. The best combination depends on whether the finished piece will lie flat, stand on a table, or become a card.
Draw each part larger than its visible final size because the hidden hinge needs extra paper. A paw attached by a tab, for example, requires approximately a finger-width extension behind its top edge. The tab should be broad rather than narrow; a thin connection concentrates force in one spot and usually tears after several movements. For younger children, enlarge the entire design instead of reducing the number of tabs to tiny dimensions.
Keep the initial supply set controlled:
- Body material: construction paper or lightweight cardstock
- Joining material: glue stick or a small amount of washable liquid glue
- Marking tools: pencil, crayons, or washable markers
- Folding tools: a craft stick or capped marker for pressing creases
- Cutting tools: child-safe scissors used with appropriate supervision
Loose decorations should not interfere with moving joints. Large paper spots, drawn whiskers, and flat paper collars are easier to manage than beads or bulky attachments. Small detachable pieces may be unsuitable around children who still mouth craft materials. A related Cat paper craft with foldable features template can provide proportions, but the hinge allowances still need to match the paper being used.
Build the Cat Body and Foldable Joints
A reliable paper hinge is a scored fold with glue applied only to its stationary tab. Begin by sketching a rounded body, a head, and the selected movable pieces on the back of the paper. Cut the large shapes first. Test their placement without glue so overlapping paws, ears, or tails have enough room to move across the body.
Scoring creates a predictable bending line. Place the paper on a firm surface and draw a ruler or the rounded edge of a craft stick along the intended crease without cutting through it. Avoid knife blades or sharp scoring tools in a child-led activity. After scoring, fold the tab backward, open it, and press it again. This first flex makes the joint easier to operate after assembly.
For the central body, a simple folded base adds dimension without complicated construction. Cut a wide cat silhouette and fold a horizontal strip at the bottom toward the back. That strip becomes a foot that can be glued to a small rectangular paper platform. An alternative is a tent-fold body: fold a rectangle in half, keep the crease at the cat’s back, and cut the front and rear layers together. The tent version stands readily, but both layers may limit where a swinging tail can be attached. A flat silhouette offers more room for facial movements and works better as a card front.
Attach each hinge in a deliberate sequence. Position the folded tab behind the body or movable part, mark its boundary lightly, and place adhesive inside that boundary. Press the tab while keeping the crease itself dry. A glue stick offers better control and less warping than a puddle of liquid glue. If liquid glue is the only option, spread a thin film with a scrap of paper and wait until the joint is secure before testing it.
- Cut and decorate the body before adding moving pieces.
- Score every hinge line and pre-fold it in both directions if the design requires two-way motion.
- Dry-fit the pieces and confirm that their movement paths do not collide.
- Glue one tab at a time, keeping adhesive away from the crease.
- Allow the joint to set, then move it slowly through its intended range.
Decorating before assembly reduces pressure on the hinges. Children can draw eyes, a muzzle, stripes, and toe lines while every piece rests flat on the table. The common alternative—finishing details after gluing—often bends the tabs or transfers marker ink onto an overlapping paw. If the cat will hold a paper object, measure that object against the paw spacing before fixing the arms in place.
Add Moving Ears, Paws, and a Tail
Each foldable feature needs a hinge suited to its movement rather than one attachment method used everywhere. Ears usually need a simple crease, paws benefit from hidden tabs, and tails may require either a pivot-like paper loop or an accordion fold. Matching the joint to the action produces cleaner motion and prevents unnecessary layers.
Folding Ears for Different Expressions
Cut two triangles with rectangular extensions along their lower edges. Score where each triangle meets its extension, then glue the extensions behind the top of the head. The ears can now stand upright or fold toward the face. If the triangles disappear completely behind the head when folded, reposition the creases slightly above the head edge. Leaving part of each ear visible makes the movement easier for small fingers to reverse.
For a simpler version, include the ears as part of the head silhouette and score across each ear base. This removes separate glued pieces and is less likely to tear, but the ears can only bend forward or backward. Separate ears permit a more dimensional result and can be replaced if damaged.
Paws That Hide or Reveal
Front paws create the clearest interactive action. Cut two long rounded shapes and add a tab at each shoulder. Mount the tabs behind the body so the paws swing inward. A cat can cover its eyes, uncover a drawn face, or reveal a short name written on its belly. Check the overlap before gluing: paws that are too short will not meet, while oversized paws may hide the entire head and strain their hinges.
A second construction turns each paw into a folded flap. Glue the upper arm flat to the body and score a crease near the wrist so only the paw opens. This method has less movement but is stronger for classroom displays where many hands may operate the feature. The full swinging arm is more expressive for individual play.
Tail Options for Flat and Standing Cats
A side-swinging tail can be attached with a broad folded tab hidden behind the body. Round the free end so it does not catch on clothing or other paper pieces. Keep a slight clearance between the tail and body; if their edges rub tightly, friction will bend the tab instead of letting the tail swing.
An accordion tail creates movement without a rotating joint. Cut a long strip, fold it back and forth at even intervals, and shape or color the outer end. Wider folds create a bold zigzag, while narrow folds make a compact spring but demand more accurate creasing. Attach only the final panel to the body. Readers adapting a Cat paper craft with foldable features design for a greeting card may prefer this tail because it compresses when the card closes.
Fix Weak Folds, Stiff Hinges, and Torn Paper
Movement problems usually come from adhesive crossing the crease, insufficient clearance, or a tab that is too small for the attached piece. Test each feature separately rather than forcing several stiff parts at once. A working hinge should bend at the scored line while its glued section stays flat. Buckling elsewhere indicates that the paper is avoiding the intended crease.
If a joint feels stiff, inspect both sides under good light. Dried glue along the fold can sometimes be loosened by gently flexing the joint in very small increments, but pulling hard may tear the paper fibers. A piece trapped against the body needs more clearance. Trim a narrow sliver from the rubbing edge, round the corner, and test again. Do not cut the hinge itself unless the piece will be removed and reattached.
A torn tab can be repaired with a paper patch. Cut a rectangle from matching paper, score it across the middle, and glue one half behind the movable piece and the other half behind the body. The patch should extend beyond the damaged area on both sides. Clear tape is faster, but it creates a slick crease that can separate from dusty construction paper and may remain visibly shiny. A paper patch blends into the design and accepts marker, though it needs drying time.
Repeated tearing at the same location signals a design problem rather than careless use. The attached part may be too heavy, the hinge may be too narrow, or the movement may exceed what the paper can tolerate. Reduce layered decorations on the part, widen the replacement tab, or limit the fold to one direction. Doubling the entire hinge with glue can make it stiffer rather than stronger; reinforcement should extend into the surrounding piece while preserving a flexible crease.
Warping occurs when wet media or excess liquid glue affects one side of the paper. Place the dry craft beneath a clean book for a short period, keeping foldable parts outside the pressed area so they are not flattened shut. Future versions can use glue stick, lighter marker application, or decoration on both sides to balance moisture. Paint adds vivid color but should dry fully before scoring because a heavy painted layer may crack across the fold.
Signs of a successful build are easy to observe: the base remains stable, tabs stay concealed, each part moves with light finger pressure, and the paper returns near its intended position without a white stress line forming. A whitening crease, stretched fibers, or a joint that grows looser after a few motions calls for reinforcement before further play. Reviewing another Cat paper craft with foldable features variation can offer a different tail or paw mechanism, but any new feature should be tested in scrap paper before altering the finished cat.
Frequently Asked Questions
What paper is best for a cat craft with moving parts?
Lightweight cardstock is dependable for the body, while construction paper works well for ears, paws, and tails. Very thin paper tears at tabs, and heavy board resists small folds.
How can children make a clean fold without a scoring tool?
Mark the fold in pencil, align a ruler with it, and press along the line using a craft stick or capped marker. The pressure should indent the paper without cutting it.
Why will the paper paws not move after gluing?
Glue may have reached the crease, or the paws may be rubbing against the body. Let the adhesive dry, inspect the hinge, and trim only the obstructing outer edge if more clearance is needed.
Can the cat be made without a template?
Yes. Build it from a large oval body, a circle head, triangle ears, rounded paw strips, and a curved tail. Add extra rectangles wherever folded attachment tabs are required.
How can a finished paper cat stand upright?
Fold a strip along the bottom of the body and glue it to a cardstock platform, or use a tent-fold body with the crease forming the back. Keep the moving parts balanced on both sides.
Conclusion
A durable moving cat depends more on hinge placement than elaborate decoration. Use a firm body, lighter movable pieces, broad tabs, and scored creases that remain free of adhesive. Decide whether the project should lie flat, stand, or close as a card before selecting the ear, paw, and tail mechanisms. Test each action with unglued pieces, then attach and check one joint at a time. If a feature rubs, buckles, or develops a pale stress line, correct the clearance or reinforce the tab before repeated use. Begin with two obvious movements, such as folding ears and inward-swinging paws; add an accordion or side-swinging tail only when the base remains stable. That measured approach produces a cat children can decorate freely while still preserving the folds that make it interactive.

Now retrieving an image set.
Amazon Basics Clear Thermal Laminating Sheets for Documents and Photos, 9 x 11.5-Inch, 2.8 mil, 200-Pack
$17.99 (as of September 18, 2026 22:40 GMT -04:00 - More infoProduct prices and availability are accurate as of the date/time indicated and are subject to change. Any price and availability information displayed on [relevant Amazon Site(s), as applicable] at the time of purchase will apply to the purchase of this product.)
Now retrieving an image set.
Rust-Oleum Painter's Touch 2X Ultra Cover Spray Paint, Gloss Black | Indoor and Outdoor Surfaces (Metal, Wood, Plastic), Fast Dry, Durable, Sprays from Any Angle, Comfort Tip, Oil Based
$5.98 (as of September 18, 2026 22:40 GMT -04:00 - More infoProduct prices and availability are accurate as of the date/time indicated and are subject to change. Any price and availability information displayed on [relevant Amazon Site(s), as applicable] at the time of purchase will apply to the purchase of this product.)
Now retrieving an image set.
Amazon Basics Cardstock Paper, 8.5" x 11", 65 lb/176 gsm, 96 Bright White, 250 Sheets
$10.63 (as of September 18, 2026 22:40 GMT -04:00 - More infoProduct prices and availability are accurate as of the date/time indicated and are subject to change. Any price and availability information displayed on [relevant Amazon Site(s), as applicable] at the time of purchase will apply to the purchase of this product.)
Now retrieving an image set.
Command 15 & 10 lb Assorted Picture Hanging Strips, 28 Pairs, SIOC | White Picture Hanging Strips, Damage-Free Wall Hangers for Frames, No Tools Required, Ideal for Decorating Apartments, Dorms
$13.99 (as of September 18, 2026 22:40 GMT -04:00 - More infoProduct prices and availability are accurate as of the date/time indicated and are subject to change. Any price and availability information displayed on [relevant Amazon Site(s), as applicable] at the time of purchase will apply to the purchase of this product.)
Now retrieving an image set.
FITTDYHE Fabric Glue Permanent, 60 ML Washable Clear Clothing Glue, Super Fabric Glue for Rhinestones, Patches, Clothes, Denim, Leather, Polyester, Fabrics, Doll Repair, Flannel, Cotton
$9.99 (as of September 18, 2026 22:40 GMT -04:00 - More infoProduct prices and availability are accurate as of the date/time indicated and are subject to change. Any price and availability information displayed on [relevant Amazon Site(s), as applicable] at the time of purchase will apply to the purchase of this product.)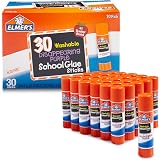
Now retrieving an image set.