
Spider craft supplies for supervised paper projects should include sturdy construction paper, child-appropriate scissors, washable glue, drawing tools, and preselected details that are large enough to handle safely. An adult should match cutting tasks to the child’s ability, control access to small decorations, and demonstrate where each of the eight legs attaches. Paper strips make lighter, easier-to-glue legs than bulky craft stems, while a glue stick usually creates less curling than wet glue. Prepare one sample spider, organize pieces in shallow containers, and pause before decorating so the body joints can set. Discard torn parts, dried glue fragments, and loose pieces that could be mouthed.
Choose Supplies for the Spider’s Structure
A successful paper spider needs a body that stays flat, legs that remain attached, and decorations that do not overpower the main shapes. Medium-weight construction paper is a practical default because it is easier for children to cut than cardstock but less likely to tear than thin printer paper. Black, brown, gray, purple, and orange all work; the choice of color has no effect on construction, so use what is already available rather than treating black paper as mandatory.
The body can be one large circle, two overlapping circles, or a folded paper shape. A single circle is simplest for children who are still learning where parts belong. Two circles introduce the abdomen-and-head arrangement without requiring a realistic spider diagram. Cardstock is useful for a hanging display or a spider that will carry several layered decorations, but its stiffness can frustrate a child using basic scissors. When cardstock is selected, an adult can pre-cut the body while leaving paper-strip legs and facial details for the child.
Leg material changes how the spider behaves. Straight paper strips produce a clean, flat result suitable for a bulletin board. Accordion-folded strips create movement and provide a repeated folding task, although narrow strips can rip at the creases. Pipe cleaners or craft stems bend easily, but their wire core and pointed cut ends require closer adult control and make them a weaker choice for children who mouth objects. Folded construction-paper strips avoid that concern and bond more reliably with ordinary paper glue.
Glue sticks work well for broad paper-to-paper contact because they apply a thin layer and reduce buckling. Washable liquid glue can hold layered cardstock, but excess moisture softens construction paper and lengthens drying time. If liquid glue is used, place a small amount in a shallow dish and apply it with a cotton swab rather than handing over a full bottle. Tape offers instant attachment, though visible tape can distract from the finished design and is difficult to reposition.
Decorative choices should remain secondary to the body and legs. Crayons, washable markers, paper dots, and large paper eyes are easier to manage than glitter, sequins, or tiny beads. Loose glitter spreads beyond the work surface and can transfer to hands and faces; drawn highlights or metallic paper scraps create sparkle with less cleanup. A practical supply plan for Spider craft supplies for supervised paper projects therefore favors paper-based details that can be counted, placed, and removed easily.
Match Cutting, Gluing, and Details to the Child
Supervision works best when the adult adjusts each task instead of taking over the entire spider. A child who can make short snips may cut fringe or separate pre-drawn leg strips but struggle to turn scissors around a circle. Another child may cut confidently yet squeeze far too much liquid glue. Divide the project by skill: prepare the demanding shapes in advance, then preserve meaningful choices such as leg position, eye count, color, pattern, and facial expression.
Scissors should fit the user’s hand and the material being cut. Child-sized scissors with blunt tips are appropriate for basic construction paper when the child can follow a stop-and-place-down instruction. Decorative-edge scissors require more hand strength and can catch on lightweight sheets. They may create appealing zigzag legs, but they are not a substitute for ordinary scissors during early cutting practice. An adult should handle utility knives, hole punches that require strong pressure, and any trimming performed while holding a piece in the air.
Glue quantity matters more than glue strength in a flat paper project. A thin coating across the end of a leg generally holds better than a large wet blob because the paper remains in contact with the body while drying. Ask the child to cover approximately a fingertip-length section at the top of each strip, press it under the body, and count slowly before releasing it. If the leg springs loose, add a small paper tab over the joint rather than repeatedly flooding the same area with glue.
Small embellishments deserve a deliberate decision. Flat paper circles can represent multiple eyes without introducing hard plastic pieces. Large adhesive-backed eyes may be suitable when an adult removes and disposes of the backing sheets, but they can still detach later. Any child likely to put materials in the mouth needs alternatives that cannot become loose, such as eyes drawn directly onto the body. The same reasoning applies to buttons, beads, pom-poms, and sequins: their visual appeal does not outweigh the need for active supervision and an age-appropriate setup.
Watch the child’s actions rather than relying only on a package age label. Repeatedly waving scissors, tasting glue, scattering small pieces, or leaving the seat with tools indicates that the activity should pause or be simplified. Replace loose features with markers, substitute torn paper for scissor work, or assemble a shared spider with the adult managing the tools. Signs that the level is appropriate include controlled tool placement, deliberate glue use, and the ability to stop when prompted.
Prepare an Efficient Supervised Work Area
A well-arranged table lets the adult observe the risky actions without interrupting every creative choice. Place scissors and glue on the adult-facing side, keep unused pieces out of immediate reach, and give each child a defined work surface. A washable mat, tray, or large scrap sheet catches glue and makes small offcuts visible. Deep supply bins are less useful during assembly because children may reach across tools or empty the contents while searching for one item.
Prepare components by function rather than color. One shallow container can hold body shapes, another can hold leg strips, and a third can hold large decorative pieces. Count at least eight leg strips per spider, plus one or two replacements for tears. Pre-sorting prevents a common interruption: discovering halfway through assembly that the remaining strips differ greatly in width or are too short to attach. Consistent strips also make counting the legs easier.
A sample spider should show the construction sequence without becoming a model that every child must copy. Leave room for variation in eye number, markings, and leg bends. The adult can point to the sample joint to show that legs attach underneath the body, then move the sample aside so the child is not simply trying to reproduce every mark. For a group, display one unfinished sample with a visible leg tab; the attachment method is more useful than a polished final appearance.
Sequence the table to separate wet and dry work. Begin with body decoration if markers will be used, attach the legs next, and add raised details only after the joints hold. Coloring over wet glue can tear softened paper, while flipping a newly assembled spider to decorate its front may shift every leg. A nearby drying area should be flat, labeled, and beyond active elbows. Hanging a damp spider immediately often causes the lower legs to slide or the body to curl.
Before children arrive, perform a short inventory: test the scissors on the chosen paper, check that glue sticks have not dried out, remove sharp scraps, and confirm that cleanup materials are within reach. During the activity, return tools to the same location after each step. Afterward, count reusable tools and sweep the tabletop by hand and sight before removing the protective sheet. This routine is especially useful when following Spider craft supplies for supervised paper projects with several children sharing supplies.
Use an 8-Leg Assembly Checklist
The clearest assembly method builds the spider from large shapes to small details. This order gives the child an understandable structure and reduces the chance that eyes, patterns, or glued decorations will be crushed while the legs are attached. It also creates natural stopping points: the adult can inspect cutting before glue appears, then inspect the joints before the spider moves to the drying area.
- Select the body. Use one sturdy circle or two overlapping shapes, and write the child’s name on the back before assembly.
- Prepare eight legs. Cut, tear, or provide eight similar paper strips; count them aloud and place four on each side.
- Shape the strips. Leave them straight, make one knee fold, or accordion-fold them without creasing the attachment ends.
- Test the layout. Arrange the legs under the body without glue and correct crowded or uneven placement.
- Attach one side. Apply a thin layer of adhesive to four strip ends, press the body over them, and allow the joints to grip.
- Attach the other side. Repeat with the remaining four strips while keeping glue away from the free ends.
- Add the face and markings. Draw features or attach large paper details only after the body can be lifted without losing a leg.
- Dry and inspect. Leave the spider flat, then check for loose decorations, exposed sticky areas, and torn joints.
Testing the layout before gluing prevents several predictable problems. Eight wide strips can consume most of a small body’s underside, leaving no room between joints. Narrowing the strips, staggering their positions, or choosing a larger body solves the structural issue more effectively than piling on extra adhesive. Legs also look more distinct when they angle away from one another instead of forming a dense fringe.
If a joint fails, identify why before repairing it. A clean strip that detached may need a broader glued area. A soaked, wrinkled strip should be replaced because more glue will weaken it further. A leg attached over crayon may not grip well, since wax can interfere with paper adhesive; turn the piece over or add a clean paper tab. Staples provide a strong mechanical connection but introduce sharp metal and are unnecessary for most supervised paper spiders.
The finished spider is ready to display when the body stays flat during a gentle lift, all eight legs remain attached, and no decorative part falls away when lightly touched. A spider intended for a wall can be mounted on a contrasting sheet to support delicate legs. A spider intended for pretend play needs fewer raised details and reinforced paper joints, but even then it should be treated as a paper creation rather than a durable toy.
Frequently Asked Questions
What paper is best for a child’s spider project?
Medium-weight construction paper balances easy cutting with enough strength for eight glued legs. Use cardstock for the body only when extra stiffness is needed or an adult will do the difficult cutting.
Can children use pipe cleaners for spider legs?
Pipe cleaners can work under close adult supervision, but their wire cores and cut ends require more control than folded paper strips. Paper is preferable when children mouth objects or need a fully flat result.
Is a glue stick or liquid glue better?
A glue stick is usually cleaner for construction-paper joints and causes less curling. Use a small amount of washable liquid glue for heavier layers, then keep the spider flat until dry.
How can an adult prepare the project without removing creativity?
Pre-cut only the shapes beyond the child’s current ability. Let the child choose colors, arrange legs, draw features, count eyes, and decide whether the legs stay straight or folded.
Why do paper spider legs keep falling off?
Common causes include tiny attachment areas, excess wet glue, waxy crayon beneath the joint, and moving the spider before it sets. Use clean strip ends, thin adhesive coverage, firm pressing, and flat drying.
Conclusion
Prioritize a stable paper body, eight manageable leg strips, controlled adhesive use, and decorations suited to the child’s behavior and dexterity. Medium-weight construction paper and a glue stick handle most tabletop versions without unnecessary complexity. Prepare demanding cuts beforehand, but leave arrangement, counting, drawing, folding, and color decisions to the child whenever those tasks can be completed safely.
Before starting, test the tools and divide supplies into shallow containers. During assembly, dry-fit the legs, attach four per side, and keep the spider flat while its joints set. Finish by checking every attachment and removing loose scraps or decorations. If the project repeatedly tears, curls, or sheds parts, simplify the materials rather than adding more glue: wider paper joints, fewer raised details, and adult-cut body shapes usually produce a sturdier result.

Now retrieving an image set.
Handcraft Blends Peppermint Essential Oil - Huge 4 Fl Oz | Steam Distilled, Premium Grade for Diffuser, Aromatherapy, Skin, Massage, Candle & Soap Making Fragrance
$9.99 (as of October 2, 2026 22:55 GMT -04:00 - More infoProduct prices and availability are accurate as of the date/time indicated and are subject to change. Any price and availability information displayed on [relevant Amazon Site(s), as applicable] at the time of purchase will apply to the purchase of this product.)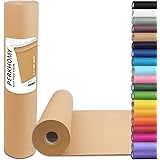
Now retrieving an image set.
PerkHomy Brown Kraft Paper Roll 17.5" x 1,200" (100') for Gift Wrapping Bulletin Board Craft Art Bouquet Flower Packing Valentines Easel Moving Shipping Floor Poster Covering Table 70GSM 50LB
$7.49 (as of October 2, 2026 22:55 GMT -04:00 - More infoProduct prices and availability are accurate as of the date/time indicated and are subject to change. Any price and availability information displayed on [relevant Amazon Site(s), as applicable] at the time of purchase will apply to the purchase of this product.)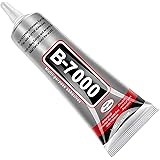
Now retrieving an image set.
B7000 Jewelry Glue for Making, FITTDYHE 1PCS 50ML/1.69 fl oz Clear Adhesive for Rhinestone, Fabric, Multipurpose Super B-7000 for Phone Repair, Nail Art, Wood, Glass, Charms
$5.99 (as of October 2, 2026 22:55 GMT -04:00 - More infoProduct prices and availability are accurate as of the date/time indicated and are subject to change. Any price and availability information displayed on [relevant Amazon Site(s), as applicable] at the time of purchase will apply to the purchase of this product.)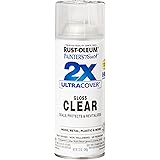
Now retrieving an image set.
Rust-Oleum Painter's Touch 2X Ultra Cover Spray Paint, Gloss Clear | Indoor and Outdoor Surfaces (Metal, Wood, Plastic), Fast Dry, Durable, Sprays from Any Angle, Comfort Tip, Oil Based
$5.98 (as of October 2, 2026 22:55 GMT -04:00 - More infoProduct prices and availability are accurate as of the date/time indicated and are subject to change. Any price and availability information displayed on [relevant Amazon Site(s), as applicable] at the time of purchase will apply to the purchase of this product.)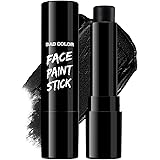
Now retrieving an image set.
BADCOLOR Black Cream-Blendable Face Body Paint Stick for Adults Children Eye Black Softball Football Baseball Sports , Non-Toxic Hypoallergenic for Halloween SFX Makeup Cosplay Joker Costume Parties
$5.99 (as of October 2, 2026 22:55 GMT -04:00 - More infoProduct prices and availability are accurate as of the date/time indicated and are subject to change. Any price and availability information displayed on [relevant Amazon Site(s), as applicable] at the time of purchase will apply to the purchase of this product.)
Now retrieving an image set.