
An easy preschool snowman craft from paper shapes can be assembled with two white circles, a hat, a triangular nose, and two stick-like arms on sturdy background paper. Adults should prepare simple shapes in advance when children are not ready to cut independently, while preschoolers choose the placement, apply glue, and add facial details. Arrange every piece without glue first so the body overlaps neatly and the face remains visible. Use a thin layer of washable glue to limit sliding and wrinkling. Large pieces, rounded corners, and supervised handling make the activity more manageable for young children than designs filled with tiny decorations.
Choose Six Shapes Preschoolers Can Handle
A six-piece snowman keeps the construction understandable while leaving meaningful choices to the child. The basic set consists of two white circles for the body, one dark rectangle for the hat brim, one dark square or short rectangle for the hat crown, one orange triangle for the nose, and two brown rectangles for arms. The arms make the total seven physical cutouts if they are counted separately, but they represent one repeated shape in the six-part design. Eyes, buttons, and a mouth can be drawn after assembly rather than cut as tiny paper pieces.
The lower body circle should be noticeably larger than the head. A circle roughly the width of an adult hand works well for the base, while the head can be about two-thirds that size. Exact measurements are unnecessary. The visible size difference helps a preschooler decide which circle belongs on the bottom, and a slight overlap creates a connected figure rather than two unrelated white disks.
Construction paper gives the shapes enough body to be picked up, rotated, and repositioned. Thin printer paper is usable, but it curls more quickly when covered with liquid glue. Cardstock is sturdier, although very stiff pieces may lift at the edges unless glue reaches the perimeter. For most preschool tables, construction paper on a medium-weight blue, gray, or pale purple background offers a practical balance between easy handling and reliable adhesion.
Large shapes matter more than perfect geometry. Hand-cut circles with small bumps still read clearly as snowballs, and an uneven triangle still works as a carrot nose. Templates can make group preparation faster, but tracing every piece to produce identical snowmen adds adult labor without improving the child’s experience. A useful test is whether the child can lift each piece from a flat table without scraping at it repeatedly.
Avoid loose sequins, beads, pom-poms, or very small paper dots when children still mouth objects or struggle with precise placement. Drawn details preserve the visual result without introducing hard-to-control parts. Readers planning a related Easy preschool snowman craft from paper shapes activity for older preschoolers can add larger paper buttons, but the core version works better when the major silhouette comes first.
Prepare the Pieces and Work Area
Preparation should remove avoidable frustration without removing the child’s decisions. Adults can cut the circles and narrow arm pieces before the activity, especially for younger preschoolers who are still learning to open and close scissors. Children with established scissor control may cut the hat from rectangles or trim a pre-drawn triangle, provided an adult supervises and supplies age-appropriate scissors.
Place one complete set of shapes on a shallow tray or sheet of contrasting paper. White circles disappear visually on a white tabletop, and dark hat pieces can blend into a dark tray. Separating sets is especially useful in a classroom because pieces otherwise migrate between children, leaving one snowman with three arms and another with none. Write a child’s name on the back of the background before glue appears.
Set out washable glue in a small cup with a short-handled brush, or use a glue stick that turns smoothly without requiring strong pressure. A squeeze bottle offers valuable hand-strength practice, but a large blob can soak paper, make pieces drift, and lengthen drying time. If children use bottles, demonstrate several small dots or a narrow line rather than covering the entire shape. Glue sticks are cleaner and faster; brushed glue makes the amount easier for an adult to limit during a group activity.
A compact setup checklist prevents interruptions:
- Background: one sturdy sheet in a color that contrasts with white.
- Cutouts: two circles, two hat parts, one nose, and two arms.
- Tools: washable glue, a dark crayon or marker, and child scissors if appropriate.
- Cleanup: a damp cloth, scrap-paper glue mat, and flat drying space.
Lay the shapes on the background without adhesive before calling children to the table. This quick check reveals missing pieces and shows whether the snowman fits. A common preparation error is making the base so large that the hat extends beyond the page. Leave room above the head and on both sides for the arms. The activity is working well when all pieces are visible, easy to grasp, and able to fit without crowding.
Assemble the Snowman in a Child-Friendly Order
Assembly is easiest when preschoolers build from the largest shape to the smallest. Ask the child to place the large circle near the lower half of the background, then position the smaller circle so it overlaps the top edge. Do not glue immediately. Dry placement lets the child test orientation, correct a circle that is too high, and understand how separate shapes form one recognizable snowman.
Once the body position works, lift only the large circle, apply a thin layer of glue, and return it to its place. Repeat with the head. Handling one piece at a time preserves the layout better than clearing the entire page and asking a young child to reconstruct it from memory. Press each circle with a flat palm for a few seconds rather than rubbing it back and forth, which can smear glue and wrinkle damp paper.
Add the hat brim across the upper part of the head, then place the hat crown directly above it. Preschoolers may put the hat at an angle or leave a small gap between the two dark pieces. Those variations do not need correction unless the parts are falling off the page. The goal is to connect basic shapes with a familiar image, not to reproduce an adult sample exactly.
The orange triangle belongs near the center of the head with its point facing either side. Present that as an observation rather than a test: a sideways point resembles a carrot, while an upward point changes the expression. Arms can extend from the large circle or from the overlap between the circles. If narrow paper arms keep curling, tuck one end slightly beneath the body before gluing, or replace them with lines drawn after the body dries.
Finish with eyes, buttons, and a mouth drawn in crayon. Crayons are less likely than wet markers to tear glue-softened paper, although markers create darker details after the collage has dried. Adults should resist redrawing a child’s features for symmetry. A face with different-sized eyes still demonstrates intentional placement. For another version of an Easy preschool snowman craft from paper shapes, invite children to count three buttons or compare the two circle sizes while they work, keeping the conversation connected to the materials rather than turning the craft into a quiz.
Adapt the Activity Without Taking Over
The best adaptation changes the physical demand while preserving the child’s authorship. A younger preschooler may need fully prepared cutouts and glue applied by an adult, but can still decide where every shape goes. An older child can trace circles, cut the hat, or create a scarf from a long rectangle. Giving every child the same adult-finished model can make the display uniform, yet it reduces opportunities to rotate pieces, judge space, and recover from unexpected placement.
For a child who finds sticky textures uncomfortable, choose a glue stick or let the child direct an adult where to place small glue dots. A loop of removable tape on the back of each shape can support a dry arrangement before permanent gluing. If picking flat pieces up is difficult, bend a tiny tab at one edge for grasping and flatten it once the shape is positioned. These changes address handling barriers without simplifying the snowman beyond recognition.
Group settings need a different pace from one-on-one crafting. Put each child’s set in a labeled envelope, demonstrate only the next one or two actions, and keep completed pages on a separate drying surface. Showing the entire sequence at once can lead children to rush toward the face details before the body is attached. In a mixed-age group, let confident cutters prepare rectangles while an adult handles circles, which demand more continuous scissor control.
Decoration should remain optional and physically manageable. A broad paper scarf, a large semicircle pocket, or stamped snowflakes can extend the activity without filling the table with tiny components. Cotton batting creates texture but can cling to wet fingers and obscure the underlying shapes. Use it only when sensory exploration is part of the plan and close supervision is available. Glitter adds cleanup and may transfer long after the collage dries, so crayon snow or white paint dots are usually more practical.
Signs that the design is too demanding include repeated requests for adults to place every piece, torn paper from excessive repositioning, or loss of interest before the body is complete. Reduce the number of optional decorations, enlarge the cutouts, or split construction and drawing into two short sessions. Adaptation succeeds when the child can make visible choices and complete most placement actions, even if an adult cuts, steadies the page, or controls the glue.
Check the Finished Snowman and Let It Dry
A brief finishing check prevents loose pieces without turning the child’s collage into an adult correction project. Look for dry corners, arm ends that have not made contact with the background, and hat pieces extending beyond the page. Lift only an unsecured edge, add a small amount of glue underneath, and press it flat. Do not peel off a firmly attached shape merely because it is tilted or off-center.
Wet paper often looks wrinkled immediately after construction. Adding more glue will usually make that problem worse. Move the collage to a flat surface and allow it to dry undisturbed. If the page begins curling, wait until the glue is no longer wet to the touch, then place a clean sheet of paper and a light book over it. Covering a freshly glued collage too soon can make pieces stick to the protective sheet or slide under pressure.
Display timing depends on the adhesive amount and paper thickness rather than a fixed number of minutes. The snowman is ready to move when the shapes no longer shift under a gentle touch, the background feels dry, and no milky glue remains visible at the edges. Pages made with glue sticks can often be handled sooner than heavily brushed collages. Keep them flat until fully settled instead of clipping damp paper vertically, which may pull the larger circle downward.
Use the finished picture to notice the process rather than judge neatness. Ask which shape became the nose, which circle is larger, or why the child placed the arms in a certain direction. Those prompts connect the visual result to shape recognition and decision-making. Save a photo if the original will be sent home, and place the child’s name beside the work rather than across the front. A successful snowman is secure enough to display and clearly reflects the child’s choices, even when its circles overlap unevenly.
Frequently Asked Questions
What age is this paper-shape snowman suitable for?
The prepared-shape version generally suits preschool-aged children. Adjust the task to the child’s abilities: adults can cut pieces for beginners, while children with safe scissor control can cut simple rectangles and triangles under supervision.
What can replace liquid glue?
A washable glue stick reduces dripping, paper wrinkles, and drying time. Double-sided adhesive can support children who avoid sticky textures, although an adult may need to prepare the adhesive.
Do the circles need to be perfectly round?
No. Slightly uneven circles still form a recognizable snowman and show that the pieces were handmade. Prioritize cutouts that are large, sturdy, and easy for the child to grasp.
How can several children do this activity at once?
Place one complete shape set in each labeled tray or envelope, provide shared glue in controlled amounts, and reserve a separate flat surface for drying. Demonstrate the body before distributing optional decorations.
What should I do if the glued paper wrinkles?
Stop adding adhesive and let the collage dry flat. Once it is dry to the touch, cover it with clean paper and place a light book on top to reduce curling.
Conclusion
Keep the snowman recognizable, manageable, and open to the child’s decisions. Two generously sized circles, a two-part hat, a triangle nose, and simple arms provide enough structure without turning placement into a precision task. Prepare only the cutting that exceeds the child’s current control, test the layout before gluing, and use less adhesive than the paper appears to need.
Watch the child’s handling rather than comparing the result with an adult sample. Enlarging pieces, changing the glue method, or removing optional decorations is more useful than repeatedly correcting placement. After the collage is secure, let it dry flat and invite the child to identify the shapes and explain the choices. The finished work should remain visibly theirs: tilted hats, uneven circles, and unexpected expressions are acceptable when the pieces hold and the child participated meaningfully.
Now retrieving an image set.
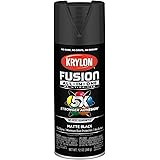
Krylon Fusion All-In-One, Matte, Black, 12 oz
$6.98 (as of September 18, 2026 22:40 GMT -04:00 - More infoProduct prices and availability are accurate as of the date/time indicated and are subject to change. Any price and availability information displayed on [relevant Amazon Site(s), as applicable] at the time of purchase will apply to the purchase of this product.)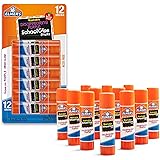
Now retrieving an image set.
Elmer's Disappearing Purple School Glue Sticks, Washable, 6 Grams, 12 Count - Arts & Crafts, Poster, Projects, Back to School, #1 Teacher Brand
$4.59 (as of September 18, 2026 22:40 GMT -04:00 - More infoProduct prices and availability are accurate as of the date/time indicated and are subject to change. Any price and availability information displayed on [relevant Amazon Site(s), as applicable] at the time of purchase will apply to the purchase of this product.)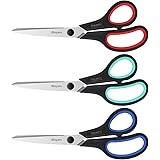
Now retrieving an image set.
iBayam 8.5" Heavy Duty Scissors All Purpose for Office School Crafts Sewing | 3-Pack, Ultra-Sharp 2.5mm Stainless Blades, Comfort Grip Handles, Left & Right Handed – Teacher Desk & Classroom Must-Have
$9.99 (as of September 18, 2026 22:40 GMT -04:00 - More infoProduct prices and availability are accurate as of the date/time indicated and are subject to change. Any price and availability information displayed on [relevant Amazon Site(s), as applicable] at the time of purchase will apply to the purchase of this product.)
Now retrieving an image set.
100% Pure Tea Tree Essential Oil for Skin & Diffuser - 4 Fl Oz | 100% Pure Tea Tree Oil for Blemish-Prone Skin & Flaky Scalp, suits Oily & Combination Skin, Daily Face Wash & Scalp Care
$9.99 (as of September 18, 2026 22:40 GMT -04:00 - More infoProduct prices and availability are accurate as of the date/time indicated and are subject to change. Any price and availability information displayed on [relevant Amazon Site(s), as applicable] at the time of purchase will apply to the purchase of this product.)
Now retrieving an image set.
Handcraft Blends Peppermint Essential Oil - Huge 4 Fl Oz | Steam Distilled, Premium Grade for Diffuser, Aromatherapy, Skin, Massage, Candle & Soap Making Fragrance
$9.99 (as of September 18, 2026 22:40 GMT -04:00 - More infoProduct prices and availability are accurate as of the date/time indicated and are subject to change. Any price and availability information displayed on [relevant Amazon Site(s), as applicable] at the time of purchase will apply to the purchase of this product.)
Now retrieving an image set.