
Building craft ideas for preschoolers with blocks work best when children combine large, age-appropriate blocks with simple add-ons such as paper shapes, washable tape, cardboard, and reusable figures. Offer one clear building prompt, limit the available pieces, and leave room for children to redesign structures that lean, collapse, or fail to fit their play plan. Strong projects include homes, bridges, animal habitats, vehicles, towers, and neighborhood scenes because each can be built, decorated, tested, and rebuilt. Check block size, loose parts, floor space, and adhesive use before starting, and treat experimentation—not a perfectly matched model—as the central outcome.
Choose Blocks and Add-On Supplies That Fit Preschool Use
A useful block activity depends more on compatible materials than on an elaborate finished example. Preschoolers need blocks they can grasp, place, remove, and compare without constant adult correction. Large wooden unit blocks, chunky interlocking blocks, foam blocks, and sturdy cardboard blocks can all work, but they behave differently. Wooden pieces provide weight and stable edges, interlocking pieces hold moving parts together, foam pieces are quiet and forgiving, and cardboard blocks suit large floor structures.
Match the block type to the intended action. A child making a tall skyline benefits from broad bases and rectangular pieces, while a vehicle needs blocks that connect firmly enough to survive movement. Foam blocks may be pleasant for a soft indoor tower but frustrating for a narrow bridge because light pieces shift easily. Mixing every block style at once can also create incompatible scales: a tiny figure beside an oversized doorway may distract a child who is trying to make the scene function.
Add-ons should extend the construction rather than bury it under decoration. Precut paper doors, windows, leaves, road signs, and animal features give children recognizable choices without requiring difficult cutting. Painter’s tape or another easily removable, surface-appropriate tape can mark roads and boundaries. Cardboard tubes, clean cartons, fabric scraps, craft sticks, and reusable toy figures can suggest functions such as tunnels, roofs, flags, or occupants. Adults should inspect every item for sharp edges, damage, and suitability for the children present. Small parts are inappropriate when children may still mouth objects or when younger siblings share the space.
Keep liquid glue away from reusable blocks unless permanent alteration is intended. Washable tape loops, paper sleeves, and props that rest against a structure preserve the blocks for later projects. Stickers can leave residue, while tight rubber bands may snap or be hard for small hands to position. A paper band wrapped around a block can become a windowed building front without changing the block itself.
A practical supply check should cover four points:
- Scale: Can the child hold and position each piece comfortably?
- Compatibility: Do blocks, figures, and props fit the same scene?
- Condition: Are all surfaces clean, intact, and free from sharp damage?
- Reuse: Can decorations be removed without ruining the blocks?
The common mistake is offering a crowded tray because more choices appear more creative. Too many shapes and accessories can make selecting harder and cleanup less manageable. Begin with one block set and two or three categories of add-ons. Extra supplies can be introduced when a child identifies a need, such as requesting a roof, a longer road, or food for an animal habitat.
Prepare a Building Area That Encourages Independent Choices
The workspace should make construction, pretend play, and rebuilding possible without forcing children to protect a fragile display. A firm floor or low table provides a predictable base. Floor building is usually better for roads, neighborhoods, and wide habitats; a table defines a smaller boundary for compact homes or figure scenes. Place the activity outside a busy walkway so an accidental foot or swinging door does not repeatedly destroy the work.
Present a simple invitation rather than a complete model to copy. A photo of a real bridge, a paper animal waiting for a home, or a toy vehicle beside a strip of tape gives the activity a purpose while leaving structural decisions open. An adult-built example can unintentionally become the standard children think they must reproduce. If an example is needed, make it small and unfinished, then ask what the structure still requires.
Sorting supplies into shallow containers reduces searching. One tray might hold rectangular blocks, another paper details, and a third reusable figures. Keep the total quantity within the physical boundary of the work area. A preschooler building on a small tray does not need a full bin emptied beside it. Limiting the first selection makes relationships between length, height, balance, and available space easier to notice.
For a mixed-age group, create separate access levels. Larger blocks and broad paper pieces can remain freely available, while small connectors or detailed decorations stay at an adult-supervised station if they are appropriate for some children but not others. Supervision remains necessary even with familiar supplies; labeling a product for a broad age range does not account for an individual child’s mouthing habits, impulse control, or ability to use it as intended.
A productive setup for Building craft ideas for preschoolers with blocks can follow this sequence:
- Define a floor mat, tray, or table as the construction boundary.
- Set out one block family and a modest number of pieces.
- Add one visual prompt and two types of decorative or play props.
- Reserve tape, cutting, or smaller accessories for supervised use.
- Provide a nearby basket for dismantling and sorting at the end.
Watch how children enter the activity. Repeatedly asking where supplies belong suggests the layout is unclear. Constant block collisions suggest the area is too tight. Wandering away before placing pieces may mean the prompt is too abstract or the choices are excessive. Successful preparation is visible when a child can find pieces, begin a structure, and change direction without waiting for an adult to manage every step.
Six Block Projects With Clear Play Possibilities
The strongest project prompts give a structure a job. A tower that only needs to be tall may hold attention briefly, whereas a tower with a paper observation deck, a figure to accommodate, or a stability test invites decisions. The following six projects use familiar preschool themes while preserving room for different solutions.
1. Window-and-Door Houses
Build a home from rectangular blocks, then add removable paper windows, doors, roof shapes, or address symbols. Place a toy person or animal nearby and ask whether it can enter, sleep, and look outside. This turns decoration into functional thinking. If the doorway is blocked or the roof falls inward, the child has a concrete reason to revise the arrangement.
2. Tested Bridges
Set two block supports apart and span them with a longer piece, stiff cardboard strip, or connected blocks. Test the bridge with a lightweight toy vehicle. Begin with a narrow gap, then increase it if the design remains stable. The useful comparison is not whose bridge is tallest; it is how different support positions change the span. Avoid loading a structure with heavy objects or positioning it where falling pieces could strike feet.
3. Animal Habitats
Invite a child to choose one animal figure and construct what it needs: a boundary, shelter, water area, shade, or path. Blue paper can represent water, green fabric can suggest grass, and cardboard tubes can become caves. A polar animal, farm animal, and woodland animal should not automatically receive identical homes. The conversation connects construction choices with the child’s existing knowledge without turning play into a fact quiz.
4. Moving Block Vehicles
Chunky interlocking blocks are usually more practical than loose unit blocks for vehicles that will be pushed. Children can add paper headlights, cargo signs, wings, or passenger pictures. If only loose blocks are available, make a parked bus, fire engine, or train scene instead of promising a model that can move intact. Choosing between a movable build and a stationary representation prevents predictable frustration.
5. Neighborhood Roads
Use removable floor tape to mark a short road, intersection, or circular route, then construct buildings alongside it. Add paper signs, trees, parking spaces, or a bridge. Start with one street rather than a sprawling town. A compact route allows a preschooler to notice whether vehicles fit around corners and whether entrances face the road. More buildings can be added after the route works.
6. Story Towers
Assign each level of a broad tower a character, event, color, or location from a familiar story. Paper character pictures can rest beside the relevant level instead of being attached. Unlike a conventional height challenge, this project gives stacking an order and makes retelling visible. Keep the tower below the child’s face and build on the floor if falling pieces are likely.
Each option can be simplified or expanded. Beginners may place paper details on a low wall; children ready for a longer challenge can connect several structures into a scene. A project is working when the child uses the construction in play, explains a choice, tests a part, or voluntarily changes it. A polished appearance is not the measure. For additional variations, the supply pairings in Building craft ideas for preschoolers with blocks can be adjusted to the block set already available rather than requiring a new kit.
Guide Testing and Redesign Without Taking Over
Adult guidance is most useful when it helps children notice what happened rather than supplying the repair. When a bridge collapses, pause before rebuilding it. Describe the visible event—one support moved, the center piece did not reach, or the vehicle was wider than the roadway—and invite the child to choose a next attempt. Concrete observations give preschoolers usable information; broad praise or criticism does not reveal what to change.
Questions should refer to the structure in front of the child. “Where could the animal enter?” is easier to act on than “How can you improve it?” Other productive prompts include “Which piece could make the base wider?” and “What happened when the truck reached the corner?” Ask one question, then allow time for physical experimentation. A stream of adult prompts can turn child-led play into an oral test.
Balance challenge against frustration. If a child has made several unsuccessful attempts, reduce one demand rather than finishing the build. Move the bridge supports closer, offer a broader foundation piece, remove an incompatible connector, or hold a paper detail while the child attaches it. This preserves ownership while making the problem manageable. Conversely, a child who completes a structure quickly may be ready to add a second occupant, connect two buildings, or redesign for a larger vehicle.
Common adult interventions often create the very problem they are meant to prevent. Correcting symmetry can replace the child’s plan with an aesthetic preference. Insisting that roofs, windows, or habitats look realistic can narrow symbolic play. Treating every collapse as a failure discourages the testing that reveals how weight and support interact. Safety limits should remain firm, but visual differences usually do not need correction.
Use observable signs to decide what to try next. A structure that repeatedly falls in the same direction may need a wider base or lighter top. Decorations that will not stay attached call for a paper sleeve, folded stand, or supervised tape tab rather than more glue. Arguments over special pieces suggest duplicates, turn-taking, or separate construction zones may be needed. If children only scatter blocks, reduce the quantity and provide a more specific role, such as building one garage for a waiting car.
Documenting with a quick photo before cleanup can preserve the child’s idea without keeping the structure indefinitely. Ask the child what the photo should show or what changed between attempts. Then dismantle and sort together, checking that reusable blocks are free of tape and that damaged accessories are discarded. This closing routine makes testing, revision, and reset part of the activity rather than framing cleanup as an unrelated interruption.
Frequently Asked Questions
What blocks are easiest for preschool building projects?
Large wooden, foam, cardboard, or chunky interlocking blocks are generally easiest to grasp and arrange. Choose intact pieces that suit each child's abilities and avoid small components when mouthing is a concern.
Should decorations be glued directly onto blocks?
Usually not. Removable paper sleeves, freestanding props, or supervised use of surface-appropriate tape preserve reusable blocks and avoid glue residue.
How many blocks should be offered at one time?
Offer enough for the planned structure without emptying an entire collection. A limited selection reduces visual clutter; add more when the child can explain what size or shape is missing.
What should an adult do when a preschooler's structure falls?
Name what visibly shifted, then let the child choose another piece or position. If frustration rises, simplify one part of the challenge instead of rebuilding everything for the child.
Can these activities work with a mixed-age group?
Yes, provided the materials suit the youngest participants or smaller accessories remain in a separately supervised area. Use broad shared prompts while allowing each child to build at a different level of complexity.
Conclusion
Begin with a compatible block set, a defined workspace, and a prompt that gives the structure a practical role. Houses, bridges, habitats, vehicles, roads, and story towers succeed when children can decorate them, use them in play, notice a problem, and revise their choices. Prioritize large manageable pieces, removable add-ons, safe placement, and close supervision appropriate to the children present.
For the next session, select one project and offer fewer accessories than you think are necessary. Watch whether children can begin independently and whether the structure supports continued play. Add supplies only in response to a visible need. When something fails, describe the movement or mismatch instead of correcting the design. That approach keeps the blocks reusable and makes the child’s planning, testing, and rebuilding the meaningful part of the project.
Now retrieving an image set.
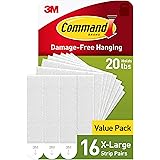
Command 20 lb X-Large Picture Hanging Strips, 16 Pairs White Command Strips Heavy Duty Picture Hanger
$10.39 (as of October 1, 2026 22:48 GMT -04:00 - More infoProduct prices and availability are accurate as of the date/time indicated and are subject to change. Any price and availability information displayed on [relevant Amazon Site(s), as applicable] at the time of purchase will apply to the purchase of this product.)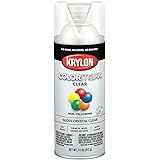
Now retrieving an image set.
Krylon K05515007 COLORmaxx Acrylic Clear Finish for Indoor/Outdoor Use, Gloss Crystal Clear , 11 Ounce (Pack of 1)
$4.48 (as of October 1, 2026 22:48 GMT -04:00 - More infoProduct prices and availability are accurate as of the date/time indicated and are subject to change. Any price and availability information displayed on [relevant Amazon Site(s), as applicable] at the time of purchase will apply to the purchase of this product.)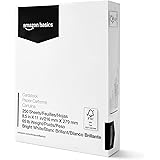
Now retrieving an image set.
Amazon Basics Cardstock Paper, 8.5" x 11", 65 lb/176 gsm, 96 Bright White, 250 Sheets
$10.63 (as of October 1, 2026 22:48 GMT -04:00 - More infoProduct prices and availability are accurate as of the date/time indicated and are subject to change. Any price and availability information displayed on [relevant Amazon Site(s), as applicable] at the time of purchase will apply to the purchase of this product.)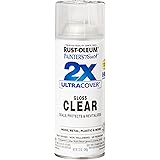
Now retrieving an image set.
Rust-Oleum Painter's Touch 2X Ultra Cover Spray Paint, Gloss Clear | Indoor and Outdoor Surfaces (Metal, Wood, Plastic), Fast Dry, Durable, Sprays from Any Angle, Comfort Tip, Oil Based
$5.98 (as of October 1, 2026 22:48 GMT -04:00 - More infoProduct prices and availability are accurate as of the date/time indicated and are subject to change. Any price and availability information displayed on [relevant Amazon Site(s), as applicable] at the time of purchase will apply to the purchase of this product.)
Now retrieving an image set.
Crayola Air Dry Clay (5lbs), Teacher Supplies, Natural White Modeling Clay for Kids, Sculpting Material, Bulk Craft Supplies for Art Classrooms
$13.58 (as of October 1, 2026 22:48 GMT -04:00 - More infoProduct prices and availability are accurate as of the date/time indicated and are subject to change. Any price and availability information displayed on [relevant Amazon Site(s), as applicable] at the time of purchase will apply to the purchase of this product.)
Now retrieving an image set.