
Make this paper bird craft by folding a circle into a semicircle body, shaping smaller folds into wings and a tail, and attaching a triangular beak near the curved edge. A crisp center crease keeps the bird balanced, while thin glue lines prevent the layered shapes from buckling or sliding. Children can change the wing angle, tail spread, and color arrangement without altering the basic assembly plan. Use child-safe scissors when pieces must be trimmed, supervise small decorations, and let wet glue set before lifting the bird.
Choose Paper and Prepare the Folded Shapes
Medium-weight construction paper gives the body enough stiffness to hold a crease without making the smaller parts difficult to fold. Printer paper is easier for young children to crease, but a finished bird made from it may droop when hung. Cardstock has the opposite tradeoff: it produces a firm body yet resists tight folds and can spring open unless each crease is pressed carefully. For a first attempt, use construction paper for the body and lighter paper for the beak, wings, and tail.
The design is built from familiar geometry rather than detailed drawing. A large circle becomes the body when folded in half. Two smaller circles or ovals become layered wings, a square folded diagonally makes a triangular beak, and narrow rectangles can be folded into tail feathers. These parts do not need to be mathematically exact. They do need enough difference in size to remain visible after assembly. If the wing is almost as large as the body, it hides the bird’s silhouette; if it is tiny, the folded detail disappears.
Prepare one large body circle, two matching wing shapes, one small square for the beak, and two or three tail strips. A cup or round lid can serve as a tracing tool for the body. Adults may pre-cut the pieces for children who are still developing scissor control. Older children can trace and cut their own shapes, accepting slight irregularities as part of the handmade result. The related Paper bird craft using simple folded shapes activity can also be prepared as individual supply sets when several children are working at once.
Color choices affect how clearly the folded construction reads. A contrasting wing makes the layered edge easy to see, while a beak in yellow, orange, or another bright color remains distinct from the face. Patterned paper works best as an accent rather than the body because a busy print can obscure the eye, crease, and overlapping parts. Double-sided paper is useful for wings and tails that expose both surfaces.
Before gluing, fold every prepared piece and arrange the bird loosely on the work surface. This dry fitting reveals whether the beak is oversized, the tail is hidden, or the wings extend below the body. Cutting first and gluing immediately is a common failure mode because children lose the chance to adjust the proportions. A successful test layout has a recognizable head end, a visible tail, and wings that sit within or just beyond the body edge.
Follow the 7-Fold Bird Assembly Plan
The seven folds create volume and recognizable features without requiring origami-level precision. Place the large circle with its preferred outer color facing down, align the edges, and fold it in half for the first fold. Press from the center toward both ends so the semicircle lies flat. The straight edge becomes the bird’s back or lower body, depending on how the finished piece will be displayed.
Make folds two and three by folding each small wing circle or oval in half. Keep the two wings aligned in the same direction if both will be visible. For a side-view bird, one wing is enough, and the spare can be used on a second project. A wing may be glued completely flat, but attaching only its folded half leaves the other layer raised. That small shadow gives the bird more dimension without adding complicated pieces.
For fold four, turn the beak square diagonally so it looks like a diamond, then fold it corner to corner. The result is a double-layer triangle. Slide its open edge slightly inside the body fold at the head end. Placing the beak between the body layers is stronger than gluing it onto the outside, especially when the bird will be handled. Keep most of the triangle outside the body; otherwise, the beak appears too short.
Folds five and six shape two narrow tail strips. Fold each strip in half lengthwise for slim feathers or across the middle for short, doubled feathers. Lengthwise folds make a clean, tapered-looking tail even when the strips remain rectangular. Angle the strips apart before securing them inside the opposite end of the body. A third flat strip may be added between them without another fold if a fuller tail is wanted.
Fold seven is optional in appearance but useful structurally: make a narrow crease along the straight edge of the body to form a small standing base. Open the body slightly and press this crease against the table. The bird should rest without rolling onto its side. If it will hang instead, skip opening the base and keep the body compressed.
Complete the assembly in a controlled order:
- Secure the beak and tail between the body layers.
- Glue the body layers together while leaving the narrow base crease usable.
- Attach the wing with its fold pointing toward the bird’s back.
- Add a drawn paper eye or a securely attached age-appropriate decoration.
- Leave the bird flat until the adhesive no longer shifts under light pressure.
The order prevents the tucked pieces from being forced into a body that is already sealed. If a fold lands slightly off center, treat it as a change in posture rather than restarting. A noticeably uneven body can be trimmed after folding, but repeated trimming often makes the bird smaller and less balanced.
Control Balance, Layering, and Glue
A well-balanced paper bird depends more on placement than perfect cutting. The beak and tail extend in opposite directions, so their weight and length should remain roughly comparable. A long, heavy tail can pull a standing bird backward. An oversized layered beak can tip it forward. Before applying adhesive, rest the body on its base crease with the loose parts tucked inside and shorten whichever end causes the body to tilt.
Layer direction changes the finished character. A wing angled upward suggests flight, a horizontal wing looks calm, and a downward-pointing wing can resemble a resting bird. Attach the wing near the body’s center rather than directly beside the beak. The central position covers less of the face and distributes the added paper over the base. If making two visible wings, stagger them slightly instead of matching every edge; the second layer will remain identifiable.
Glue sticks are usually cleaner for broad, flat contact areas, particularly when lightweight paper is used. Liquid school glue holds tucked pieces securely but introduces moisture. Too much liquid glue softens the paper fibers, causing wrinkles around the body and wing. Apply a thin line inside the body near the beak and tail, then use small dots for the wing. Press through a scrap sheet to keep fingers clean and distribute the adhesive without smearing it across the colored surface.
Tape offers immediate hold but creates a stiff, shiny patch that may interfere with the standing crease. It is useful on the hidden interior when a hanging bird must be assembled quickly. Staplers provide strong attachment, although the metal ends and required hand strength make them less suitable for independent use by young children. For most tabletop projects, glue produces the neatest finish if drying time is available.
Check the construction before adding decorative weight. The crease should remain sharp, the beak should stay captured when gently touched, and the tail should not rotate inside the body. A wing that opens slightly while the body remains flat is working as intended. Sliding parts, a spreading body, or a base that collapses indicate that the glue is still wet or the contact area is too small. Reinforce hidden joints rather than coating the outside.
Small craft eyes, sequins, and beads can become choking hazards and are unnecessary for a recognizable bird. A paper dot or marker eye keeps the surface light and flat. Feathers add texture, but they can overwhelm the simple geometry and make the bird harder to balance. Readers comparing variations of a Paper bird craft using simple folded shapes should prioritize secure construction before adding tactile materials.
Adapt the Bird for Different Ages and Displays
The same folded-shape bird can be simplified or extended without changing its core construction. For preschool-age makers, provide pre-cut pieces and mark each fold with a light dotted line. The child can match edges, press creases, choose colors, and decide where the wing belongs. This keeps the work focused on bilateral matching, shape recognition, and adhesive control rather than demanding accurate circle cutting.
Early elementary children can trace their own circles, compare large and small shapes, and test how wing position changes the silhouette. Ask them to assemble the bird without glue first and explain which end should hold the beak. That brief planning step exposes reversed pieces before they become permanent. Children ready for a greater challenge can vary the tail geometry, use two overlapping wing folds, or create a smaller bird while preserving the same proportions.
A classroom production line may seem efficient, but assigning each child only one task reduces ownership of the finished object. A better group setup places tracing tools, cut paper, glue, and drying space at separate stations while allowing each maker to complete an entire bird. If time is limited, pre-cutting the large circles saves more time than pre-folding them. The center fold is the main structural action and should remain part of the child’s work whenever their motor skills allow it.
Display method determines which structural choices matter. For a tabletop bird, widen the narrow base crease until both sides contact the surface. For a hanging bird, keep the body flat and place a small reinforced paper tab near the balance point along the back. Thread should pass through the tab rather than the single body layer, which may tear. A wall collage needs neither a base nor a hanging hole; flatten the raised wing slightly so the bird adheres without twisting away from the background.
Several birds can form a flock, but size and color variation will produce more visual interest than piling on decorations. Use three body-circle sizes and repeat a limited palette across the group. Children might place the flock around a paper tree, over a painted sky, or beside folded nests. Names, short bird descriptions, or invented calls can be written on separate labels so text does not crowd the folded forms.
Adaptations are working when a child can identify each folded shape and the finished bird remains stable in its intended display. If children repeatedly need adults to hold pieces during every fold, the paper may be too stiff or the parts too small. Increase the dimensions before removing steps. For more design variations, the Paper bird craft using simple folded shapes theme can be repeated with different wing angles and tail arrangements while retaining the same dependable body fold.
Frequently Asked Questions
What type of paper works best for a folded paper bird?
Construction paper offers a useful balance of stiffness and foldability. Use lighter paper for small beaks or wings and avoid heavy cardstock when children may struggle to press firm creases.
How can the paper bird stand upright?
Add a narrow fold along the body’s straight edge, open it slightly, and flatten that crease against the table. Shorten an unusually long beak or tail if the bird still tips.
Can young children make this bird without scissors?
Yes. An adult can prepare the circles, square, and strips beforehand. Children can complete the folds, arrange the pieces, apply glue, and add flat drawn details.
Why does the folded bird wrinkle after gluing?
Wrinkling usually comes from excess liquid glue soaking the paper. Use small dots or thin lines, press through scrap paper, and let the bird dry flat before handling it.
How can the basic bird be made more challenging?
Let children trace and cut their own shapes, overlap two folded wings, vary the tail geometry, or build a smaller version while keeping the body, beak, and wings proportional.
Conclusion
A successful folded bird comes from clear proportions, firm creases, and restrained use of glue rather than elaborate decoration. Begin with a construction-paper circle, test the beak and tail inside the body before sealing it, and position the wing only after the bird balances. Choose the final format early: standing birds need a stable base crease, hanging birds need a reinforced attachment point, and collage birds work best when kept relatively flat. Adjust the preparation to the maker’s skill level by enlarging pieces or pre-cutting shapes instead of removing the central folding experience. Once the first bird holds its form, vary wing angles, tail spreads, colors, and sizes to create distinct birds from the same seven-fold plan.

Now retrieving an image set.
Crayola Air Dry Clay (5lbs), Teacher Supplies, Natural White Modeling Clay for Kids, Sculpting Material, Bulk Craft Supplies for Art Classrooms
$11.24 (as of September 18, 2026 22:40 GMT -04:00 - More infoProduct prices and availability are accurate as of the date/time indicated and are subject to change. Any price and availability information displayed on [relevant Amazon Site(s), as applicable] at the time of purchase will apply to the purchase of this product.)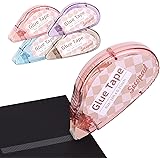
Now retrieving an image set.
Secopad Scrapbook Tape, Glue Tape for Crafts, 4 Pack, Light-Colored Shell | 0.3IN x 26FT, Sticky & Safe, Double Sided Tape for Crafts, Scrapbooking Junk Journaling Supplies, For School Office Teachers
$6.99 (as of September 18, 2026 22:40 GMT -04:00 - More infoProduct prices and availability are accurate as of the date/time indicated and are subject to change. Any price and availability information displayed on [relevant Amazon Site(s), as applicable] at the time of purchase will apply to the purchase of this product.)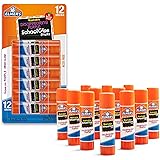
Now retrieving an image set.
Elmer's Disappearing Purple School Glue Sticks, Washable, 6 Grams, 12 Count - Arts & Crafts, Poster, Projects, Back to School, #1 Teacher Brand
$4.59 (as of September 18, 2026 22:40 GMT -04:00 - More infoProduct prices and availability are accurate as of the date/time indicated and are subject to change. Any price and availability information displayed on [relevant Amazon Site(s), as applicable] at the time of purchase will apply to the purchase of this product.)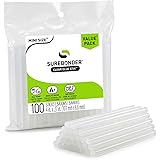
Now retrieving an image set.
Surebonder Clear, All Purpose, All Temp., Mini Size Hot Glue Sticks 0.27 in. Diameter, 4 in. Length -100 Pack
$5.97 (as of September 18, 2026 22:40 GMT -04:00 - More infoProduct prices and availability are accurate as of the date/time indicated and are subject to change. Any price and availability information displayed on [relevant Amazon Site(s), as applicable] at the time of purchase will apply to the purchase of this product.)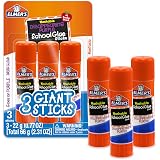
Now retrieving an image set.
Elmer's Disappearing Purple School Glue Sticks, Washable, 22 Grams, 3 Count - Poster, Vision Board, Back to School Supplies, #1 Teacher Brand
$2.89 (as of September 18, 2026 22:40 GMT -04:00 - More infoProduct prices and availability are accurate as of the date/time indicated and are subject to change. Any price and availability information displayed on [relevant Amazon Site(s), as applicable] at the time of purchase will apply to the purchase of this product.)
Now retrieving an image set.