
Materials That Produce Clean Painted Details
A plain, uncoated paper plate provides a better painting surface than a glossy or heavily waxed plate. Matte fibers hold tempera paint instead of causing it to bead or slide. A sturdy dinner-size plate is suitable for a wall display, while a smaller dessert plate dries faster and is easier for preschoolers to turn as they work.
Washable tempera paint is the practical choice for most children. Red and black cover the main design, with white available for eyes or small highlights. Tempera generally cleans from hands and many washable surfaces more readily than acrylic, although paint labels and clothing-care instructions still matter. Acrylic may produce a darker, more durable finish, but its stain risk makes it a less forgiving option for young children or group tables.
Use a broad brush or foam brush for the red base. A smaller round brush gives better control around the head and wing line. Spots can be made with a fingertip, cotton swab, round sponge dauber, pencil eraser, or the end of a craft cork. Each tool changes the appearance: fingertips create irregular organic dots, while a dauber produces more consistent circles. Painted details avoid the loose buttons, sequins, and plastic eyes that can detach from the finished project.
A focused supply setup keeps wet tools from crossing into the wrong colors. Prepare:
- One matte paper plate with no food residue or oily coating
- Washable red, black, and white tempera paint
- One broad brush and one detail brush
- A dot-making tool such as a cotton swab or sponge dauber
- Black construction paper, child-safe scissors, and glue if adding paper legs or antennae
- A washable table covering and a flat drying area
Too much equipment can make a simple project harder to manage. For a low-mess version, paint every feature and omit attached legs, eyes, and embellishments. Readers planning a paper plate ladybug craft with painted details for a classroom should also label brushes by color or provide separate paint stations. That small step prevents the red paint from turning muddy when a black-loaded brush is dipped into it.
Paint the Ladybug in the Right Order
The base color must be applied before the dark markings because black paint is difficult to cover once misplaced. Set the plate with its bottom facing upward if a gently domed ladybug is wanted. The raised shape reads more like an insect body and leaves the food-contact side unused. Painting the front is still workable, but the rim creates deeper grooves where paint can pool.
Apply a thin red coat from the center toward the edge. Long overlapping strokes give more even coverage than repeatedly brushing one damp area. A small amount of the plate may show through after the first pass; adding a second thin coat after drying is better than flooding the surface. Heavy paint saturates the paper fibers, softens the plate, and increases the chance that the rim will buckle.
Leave a curved area at one edge unpainted if children can control the boundary, then fill that section with black for the head. For younger makers, painting the entire plate red first is easier. Once it is dry, a black semicircle can be painted over the red. The black may need a second coat, but this approach removes the frustration of trying to preserve a precise blank area.
Dry the plate flat before adding the center line or spots. The surface is ready when it no longer looks shiny and a light touch at the edge does not lift color. Drying time varies with paint thickness, room airflow, humidity, and plate coating, so a fixed number of minutes is less reliable than checking the surface. A fan may move air across the room, but it should not blow directly on lightweight plates or wet paper pieces.
Paint a black line from the head toward the opposite rim to divide the red shell into two wings. A narrow line gives a tidy graphic look; a wider, slightly uneven line is easier for preschool hands. Turning the plate as the line is painted is often more controlled than reaching across it. If symmetry matters for a display, an adult can make a faint pencil guide after the base coat dries. Avoid drawing hard enough to score the damp plate.
For a one-session activity, paint several base plates before children arrive or divide the project into two periods. Trying to add black markings over tacky red paint usually creates brownish edges and blurred spots. The staged approach may take longer on the schedule, but it produces clearer color separation and gives children a better surface for deliberate detail work.
Create Spots, Wings, Eyes, and Antennae
Spot placement determines whether the finished plate immediately reads as a ladybug rather than a red dotted circle. Put spots on both sides of the center wing line, leaving visible red space around each mark. An exact biological pattern is unnecessary for a children’s craft, and the two sides do not have to match. Three or four spots per wing create a clear design without crowding the surface.
Load the dotting tool lightly and press it straight down once. Twisting a sponge or repeatedly tapping the same spot tends to roughen damp paper and produce ragged circles. Test the first print on scrap paper, especially when using a large dauber. If the mark looks raised or forms a puddle, remove some paint before touching the plate. Small cotton-swab dots dry quickly, whereas large fingertip circles are expressive but more likely to smear.
Painted eyes can be simple white circles with smaller black pupils. Place them on the black head only after that area is dry enough to accept white paint. White tempera may look gray over black on its first coat, so allow it to dry and add a second small dab rather than applying one thick mound. Another option is to paint tiny white highlights directly onto black eyes. That method uses less paint and preserves the bold black head.
Antennae may be painted on the head, drawn after drying with a suitable washable marker, or cut from narrow strips of black construction paper. Painted antennae keep the project flat and durable for folders or bulletin boards. Paper strips add dimension but can bend or detach. When attaching them, glue the ends to the back of the plate and let the bond set before lifting the ladybug.
Legs follow the same tradeoff. Six short black lines painted around the lower sides are quick and secure. Accordion-folded paper legs create movement, but cutting and gluing them shifts attention away from paint control. For children practicing brush pressure and mark making, keep the body details painted. For older children developing cutting accuracy, add paper appendages after the painted shell is complete.
A successful paper plate ladybug craft with painted details should still show the maker’s choices. Adults can demonstrate one dot, one controlled line, and how to remove excess paint without prescribing identical spot counts. Templates produce uniform classroom displays, but free placement better reflects each child’s motor control and visual planning.
Prevent Curling, Smears, and Uneven Coverage
Most finish problems come from excess moisture or adding a new color too soon. Paper plates absorb water from tempera paint, and saturated fibers expand unevenly. The plate may flatten while wet and curl as it dries. Thin layers, limited brush rinsing, and flat drying reduce that movement more effectively than trying to bend the finished plate back into shape.
Blot rinsed brushes before returning them to the project. A dripping brush dilutes the paint and pushes watery color toward the rim. If coverage looks streaky, wait for the first layer to dry before deciding whether another coat is needed. Brushing over half-dry tempera can lift the earlier layer, exposing fuzzy paper and creating pale patches.
Smears usually appear when a hand rests on wet spots or when several painted plates overlap in the drying area. Teach children to rotate the plate by touching an unpainted edge, then stop rotating once details cover the full surface. Place each finished piece on a separate sheet of scrap paper or a named tray. A drying rack is useful only if its rails will not press into wet paint.
Use the following checks before moving to the next stage:
- Base-coat check: The red surface looks matte rather than glossy.
- Touch check: A gentle touch near the rim leaves no paint on the finger.
- Brush check: Detail brushes hold paint without dripping from the ferrule.
- Space check: Spots have enough red around them to remain distinct.
- Final check: White eye paint and glued paper pieces are firm before display.
A mistake does not always need to be covered. An oval spot can remain part of the insect’s individual pattern, and a slightly curved center line can suggest turned wings. Correct only problems that obscure the design, such as a black smear across the face. Once dry, that area can be reshaped with red paint, allowed to dry again, and then repainted carefully. Reworking wet paint immediately usually enlarges the smear.
If the plate remains very soft after drying, too much paint was probably used or the plate was thin. Mounting it on cardstock can support a display, but it will not remove severe ripples. The better adjustment for the next version is a sturdier matte plate and less paint per stroke, not a stronger adhesive.
Adapt the Activity for Different Ages and Groups
The best version matches the child’s hand control and the available drying time. Toddlers and young preschoolers can paint a prepared red plate with black fingertip spots while an adult handles the head and wing division. Close supervision is appropriate whenever paint, cotton swabs, scissors, or small materials are present, and the product labels should be checked for age guidance.
Older preschoolers can complete the broad base, stamp spots, and add short painted antennae. School-age children may plan bilateral patterns, mix a warmer or cooler red, or add a narrow highlight along each wing. Increased complexity should come from purposeful paint decisions rather than piling on decorations. Too many glued additions can hide the painted surface that gives this version its character.
For a group, separate painting into stations: red base coats, black features, and final white details. This arrangement works only when dry plates move between stations; otherwise, it encourages rushed layering. If the activity must fit one short period, provide pre-painted red plates and let children complete the recognizable features. That reduces ownership of the base-painting stage but preserves time for spots, faces, and individual patterns.
A shared example should show technique rather than a required result. Demonstrate how a thin coat leaves the plate firm and how a loaded cotton swab makes one complete dot. Then move the sample aside so children are not trying to duplicate every mark. Comparing finished insects by spot count, line width, or antenna shape can become an informal observation activity without labeling one design as the correct one.
Display conditions affect construction choices. Flat painted antennae are suited to portfolio storage, while attached paper antennae stand out on a wall. A hanging ladybug needs a reinforced hole near the rim because dampened paper can tear. Apply a small piece of tape to the back after everything is dry, then punch through the reinforced area. Do not punch a wet plate or hang it by a loosely glued appendage.
When repeating the paper plate ladybug craft with painted details, change one variable rather than replacing the whole method. Children might use smaller dots, compare brush and sponge marks, or paint open wings with a black triangular gap. Keeping the plate, color sequence, and drying routine consistent lets them notice how tool choice changes the finished image.
Frequently Asked Questions
Which paint works best on a paper plate ladybug?
Washable tempera is suitable for most children because it covers matte plates well and is easier to manage than acrylic. Use thin coats to limit curling and check the paint label for surface, cleanup, and age information.
Should the front or back of the plate be painted?
Painting the back creates a gently domed insect body and avoids the deeper food-side rim. Either side works, but an uncoated, matte surface holds paint more evenly than a glossy one.
How can children make round ladybug spots?
Press a lightly loaded cotton swab, sponge dauber, fingertip, or pencil eraser straight onto the dry red surface. Test the tool on scrap paper first and avoid twisting it in the wet paint.
Why is the paper plate curling after painting?
Curling usually means the plate absorbed too much moisture. Use less paint, blot rinsed brushes, apply thin layers, and dry the plate flat before adding another color.
Can the ladybug be completed in one activity period?
Yes, if red base coats are prepared in advance or the session includes a drying break. Adding black details while the red layer is wet is likely to cause muddy edges and smears.
Conclusion
Clean color separation matters more than perfectly matched wings or identical spots. Choose a matte, reasonably sturdy plate; apply red tempera in thin strokes; and wait until the surface loses its shine before painting black features. A lightly loaded dotting tool produces distinct markings without soaking the paper, while painted eyes, legs, and antennae keep the design flat and reduce loose components.
Plan the version around the child’s control, the time available, and how the finished ladybug will be displayed. Pre-painted plates are useful for short group sessions, whereas a two-stage project gives children experience with the full painting sequence. Before displaying the work, check that thick spots, white eye details, glue, and reinforced hanging areas are fully dry.
Now retrieving an image set.
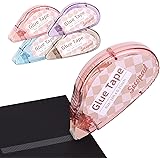
Secopad Scrapbook Tape, Glue Tape for Crafts, 4 Pack, Light-Colored Shell | 0.3IN x 26FT, Sticky & Safe, Double Sided Tape for Crafts, Scrapbooking Junk Journaling Supplies, For School Office Teachers
$6.99 (as of September 18, 2026 22:40 GMT -04:00 - More infoProduct prices and availability are accurate as of the date/time indicated and are subject to change. Any price and availability information displayed on [relevant Amazon Site(s), as applicable] at the time of purchase will apply to the purchase of this product.)
Now retrieving an image set.
Crayola Construction Paper Bulk Pack (480 Sheets) – 10 Assorted Colors, 9x12, Teacher School Supplies & Classroom Must Haves, Card Making Craft Supplies, Art Paper
$11.76 (as of September 18, 2026 22:40 GMT -04:00 - More infoProduct prices and availability are accurate as of the date/time indicated and are subject to change. Any price and availability information displayed on [relevant Amazon Site(s), as applicable] at the time of purchase will apply to the purchase of this product.)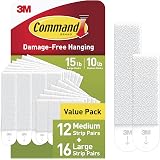
Now retrieving an image set.
Command 15 & 10 lb Assorted Picture Hanging Strips, 28 Pairs, SIOC | White Picture Hanging Strips, Damage-Free Wall Hangers for Frames, No Tools Required, Ideal for Decorating Apartments, Dorms
$13.99 (as of September 18, 2026 22:40 GMT -04:00 - More infoProduct prices and availability are accurate as of the date/time indicated and are subject to change. Any price and availability information displayed on [relevant Amazon Site(s), as applicable] at the time of purchase will apply to the purchase of this product.)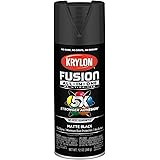
Now retrieving an image set.
Krylon Fusion All-In-One, Matte, Black, 12 oz
$6.98 (as of September 18, 2026 22:40 GMT -04:00 - More infoProduct prices and availability are accurate as of the date/time indicated and are subject to change. Any price and availability information displayed on [relevant Amazon Site(s), as applicable] at the time of purchase will apply to the purchase of this product.)
Now retrieving an image set.
Rust-Oleum Stops Rust Spray Paint, Semi-Gloss Black | Rust Resistant, Indoor and Outdoor, Beautiful Finish on Metal, Wood and More, Sprays from Any Angle, 12 oz
$6.48 (as of September 18, 2026 22:40 GMT -04:00 - More infoProduct prices and availability are accurate as of the date/time indicated and are subject to change. Any price and availability information displayed on [relevant Amazon Site(s), as applicable] at the time of purchase will apply to the purchase of this product.)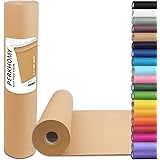
Now retrieving an image set.