
Craft activities for four-year-olds and caregivers work best when washable materials, short multistep methods, and flexible timing let the child make visible choices while an adult manages safety and difficult preparation. Offer large paper, chunky crayons, blunt child scissors, glue sticks, stickers, or washable paint, then limit each session to a few clear actions such as tear, arrange, attach, and decorate. Caregivers should demonstrate briefly without correcting every uneven edge or unexpected color. A productive activity usually lasts 15 to 30 minutes, but stopping while interest remains is better than pushing toward a polished result.
Choose Materials a Four-Year-Old Can Control
Material size and handling matter more than the number of supplies on the table. Four-year-olds are still refining hand strength, bilateral coordination, and control of small movements. A thick crayon that makes a mark without heavy pressure is more usable than a hard, narrow pencil. A glue stick gives the child more control than a bottle that can release a large puddle with one squeeze.
Begin with a stable work surface and a limited selection. Large construction sheets, washable markers, chunky crayons, tempera paint, broad brushes, masking tape, stickers, modeling dough, and blunt-tip child scissors cover a wide range of projects. Place only the materials needed for the current stage within reach. A crowded tray can turn choosing into the main activity and increases the chance that wet paint, loose scraps, and open glue will collide.
Check every item for age labeling, condition, and foreseeable misuse. Supervision remains necessary even when packaging identifies a product as suitable for young children. Replace dried markers, cracked plastic tools, loose brush ferrules, and scissors that pinch rather than cut. Avoid tiny decorative pieces when a child still mouths objects, and keep staplers, craft knives, hot glue, solvents, permanent ink, and adult-strength adhesives under adult control. Food items are not automatically safer: dried beans, hard pasta, and popcorn kernels can be choking hazards and may be unsuitable where allergies are a concern.
A useful starter set is deliberately modest:
- Mark-making: washable crayons, markers, and tempera paint
- Joining: glue sticks, painter’s tape, and reusable dough
- Cutting and shaping: child scissors, large paper, and corrugated cardboard
- Adding detail: large stickers, yarn lengths, tissue squares, and leaves
Washable does not mean stain-proof, so test unfamiliar color on a spare cloth and cover the table. Painter’s tape is often easier to tear and reposition than clear tape, while cardboard gives more resistance than thin paper when a child presses firmly. For more supply-specific ideas, the collection on Craft activities for four-year-olds and caregivers can help caregivers select projects around materials already at home.
The common mistake is buying a themed kit with numerous small, pre-cut decorations and expecting independent assembly. Such kits may produce a recognizable object, but they often leave the adult peeling backings, aligning parts, and repairing mistakes. Open materials require more tolerance for unpredictable results, yet they give the child more meaningful decisions about placement, color, texture, and shape.
Match the Method to Preschool Attention and Motor Skills
A successful preschool method breaks one interesting idea into a few actions the child can understand and repeat. Processes such as tearing, stamping, rolling, pressing, snipping, spreading, and sticking provide immediate feedback. The child can see a piece separate, a print appear, or two parts join, which makes the relationship between action and result easy to follow.
Set up the hard-to-manage elements before inviting the child over, but do not complete the creative decisions in advance. A caregiver might tape paper to the table, pour a shallow amount of paint, loosen marker caps, or cut thick cardboard. The child can then choose colors, make marks, position parts, and decide when the picture feels finished. This division preserves participation while reducing delays that can consume a short attention window.
Demonstrate one movement on a scrap rather than making a model the child is expected to copy. To introduce scissors, show how the thumb points upward and let the child make short cuts along the edge of a paper strip. Free cutting is often a better starting point than following a narrow printed line. Curves and detailed outlines demand greater hand control; insisting on them may turn a manageable tool lesson into a judgment about accuracy.
Use short, concrete prompts tied to what the child can do next: “Would you like to press the sponge or move it?” and “Where should this piece go?” are clearer than asking the child to create an elaborate finished scene without support. If the child hesitates, offer two choices rather than taking over. Choice narrows the decision without deciding the artwork for them.
Caregiver participation works best beside the child, not on top of the child’s work. An adult can make a separate collage, hold a rolling piece of cardboard steady, or help turn the page. Correcting color choices, rotating every backward shape, or moving pieces into symmetry communicates that appearance matters more than investigation. By contrast, describing an observable action—“You pressed three circles close together”—invites conversation without assigning a grade.
Watch for signs that the method fits: the child repeats an action, experiments with pressure or placement, requests another piece, or explains what a mark represents. Repeated dropping of tools, rapid switching, asking the adult to do every step, or distress over sticky hands suggests the task or sensory load should change. Offer a sponge applicator instead of finger paint, larger pieces instead of tiny ones, or tape instead of glue. Adapting the method is more useful than demanding completion.
Try Four Caregiver-and-Child Projects
Projects for this age are strongest when each one emphasizes a small set of actions but allows several possible outcomes. The following activities use familiar supplies and give the caregiver a defined support role without turning the child into an observer.
Torn-Paper Color Garden
Provide colored paper, a large background sheet, and a glue stick. The child tears pieces for flowers, grass, insects, or invented plants, arranges them without glue, and then attaches them. The caregiver can hold the background still or help start a difficult tear. Unlike a project built from adult-cut petals, this version makes irregular edges part of the design and exercises both hands working together.
Cardboard Shape Printer
Cut sturdy cardboard into several large shapes before the session. Put a small amount of washable paint on a tray, then let the child dip an edge or flat surface and press prints onto paper. Ask what happens when the same piece is turned, overlapped, or pressed lightly. A sponge may make clearer prints, but cardboard introduces variation and demonstrates that an ordinary discarded material can become a tool. Stop adding paint if the tray becomes deep enough to soak the pieces; excess paint hides the shape and increases slipping.
Tape-Resist Road Map
Help the child place strips of painter’s tape across heavy paper to form roads, crossings, or enclosed spaces. Color or paint over the entire surface, allow wet paint to dry, and then peel the tape away together. Removing the strips reveals contrasting lines and gives the project a satisfying second stage. If waiting for paint to dry is unrealistic, use crayons instead. The dry version offers the same reveal without requiring the child to leave and return later.
Texture Creature Collage
Set out a few large pieces of corrugated cardboard, felt, yarn, tissue, and plain paper. The child chooses a body shape and adds features to create a real or imaginary creature. Pre-cut yarn into manageable lengths and reserve any thick-material cutting for the adult. Glue sticks may not hold heavy corrugated pieces; painter’s tape loops or a small amount of child-appropriate liquid glue applied with caregiver help can work better.
Each activity can be simplified without losing its central experience. A child who avoids scissors can tear; a child who dislikes glue can arrange reusable pieces on contact paper handled by the caregiver; a child who wants movement can print while standing. Finished examples should be treated as possibilities rather than standards. Showing a highly polished sample may cause a four-year-old to ask the adult to reproduce it instead of trying an uncertain idea.
Rotate these projects rather than presenting all four at once. Repeating a favorite activity with a different surface or color palette builds familiarity while leaving room for variation. Additional Craft activities for four-year-olds and caregivers can be chosen by the action a child enjoys, such as stamping, tearing, or constructing, rather than by a complicated seasonal theme.
Manage Timing, Help, and Common Frustrations
Timing should follow the child’s engagement rather than an adult expectation that every project must be completed in one sitting. Many four-year-olds can participate productively for roughly 15 to 30 minutes, but interest varies by day, familiarity, hunger, fatigue, and sensory comfort. A five-minute stamping session with focused experimentation may be more worthwhile than a prolonged activity ending in conflict.
Prepare before announcing the activity. Cover the surface, set out a drying location, put cleaning supplies nearby, and separate materials into stages. If a collage requires both drawing and gluing, begin with the drawing tools and bring out adhesive later. This sequence reduces clutter and prevents the child from gluing unused materials simply because everything is available.
Use a simple session rhythm:
- Invite: name the main action and show the available choices.
- Demonstrate: model one tool movement on a separate scrap.
- Step back: let the child repeat, alter, or reject the example.
- Assist selectively: stabilize, open, pour, or cut only where needed.
- Close clearly: give notice before cleanup and choose where the work will dry or be displayed.
Frustration often reveals a mismatch rather than unwillingness. Paper that slides makes drawing harder, a nearly empty glue stick will not attach textured material, and dull scissors fold paper instead of cutting it. Check the tool and setup before correcting the child’s technique. Tape the page down, replace the failing supply, or switch to thinner material. If the child wants the adult to draw a specific object, draw it on your own sheet while narrating a simple starting shape; avoid quietly finishing the child’s page.
Mess also needs a realistic boundary. Washable paint on a protected table is a planned condition, while paint thrown toward a wall requires an immediate limit and perhaps a different activity. State what the material is for, redirect once, and remove it if unsafe use continues. Substituting crayons or dough lets creative time continue without treating access to every medium as mandatory.
End while the child can still cooperate. Give a brief warning, invite one final mark, and assign a concrete cleanup job such as placing crayons in a box or carrying paper scraps to a bin. Expecting a preschooler to wash every brush and restore the entire room is unrealistic; doing all cleanup invisibly, however, misses a useful part of the routine. Shared cleanup reinforces that materials have a beginning, a working period, and a place to go afterward.
A session is working when the child handles more of the process over repeated attempts, makes choices without waiting for approval, and tolerates small surprises such as a torn edge or mixed color. It is failing when the caregiver performs most of the assembly, appearance becomes a source of correction, or the same material repeatedly causes distress. Adjusting scope, tools, or timing protects the shared experience better than insisting on the planned result.
Frequently Asked Questions
How long should a craft session last for a four-year-old?
Plan for about 15 to 30 minutes, but follow the child's behavior rather than the clock. End sooner if tools are being dropped, directions are no longer understood, or frustration replaces experimentation.
Should caregivers prepare pieces before the activity?
Prepare parts that require adult tools or excessive waiting, such as thick cardboard cuts. Leave color, arrangement, mark-making, and other visible creative decisions to the child.
What can replace glue for a child who dislikes sticky textures?
Try painter's tape loops, large stickers, reusable dough, or an adult-managed sheet of contact paper. The substitute should still allow the child to place and reposition elements.
Is it helpful to show a finished example?
A quick process demonstration is usually more useful than a polished model. If an example is shown, explain that it is one possibility and avoid expecting the child's version to match it.
What should a caregiver do when a child asks for help constantly?
Check whether the tool or step is genuinely too difficult, then assist only with that part. Offer two manageable choices and return the next action to the child instead of completing the project.
Conclusion
Strong creative sessions at age four depend on usable materials, limited steps, and a clear division of roles. Set out a small selection, manage hazards and difficult preparation, then leave placement, color, repetition, and imaginative meaning to the child. Judge the activity by participation rather than resemblance to a sample.
For the next session, choose one process—tearing, printing, taping, or building—and prepare only what that process requires. Watch whether the child can control the tools, repeat an action, and recover from small surprises. If interest fades or frustration rises, shorten the task or change the material instead of finishing it for them. A modest project that invites genuine decisions is better suited to a four-year-old and caregiver than an elaborate result assembled mainly by the adult.

Now retrieving an image set.
Crayola Air Dry Clay (5lbs), Teacher Supplies, Natural White Modeling Clay for Kids, Sculpting Material, Bulk Craft Supplies for Art Classrooms
$11.24 (as of September 18, 2026 22:40 GMT -04:00 - More infoProduct prices and availability are accurate as of the date/time indicated and are subject to change. Any price and availability information displayed on [relevant Amazon Site(s), as applicable] at the time of purchase will apply to the purchase of this product.)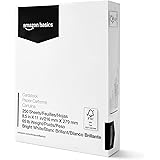
Now retrieving an image set.
Amazon Basics Cardstock Paper, 8.5" x 11", 65 lb/176 gsm, 96 Bright White, 250 Sheets
$10.63 (as of September 18, 2026 22:40 GMT -04:00 - More infoProduct prices and availability are accurate as of the date/time indicated and are subject to change. Any price and availability information displayed on [relevant Amazon Site(s), as applicable] at the time of purchase will apply to the purchase of this product.)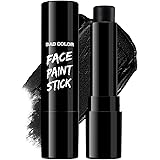
Now retrieving an image set.
BADCOLOR Black Cream-Blendable Face Body Paint Stick for Adults Children Eye Black Softball Football Baseball Sports , Non-Toxic Hypoallergenic for Halloween SFX Makeup Cosplay Joker Costume Parties
$5.99 (as of September 18, 2026 22:40 GMT -04:00 - More infoProduct prices and availability are accurate as of the date/time indicated and are subject to change. Any price and availability information displayed on [relevant Amazon Site(s), as applicable] at the time of purchase will apply to the purchase of this product.)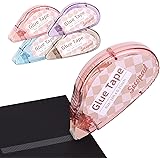
Now retrieving an image set.
Secopad Scrapbook Tape, Glue Tape for Crafts, 4 Pack, Light-Colored Shell | 0.3IN x 26FT, Sticky & Safe, Double Sided Tape for Crafts, Scrapbooking Junk Journaling Supplies, For School Office Teachers
$6.99 (as of September 18, 2026 22:40 GMT -04:00 - More infoProduct prices and availability are accurate as of the date/time indicated and are subject to change. Any price and availability information displayed on [relevant Amazon Site(s), as applicable] at the time of purchase will apply to the purchase of this product.)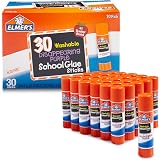
Now retrieving an image set.
Elmer's Disappearing Purple School Glue Sticks, Washable, 7 Grams, 30 Count - Posters, Back to School, Bulk Pack for Classrooms, #1 Teacher Brand
$7.49 (as of September 18, 2026 22:40 GMT -04:00 - More infoProduct prices and availability are accurate as of the date/time indicated and are subject to change. Any price and availability information displayed on [relevant Amazon Site(s), as applicable] at the time of purchase will apply to the purchase of this product.)
Now retrieving an image set.