
Cardboard craft ideas using sturdy recycled pieces work best when clean corrugated boxes are matched to projects that benefit from rigid panels, layered supports, and slot-based joints. Shipping cartons suit buildings, vehicles, looms, and tabletop games, while thinner cereal-box board is better reserved for trim and movable details. Cut away crushed folds, reinforce load-bearing areas by crossing the flute direction, and test tabs or slots before applying glue. Child-safe scissors can handle light board, but an adult should make utility-knife cuts on a protected surface. A successful build stands square, survives gentle handling, and uses no more reinforcement than its function requires.
Choosing Recycled Cardboard That Will Hold Its Shape
Corrugated shipping cartons provide the most useful structural material because the fluted center resists bending while the flat outer liners create workable surfaces. Look for broad panels without deep creases, torn corners, damp patches, oil marks, or a musty smell. A clean panel that springs back after light pressure is a stronger starting point than one that stays dented. Remove packing tape, shipping labels, staples, and plastic windows before children handle or decorate the material.
Not every sturdy-looking box behaves the same way. Single-wall corrugated board is light enough for masks, ramps, small houses, and game boards. Double-wall board, recognizable by two fluted layers along a cut edge, is harder to cut but useful for bases, stools made only for dolls, large play panels, or parts that must remain upright. Paperboard from cereal and cracker boxes bends cleanly and works well for fins, pockets, dials, scales, and decorative overlays, but it cannot replace corrugated board in a load-bearing wall.
The direction of the internal flutes affects how a piece bends. A tall tower wall is less likely to buckle when its flutes run vertically from base to top. A shelf or bridge deck becomes stiffer when a second panel is laminated beneath it with the flutes running in the opposite direction. This crossed arrangement spreads flexing across both axes. Using several layers in the same direction adds thickness, but it may still leave an obvious hinge line.
Match the board to the expected handling rather than choosing the thickest piece automatically. Younger children may find double-wall board frustrating because scissors crush its edges and tabs resist folding. For them, an adult can prepare structural panels while leaving paperboard signs, windows, characters, and scenery for child-led cutting. Older children can measure slots, compare grain direction, and test prototypes from scraps before committing a large panel.
Use this compact sorting checklist before storing reclaimed pieces:
- Keep: clean, dry panels; straight corner sections; tubes; flat dividers; and uncoated paperboard.
- Reserve for details: lightly creased pieces, thin cartons, and small offcuts.
- Recycle instead: greasy food boxes, wet board, moldy material, heavily crushed panels, and pieces with embedded sharp fasteners.
A common mistake is saving every carton and deciding on quality during the activity. Sorting early prevents weak material from reaching a critical base or wheel. It also makes Cardboard craft ideas using sturdy recycled pieces easier to plan around consistent panel sizes rather than an overflowing pile of unusable scraps.
Preparing Panels and Making Reliable Joints
Strong cardboard construction depends more on joint design than on generous amounts of glue. Begin by flattening the carton along existing seams instead of forcing folded walls backward. Mark parts with a ruler and pencil, placing long structural edges away from crushed folds. Child-safe scissors are suitable for thin corrugated board and paperboard; dense board, long straight cuts, and internal openings should be cut by an adult with a utility knife on a cutting mat.
Score fold lines rather than cutting partway through them. An adult can draw a capped pen, blunt butter knife, or scoring tool along a ruler to compress the outer liner. Place the score on the outside of a valley fold so the panel closes along a controlled line. Excess pressure can slice the liner, creating a weak hinge that tears after repeated movement. Test the pressure on an offcut from the same box because liner thickness varies.
Tabs are appropriate for lightweight walls and decorative parts. Make each tab broad enough to provide a real bonding surface, fold it sharply, and hold it until the adhesive grips. Slots create faster, cleaner assemblies for dividers, animal forms, trees, and display stands. Two mating slots should be close to the cardboard’s thickness and extend halfway into each piece. A loose slot wobbles; a narrow one crushes the edge and may split the outer paper.
White school glue gives children time to reposition parts and dries with less bulk than heavy tape, but it needs pressure and drying time. Painter’s tape can act as a temporary clamp and usually accepts paint better than glossy packing tape. Hot glue sets quickly on awkward corners, yet it should remain an adult-operated option because the adhesive and applicator can burn skin. Staples and exposed wire are poor choices for children’s builds because their sharp points can become hidden between layers.
For a freestanding house, attach two wall panels with folded interior corner strips rather than running tape only along the outside seam. Add a floor panel or a cross-shaped internal divider to hold the walls square. For a vehicle axle, reinforce each axle hole with a small extra square of cardboard before piercing it; otherwise the rotating skewer or paper straw enlarges the soft hole.
Dry-fit the complete structure before decorating it. Parts should meet without being forced, the base should rest flat, and moving pieces should clear nearby walls. If a model leans before glue is applied, decoration will not correct the geometry. Adjust slot width, trim mismatched edges, or add a triangular brace first. That brief trial is more effective than concealing an unstable connection beneath layers of tape.
Nine Builds Matched to Cardboard Strength
Useful project choices exploit cardboard’s stiffness, broad surface area, or layered edge instead of asking it to imitate flexible paper. The following builds range from short tabletop activities to structures that may take more than one session. Scale each design to the cartons available; enlarging a model increases leverage on every joint, so bigger versions need wider bases and more bracing.
- Slot-together animals: Cut a side profile and a pair of leg pieces from single-wall board. Half-depth slots let the animal stand without glue. Paperboard ears, wings, or tails add detail without making the body top-heavy.
- Marble-free ball maze: Glue corrugated strips onto a shallow box lid and guide a large craft pom-pom by tilting the tray. A pom-pom avoids the small, hard rolling piece used in a traditional marble maze, though adult judgment is still needed for children who mouth materials.
- Tabletop puppet theater: Use a low carton with an adult-cut stage opening. Folded side braces keep the front upright, while a cereal-box curtain valance hides uneven cut edges.
- Cardboard weaving loom: Cut evenly spaced notches across opposite edges of a rigid rectangle. The panel must resist bowing under yarn tension; doubling it with crossed flute directions works better than adding tape after it curves.
- Rolling delivery van: Build a rectangular body, reinforce axle openings, and use corrugated circles or clean plastic lids where age-appropriate. Wheels should share the same diameter and sit clear of the body.
- Miniature room: Join three walls and a floor, then add paperboard furniture. This build teaches scale: measure a cardboard figure first so doors, beds, and tables relate to one another.
- Shadow and light screen: Create adult-cut openings in a standing panel and cover selected areas with translucent tissue. A flashlight may be used under supervision; candles and hot bulbs do not belong near cardboard.
- Ring-toss target: Slot upright tubes or folded posts into a wide, layered base and toss rings made from corrugated strips. If the base lifts during play, widen it or add another cardboard layer rather than placing a hard weight inside.
- Interlocking city set: Prepare rectangular building fronts with bottom slots that fit perpendicular feet. Children can rearrange streets, signs, bridges, and parks, then store the flat pieces after play.
Choose by function as well as appearance. The loom and ring-toss target need reinforced bases because they experience tension or impact. A miniature room relies more on square corners than thick material. Slot animals and city pieces are practical for group settings because they can be disassembled, repaired, and stored flat. The van requires the most precise alignment; it is a better choice when measuring and mechanical testing are part of the activity.
A weak assumption is that elaborate decoration makes a project more engaging. Heavy paint, glued stones, or thick clay can warp panels and overwhelm small joints. Let the structure prove itself first, then add lightweight color and details. For variations organized around the same recycled material, keep Cardboard craft ideas using sturdy recycled pieces focused on what each box panel can physically support.
Finishing, Testing, and Fixing Weak Structures
Finishing should preserve the board’s shape rather than saturate or conceal it. Markers, crayons, colored pencils, paper collage, and light coats of tempera paint add color with manageable moisture. Peel away glossy tape from areas intended for paint, or cover it with a paper label. Paint one thin coat, allow it to dry flat, and assess curling before adding another. Large wet areas contract as they dry and can pull a previously square wall out of alignment.
Test the undecorated build under the conditions it will face. Set a theater upright and move puppets behind it. Roll the van across a hard surface and watch whether its wheels rub. Pull yarn across the loom and check for bowing. Toss one ring at the target from close range. These simple trials reveal whether the failure comes from the base, a connection, or a moving part.
A leaning wall usually needs geometry corrected, not more adhesive. Confirm that its bottom edge is straight, then add a perpendicular floor or a triangular gusset at the corner. A sagging bridge needs greater depth beneath its deck; fold a long strip into a channel or laminate a second panel with its flutes crossing the first. A wheel that wanders may have off-center axle holes or an axle that is not perpendicular to the body. Redrawing both holes from a shared baseline is more reliable than enlarging one opening.
Signs of a sound design include cleanly seated slots, a base that does not rock, joints that remain closed when gently handled, and movable pieces that operate without tearing their supports. Warning signs include white stress lines at folds, widening axle holes, crushed slot edges, peeling surface paper, and repeated dependence on new tape. Stop and replace a damaged structural part if its layers have separated; wrapping a delaminated edge often transfers the failure to the next weak point.
Storage affects whether a build survives for another session. Keep flat components dry and horizontal, and avoid stacking weight on tubes, wheels, or projecting details. Large models can be designed with removable roofs, slotted walls, or detachable decorations so the strongest panels remain reusable. If a creation has reached the end of play, remove non-paper accessories and adhesives where practical before placing accepted cardboard in the local recycling stream; recycling rules differ by community.
Children gain more design value from diagnosing a weak joint than from having an adult silently rebuild it. Ask what moves first, where pressure travels, and whether a brace, wider foot, lighter decoration, or smaller scale would address that movement. The aim is not an indestructible object. It is a structure suited to its task, made with understandable choices and repaired without burying the original board beneath tape.
Frequently Asked Questions
Which cardboard is strongest for children’s construction projects?
Clean corrugated shipping boxes are generally the strongest practical choice. Use double-wall board for rigid bases and single-wall board where children need to fold, slot, or cut pieces more easily.
How can cardboard be joined without hot glue?
Use fitted slots, folded tabs, interior corner strips, white school glue, or temporary painter’s-tape clamps. Dry-fitting parts first improves the joint and reduces the amount of adhesive needed.
How do you stop a cardboard structure from bending?
Add a perpendicular brace, triangular gusset, folded channel, or second layer with its flutes running across the first layer. Reinforcement works best at the bending point rather than across the entire model.
Can painted cardboard still be recycled?
Acceptance depends on the local recycling program and the amount of paint, glue, tape, or attached material. Remove non-paper components where practical and check the recycler’s current instructions.
What should an adult cut instead of a child?
An adult should handle utility-knife work, dense double-wall board, long precision cuts, and enclosed openings. Children can often use age-appropriate scissors for paperboard, thin corrugated pieces, and decorative details under supervision.
Further Reading
Authoritative Sources
- Reducing and Reusing Basics
epa.govThe U.S. Environmental Protection Agency explains how reuse can extend a material’s useful life before recycling or disposal
- Art and Craft Safety Guide
cpsc.govThis U.S. Consumer Product Safety Commission guide provides background on selecting and using art materials with children
Conclusion
Reliable cardboard building begins with selective reuse: save dry corrugated panels, discard contaminated or crushed pieces, and match thickness to the job. Plan flute direction before cutting, use joints that control movement, and reinforce only the places that carry tension, impact, or repeated handling. A dry fit should come before paint because square walls, aligned axles, and snug slots are easier to correct while every surface remains visible.
Choose one build that suits the child’s current cutting and measuring ability, prepare any adult-only cuts, and keep several offcuts for testing scores and slots. If the model leans or binds, identify the first moving part instead of adding layers of tape. That approach turns discarded boxes into workable construction material while keeping the activity manageable, repairable, and appropriately scaled.

Now retrieving an image set.
Crayola Air Dry Clay (5lbs), Teacher Supplies, Natural White Modeling Clay for Kids, Sculpting Material, Bulk Craft Supplies for Art Classrooms
$11.24 (as of September 18, 2026 22:40 GMT -04:00 - More infoProduct prices and availability are accurate as of the date/time indicated and are subject to change. Any price and availability information displayed on [relevant Amazon Site(s), as applicable] at the time of purchase will apply to the purchase of this product.)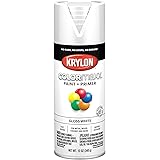
Now retrieving an image set.
Krylon ColorMaxx 12 Oz. Gloss Spray Paint, White - 1 Each
$4.48 (as of September 18, 2026 22:40 GMT -04:00 - More infoProduct prices and availability are accurate as of the date/time indicated and are subject to change. Any price and availability information displayed on [relevant Amazon Site(s), as applicable] at the time of purchase will apply to the purchase of this product.)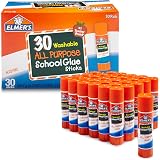
Now retrieving an image set.
Elmer's All Purpose School Glue Sticks, Acid-Free and Washable, Clear, 7 Grams, 30 Count - Craft Projects, Poster, Classroom Supplies, #1 Teacher Brand
$10.99 (as of September 18, 2026 22:40 GMT -04:00 - More infoProduct prices and availability are accurate as of the date/time indicated and are subject to change. Any price and availability information displayed on [relevant Amazon Site(s), as applicable] at the time of purchase will apply to the purchase of this product.)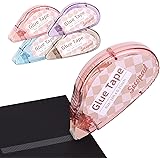
Now retrieving an image set.
Secopad Scrapbook Tape, Glue Tape for Crafts, 4 Pack, Light-Colored Shell | 0.3IN x 26FT, Sticky & Safe, Double Sided Tape for Crafts, Scrapbooking Junk Journaling Supplies, For School Office Teachers
$6.99 (as of September 18, 2026 22:40 GMT -04:00 - More infoProduct prices and availability are accurate as of the date/time indicated and are subject to change. Any price and availability information displayed on [relevant Amazon Site(s), as applicable] at the time of purchase will apply to the purchase of this product.)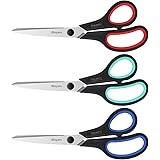
Now retrieving an image set.
iBayam 8.5" Heavy Duty Scissors All Purpose for Office School Crafts Sewing | 3-Pack, Ultra-Sharp 2.5mm Stainless Blades, Comfort Grip Handles, Left & Right Handed – Teacher Desk & Classroom Must-Have
$9.99 (as of September 18, 2026 22:40 GMT -04:00 - More infoProduct prices and availability are accurate as of the date/time indicated and are subject to change. Any price and availability information displayed on [relevant Amazon Site(s), as applicable] at the time of purchase will apply to the purchase of this product.)
Now retrieving an image set.