
Choose Materials That Create Texture Without Excess Weight
The strongest material combination is a rigid paper plate with lightweight feather pieces and a thin, controllable adhesive. A plain, uncoated plate accepts washable tempera paint and school glue more reliably than a glossy or wax-coated plate. If the surface feels slick, skip wet paint or test a small area first; paint may bead, and glued pieces may lift after drying.
Construction paper is the most predictable feather material because it is easy to cut, holds a crease, and gives each row a defined edge. Tissue paper creates softer texture but wrinkles quickly under wet glue. Flattened paper cupcake liners provide ready-made ridges, although several liners can make the owl front-heavy. Scraps of corrugated paper add strong relief and are better used as a few accents than as full coverage. Real craft feathers can shed, conceal facial details, and be unsuitable around children who still mouth materials, so paper alternatives are usually easier to manage.
Color selection affects whether the texture can actually be seen. Three nearby shades—such as tan, medium brown, and dark brown—produce clearer layers than one uniform color. A contrasting cream or gray chest can separate the body from darker wings. Patterned paper works for selected feathers, but using a different print in every row makes the face harder to read. For a classroom batch, limit the shared palette while allowing children to choose the order of their feather colors.
A practical supply set includes a paper plate, two or three paper colors, child-appropriate scissors, a glue stick or small amount of liquid school glue, and materials for the eyes and beak. Markers can replace paint when drying time is limited. A glue stick is cleaner and causes less warping; liquid glue grips thicker folded pieces more effectively but needs careful dosing. Cotton swabs or a small scrap of cardboard can spread dots of glue without soaking the plate.
Check every decorative item against the child’s age and habits. Loose sequins, buttons, plastic eyes, and tiny paper punches are small parts, not necessary features. Large paper circles make equally expressive eyes and remain easier to position. Adult cutting may be appropriate for thick plates, while children can tear paper or snip pre-cut strips. The material plan for a Paper plate owl craft with textured feathers should match the participants’ cutting control, attention span, and need for close supervision rather than aiming for a single polished model.
Prepare the Plate, Face, and Feather Pieces
Preparation should establish the owl’s proportions before glue makes repositioning difficult. Place the plate right side up for a shallow, framed body or turn it over for a broader flat work surface. The flat back is generally easier for young makers because the feather rows do not have to cross the raised rim. If the plate will be painted, apply a thin coat and allow it to dry fully before assembling the paper details.
Choose the orientation next. A whole plate produces a round owl with ample room for layering. Folding both sides inward creates suggested wings, but the folds may spring open unless they are creased firmly. Cutting away a small curve at the top can imply two ear tufts, though the owl remains recognizable without them. These pointed shapes are decorative rather than anatomically necessary, so they should not take priority over the large forward-facing eyes and short beak that make the face legible.
Make feather pieces before assembly so the child can focus on pattern and placement. For simple scalloped feathers, cut paper strips and divide them into thumb-width rectangles, then round one short end. Older children can fold each piece lengthwise, make two or three short edge snips, and reopen it to produce shallow barbs. The snips should stop well before the center fold; cutting through turns the feather into separate scraps. Torn ovals are an effective no-template alternative and produce naturally varied edges.
A compact preparation sequence keeps the parts proportional:
- Set the plate in its final orientation and lightly identify the eye area.
- Prepare enough feather pieces to test one row across the widest part of the plate.
- Use that first row to estimate how many additional pieces are needed.
- Cut two large matching eye circles, two smaller pupils, and one short triangular beak.
- Place every facial piece without glue and adjust the spacing before assembly.
Large eyes placed close together create a clearer owl expression than small eyes separated near the plate edges. Slightly offset pupils can suggest that the owl is looking sideways, but each pupil should remain fully on its eye circle. Keep the beak narrow enough to fit between and below the eyes rather than covering the textured chest.
A common preparation mistake is producing dozens of tiny feathers because small pieces appear more detailed. They also require more glue, extend the activity, and can overwhelm a child’s hand control. Begin with larger pieces and add a few smaller accents only if the plate still has open areas. Pre-sorting parts into shallow trays reduces lost pieces and prevents wet components from being stacked together.
Build Overlapping Feather Rows That Stay Visible
Layering from the bottom edge toward the face creates the clearest feather effect. Position the first row along the lower plate, with rounded or torn ends pointing down. Attach glue only to the upper portion of each piece. The free lower edge casts a small shadow and can be lifted gently after drying, which supplies more texture than gluing every feather completely flat.
Begin the second row above the first and overlap it enough to hide the glued tops without covering the visible ends. Stagger the pieces so each new feather sits over a gap in the row below, much like overlapping shingles. This arrangement avoids straight vertical seams and distributes thickness across the plate. If all pieces align in columns, the surface resembles a grid rather than plumage; if each row covers nearly all of the previous one, the colors and cut edges disappear.
For a preschool group, three broad rows of torn paper are more manageable than many narrow layers. An older child can combine methods by using fringed feathers on the chest, folded ovals on the wings, and two longer pieces above the eyes. Added complexity should remain visible from normal viewing distance. Minute cuts that collapse under glue increase effort without improving the finished texture.
Attach separate wings after the chest rows are stable. A wing can be a long paper oval, a handprint tracing, or a section cut from a second plate. Place it at the side with part of the chest texture still visible. Gluing only the top of a paper wing allows the lower edge to stand away from the body, but a heavily decorated wing may droop. In that case, glue a larger area or choose flat construction paper rather than corrugated card.
Add the eye circles near the upper third of the plate and let them overlap slightly if desired. The beak can sit on top of the lower eye edges or immediately beneath them. Eyebrows, small ear tufts, or a contrasting ring around each eye may be added afterward, but too many raised features compete with the feather rows. The face should remain the visual anchor.
Watch for three failure signs during assembly: pieces sliding downward, the plate beginning to curl, or feather edges vanishing under excess adhesive. Sliding means the glue layer is too wet or the plate has been moved too soon. Curling indicates moisture imbalance; pause and let the work rest flat. Hidden edges mean the adhesive is spreading beyond the attachment area. Correct the next row rather than pulling apart wet paper, which usually tears the surface. These checks make the Paper plate owl craft with textured feathers easier to finish without replacing the plate.
Dry, Reinforce, and Display the Finished Owl
Flat drying preserves the layered surface and prevents the owl from twisting under uneven moisture. Move the plate by supporting it from underneath, then place it on a washable mat or clean sheet of scrap paper. Do not stack another object on top; pressure flattens the free feather edges and may glue them to the face. A plate made mainly with a glue stick may be ready sooner than one covered with paint and liquid glue, so judge dryness by touch rather than a fixed schedule.
Check hidden joins before hanging the owl. Lift the plate gently and look for wing corners, eye circles, or feather tops that separate from the surface. Repair only those spots with a small dab of glue. Adding a broad new coat across the back does not secure loose front pieces and may cause fresh warping. If a child wants more dimension after drying, gently bend a few unglued feather tips outward instead of creasing every piece.
The display method should suit the plate’s weight. Removable wall-safe hanging products may be appropriate where their manufacturer permits their use, while a classroom display can use clips on a line so the plate itself is not pierced. For a hanging loop, an adult can make two reinforced holes near the top and thread yarn through both. Two holes distribute the load and help keep the owl facing forward; one central hole can tear if the layered plate is heavy. Avoid a long dangling cord in spaces used by very young children.
If the owl will be handled as a mask or puppet, change the construction plan before decorating. Cutting eye holes removes the large paper eyes that define the design, and a wooden handle adds a rigid component requiring closer supervision. A safer play option is to keep the owl intact and attach a wide folded-paper handle to the back, provided the plate is light. For display-only work, skip the handle and preserve the clean silhouette.
Successful texture remains distinct after drying: rows are still visible, several edges lift slightly, and the plate lies mostly flat. A failing assembly feels damp, sheds pieces when raised, or bends sharply beneath thick decorations. Allow more drying time first; reinforcement should follow only after the adhesive has set enough to reveal which joins are genuinely weak.
Finished owls can support close observation without turning every design choice into a lesson requirement. Children might compare smooth and fringed paper, arrange light-to-dark feather rows, or notice how overlapping shapes conceal glue. When repeating the activity, vary one feature—such as feather material or wing construction—rather than changing every supply. That makes differences in texture easy to see and keeps setup realistic for homes, libraries, or classrooms.
Frequently Asked Questions
What can be used for textured owl feathers?
Construction paper, torn tissue, flattened cupcake liners, and lightweight corrugated paper all create visible texture. Construction paper is the easiest option when clean layering and reliable gluing matter most.
Should the front or back of the paper plate be decorated?
The flat back offers the easiest surface for feather rows. The front creates a framed appearance, but its raised rim can make layered pieces harder to attach evenly.
How do you keep paper feathers from falling off?
Glue the upper section of each feather to a clean, dry plate, press the join briefly, and keep the plate flat while it dries. Use small dabs of liquid glue for thicker paper.
Can children make the owl without scissors?
Yes. Children can tear paper into ovals or short strips while an adult prepares the eyes and beak. Torn edges create texture without requiring detailed cutting.
Why is the finished paper plate curling?
Excess paint or liquid glue can shrink as it dries and pull the plate out of shape. Use thinner adhesive applications, pause between wet stages, and dry the owl flat.
Conclusion
A convincing owl depends less on elaborate decoration than on clear proportions, controlled adhesive, and feather layers that remain visible. Choose a firm, non-glossy plate and light paper that children can cut or tear at an appropriate scale. Prepare the eyes and a test row before gluing, then build the chest upward with staggered pieces attached only at their tops. Large paper facial features are easier to manage than tiny loose embellishments and keep the design readable. Once assembly is complete, dry the plate flat, inspect individual joins, and select a display method that can carry its final weight. If time or hand control is limited, reduce the number of rows rather than making every piece smaller; broad, well-spaced layers produce stronger texture with fewer assembly problems.
Now retrieving an image set.
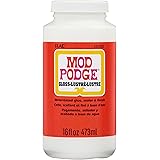
Mod Podge Gloss Sealer, Glue & Finish: All-in-One Craft Solution- Quick Dry, Easy Clean, for Wood, Paper, Fabric & More. Non-Toxic - Craft with Confidence, Made in USA, 16 oz., Pack of 1
$7.99 (as of September 29, 2026 22:47 GMT -04:00 - More infoProduct prices and availability are accurate as of the date/time indicated and are subject to change. Any price and availability information displayed on [relevant Amazon Site(s), as applicable] at the time of purchase will apply to the purchase of this product.)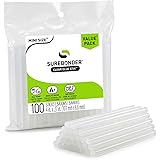
Now retrieving an image set.
Surebonder Clear, All Purpose, All Temp., Mini Size Hot Glue Sticks 0.27 in. Diameter, 4 in. Length -100 Pack
$5.97 (as of September 29, 2026 22:47 GMT -04:00 - More infoProduct prices and availability are accurate as of the date/time indicated and are subject to change. Any price and availability information displayed on [relevant Amazon Site(s), as applicable] at the time of purchase will apply to the purchase of this product.)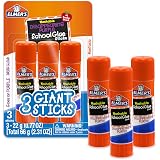
Now retrieving an image set.
Elmer's Disappearing Purple School Glue Sticks, Washable, 22 Grams, 3 Count - Poster, Vision Board, Back to School Supplies, #1 Teacher Brand
$5.22 (as of September 29, 2026 22:47 GMT -04:00 - More infoProduct prices and availability are accurate as of the date/time indicated and are subject to change. Any price and availability information displayed on [relevant Amazon Site(s), as applicable] at the time of purchase will apply to the purchase of this product.)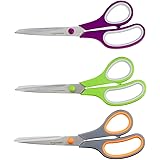
Now retrieving an image set.
Amazon Basics Multipurpose Stainless Steel Scissors for Office, Crafts, Right/Left Handed, Comfort Grip, PVD Coated, 3-Pack, Multicolor
$7.55 (as of September 29, 2026 22:47 GMT -04:00 - More infoProduct prices and availability are accurate as of the date/time indicated and are subject to change. Any price and availability information displayed on [relevant Amazon Site(s), as applicable] at the time of purchase will apply to the purchase of this product.)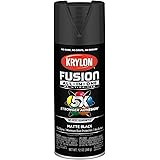
Now retrieving an image set.
Krylon Fusion All-In-One, Matte, Black, 12 oz
$6.98 (as of September 29, 2026 22:47 GMT -04:00 - More infoProduct prices and availability are accurate as of the date/time indicated and are subject to change. Any price and availability information displayed on [relevant Amazon Site(s), as applicable] at the time of purchase will apply to the purchase of this product.)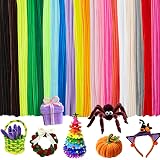
Now retrieving an image set.