
Paper and ink arts for supervised older children work best when the adult matches each method to the child’s control, the ink’s permanence, and the paper’s absorbency. Begin with washable drawing ink, sturdy mixed-media sheets, protected clothing, and a workspace where spills can be contained. Introduce dip pens, brush lettering, stamping, resist drawing, monoprinting, marbling, ink washes, and simple print blocks one technique at a time. Supervision should cover sharp nibs, staining inks, skin contact, and cleanup rather than directing every artistic decision. Test combinations on scraps first, because feathering, buckling, muddy colors, and excessive ink are the most common preventable failures.
Choosing Paper, Ink, and a Contained Workspace
Material compatibility determines whether an ink activity feels controlled or frustrating. Thin copier sheets absorb liquid quickly, wrinkle under broad washes, and may allow color to bleed through onto the table. Heavier drawing or mixed-media paper gives an older child more time to move a brush, pull a print, or correct an uneven mark. Smooth paper favors crisp nib lines and stamped detail, while lightly textured paper creates broken, expressive strokes but can catch a pointed pen.
Ink should be selected by behavior rather than color alone. Washable, water-based ink is the practical starting point when a child has not yet learned how much liquid a brush or dropper holds. Pigmented or permanent products may produce stronger darks and water-resistant layers, but they also raise the consequences of splashes, stained clothing, and dried residue on tools. Products intended for technical pens may not flow safely or predictably through every dip nib, and printer ink is not a substitute for bottled art ink.
A useful first test places a line, a filled shape, and one drop of water on a paper offcut. A spreading halo indicates feathering; a dark patch visible on the reverse indicates substantial strike-through; a raised ripple signals that the sheet needs less liquid, greater weight, or temporary taping to a rigid board. Testing also reveals whether one color lifts when a second wet layer passes over it. That small trial prevents a child from discovering an incompatible combination halfway through a detailed piece.
Containment should preserve independence rather than make the table feel restricted. Cover the work surface with a wipeable barrier, place the ink bottle inside a low tray, and pour only a shallow working amount into a stable container. Keep clean water separate from rinse water so accidental dilution is easy to avoid. Paper towels should be within reach before the bottle opens, not fetched after a spill.
A compact setup checklist is enough:
- Surface: washable covering over a level table with adequate elbow room.
- Paper: offcuts for testing plus heavier sheets for wet methods.
- Ink: labeled, age-appropriate products used according to their packaging.
- Protection: apron or old shirt, tied-back hair, and clean hands.
- Cleanup: towels, water, tool rest, and a designated drying area.
The weakest setup is a crowded table shared with food, electronics, or finished artwork. A better arrangement separates the wet station from the drying station and gives every tool a resting place. Readers comparing supplies for Paper and ink arts for supervised older children should prioritize predictable handling and washable surroundings before buying a large color range.
Eight Ink Methods Suited to Older Children
Older children can handle methods that require pressure control, sequencing, and patience, provided each unfamiliar motion is demonstrated separately. A short technique sample is more useful than an adult-made finished model: it shows how the material moves without implying that every result should look alike.
Line-Based Methods
Dip-pen drawing teaches direction and pressure. The child loads only the vent area of a suitable nib, touches excess ink to the container edge, and pulls the pen rather than pushing its point into the sheet. Broad nibs are generally more forgiving than very sharp points. A practice page of slow lines, curves, and hatch marks reveals whether the nib is overloaded or held too upright.
Brush lettering replaces metal with a soft point and makes thick-to-thin transitions through pressure. It suits children who can slow down and rotate the page instead of twisting the wrist into awkward positions. Contour drawing with a waterproof liner and a later wash separates line control from color application, but the outline must dry and should be tested before water is added.
Transfer and Surface Methods
Stamping uses foam shapes, erasers designed for carving, or ready-made rubber stamps to repeat motifs. Ink pads contain less free liquid than open bottles, so they are a sensible bridge to printmaking. Pressing harder does not necessarily improve the image; excess pressure can fill fine recesses and blur edges.
Simple block printing can use pre-cut foam plates or soft print surfaces intended for the child’s age and skill. An adult should take over any cutting that exceeds the child’s demonstrated tool control. A thin, even ink film produces clearer impressions than a glossy, pooled layer. Monoprinting uses a small amount of water-based printing ink rolled or brushed onto a smooth plate, then transferred once to paper. It invites experimentation because ghost prints and wiped marks become part of the result.
Wet and Resist Methods
Ink wash builds values by diluting one color into several strengths. Labeling three wells light, medium, and dark helps prevent every area from becoming the same tone. Wax resist places white or colored crayon marks beneath a transparent wash; firm wax coverage repels more liquid than faint sketching. Controlled paper marbling should use a child-appropriate kit and its specified bath rather than improvised chemical mixtures. It needs more setup and closer oversight than a wash, but it demonstrates floating color and transfer clearly.
Choose one method according to the behavior a child is ready to practice. Stamping suits repetition, washes develop water control, and dip pens reward deliberate line direction. Combining all eight in one session usually creates rushed transitions and contaminated tools. A better progression repeats one method on small sheets, reviews what changed, and then introduces a compatible second layer.
Supervision for Nibs, Stains, Spills, and Cleanup
Effective supervision controls hazards while leaving composition, color, and imagery with the child. The adult should decide where open ink sits, which tools are available, and how cleanup occurs. The child can decide what to draw, which marks to repeat, and when the image feels complete. Hovering over every stroke reduces experimentation without necessarily improving safety.
Pointed nibs deserve the same calm rules used for other sharp studio tools. Carry them point-down only when safely contained, keep them on a tool rest during pauses, and never gesture with a loaded pen. A snagging nib, bent point, or loose holder should be removed from use. If the child repeatedly pushes the nib toward the paper or waves it while talking, switch to a brush, felt-tip drawing pen, or stamp until control improves.
Ink labeling also matters. “Non-toxic” does not mean edible, suitable for skin decoration, or harmless to every surface. Children should avoid touching their face, eating at the table, blowing ink through straws, or putting brush handles in their mouths. Use products according to the manufacturer’s directions, provide ventilation where the label calls for it, and wash exposed skin promptly. Solvent-based, alcohol-heavy, aerosol, or strongly odorous materials are poor default choices for a casual home activity.
A spill response should be rehearsed in one sentence: set the tool down, move the artwork, blot the puddle, and tell the adult. Rubbing immediately can spread dye farther across fabric or a porous tabletop. The adult can then follow the product label and surface-care instructions. Never mix household cleaners in an attempt to remove a stubborn stain.
Cleanup is part of the method, not an afterthought. Cap containers before moving used paper, rinse compatible brushes before ink dries near the ferrule, and wipe nibs in the manner recommended for the ink and metal. Finished sheets need a flat, protected drying location where another page will not be placed on top. Pouring leftover working ink back into the original bottle may introduce water, paper fibers, or other colors, so retain only uncontaminated material when the product directions permit it.
Supervision is working when the child pauses before reloading, keeps the bottle in its tray, and manages small drips without panic. It is failing when tools migrate across the table, wet pages pile together, or the adult cannot see the open container. For more age-matched setup choices, the central principle behind Paper and ink arts for supervised older children is graduated responsibility: increase freedom after consistent handling, not merely after a birthday.
Diagnosing Feathering, Buckling, Blots, and Muddy Color
Ink problems usually reveal a mismatch among liquid volume, paper surface, tool loading, and drying time. Treating every flaw as poor drawing discourages useful observation. A child who can identify what the material did can change the next test instead of discarding the whole idea.
Feathering appears as fine branches spreading from a line. The paper is pulling fluid sideways through its fibers, or the tool is depositing more ink than the surface can contain. Try smoother or more heavily sized paper, unload the nib slightly, or use a less fluid application. Adding greater hand pressure is the wrong response because it can release another pool and damage the sheet.
Buckling occurs when wet fibers expand unevenly. Heavier watercolor or mixed-media stock tolerates washes better than lightweight drawing paper, though no sheet is immune to excessive soaking. Tape suitable paper to a board before painting, work in thinner passes, and let one area settle before adding another. A hair dryer may push wet ink, overheat a surface, or encourage rushed handling; ordinary flat drying is usually easier to control.
Blots and railroading point to opposite loading problems. A large blob at the start of a dip-pen line indicates too much ink or a pause with the nib touching the page. Two faint parallel edges with an empty center can indicate too little flow, dried residue, or a poor angle. Test on scrap after every dip until the first stroke becomes predictable.
Muddy color develops when multiple wet hues mix beyond the intended boundary or when a dirty brush carries complementary pigments into a fresh area. Two deliberate colors often produce a clearer result than an unrestricted palette. Give each color a separate well, rinse until the water leaving the brush is clear, and allow adjacent shapes to dry if a sharp boundary is wanted. If soft blending is the goal, join them while both edges remain damp and stop before repeated brushing dulls the mixture.
A useful troubleshooting sequence changes one variable at a time: first use less ink, then test different paper, then alter the tool or drying interval. Changing everything together may produce a better sheet, but it does not show which adjustment mattered. Save labeled samples with brief notes such as “one dip,” “dry first layer,” or “smooth side.” Those records turn accidental effects into repeatable choices and make future Paper and ink arts for supervised older children sessions easier to plan.
Frequently Asked Questions
What is the safest ink to begin with?
A washable, water-based art ink labeled for the child’s age is a practical starting choice. Check the package directions, protect clothing and surfaces, and do not assume washable means stain-free.
Which paper works best for ink washes?
Mixed-media or watercolor paper handles diluted ink better than copier paper. Test first because surface sizing, texture, ink formula, and water quantity all affect spreading and buckling.
Can older children use dip pens?
They can use appropriate dip pens under direct adult supervision after learning safe carrying, shallow loading, pull strokes, and tool-rest habits. Switch to a brush or felt-tip pen if the nib is mishandled.
How can ink stains be limited?
Use a shallow amount inside a spill tray, wear protective clothing, keep towels nearby, and blot rather than spread fresh spills. Follow the ink label and the surface manufacturer’s cleaning directions.
Why do ink colors turn muddy?
Too many wet colors, repeated brushing, or a poorly rinsed brush can dull mixtures. Limit the palette, separate working wells, clean tools between colors, and let neighboring areas dry when crisp separation is needed.
Conclusion
A successful ink session depends less on an elaborate supply collection than on deliberate matches among method, paper, fluid level, and demonstrated tool control. Begin with washable ink and a small technique sample, then introduce sharper tools, permanent media, or more complex transfers only after the child handles simpler materials consistently. Keep open containers in trays, separate wet work from drying work, and treat cleanup as the final stage of the process.
Save test strips and failed impressions rather than viewing them as waste. Feathered lines, buckled sheets, and dull mixtures show exactly which variable needs attention. For the next session, choose one adjustment—less ink, sturdier paper, cleaner water, or more drying time—and compare the result. That measured approach preserves creative ownership while making supervision specific, calm, and genuinely useful.
Now retrieving an image set.
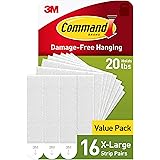
Command 20 lb X-Large Picture Hanging Strips, 16 Pairs White Command Strips Heavy Duty Picture Hanger
$10.39 (as of September 28, 2026 22:47 GMT -04:00 - More infoProduct prices and availability are accurate as of the date/time indicated and are subject to change. Any price and availability information displayed on [relevant Amazon Site(s), as applicable] at the time of purchase will apply to the purchase of this product.)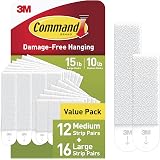
Now retrieving an image set.
Command 15 & 10 lb Assorted Picture Hanging Strips, 28 Pairs, SIOC | White Picture Hanging Strips, Damage-Free Wall Hangers for Frames, No Tools Required, Ideal for Decorating Apartments, Dorms
$13.99 (as of September 28, 2026 22:47 GMT -04:00 - More infoProduct prices and availability are accurate as of the date/time indicated and are subject to change. Any price and availability information displayed on [relevant Amazon Site(s), as applicable] at the time of purchase will apply to the purchase of this product.)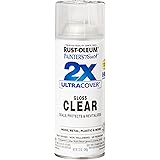
Now retrieving an image set.
Rust-Oleum Painter's Touch 2X Ultra Cover Spray Paint, Gloss Clear | Indoor and Outdoor Surfaces (Metal, Wood, Plastic), Fast Dry, Durable, Sprays from Any Angle, Comfort Tip, Oil Based
$5.98 (as of September 28, 2026 22:47 GMT -04:00 - More infoProduct prices and availability are accurate as of the date/time indicated and are subject to change. Any price and availability information displayed on [relevant Amazon Site(s), as applicable] at the time of purchase will apply to the purchase of this product.)
Now retrieving an image set.
Vanilla Oleoresin Essential Oil for Skin, Hair & Diffuser - 0.34 Fl Oz | Vanilla Oil for Hair, Aromatherapy & DIY, Long-Lasting Sweet Scent, Natural Fragrance Oil - Gya Labs
$9.99 (as of September 28, 2026 22:47 GMT -04:00 - More infoProduct prices and availability are accurate as of the date/time indicated and are subject to change. Any price and availability information displayed on [relevant Amazon Site(s), as applicable] at the time of purchase will apply to the purchase of this product.)
Now retrieving an image set.
Rust-Oleum Stops Rust Spray Paint, Semi-Gloss Black | Rust Resistant, Indoor and Outdoor, Beautiful Finish on Metal, Wood and More, Sprays from Any Angle, 12 oz
$6.48 (as of September 28, 2026 22:47 GMT -04:00 - More infoProduct prices and availability are accurate as of the date/time indicated and are subject to change. Any price and availability information displayed on [relevant Amazon Site(s), as applicable] at the time of purchase will apply to the purchase of this product.)
Now retrieving an image set.