
Choose Materials That Will Stay Flat
Plate stiffness matters more than decorative detail when a snowman will remain on a wall, door, bulletin board, or window for several weeks. Thin plates may be adequate for a short tabletop activity, but their centers buckle easily under wet paint and their rims can split where sections are joined. Choose uncoated white paper plates that feel firm when held by one edge. Plates with moderately deep rims provide useful overlap without making the finished figure project too far from the display surface.
Two plates produce a compact head-and-body figure, while three plates create the familiar graduated snowman shape. Using three identical plates is convenient, but trimming the rim from the head plate or selecting two plate sizes produces clearer proportions. Cutting a plate reduces its stiffness, so any trimmed section should receive a cardstock backing before hanging. For a classroom display with limited wall space, two plates are often the more reliable choice because the shorter figure needs fewer joints and is less likely to swing or fold.
Lightweight decorations preserve the plate structure. Cardstock works well for a hat, carrot nose, scarf ends, eyes, and buttons because it remains crisp without adding much mass. Washable markers are lighter and less likely to wrinkle the surface than heavy layers of paint. Small pieces of tissue paper can create texture, but cotton balls should be used selectively: a fully covered body can become bulky, collect dust, and pull a hanging snowman forward.
A practical supply check should include:
- Structure: two or three firm white paper plates, scrap cardstock, and clear tape;
- Assembly: washable school glue or a glue stick, child-safe scissors, and clothespins for temporary clamping;
- Features: markers, paper scraps, yarn, ribbon, or lightweight felt;
- Mounting: painter’s tape, removable adhesive strips, poster putty, or yarn selected for the actual surface.
A common mistake is choosing decorations first and mounting hardware last. The surface and expected display period should shape the supply choices from the beginning. A window-facing piece needs flat paper details and clean edges, whereas a bulletin-board snowman can accommodate a raised scarf or textured trim. The broader Paper plate snowman craft for winter displays project can therefore be adjusted without changing its basic plate structure.
Build and Decorate the Snowman
Complete the face and clothing pieces before connecting the plates. Separate work areas are easier for children to reach, and flat plates are less likely to bend while being colored. Place the flattest side faceup for decoration unless the plate design makes the underside visibly uneven. Before applying glue, arrange the eyes, nose, mouth, buttons, and hat to check spacing and confirm that no important feature crosses a future joint.
For the body, overlap adjacent rims by roughly an inch rather than joining them edge to edge. An edge-to-edge seam has very little bonding area and tends to open when the snowman is lifted. Apply a modest line of school glue within the overlap, press the plates together, and add a strip of clear tape across the back after the glue sets. A glue stick creates less moisture and permits faster handling, but liquid school glue generally fills the ridged surfaces more effectively. Too much liquid glue is counterproductive because it softens the plate and lengthens drying time.
Use this order to keep the work manageable:
- Dry-fit the plates and mark each overlap lightly with pencil.
- Decorate the separate face and body sections.
- Glue on flat paper features and allow them to set.
- Join the plates from top to bottom, keeping their centers aligned.
- Add the scarf across a joint only after the underlying connection is firm.
The scarf can serve both a visual and structural purpose. A cardstock band wrapped across the neck seam conceals the overlap and limits sideways movement. Yarn looks softer but does not reinforce the joint unless it is attached to a paper backing. If children want loose scarf ends, keep them short enough that they will not catch on nearby projects or obscure another student’s work on a crowded display board.
Drying position determines whether the finished snowman remains flat. Lay the assembled figure on a protected horizontal surface and place lightweight books near—not directly on—each seam. Clothespins can clamp accessible rims, although strong clips may leave dents. Hanging the piece before the adhesive cures allows gravity to pull the plates apart. Signs of a sound assembly include aligned centers, seams that do not flex when lifted, and decorations that remain flush at their edges. Rippling around glued pieces, damp translucent spots, or shifting rims indicate that the craft needs more drying time.
Reinforce the Plates for Display
Reinforcement should concentrate on joints and mounting points instead of covering the entire back. A full cardboard backing makes the snowman durable, but it adds weight and may be unnecessary for a seasonal indoor display. Small cardstock bridges are usually sufficient: cut strips several inches long, place one vertically across each rear seam, and tape or glue them to both plates. The strip distributes stress beyond the narrow overlap and helps the figure resist folding when moved.
A hanging snowman needs an anchor that does not rely on a single hole punched through the plate. Paper plate centers tear more readily than their rims, especially after exposure to paint or glue. For a yarn hanger, tape both yarn ends to a rectangular cardstock patch, then attach that patch across the upper back of the head. Run a second strip of tape over the yarn ends in the opposite direction. The load is then spread over a wider area instead of pulling against two small points.
Door displays face different forces from wall displays. Opening and closing a door causes vibration, while moving air can make loose sections flap. For that location, reinforce every plate seam and secure both the upper and lower portions of the snowman. A single top loop lets the body swing, so add a removable adhesive point behind the bottom plate. On a quiet classroom bulletin board, staples through reinforced rims may be adequate when the board owner permits them.
More reinforcement is not always better. Thick corrugated cardboard can make a lightweight craft top-heavy, and extensive tape may show around plate edges when viewed from the side. A useful test is to lift the completed figure by its intended hanger for several seconds over a table. The seams should remain straight, the head should not tilt forward, and the hanger patch should show no lifting corners. If a joint bends, add a narrow vertical bridge rather than layers of tape only at the seam.
For projects intended to be stored and reused, removable decorations require extra judgment. Hook-and-loop dots make interchangeable hats possible, but their pulling force can crease an unsupported plate. Mount each dot over a small cardstock patch and separate the fastener by sliding a finger between its halves rather than tugging the decoration outward. A simpler Paper plate snowman craft for winter displays version with permanently glued features is better for younger makers and short-term seasonal use.
Select the Right Mounting Method
The mounting method should match the surface, viewing angle, and expected duration. Painter’s tape is convenient on many painted walls, but adhesion varies with wall texture, paint condition, dust, and humidity. Test it in an inconspicuous location and follow the tape manufacturer’s removal directions. Roll small pieces with the adhesive facing outward and place them behind reinforced plate rims rather than damp or painted areas.
Removable adhesive strips provide a flatter presentation and can support several points along a tall snowman. They should be applied only to compatible, clean surfaces according to their package directions. Do not assume that a product labeled removable is suitable for every finish. Delicate paint, wallpaper, recently painted walls, and porous surfaces may require a different approach. A bulletin board is often easier: staples or pushpins can pass through reinforced rim areas, provided an adult handles sharp fasteners and the display rules allow them.
Windows call for a two-sided appearance because the back may be visible from outdoors. Use clear removable tabs near the top and bottom, hide cardstock seam bridges beneath white paper, and avoid opaque tape extending beyond the plate edges. Suction-cup hooks can hold a yarn loop without adhesive on the glass, but the figure may rotate unless its lower plate is also stabilized. Condensation is a warning sign; moisture can weaken paper and cause marker colors to bleed, so choose an interior wall if the window regularly becomes damp.
Freestanding displays offer an alternative when adhesives and fasteners are prohibited. Attach the snowman to a wide folded-cardstock easel or place it against a rigid display panel. The base must extend far enough behind the lowest plate to counter the forward weight of hats, pom-poms, or a layered scarf. A shallow easel works for flat paper features, while a more angled support is needed for dimensional decorations. Freestanding versions consume table space and are easier to knock over, so they suit shelves and supervised display areas better than busy walkways.
Check the installation after the first day. Corners beginning to peel, a widening gap between plates, or a figure leaning away from the surface indicates that the mounting points are under strain. Add support at a reinforced rim or remove a heavy decoration rather than simply pressing the same failing adhesive back into place. When taking the display down, support the snowman with one hand while releasing each fastener with the other. That approach protects both the surface and the plate joints, making the project more likely to survive storage.
Frequently Asked Questions
Should the plates be painted white?
White plates usually need no base coat. Skipping paint shortens drying time and reduces curling; add pale blue shading or small marker details if more depth is wanted.
What glue works best for joining paper plates?
Washable school glue grips overlapping ridges well, while a glue stick adds less moisture. Reinforce the cured seam with clear tape or a cardstock strip on the back.
How can children make the snowman without cutting plates?
Use two plate sizes or overlap three full-size plates. Provide precut cardstock features when scissor use is not appropriate for the group.
How long should the craft dry before hanging?
Wait until every glued area feels dry, opaque, and firm. Thick liquid-glue seams or layered decorations may need to remain flat longer than small paper features.
How should a finished snowman be stored?
Remove loose mounting materials, place the snowman flat between clean sheets of paper, and use a rigid folder or shallow box that does not compress raised decorations.
Conclusion
A durable winter snowman depends on controlling moisture, weight, and stress at the seams. Begin with firm plates, keep decorative pieces light, and overlap the rims to create enough bonding area. Let each glued stage dry flat before adding another source of weight. Cardstock bridges and broad hanger patches provide more useful support than repeatedly taping a weak joint.
Choose the mounting system only after checking the display surface and the forces the piece will face. A bulletin board, window, moving door, and tabletop each require a different balance of stability and easy removal. Test the completed snowman over a table, correct any bending or peeling, and secure both ends when movement is likely. Those checks preserve the child-made details while keeping the finished display straight, tidy, and easier to remove or store.
Now retrieving an image set.
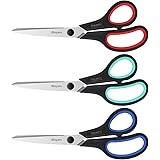
iBayam 8.5" Heavy Duty Scissors All Purpose for Office School Crafts Sewing | 3-Pack, Ultra-Sharp 2.5mm Stainless Blades, Comfort Grip Handles, Left & Right Handed – Teacher Desk & Classroom Must-Have
$9.99 (as of September 18, 2026 22:40 GMT -04:00 - More infoProduct prices and availability are accurate as of the date/time indicated and are subject to change. Any price and availability information displayed on [relevant Amazon Site(s), as applicable] at the time of purchase will apply to the purchase of this product.)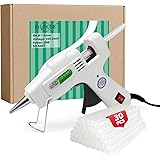
Now retrieving an image set.
Krightlink Mini Hot Glue Gun Kit with 30 Glue Sticks 20w Fast Preheating | 20w Hot Melt High Temp hot glue gun, Anti-Drop Precision Nozzle, for School Crafts DIY Arts, Quick Home Repairs-White
$8.54 (as of September 18, 2026 22:40 GMT -04:00 - More infoProduct prices and availability are accurate as of the date/time indicated and are subject to change. Any price and availability information displayed on [relevant Amazon Site(s), as applicable] at the time of purchase will apply to the purchase of this product.)
Now retrieving an image set.
Rust-Oleum Stops Rust Spray Paint, Semi-Gloss Black | Rust Resistant, Indoor and Outdoor, Beautiful Finish on Metal, Wood and More, Sprays from Any Angle, 12 oz
$6.48 (as of September 18, 2026 22:40 GMT -04:00 - More infoProduct prices and availability are accurate as of the date/time indicated and are subject to change. Any price and availability information displayed on [relevant Amazon Site(s), as applicable] at the time of purchase will apply to the purchase of this product.)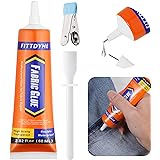
Now retrieving an image set.
FITTDYHE Fabric Glue Permanent, 60 ML Washable Clear Clothing Glue, Super Fabric Glue for Rhinestones, Patches, Clothes, Denim, Leather, Polyester, Fabrics, Doll Repair, Flannel, Cotton
$9.99 (as of September 18, 2026 22:40 GMT -04:00 - More infoProduct prices and availability are accurate as of the date/time indicated and are subject to change. Any price and availability information displayed on [relevant Amazon Site(s), as applicable] at the time of purchase will apply to the purchase of this product.)
Now retrieving an image set.
Handcraft Blends Peppermint Essential Oil - Huge 4 Fl Oz | Steam Distilled, Premium Grade for Diffuser, Aromatherapy, Skin, Massage, Candle & Soap Making Fragrance
$9.99 (as of September 18, 2026 22:40 GMT -04:00 - More infoProduct prices and availability are accurate as of the date/time indicated and are subject to change. Any price and availability information displayed on [relevant Amazon Site(s), as applicable] at the time of purchase will apply to the purchase of this product.)
Now retrieving an image set.