
Choose an Accurate Cocoon Life Cycle
A moth life cycle is the clearest scientific basis for this activity because many moth caterpillars make cocoons around their pupae. The sequence children should see is egg, larva or caterpillar, pupa protected by a cocoon, and adult moth. Keeping those stages visually separate prevents the cocoon from being mistaken for an egg, nest, or sleeping bag.
Preschool explanations should be accurate without becoming overloaded with vocabulary. Tell children that the caterpillar grows, makes a protective covering, changes inside it, and later emerges as an adult moth. The animal is not simply resting inside. Metamorphosis involves a major change in body form, even though the detailed biology is beyond what most preschoolers need for this lesson.
The words cocoon and chrysalis should not be treated as interchangeable. A cocoon is a covering, often made with silk spun by a moth caterpillar, surrounding the pupa. A chrysalis is the hardened outer form of a butterfly pupa and usually has no surrounding silk cocoon. There are exceptions and variations among insect species, so avoid absolute claims about every moth or butterfly. For a simple classroom model, label the adult as a moth and describe the wrapped stage as a cocoon.
A practical display places four images from left to right on one strip of cardboard. Use tiny paper circles for eggs on a leaf, a segmented caterpillar, a wrapped oval for the cocoon, and a broad-winged moth. A vertical wheel can also show sequence, but a straight strip is easier for young children to follow and rearrange. Wheels are better for repeated turning; strips are better for checking whether the stages are in order.
The main misconception to avoid is saying that the caterpillar “turns into a cocoon.” The caterpillar makes the cocoon, while the pupa develops inside. Model the distinction with a toy figure or paper caterpillar placed inside a loose paper sleeve before children glue their own version. That small demonstration gives the wrapping action a clear purpose and makes the related Cocoon craft for preschool lessons about insects more than a decorative project.
Select Preschool-Suitable Materials
Large, lightweight components give preschoolers more control than miniature decorations. Start with a sturdy sheet of cardstock, thin cardboard, or a paper plate divided into four areas. Add construction paper, washable school glue, chunky crayons, short pieces of yarn, and tissue paper. Each material should serve a visible part of the life cycle rather than being included only for ornament.
Yarn creates a convincing silk-like texture, but long strands can tangle around hands or drag through glue. Cut it into short lengths before the lesson and provide only a small bundle at each place. Crumpled tissue paper is faster and easier to attach, making it useful for younger groups or short sessions. A folded paper pocket is the strongest option when the teacher wants children to place a caterpillar inside and later remove an adult moth.
Loose glitter, beads, dry beans, pom-poms, and tiny plastic eyes add unnecessary handling risks for children who may mouth materials. They also distract from the sequence being taught. Draw eyes with crayons or use large teacher-prepared paper circles instead. Any craft component should be selected for the actual children in the room, with close adult supervision and attention to individual allergies, sensory needs, and classroom policies.
Prepare the activity with a compact material check:
- Base: one rigid strip or divided plate per child.
- Stages: four large paper pieces that are easy to identify and grasp.
- Cocoon texture: short yarn, tissue, or a folded paper sleeve.
- Adhesive: washable, age-appropriate glue used in small amounts.
- Marking tools: thick crayons or washable markers.
- Labels: optional stage words for an adult to read aloud.
Material choice should match the lesson priority. If sequencing is the goal, prepare most shapes in advance so cutting does not consume the session. If hand strength and scissor control are also goals, allow children who are ready to snip wide paper strips for the caterpillar or cocoon. Thin yarn and curved moth outlines are frustrating cutting tasks for beginners, so those pieces are better prepared by an adult.
Too much glue is the most common material failure. Yarn and tissue absorb adhesive, tempting children to keep squeezing until the base becomes wet and buckles. Put glue in shallow cups with brushes, offer glue sticks for flat paper pieces, or mark several visible glue dots. A finished cocoon should remain attached when the base is lifted, but it does not need to be saturated.
Build the Cocoon Craft in Four Stages
A consistent assembly order keeps the life cycle understandable while leaving room for individual artwork. Divide the base into four panels and place an arrow between adjacent stages. Before anyone glues, invite children to set the pieces down in the order they think is correct. Moving an unglued piece is much easier than repairing a sequence after adhesive has dried.
1. Add Eggs to a Leaf
Give each child a large green paper leaf and several small white paper circles. The eggs should sit on the leaf rather than floating elsewhere on the base. For children who are not ready to handle small circles, print or draw a cluster of larger dots. Explain that an adult moth lays eggs and that a caterpillar hatches from an egg.
2. Assemble the Caterpillar
Use three or four broad paper ovals or one thick strip folded like an accordion. A segmented body makes the caterpillar recognizable without requiring a realistic species illustration. Place it beside a leaf with a small bite shape removed to connect the larval stage with feeding and growth. Avoid suggesting that every caterpillar looks the same; colors and markings vary widely.
3. Wrap the Pupa in a Cocoon
Make an oval from brown or cream paper, then layer short yarn pieces or twisted tissue around it. For an interactive version, fold a rectangle into a pocket and put a small paper pupa inside before adding yarn to the outside. Do not seal every edge if children are expected to inspect the hidden piece later. The visible wrapping demonstrates that the cocoon surrounds and protects the pupal stage.
4. Attach the Adult Moth
Finish with a symmetrical moth shape that has two pairs of wings and antennae. Children may press paint or crayon marks onto one folded wing and transfer them to the other, although real wing patterns are not always perfectly mirrored. Keep the moth separate from butterfly clichés such as automatically adding a chrysalis label. The adult belongs after the cocoon, with an arrow showing emergence.
A teacher making one communal model can stop before attaching each stage and ask the group where it belongs. Individual projects offer more hands-on practice but require extra preparation, glue management, and drying space. For a class with limited time, create one shared life-cycle board and let each child contribute one textured cocoon. For a longer center activity, use the complete Cocoon craft for preschool lessons about insects as a four-part sequence.
The project is working when children can point from one stage to the next and explain that the moth comes after the cocoon. Neat borders, matching colors, and identical shapes are not meaningful measures of understanding. If children consistently place the cocoon before the caterpillar, pause for a physical demonstration rather than correcting every finished base afterward.
Turn the Finished Project Into an Insect Lesson
The finished artwork becomes useful teaching evidence when children talk, point, move pieces, and compare stages. Ask specific questions such as “What comes out of the egg?” and “Who makes the covering around the pupa?” Questions with visible answers are more productive than asking a preschooler to recite the word metamorphosis without context.
Use the project during a second short session after the glue dries. Cover three stages with paper and reveal them one at a time, inviting children to predict what follows. Another option is to make duplicate stage cards and have small groups match each card to the corresponding part of the artwork. Repeated sequencing shows whether children understand the process rather than merely remembering where they glued a shape.
Observation adds depth when it is responsible and realistic. Photographs from a library book, museum, university, or nature organization can show that actual cocoons differ in size, color, texture, and placement. Some may be attached to vegetation, hidden in leaves, or formed in other protected locations. Do not imply that every brown oval hanging from a branch is a moth cocoon. Outdoor objects should be observed where they are unless an adult can identify and manage them appropriately.
Language practice fits naturally into the lesson. Invite each child to dictate one sentence about a stage, then write the sentence beneath the relevant panel. A child might say, “The caterpillar wraps itself,” which gives the teacher a chance to refine the idea: “The caterpillar spins silk to make a covering.” Recasting the sentence preserves participation while adding accurate vocabulary.
Comparing a moth cocoon with a butterfly chrysalis is appropriate once the primary sequence is secure. Put two clear pictures side by side and ask what children notice. The aim is not to test obscure differences but to prevent a common false rule. Explain that both are connected with the pupal stage, while the structures around that stage differ. Preschoolers may remember only part of the distinction, which is acceptable if the classroom language remains accurate.
A weak lesson measures success by whether every moth looks alike. A stronger assessment asks each child to select the first stage, place the caterpillar before the cocoon, and identify the adult at the end. If a child cannot yet verbalize the sequence, pointing or arranging cards can still reveal understanding. Save one model near the science area so children can revisit the process through play rather than treating the project as a one-time decoration.
Manage Groups, Drying Time, and Common Problems
Classroom logistics determine whether the project remains focused on insects or becomes a long wait for supplies. Sort each child’s large paper pieces into a tray or envelope before the session. Keep shared yarn in small portions, place finished work on labeled drying sheets, and reserve one table for adhesive. This arrangement reduces lost stages and prevents wet projects from being stacked together.
For a group activity, demonstrate only the next action instead of completing the entire model while children watch. A long demonstration asks preschoolers to remember too many steps. Show the egg panel, let children complete it, and then move to the caterpillar. Children who work quickly can add leaf veins or wing markings while others finish, preserving the sequence without rushing the group.
If yarn lifts away from the cocoon, the likely causes are pieces that are too long, too little contact with the base, or movement before drying. Shorten the strands and press them onto several small glue lines. If the cardboard bends, reduce liquid adhesive and move the project to a dry backing sheet. If the removable pupa becomes permanently trapped, leave one pocket edge unglued and mark that edge for adults before distributing materials.
Mixed-age and mixed-ability groups need different entry points. Younger preschoolers can place prepared shapes and press tissue onto glue. Older children can cut simple ovals, draw arrows, or dictate labels. A child who avoids sticky textures can use a glue stick and folded paper strips instead of yarn dipped in adhesive. Adaptation should preserve the life-cycle relationship; replacing every tactile task is preferable to excluding a child from the scientific sequence.
Watch for signs that the lesson has become too complicated. Children randomly covering all four panels with yarn, repeatedly asking which piece comes next, or waiting several minutes for adult help suggest that there are too many materials or directions. Remove decorative extras, return to four distinct stage pieces, and use a visible sample as a reference. Simplifying the construction often improves both independence and scientific clarity.
Plan cleanup as part of the activity rather than an afterthought. Count reusable crayons, discard glue-soaked scraps, wipe surfaces promptly, and check the floor for small offcuts. Display the projects at children’s eye level only after they are dry. A brief follow-up conversation the next day gives the teacher a better picture of retained understanding than asking questions while children are still handling supplies.
Frequently Asked Questions
Do butterflies make cocoons?
Most butterflies form an exposed chrysalis rather than spinning a silk cocoon around the pupa. Use a moth as the adult insect when teaching a simple cocoon sequence.
What can replace yarn on the cocoon?
Twisted tissue paper, narrow paper strips, or a folded paper sleeve can create the covering. Paper is usually less tangled and requires less liquid glue than yarn.
How long should the activity take?
Allow roughly 20 to 30 minutes when the main shapes are prepared beforehand. Split assembly and sequencing discussion into separate sessions if the group needs frequent movement breaks.
Should preschoolers cut all the pieces themselves?
No. Children ready for scissors can cut wide strips or simple ovals, while adults prepare curved moth shapes and difficult materials. The cutting demand should not obscure the insect lesson.
How can a teacher check whether children understand the life cycle?
Ask children to arrange four loose stage cards, point to what comes after the caterpillar, and explain what emerges from the cocoon. Sequence knowledge matters more than decorative neatness.
Conclusion
Keep the project centered on one accurate moth sequence and four visually distinct stages. Large prepared shapes, controlled amounts of washable glue, and a choice of yarn, tissue, or folded paper make the construction manageable for preschool hands. The cocoon should visibly surround the pupal stage, while the finished adult should be identified as a moth rather than automatically labeled a butterfly.
Prepare materials according to the group’s cutting ability, demonstrate one action at a time, and leave enough space for projects to dry flat. Once the pieces are secure, return to them for the most valuable part of the lesson: arranging stages, describing what changes, and comparing a cocoon with a chrysalis. If children can show what comes before and after the cocoon, the activity has communicated its central scientific idea.
Now retrieving an image set.
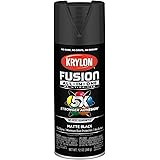
Krylon Fusion All-In-One, Matte, Black, 12 oz
$6.98 (as of September 18, 2026 22:40 GMT -04:00 - More infoProduct prices and availability are accurate as of the date/time indicated and are subject to change. Any price and availability information displayed on [relevant Amazon Site(s), as applicable] at the time of purchase will apply to the purchase of this product.)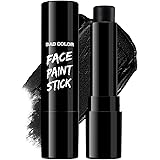
Now retrieving an image set.
BADCOLOR Black Cream-Blendable Face Body Paint Stick for Adults Children Eye Black Softball Football Baseball Sports , Non-Toxic Hypoallergenic for Halloween SFX Makeup Cosplay Joker Costume Parties
$5.99 (as of September 18, 2026 22:40 GMT -04:00 - More infoProduct prices and availability are accurate as of the date/time indicated and are subject to change. Any price and availability information displayed on [relevant Amazon Site(s), as applicable] at the time of purchase will apply to the purchase of this product.)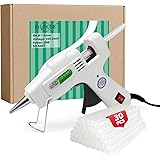
Now retrieving an image set.
Krightlink Mini Hot Glue Gun Kit with 30 Glue Sticks 20w Fast Preheating | 20w Hot Melt High Temp hot glue gun, Anti-Drop Precision Nozzle, for School Crafts DIY Arts, Quick Home Repairs-White
$8.54 (as of September 18, 2026 22:40 GMT -04:00 - More infoProduct prices and availability are accurate as of the date/time indicated and are subject to change. Any price and availability information displayed on [relevant Amazon Site(s), as applicable] at the time of purchase will apply to the purchase of this product.)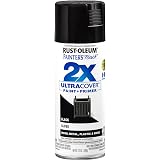
Now retrieving an image set.
Rust-Oleum Painter's Touch 2X Ultra Cover Spray Paint, Gloss Black | Indoor and Outdoor Surfaces (Metal, Wood, Plastic), Fast Dry, Durable, Sprays from Any Angle, Comfort Tip, Oil Based
$5.98 (as of September 18, 2026 22:40 GMT -04:00 - More infoProduct prices and availability are accurate as of the date/time indicated and are subject to change. Any price and availability information displayed on [relevant Amazon Site(s), as applicable] at the time of purchase will apply to the purchase of this product.)
Now retrieving an image set.
Amazon Basics Clear Thermal Laminating Sheets for Documents and Photos, 9 x 11.5-Inch, 2.8 mil, 200-Pack
$17.99 (as of September 18, 2026 22:40 GMT -04:00 - More infoProduct prices and availability are accurate as of the date/time indicated and are subject to change. Any price and availability information displayed on [relevant Amazon Site(s), as applicable] at the time of purchase will apply to the purchase of this product.)
Now retrieving an image set.