
A gingerbread house paper craft without edible parts is made by cutting a sturdy cardstock template, folding scored tabs, joining the walls with child-appropriate adhesive, and decorating the structure with paper details instead of candy. A flat façade is easiest for younger children, while a freestanding house works better for children who can align folds and hold glued seams. Reinforce the base and roof ridge so the finished model does not sag. Paper circles, scalloped strips, drawn icing lines, pom-poms, and craft foam can create a convincing gingerbread look without introducing food, crumbs, or melting decorations.
Choose a House Format That Matches the Child
The best house format depends more on construction ability than on age printed on a project label. A flat house assembled from rectangles, triangles, and a door gives young children a large decorating surface without requiring them to manage tabs or corners. A folded standing house introduces measuring, scoring, and structural joins, so it suits children who can cut near a line and wait while adhesive begins to hold.
A flat façade is the dependable choice for a preschool table, a classroom display, or a short activity period. Cut a brown rectangle for the wall and place a triangle above it for the roof peak. Children can add windows, roof tiles, and imitation icing before the pieces are mounted on a contrasting background. The result still reads clearly as a gingerbread house, but there is no risk of walls separating or a roof sliding out of position.
A freestanding model offers more play and display value, although its folds must be planned before decorating. A simple template can use four connected wall panels with a narrow glue tab at one end. Two opposite wall panels receive triangular gables, and two separate rectangles form the roof. This design is easier to control than six individual panels because the connected walls naturally establish the house perimeter.
Choose a shallow house rather than a tall one for a first three-dimensional build. Wide walls and a low roof place less leverage on glued seams. A child who wants a detailed model can add a porch, chimney, or layered shutters after the shell is stable; attaching those pieces too early makes the template harder to fold flat.
The common misconception is that a more elaborate template creates a better activity. Extra tabs, dormers, and roof angles often shift the adult’s role from assisting to rebuilding. For a group project, prepare one folded sample and one unassembled sample so children can see both the final form and the location of the folds. The broader Gingerbread house paper craft without edible parts approach can therefore be adjusted without changing its recognizable holiday theme.
Select Materials That Hold Their Shape
Cardstock provides the most useful balance of stiffness, cutability, and surface quality for a paper gingerbread house. Brown cardstock in a medium craft weight usually folds cleanly while remaining firm enough for small walls. Ordinary printer paper works for decorative pieces, but a freestanding shell made from it tends to bow under roof weight or buckle where wet glue is applied.
Corrugated cardboard is stronger, yet it introduces tradeoffs. Its thickness can be difficult for children to cut, exposed edges look less like baked gingerbread, and narrow tabs resist sharp folds. It is better used as a hidden base beneath the house. Construction paper is easy to trim and available in suitable colors, but it may fade, wrinkle, or tear at a heavily handled seam. Use it for doors, shingles, candy shapes, and landscape details rather than for the main three-dimensional structure.
Adhesive choice affects both working time and stability. A glue stick keeps paper relatively dry and is manageable for children, but it performs best on broad, flat overlaps. White school glue forms a stronger tab joint when applied sparingly. Too much liquid glue saturates cardstock and allows the seam to drift while drying. Double-sided craft tape gives an immediate hold and avoids warping, though alignment must be correct on the first attempt because repositioning can tear the paper surface.
A practical supply set includes:
- Brown cardstock: house walls and roof panels
- White and colored paper: icing lines, windows, sweets, and trim
- A ruler and blunt scoring tool: straight, controlled folds
- Child-appropriate scissors: basic shapes and fringed trim
- Glue stick or a small amount of white glue: decorations and structural tabs
- A cardboard rectangle: a stable display base
Pom-poms, sequins, buttons, foam pieces, and beads can expand the design, but small loose items are unsuitable for children who may mouth craft materials. Non-edible does not automatically mean appropriate for every child. Match the size of embellishments to the users, supervise cutting and gluing, and follow the age guidance supplied with purchased materials.
Test pens and markers on a scrap of the actual cardstock. Dark ink usually remains visible on brown paper, while pale markers may appear faint. White crayons, paint markers used with close adult oversight, or narrow strips of white paper produce clearer icing effects. A material test prevents children from completing detailed lines that disappear as the ink dries.
Cut, Fold, and Assemble the House
Accurate folds matter more than perfectly cut decorative edges because the folds determine whether the walls meet squarely. Print or draw the template, cut around its outer perimeter, and mark every fold line before adding dimensional decorations. If the template was printed on regular paper, trace it onto cardstock rather than gluing the thin printout over the structural sheet; laminated layers can curl when folded.
Follow this assembly order for a basic freestanding model:
- Cut the connected wall shape, including the end tab and both gable peaks.
- Score each wall boundary by running a blunt tool along a ruler. Press enough to guide the fold without slicing the cardstock.
- Fold the walls inward and test the end-tab overlap without adhesive.
- Cut two matching roof rectangles with a slight overhang at the front, back, and sides.
- Decorate wall panels while the template is still mostly flat, keeping bulky pieces away from folds and tabs.
- Join the end tab, set the wall shell on its base, and allow the seam to become secure.
- Attach the roof panels one at a time, aligning their top edges at the ridge.
Dry fitting exposes errors while they are still reversible. Wrap the wall strip into shape, check that the bottom edges sit evenly, and rest the roof pieces over the gables. If a roof panel falls short, cut a replacement rather than stretching the walls inward. If it overhangs slightly, the excess resembles an eave and is usually harmless.
A narrow strip of folded cardstock can reinforce the roof ridge from underneath. Fold the strip lengthwise into an angle, glue one half beneath each roof panel, and then place the completed roof on the walls. This method controls the roof angle better than trying to balance two loose rectangles while their glue remains wet.
For children working independently, place adhesive only where it performs a clear job. Color the structural tabs lightly with a pencil before assembly so they are easy to identify. Decorations should not cover the tabs, fold lines, or the bottom edge that meets the base. A row of heavy pom-poms along one roof side can pull that panel downward, so distribute raised decorations across both slopes or reserve them for the base.
A successful shell sits without being squeezed, has four wall bottoms touching the base, and keeps its ridge centered above the gables. Gaps that widen when hands are removed signal that a fold is off line or a seam needs more setting time. More variations on Gingerbread house paper craft without edible parts can use the same assembly sequence even when window and roof designs change.
Create Non-Edible Gingerbread Decorations
Paper decoration works best when it imitates the visual features of candy rather than attempting to reproduce every edible detail. White wavy strips suggest piped icing, overlapping circles resemble gumdrops, and red-and-white paper spirals create peppermint discs. These shapes remain clean in storage, do not attract pests, and can be attached before the structure is displayed.
Layering produces stronger visual depth than drawing alone. Place a smaller white rectangle inside a colored rectangle to make a window frame, or stack three circles of decreasing size for a raised sweet. Scalloped strips can run beneath the roof edge like icing trim. For shingles, cut several strips with rounded lower edges and overlap them from the eave upward, just as real roofing courses overlap. Attaching the bottom row first hides the straight top edges beneath the next row.
A useful design limit is to repeat two or three decorative shapes rather than filling every surface with unrelated pieces. For example, a house might use peppermint circles around the door, scalloped white trim under the roof, and square windows with crossed paper muntins. Repetition makes the finished structure coherent and reduces the number of tiny pieces an adult must prepare.
Texture can be introduced without food. Crumpled tissue paper creates soft snow, cotton balls form drifts, and craft foam makes thick doors or shutters. Glitter offers sparkle but spreads beyond the work area and can be difficult to remove from hands and floors. Metallic paper, foil stickers, or sequins provide a contained alternative. When loose glitter is used, apply it over a tray and seal only if the chosen sealer is appropriate for the materials and will be handled by an adult.
Leave roof and wall folds undecorated until the test fit is complete. A frequent failure occurs when children glue stiff trim across a fold and then discover that the wall cannot bend. Another is placing windows so close to a corner that half of the frame disappears around the edge. Mark a narrow no-decoration zone beside every score line before distributing the pieces.
The display base can carry details that would overload the house itself. Add paper trees made from folded triangles, a path of gray ovals, or a fence formed from craft sticks where suitable. A label with the child’s name belongs on the underside or rear edge rather than across the scene. This keeps the model identifiable while preserving the designed front view.
Prevent Sagging, Mess, and Assembly Problems
Structural problems usually appear at wet seams, unsupported roof panels, or folds covered by decoration. Each has a different remedy. A damp, bowed wall needs less liquid adhesive and more drying time; an opening corner needs better tab contact; a slipping roof needs support at the ridge or gables rather than another heavy layer of glue.
If a seam will not stay closed, hold it with a removable paper clip or clothespin only when the clip can be placed without crushing the cardstock. Put a scrap of paper between the clip and decorated surface to reduce marks. For a classroom station, double-sided tape may be more practical because children do not need to wait while holding corners. White glue remains useful when the model can dry undisturbed between stages.
Warping commonly comes from treating paper adhesive like cake icing. Thick beads look decorative at first but add moisture and weight. Make imitation icing with cut paper, a controlled marker line, or thin glue lines applied by an adult when the specific decorative material calls for them. If cardstock begins to curl, stop adding wet materials and let it dry flat before assembly.
Plan the work surface around incomplete houses, not only active crafting. A shallow tray keeps each child’s roof pieces, windows, and name label together. Finished wall shells need a level shelf where they will not be moved before the joins set. In a group, divide the activity into a decoration session and a later assembly session. This takes longer on the calendar but produces fewer collapsed structures than rushing wet, heavily decorated walls into shape.
Before calling the project finished, check four points: the base is flat, all corners remain joined without hand pressure, the roof touches both gables, and no small embellishments are loose. A wobbling model may only need a wider cardboard base and two small hidden paper tabs connecting opposite walls to it. A severely twisted shell is usually faster to reopen and refold than to disguise with decorations.
Storage should protect the roof from downward pressure. Place the house in a box with space above the ridge, and avoid plastic wrapping that presses against raised trim. Flat façades are the better option when projects must travel home in backpacks. For additional planning ideas, the Gingerbread house paper craft without edible parts theme can be adapted into cards or wall displays that require no three-dimensional transport.
Frequently Asked Questions
What paper is best for a freestanding gingerbread house?
Brown cardstock is firm enough to support a small roof while remaining easy to score and fold. Use lightweight paper for decorative layers and corrugated cardboard only as a hidden base.
Can young children make this project without a template?
Yes. A flat house made from one rectangle, one roof triangle, and simple door and window shapes is easier than a folded model and does not require a printed template.
What can replace candy on a paper gingerbread house?
Use colored paper circles, foam shapes, pom-poms, buttons, stickers, scalloped strips, or drawn designs. Avoid small loose pieces when crafting with children who may put items in their mouths.
How do I keep the roof from sliding off?
Join the roof panels underneath with a lengthwise-folded cardstock strip, let that ridge set, and then attach the roof to the gable edges with small amounts of adhesive.
Should the house be decorated before or after assembly?
Add flat wall details before assembly, but keep tabs and folds clear. Attach bulky roof trim, pom-poms, landscaping, and pieces that cross corners only after the shell is stable.
Conclusion
A successful paper gingerbread house begins with a format the child can actually build. Choose a flat design for speed and independent decorating, or use a connected-wall template when a freestanding display is worth the extra folding and drying time. Cardstock should carry the structure, while lighter paper, foam, stickers, and other suitable materials supply the candy-like details.
Test the shell before adding raised decorations, keep every fold and glue tab clear, and use adhesive sparingly. Reinforce the roof ridge and secure the house to a firm base if it will be moved or displayed for several weeks. Before storage or transport, check for open seams, loose small parts, and pressure on the roof. Those practical choices preserve the playful gingerbread appearance without relying on edible components.

Now retrieving an image set.
100% Pure Tea Tree Essential Oil for Skin & Diffuser - 4 Fl Oz | 100% Pure Tea Tree Oil for Blemish-Prone Skin & Flaky Scalp, suits Oily & Combination Skin, Daily Face Wash & Scalp Care
$9.99 (as of September 18, 2026 22:40 GMT -04:00 - More infoProduct prices and availability are accurate as of the date/time indicated and are subject to change. Any price and availability information displayed on [relevant Amazon Site(s), as applicable] at the time of purchase will apply to the purchase of this product.)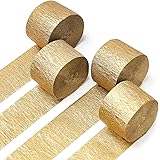
Now retrieving an image set.
PartyWoo Gold Crepe Paper Streamers 4pcs 328 FT Gold Streamers | Wedding Birthday Baby Shower Engagement Anniversary New Year Eve Graduation Bridal Shower Party Decorations
$6.99 (as of September 18, 2026 22:40 GMT -04:00 - More infoProduct prices and availability are accurate as of the date/time indicated and are subject to change. Any price and availability information displayed on [relevant Amazon Site(s), as applicable] at the time of purchase will apply to the purchase of this product.)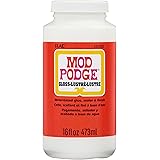
Now retrieving an image set.
Mod Podge Gloss Sealer, Glue & Finish: All-in-One Craft Solution- Quick Dry, Easy Clean, for Wood, Paper, Fabric & More. Non-Toxic - Craft with Confidence, Made in USA, 16 oz., Pack of 1
$7.99 (as of September 18, 2026 22:40 GMT -04:00 - More infoProduct prices and availability are accurate as of the date/time indicated and are subject to change. Any price and availability information displayed on [relevant Amazon Site(s), as applicable] at the time of purchase will apply to the purchase of this product.)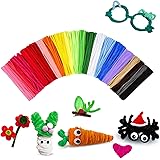
Now retrieving an image set.
200 Pcs Pipe Cleaners Craft Bulk, 20 Colors Pipe Cleaner, Chenille Stems | Kids Toys & Games Gifts for Ages 5-7, Craft Supplies for Projects Creative DIY Room Decor, Halloween Christmas Decorations
$5.99 (as of September 18, 2026 22:40 GMT -04:00 - More infoProduct prices and availability are accurate as of the date/time indicated and are subject to change. Any price and availability information displayed on [relevant Amazon Site(s), as applicable] at the time of purchase will apply to the purchase of this product.)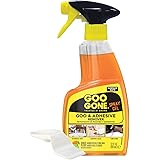
Now retrieving an image set.
Goo Gone Adhesive Remover Spray Gel 12 Oz with Scraper, Surface Safe | Citrus Cleaning Power for Hard Surfaces, Carpet & Fabric, Removes Glue, Stickers, Tape Residue, Grease, Gum & Wax, Drip Free
$17.98 (as of September 18, 2026 22:40 GMT -04:00 - More infoProduct prices and availability are accurate as of the date/time indicated and are subject to change. Any price and availability information displayed on [relevant Amazon Site(s), as applicable] at the time of purchase will apply to the purchase of this product.)
Now retrieving an image set.