
Choose a Mask Base That Stays Light and Holds Its Shape
The most useful mask base is firm enough to span the face without folding into the eyes, yet light enough that its straps do not need to be tight. Medium-weight cardstock, a plain paper plate, or two layers of construction paper usually provide a workable balance. Thin printer paper tends to curl after glue or paint is added, while thick corrugated cardboard can feel bulky and develop stiff edges near the cheeks.
Size the base from temple to temple rather than covering the child’s entire face. A half-mask that ends above the nostrils leaves the nose and mouth unobstructed, allows easier conversation, and reduces the amount of material the fastening must support. Before decorating, hold the uncut sheet near—not pressed against—the child’s face and mark approximate eye level and outer width. An adult should handle this fitting step so pencils, scissors, and unfinished edges remain away from the eyes.
A practical base can be made by folding cardstock lightly down the center, sketching half of a rounded mask shape, and cutting through both sides to produce symmetry. Do not sharply crease the finished mask unless the design needs a center ridge; a hard fold may point toward the nose. Round every corner, especially near the temples, because pointed paper corners become more noticeable when a strap pulls the mask backward.
Moisture changes how the base behaves. Heavy paint, wet glue, and layered tissue can cause one side to shrink or bow as it dries. Decorate both sides lightly or place the drying mask beneath a clean sheet of parchment paper and a flat, lightweight book once the surface is no longer tacky. Never fit a damp mask. Adhesive may transfer to skin, paint can irritate sensitive areas, and a soft strap hole can tear even if it looked secure before decorating.
For a first attempt, keep the silhouette compact and the decoration flat. Elaborate ears, horns, or a long beak shift weight away from the face and make strap tension harder to judge. The base instructions in this Paper mask craft with comfortable child-safe straps are most effective when comfort and visibility determine the shape before the character theme does.
Cut Eye Openings and Shape the Mask for a Clear View
Eye openings should be established while the mask is still plain because vision cannot be corrected reliably after layered decoration covers the cutting marks. Ask the child to look straight ahead while an adult notes the horizontal eye line and approximate spacing. Remove the mask from the face before drawing or cutting. Never cut, punch, or trim any part while it is being worn.
Begin with openings smaller than the intended finished size, then widen them gradually during off-face fitting checks. Rounded oval or softly rectangular openings are easier to reinforce than narrow points. Cut edges should sit well outside the eyelashes and should not touch the eyelids when the child looks left, right, up, or down. If the child must tilt or turn the head unusually to locate objects, enlarge the openings or abandon that base and recut it.
A common shortcut is tracing the eye holes from an adult-sized template. That may place openings too far apart, too high, or too low for a child. Another mistake is aligning decorative eyes with the character illustration instead of the wearer’s actual pupils. The decoration can be asymmetrical or exaggerated, but the functional openings must follow the wearer’s sight line.
To start an interior cut, an adult can place the mask on a cutting-safe surface, make a small opening with an appropriate tool, and then use scissors to complete the shape. A child should not push scissors blindly through the paper because the blades can slip. After cutting, run a fingertip along the edges and trim any pointed fibers. A narrow ring of paper glued around the back of each opening can strengthen thin cardstock without creating a hard rim against the face.
The nose area also affects fit. A shallow curved notch may help the mask rest above the bridge rather than sliding downward, but a deep notch can form two sharp points. Round both sides and test the mask without straps first. It should sit in the intended position with only gentle hand support. If it rocks, pinches, or blocks peripheral vision at that stage, tighter straps will not solve the underlying shape problem.
Clear vision matters more than a perfectly centered design. During a trial, place a few familiar objects at different heights and ask the child to identify them without walking. This is a fitting check, not a guarantee that the mask is suitable for running, stairs, playground equipment, or crowded play.
Compare Soft Strap Options and Attachment Methods
A comfortable fastening spreads light pressure and releases easily when the mask catches or the child wants it off. Wide, soft ribbon generally feels smoother behind the head than thin string. Soft, broad elastic can allow quick on-and-off use, but it must not be stretched tightly, and narrow elastic may press behind the ears. Yarn is easy to obtain but can fray, form stubborn knots, and feel rough against skin.
For supervised pretend play, two ribbon ties can be attached at the temples and tied loosely behind the head by an adult. Use a bow rather than a hard double knot so the mask can be removed promptly. Keep tie ends only as long as needed for fitting; excessive trailing length can catch on costumes, chairs, or play structures. Do not use wire, fishing line, beaded cords, or rigid plastic ties.
A single elastic loop is convenient only after its relaxed length has been checked on the intended wearer. Secure the elastic to the mask rather than testing an unfastened band around the child’s head. The finished loop should hold the lightweight mask in place without leaving pressure marks or pulling the paper sharply into the temples. Elastic that launches the mask forward when released is under unnecessary tension.
Reinforce the Attachment Points
Strap holes usually fail because all the pulling force is concentrated on a small circle of paper. Glue a rounded cardstock patch to the back of each temple area and let it dry fully before making the hole. Position the hole inward from the edge, leaving enough material around it to resist tearing. An adult can use a hole punch for a smooth opening; irregular scissor punctures are more likely to split.
Thread ribbon through the reinforced hole and tie it to itself on the outer side so the knot does not rub the child’s temple. If elastic is used, secure it according to the material’s behavior and cover any firm attachment on the back with a smooth paper patch. Staples are a poor choice near the face because legs can lift or become exposed as the paper bends. Tape alone may peel from painted or dusty surfaces, so it should not be treated as a dependable structural attachment.
A handheld alternative removes the head strap entirely. Attach a wide folded cardstock handle to one side or use a smooth craft stick with adult supervision, covering the upper attachment area so no hard edge contacts the face. This option suits short photo activities, children who dislike anything around the head, or masks with delicate decorations. It requires one hand and is easier to drop, but it also permits immediate removal. Choose between ties, elastic, and a handle by considering the child’s comfort, the length of play, and the surrounding activity—not merely appearance.
Test the Fit Before Dress-Up Play Begins
A fit check should happen in stages: inspect the completed mask, place it briefly, observe the child at rest, and then ask for small head movements. The mask should remain above the nostrils, keep every edge away from the eyes, and come off without struggling. A child who repeatedly pushes it upward, squints, pulls at the fastening, or asks to remove it is giving useful fit information; tightening the strap is not the correct response.
Start with a ten-second trial while the child is seated. Check that the fastening lies flat and that hair has not become tangled in elastic or knots. Ask how the temples, ears, nose, and cheeks feel rather than relying only on visible marks. Next, have the child look side to side and gently nod. If the mask slides, first reduce weight or adjust the nose shape. Increasing tension should be the last option, and only a small adjustment may be appropriate.
Use this compact pre-play check:
- Vision: Both openings remain clear during normal eye and head movement.
- Breathing: The nose and mouth are completely uncovered.
- Edges: Corners, dried glue, and attachments do not touch sensitive skin.
- Fastening: The strap is soft, loose enough for comfort, and easy for an adult to release.
- Activity: Play stays away from stairs, climbing, running, cooking areas, and open flames.
Comfort can change after several minutes. Cardstock may soften with warmth, knots may migrate, and decorations may begin to droop into the sight line. Recheck during play rather than assuming the initial fit will hold. Remove the mask immediately if the strap tears partly free, the child reports pain, vision becomes restricted, or the mask becomes wet.
Age and behavior matter more than a fixed project label. A child who mouths materials, cannot remove the mask readily, or becomes distressed by face coverings needs a different format, such as decorating a flat mask for display or using a handheld version with close adult supervision. Masks are props, not protective equipment, and they should never be worn during sleep, unsupervised play, or activities where reduced vision could cause a fall or collision.
For group crafting, label each base and fit every fastening to its actual wearer. Precut equal elastic loops may save time, but children’s head sizes and sensory preferences differ. A fitting station run by an adult is more reliable than asking children to trade masks or judge tension for one another. The safety checks for a Paper mask craft with comfortable child-safe straps should remain part of the activity even when the decorative design is shared.
Decorate Without Adding Sharp, Heavy, or Loose Parts
Flat decoration preserves comfort better than thick, dangling, or rigid additions. Crayons, washable markers, paper shapes, and small amounts of child-appropriate glue keep weight close to the base. Place embellishments around the brow and outer cheeks while keeping the eye openings, strap holes, and nose area clear. Decoration that crosses a functional edge can conceal a tear or produce a rough surface after drying.
Feathers, pom-poms, sequins, bells, and plastic gems may suit some closely supervised projects, but they add weight and can detach. Small loose pieces are not appropriate for children who may put craft materials in their mouths. Glitter can migrate toward the eyes, while long feathers can block side vision. A similar visual effect can often be made with drawn texture or lightweight paper cutouts that are firmly attached and positioned away from the openings.
Balance matters as much as total weight. A cluster of decorations on one temple pulls that side downward and encourages the wearer to tolerate a tighter strap. Mirror large additions across both sides or place one light feature near the center. If the mask twists when held by the strap, remove weight rather than trying to compensate with more tension.
Let all adhesive and paint dry fully before adding or adjusting the fastening. A dry-looking top surface can hide moisture between layered pieces, so inspect the back and flex the base gently. Decorations should remain attached without crackling glue ridges, lifting corners, or pieces dropping from the mask. Trim loose fibers and cover any rough attachment patch with smooth paper.
Durability has limits. A homemade paper mask is suitable for calm, supervised dress-up, storytelling, or a short photo session; it is not built for vigorous outdoor play. Store it flat in a dry place with the straps laid loosely beside it. Before reuse, check for torn holes, hardened elastic, peeling tape, and bent edges. Replace the fastening or retire the mask when repairs would create thick, stiff layers near the face.
Children can lead the color and character choices while adults retain control of cutting, fit, and attachment decisions. That division preserves creative ownership without asking a child to evaluate risks that are difficult to see. More variations on a Paper mask craft with comfortable child-safe straps should follow the same order: functional openings and a light base first, secure decoration second, and fastening only after the mask is dry.
Frequently Asked Questions
What is the most comfortable strap material for a paper mask?
Soft, wide ribbon often distributes pressure better than thin string. Broad elastic can be convenient if it rests without stretching tightly, while a handheld stem is useful for children who dislike head straps.
Can staples be used to attach mask straps?
Avoid staples near the face because bending paper can expose their legs. Reinforced punched holes with ribbon, or securely enclosed elastic attachments, create smoother contact areas.
How can I keep the strap holes from tearing?
Glue rounded cardstock patches behind both temple areas, allow them to dry, and punch holes inward from the edges. Keeping the mask lightweight also reduces force on each hole.
How large should the eye openings be?
They should clear the eyelashes and permit comfortable forward and side vision. Start small, enlarge gradually during off-face fitting, and discard any mask that still makes the child tilt or turn unnaturally to see.
Is elastic or ribbon better for a group project?
Ribbon allows individual adjustment but requires adult tying. Elastic is faster to put on, yet every loop must be fitted separately; one precut size will not suit every child comfortably.
Conclusion
A successful wearable mask begins with a light, dry base and correctly placed eye openings, not an especially tight fastening. Reinforce the temple holes before adding soft ribbon or broad elastic, keep knots and firm attachments away from the skin, and remove excess strap length. A handheld design is the practical choice when a child resists headwear or needs instant removal.
Before play, check vision, breathing clearance, edges, strap pressure, and the security of every decoration. Repeat that check after the mask has been worn for a few minutes because paper and fastening materials can shift. Keep use calm and supervised, away from running, climbing, stairs, heat, and flames. If the child squints, pulls at the strap, reports discomfort, or cannot remove the mask easily, stop and adjust the design rather than tightening it.

Now retrieving an image set.
100% Pure Tea Tree Essential Oil for Skin & Diffuser - 4 Fl Oz | 100% Pure Tea Tree Oil for Blemish-Prone Skin & Flaky Scalp, suits Oily & Combination Skin, Daily Face Wash & Scalp Care
$9.99 (as of September 18, 2026 22:40 GMT -04:00 - More infoProduct prices and availability are accurate as of the date/time indicated and are subject to change. Any price and availability information displayed on [relevant Amazon Site(s), as applicable] at the time of purchase will apply to the purchase of this product.)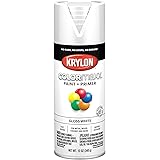
Now retrieving an image set.
Krylon ColorMaxx 12 Oz. Gloss Spray Paint, White - 1 Each
$4.48 (as of September 18, 2026 22:40 GMT -04:00 - More infoProduct prices and availability are accurate as of the date/time indicated and are subject to change. Any price and availability information displayed on [relevant Amazon Site(s), as applicable] at the time of purchase will apply to the purchase of this product.)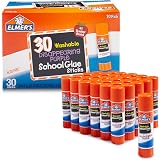
Now retrieving an image set.
Elmer's Disappearing Purple School Glue Sticks, Washable, 7 Grams, 30 Count - Posters, Back to School, Bulk Pack for Classrooms, #1 Teacher Brand
$7.49 (as of September 18, 2026 22:40 GMT -04:00 - More infoProduct prices and availability are accurate as of the date/time indicated and are subject to change. Any price and availability information displayed on [relevant Amazon Site(s), as applicable] at the time of purchase will apply to the purchase of this product.)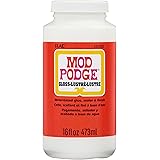
Now retrieving an image set.
Mod Podge Gloss Sealer, Glue & Finish: All-in-One Craft Solution- Quick Dry, Easy Clean, for Wood, Paper, Fabric & More. Non-Toxic - Craft with Confidence, Made in USA, 16 oz., Pack of 1
$7.99 (as of September 18, 2026 22:40 GMT -04:00 - More infoProduct prices and availability are accurate as of the date/time indicated and are subject to change. Any price and availability information displayed on [relevant Amazon Site(s), as applicable] at the time of purchase will apply to the purchase of this product.)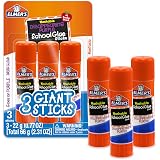
Now retrieving an image set.
Elmer's Disappearing Purple School Glue Sticks, Washable, 22 Grams, 3 Count - Poster, Vision Board, Back to School Supplies, #1 Teacher Brand
$2.89 (as of September 18, 2026 22:40 GMT -04:00 - More infoProduct prices and availability are accurate as of the date/time indicated and are subject to change. Any price and availability information displayed on [relevant Amazon Site(s), as applicable] at the time of purchase will apply to the purchase of this product.)
Now retrieving an image set.