
Children’s craft glitter is easier to control when an adult portions it into a small tray, the child applies glue only where sparkle is wanted, and excess glitter is pressed or poured rather than shaken through the air. Fine loose glitter requires close supervision because drifting particles can reach eyes, mouths, clothing, and surrounding surfaces. Glitter glue, pre-glittered materials, and larger decorative flakes provide lower-scatter alternatives for younger children. Work over a rimmed surface, keep hands away from the face, and remove spills with damp paper or a vacuum instead of sweeping particles into the air.
Choose a Glitter Format That Matches the Child and Project
The form of glitter affects how much control a child has before the activity even begins. Very fine loose glitter flows quickly, clings through static, and can escape through tiny gaps in a folded sheet or storage lid. Larger flakes are easier to see and retrieve, while glitter glue keeps reflective particles suspended in an adhesive that can be squeezed or brushed onto the project. Pre-glittered foam shapes, metallic paper, sequins, and reflective stickers avoid pouring altogether.
Age labels and package directions deserve attention, but they do not replace judgment about the individual child. A child who still puts fingers, tools, or materials near the mouth is not a good candidate for loose glitter. The same applies when a child rubs their eyes frequently or cannot yet follow a stop-and-wash-hands instruction. For these situations, glitter glue or a collage made with shiny paper offers the visual effect with fewer mobile particles. Adult supervision remains necessary because glitter glue and decorative pieces are still craft materials rather than cosmetics or food.
Product wording can be misleading if shoppers treat “non-toxic” as meaning harmless in every type of contact. That description does not make a craft product edible, suitable for use around the eyes, or appropriate for application to skin. Cosmetic glitter and edible decorative products are separate categories with intended uses that should not be confused with ordinary craft glitter. Keep package labeling available throughout the project so an adult can check intended use, age guidance, cleanup directions, and any warnings instead of relying on the appearance of the material.
Project design matters as much as particle size. A flat card with broad glue shapes is easier to manage than a three-dimensional pinecone, mask, or ornament that must be rotated while glitter is loose. Beginners can decorate a cardstock star inside a shallow tray using glitter glue or a few pinches of larger flakes. Older children with reliable tool control may use fine glitter for narrow lines, but an adult should dispense each portion rather than placing the full container on the table.
A practical selection order is:
- Lowest scatter: metallic paper, reflective stickers, or pre-glittered shapes.
- Moderate control: glitter glue applied from a fine nozzle or with a brush.
- More supervision: larger loose flakes portioned into a tray.
- Highest containment need: fine loose glitter used in very small amounts.
Choosing a controlled format is not a lesser creative experience. It lets the child concentrate on color placement and pattern without spending the activity rescuing spilled material. The broader resource on Children’s craft glitter with safer application methods can support project planning when several ages are working together.
Prepare a Work Area That Contains Loose Particles
A rimmed work surface provides the first line of containment. A shallow washable tray, rimmed baking sheet reserved for crafts, or sturdy box lid catches particles that miss the glued area. Place one project inside each tray rather than covering a large shared table with glitter. Shared open containers invite reaching across other children, bumped elbows, and accidental mixing of colors.
Set the activity on a stable table away from food preparation, fans, open windows, pets, and floor traffic. Moving air distributes lightweight particles beyond the work zone, while carpet and upholstered furniture hold glitter that is difficult to collect. A smooth floor and wipeable table make escaped pieces visible. If the only available room has carpet, put a reusable floor mat beneath the chair and keep the tray well inside the table edge.
Preparation should separate clean tools from glitter-contact tools. Place glue, a small brush, a folded sheet of paper, and the project inside the tray before opening the glitter. Keep a damp cloth or paper towel nearby for hands, but do not let it touch the artwork. An adult can transfer a teaspoon-sized or smaller working amount into a low container; the original jar should then be closed and moved beyond the child’s reach. Limiting the available quantity reduces the consequence of a tip without limiting the design.
For a group activity, a single glitter station is often more manageable than issuing a jar to every child. Each participant brings a glued project to the station, where an adult handles the portioning. The tradeoff is a little waiting time, but the method prevents multiple open jars and gives the adult a chance to check whether the glue pattern is ready. Children waiting for the station can add paper pieces or draw background details away from the loose material.
Clothing protection should be simple and fitted enough not to sweep through the tray. A washable art smock is preferable to an oversized adult shirt with loose cuffs. Tie back long hair before opening the container, and remove drinks, snacks, phones, and favorite fabric items from the table. Handwashing belongs at the end of the activity and whenever a child touches the face. A merely tidy-looking table is not a sign that cleanup is complete; inspect chair seats, sleeves, the floor around the table, and the tray rim under good light.
The setup is working when glitter remains inside the tray, the child can reach every tool without leaning across open material, and the adult can close the supply immediately. Reposition the activity if the tray slides, the child repeatedly reaches over it, or airflow makes loose particles move before application begins.
Apply Glitter Without Shaking or Airborne Scatter
Controlled application uses small portions and low movements close to the project. Begin by drawing the design with glue rather than spreading adhesive over the entire surface. Thick puddles prolong drying and allow glitter to slide, while lines that are too thin may dry before the particles are added. A continuous, modest glue layer gives the glitter something to grip without soaking lightweight paper.
For loose glitter, place the artwork flat inside the tray. An adult or capable older child can take a small pinch from the working cup and release it just above the glue. A folded-paper pour is another useful option: place a little glitter in the crease and tap the paper gently with one finger so the material travels in a narrow stream. Avoid holding a shaker high over the project. Height gives particles more opportunity to drift, and vigorous shaking releases far more than the glue can retain.
After covering the adhesive, lay a clean piece of waxed paper or similar nonstick craft barrier over the design and press lightly with fingertips. Remove the barrier straight upward, then let the project rest briefly before lifting it. Tip the artwork slowly over the tray so unattached glitter falls away. A folded clean sheet beneath the project can funnel reusable excess into a labeled container, but recovered colors should remain separate from the original supply if glue fragments or paper fibers are present.
Glitter glue requires a different technique. Squeeze bottles can release a sudden blob when children grip too hard or when dried material partly blocks the nozzle. Test the flow onto scrap paper first. Young children may get better control if an adult dispenses a small amount onto a palette and the child uses a short-handled brush. Thin glitter-glue layers dry more evenly than raised pools, although the sparkle may look less dense until the adhesive becomes clear. Adding another thin layer after drying is usually more manageable than applying one heavy coat.
Consider a cardstock moon project as a practical comparison. With a shaker jar, a child may cover the moon, background, tray, and sleeves in one motion. With folded-paper pouring, the adult supplies a narrow stream while the child rotates the card inside the tray. With glitter glue, the child traces craters directly and no excess needs to be returned. The best option depends on whether the goal is full coverage, precise lines, or independent application.
Stop the process if glitter reaches the face, the child begins blowing on the project, or frustration leads to fast shaking. Move hands away from the workspace and deal with the contact calmly according to the product label; seek appropriate medical guidance if particles enter an eye, are inhaled, or are swallowed and symptoms or concern persist. Blowing, brushing with bare hands, and rubbing the eyes can spread the material. More examples of controlled pouring and adhesive placement appear in Children’s craft glitter with safer application methods.
Handle Cleanup, Storage, and Common Problems
Cleanup should collect glitter rather than redistribute it. Close every container before moving the artwork, then carry the entire tray to the cleanup area. Lift reusable excess with folded paper and place contaminated material in household waste if it contains wet glue, lint, or mixed debris. Trying to recover every speck often creates more scatter than discarding a small unusable amount.
Use a damp paper towel or washable cloth on hard surfaces, working from the outer edge of the spill toward the center. Replace or rinse the cloth when it becomes loaded rather than dragging particles across the table. A vacuum may be useful for dry glitter on flooring or upholstery if the appliance instructions permit that use. Avoid dry sweeping, which can push lightweight particles into cracks or stir them upward. Sticky tape can lift isolated particles from fabric, but test delicate material first and do not rub glitter deeper into the weave.
Wet artwork needs a protected drying location that children and pets cannot disturb. Leave it flat in the tray until the adhesive is fully dry according to its instructions. Standing a wet card upright may create glitter trails, while stacking projects transfers adhesive and reflective particles between surfaces. Once dry, tap the piece gently over the tray again. If glitter continues falling with ordinary handling, the original glue layer may have dried too soon, been too sparse, or failed to suit the surface.
Adding a clear top layer can reduce shedding on some projects, but it introduces another material and may dull the sparkle, warp paper, or react poorly with the original adhesive. Test any sealer on a sample made from the same supplies, follow its label, and reserve spray products for adult-controlled use in an appropriate location. For young children’s work, choosing glitter glue or pre-glittered materials at the start is usually simpler than trying to seal a heavily shedding loose-glitter surface afterward.
Store glitter in its original, clearly labeled container with the lid checked for a secure fit. Put that container inside a second closed bin, separate from food, cosmetics, and children’s independent-access art supplies. Do not transfer craft glitter into spice jars or other food-like packaging. A damaged lid, split bag, or container with glitter packed into its threads should be replaced or enclosed before storage.
Repeated spills usually point to a process problem rather than carelessness. A tall cup tips more readily than a low dish; a full jar causes a larger spill than a measured portion; and a crowded table leaves nowhere to set the artwork safely. Adjust the container, quantity, or station before asking the child to “be more careful.” If loose glitter still spreads beyond the tray after those changes, switch formats. The practical goal is a method the child can use predictably, not preserving a material that does not fit the setting.
Frequently Asked Questions
What Is the Lowest-Mess Substitute for Loose Glitter?
Pre-glittered foam shapes, metallic paper, and reflective stickers create sparkle without pouring. Glitter glue is useful when children need to draw lines or fill small areas, although it still requires supervised craft use.
How Can Excess Glitter Be Returned to a Container?
Catch it on a clean folded sheet, bring the fold to a labeled container, and pour slowly. Keep recovered material separate if it contains glue, fibers, or mixed colors, and discard contaminated excess.
Should Glitter Artwork Be Sealed?
A compatible clear coating may reduce shedding, but it can change color, shine, or paper shape. Test the complete material combination first and follow the coating label; adults should control any spray application.
What Should an Adult Do If Glitter Gets Near a Child’s Eyes?
Stop the activity and prevent rubbing, which may increase irritation. Follow the product label and obtain appropriate medical or poison-control guidance when exposure, discomfort, breathing concerns, or uncertainty warrants it.
Conclusion
A successful glitter activity is determined before the container opens. Match the format to the child’s habits and motor control, favor contained sparkle when loose particles add little to the project, and work with only a small portion inside a rimmed tray. Glue placement should come first, followed by a low, gentle pour or light pressing—not high shaking or blowing.
Afterward, keep the project flat until dry, collect escaped material with damp wiping or suitable vacuuming, and store the labeled supply inside a second closed bin. If particles repeatedly spread beyond the station, change the container, simplify the design, or replace loose glitter with glitter glue or reflective cutouts. Better containment protects the workspace while giving children clearer control over where the sparkle appears.
Now retrieving an image set.
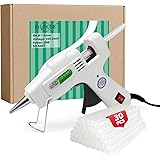
Krightlink Mini Hot Glue Gun Kit with 30 Glue Sticks 20w Fast Preheating | 20w Hot Melt High Temp hot glue gun, Anti-Drop Precision Nozzle, for School Crafts DIY Arts, Quick Home Repairs-White
$8.54 (as of September 18, 2026 22:40 GMT -04:00 - More infoProduct prices and availability are accurate as of the date/time indicated and are subject to change. Any price and availability information displayed on [relevant Amazon Site(s), as applicable] at the time of purchase will apply to the purchase of this product.)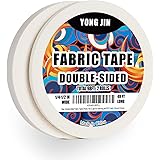
Now retrieving an image set.
Double-Sided Fabric Tape,Hem Tape No Sew No Iron,1/4"+1/2" (2 Rolls) | No Sewing or Ironing Required, Quick Clothing Repairs, Fabric Bonding, For Hemming and DIY Crafts
$7.99 (as of September 18, 2026 22:40 GMT -04:00 - More infoProduct prices and availability are accurate as of the date/time indicated and are subject to change. Any price and availability information displayed on [relevant Amazon Site(s), as applicable] at the time of purchase will apply to the purchase of this product.)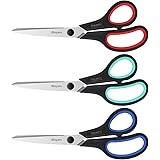
Now retrieving an image set.
iBayam 8.5" Heavy Duty Scissors All Purpose for Office School Crafts Sewing | 3-Pack, Ultra-Sharp 2.5mm Stainless Blades, Comfort Grip Handles, Left & Right Handed – Teacher Desk & Classroom Must-Have
$9.99 (as of September 18, 2026 22:40 GMT -04:00 - More infoProduct prices and availability are accurate as of the date/time indicated and are subject to change. Any price and availability information displayed on [relevant Amazon Site(s), as applicable] at the time of purchase will apply to the purchase of this product.)
Now retrieving an image set.
Crayola Air Dry Clay (5lbs), Teacher Supplies, Natural White Modeling Clay for Kids, Sculpting Material, Bulk Craft Supplies for Art Classrooms
$11.24 (as of September 18, 2026 22:40 GMT -04:00 - More infoProduct prices and availability are accurate as of the date/time indicated and are subject to change. Any price and availability information displayed on [relevant Amazon Site(s), as applicable] at the time of purchase will apply to the purchase of this product.)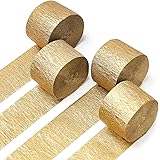
Now retrieving an image set.
PartyWoo Gold Crepe Paper Streamers 4pcs 328 FT Gold Streamers | Wedding Birthday Baby Shower Engagement Anniversary New Year Eve Graduation Bridal Shower Party Decorations
$6.99 (as of September 18, 2026 22:40 GMT -04:00 - More infoProduct prices and availability are accurate as of the date/time indicated and are subject to change. Any price and availability information displayed on [relevant Amazon Site(s), as applicable] at the time of purchase will apply to the purchase of this product.)
Now retrieving an image set.