
The best craft kits for four-year-olds with large pieces use graspable components, simple assembly steps, washable materials, and age-appropriate parts that remain easy to track during play. Look for broad foam shapes, thick cards, jumbo stickers, chunky beads, or wide craft sticks rather than tiny decorations that require a precise pincer grip. Check the stated age range, choking-hazard labeling, adhesive type, and whether an adult must cut or prepare anything. A suitable kit lets the child make meaningful choices without needing an adult to complete every step. Large pieces reduce frustration, but close supervision and a quick component check are still necessary.
What Counts as a Useful Large Piece?
A useful large piece is not merely bigger than the smallest item in the box. It should be easy for a four-year-old to see, pick up, rotate, position, and release without repeated adult correction. Broad foam shapes, thick cardboard cutouts, jumbo stickers with accessible backing tabs, wide craft sticks, and chunky threading pieces generally demand less finger precision than sequins, miniature pom-poms, narrow paper strips, or tiny adhesive dots.
Shape and thickness matter as much as length or width. A flat decoration may look large across its surface but remain difficult to lift from a table. Thick felt shapes and corrugated cards offer an edge that small fingers can grasp. A large sticker can still cause frustration if its backing has no split or tab, while a somewhat smaller sticker may work well when the liner peels away easily. Product photographs rarely reveal these handling differences, so inspect package descriptions for dimensions and look closely at how each component is used.
The project base should also be stable enough to receive the pieces. A thin paper animal that slides or folds under pressure makes placement harder, even when its decorations are oversized. Stiff cards, shallow trays, paper plates, and preformed foam bases are easier to hold steady. For example, attaching five large felt spots to a rigid ladybug shape gives a child a clear target. Gluing the same spots onto lightweight tissue creates an unnecessary coordination challenge.
Large components should simplify the physical task without removing the child’s decisions. A kit in which every piece fits into one exact slot can become an assembly puzzle led by an adult. A more flexible set might provide several large eyes, mouths, shapes, and colors so the child decides how a face or creature will look. That balance makes Craft kits for four-year-olds with large pieces more engaging than projects designed mainly to reproduce the package image.
Do not assume that “jumbo,” “chunky,” or “preschool” has a standard meaning. Compare the pictured parts with familiar objects, read any listed measurements, and check whether small accessories are mixed into an otherwise large-piece kit. If dimensions are unavailable, choose a set you can inspect in person or one with clear component photographs rather than relying on the marketing label alone.
Safety Checks Before Opening the Kit
Package age guidance and hazard statements deserve attention before appearance, theme, or project count. Confirm that the kit is intended for the child’s age and read the entire warning panel. A box may feature large foam figures yet include small plastic eyes, beads, magnets, fasteners, or decorative gems. Those secondary items can determine whether the activity is appropriate for a particular household, especially when younger siblings are nearby.
Large pieces reduce some handling concerns, but they do not make a kit automatically safe. Long cords can create entanglement concerns, pointed wooden components can splinter, and peel-off liners can scatter onto the floor. Paint, glue, markers, and modeling materials need their own review. Check whether supplies are labeled washable and nontoxic, whether ventilation is advised, and whether the adhesive requires adult handling. “Washable” describes cleanup performance; it does not mean a material is intended for skin, eyes, or mouths.
Run a short inventory before giving the box to the child. This takes less time than interrupting the project after an unsuitable component appears:
- Read: Verify the age range, instructions, warnings, and required supervision.
- Sort: Remove staples, plastic ties, packets, sharp tools, and pieces too small for the setting.
- Inspect: Check wooden parts for rough edges and containers for leaks or damage.
- Count: Note small removable items so they can be collected after the activity.
- Prepare: Supply a child-appropriate tool only where the instructions call for one.
Household context changes the decision. A chunky-bead necklace kit may be manageable for a supervised four-year-old who no longer mouths objects, but it may be a poor choice at a shared table with a toddler. A collage set made from large paper and felt shapes would be easier to contain. Similarly, a kit requiring a hot-glue gun is not transformed into a child-led activity simply because an adult operates the tool; the child may spend most of the session waiting.
The common mistake is treating supervision as a substitute for suitable design. Watching closely cannot make an overly complex cutting step comfortable or prevent every tiny gem from dropping. Prefer a kit whose ordinary use already fits the child and reserve adult intervention for opening packages, reading directions, dispensing modest amounts of glue, or responding when help is requested.
Matching the Project to a Four-Year-Old’s Skills
A well-matched kit gives the child a sequence that can be understood one action at a time. At four, many children can press stickers, spread glue over a defined area, place broad shapes, make marks with thick crayons, and thread large components onto a firm lace. Individual ability varies, so the package age is a starting point rather than proof that every included action will be comfortable.
Look at the hardest step, not the easiest one shown on the front. A project may begin with large precut pieces but finish with knot tying, exact folding, or lining up narrow tabs. That final requirement often shifts control to the adult. Kits work more smoothly when their most demanding action is still within reach, such as peeling a large sticker, pressing a foam shape onto adhesive, or pushing a blunt lace through a wide opening.
Open-ended collage kits usually tolerate uneven placement, extra glue, and changed plans. They suit children who want to choose colors and arrange pieces freely. Model-copying kits demand more visual matching and may frustrate a child who expects the result to resemble the polished example. Neither format is inherently wrong. Choose the open-ended option for experimentation and conversation; select a simple model-based project when the child enjoys following a short visual sequence and can accept natural differences in the finished result.
Project duration matters too. A box promising many finished items may divide supplies into repetitive tasks that outlast the child’s interest. One sturdy puppet with large facial pieces can offer more participation than several elaborate ornaments requiring adults to complete delicate attachments. Signs of a good match include choosing among components, attempting the next step without prompting, and returning attention after a brief pause. Repeatedly abandoning tools, asking the adult to place every item, or tearing materials through force can indicate that the task or setup is too demanding.
When comparing Craft kits for four-year-olds with large pieces, favor a forgiving process over an impressive package result. Precut shapes, visible placement areas, thick materials, and alternatives to exact alignment support genuine participation. Avoid correcting harmless differences. A sideways roof, mixed-up colors, or three eyes on an animal may reflect the child’s plan rather than a mistake.
How to Set Up the Activity for Independent Participation
Good setup makes the available choices visible without placing every component within reach at once. Emptying the entire package onto a table can turn a simple project into a sorting and cleanup problem. Put the project base in front of the child, offer a small selection of large pieces in a shallow tray, and keep refills nearby. Contrasting trays help pale foam or clear sticker liners remain visible.
Prepare only the steps that genuinely block participation. An adult might open sealed paint pots, loosen a sticker corner, cut a required length of yarn, or place glue in a low container. The child can still choose, position, press, color, and assemble. Completing all the preparation in advance may make the session smoother, but excessive preparation can reduce the activity to placing pieces exactly where an adult indicates.
Glue quantity is a frequent source of failure. A full squeeze bottle invites puddles that cause pieces to slide and extend drying time. Offer a small amount of washable glue with a short spreading tool, or choose self-adhesive components if the child finds glue distracting. Glue sticks produce less liquid mess but may not hold thick pom-poms or textured materials well. Self-adhesive foam is convenient, although removing the backing may become the most difficult step unless it has an easy-lift edge.
Use a simple working sequence rather than explaining the whole project at once. Show one action on a spare piece, let the child try it, and then pause. Instructions such as “choose a shape, add glue, press it down” are easier to act on than a long description of the finished design. If several parts need drying between stages, say so before starting; waiting unexpectedly can feel like the activity has ended.
Measure success by participation rather than resemblance to the box. The setup is working when the child handles most components, makes visible choices, and needs occasional rather than continuous physical assistance. It is failing when materials repeatedly roll away, backing paper cannot be removed, glue overwhelms the base, or the adult’s hands remain in the project. Adjust by offering fewer pieces, stabilizing the base with removable tape, changing the adhesive, or ending after one completed stage. A second session is often better than pushing through fatigue.
Store unused components in a closed container immediately after the session, then check the floor and chair area for dropped pieces. Kits with individually bagged projects simplify storage, while bulk assortments offer more creative freedom but require better sorting. Families planning repeated activities may prefer the flexibility of Craft kits for four-year-olds with large pieces that can be divided into several short sessions rather than completed in one sitting.
Frequently Asked Questions
What types of large pieces are easiest for a four-year-old to handle?
Thick foam shapes, sturdy cardboard cutouts, wide craft sticks, jumbo stickers with peel tabs, and chunky threading pieces are usually easier to grasp and position than thin or slippery decorations.
Are large-piece kits free from choking hazards?
No. An otherwise large-piece kit may include small eyes, beads, caps, fasteners, or packaging parts. Read warnings, inspect every component, and supervise the activity.
Should a four-year-old use glue or self-adhesive pieces?
Either can work. Self-adhesive foam limits liquid mess, while washable glue allows more material choices. Select the option the child can control without the adult taking over.
How long should one kit activity last?
Follow the child’s engagement rather than a fixed schedule. Choose projects that can stop after a completed stage, and save remaining pieces if attention or hand control begins to fade.
What should I do if the child cannot complete the advertised project?
Simplify the design, offer fewer components, stabilize the base, or complete only one stage. The child’s participation and choices matter more than copying the package image.
Conclusion
Choose by examining the complete activity rather than trusting a preschool label or a photograph of oversized parts. The strongest option combines graspable components with a stable base, manageable adhesive, short instructions, and room for the child to decide how the project looks. Read the warnings and inspect secondary items because a few beads, caps, cords, or fasteners can change the suitability of the entire box.
Before the first session, remove packaging, set out a limited selection, and prepare only the steps the child cannot reasonably perform. Watch what happens once work begins: independent choices and occasional requests for help signal an appropriate challenge, while constant adult assembly points to a mismatch. If necessary, reduce the number of steps or save the remaining materials for another day rather than forcing completion.
Now retrieving an image set.
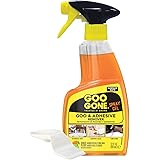
Goo Gone Adhesive Remover Spray Gel 12 Oz with Scraper, Surface Safe | Citrus Cleaning Power for Hard Surfaces, Carpet & Fabric, Removes Glue, Stickers, Tape Residue, Grease, Gum & Wax, Drip Free
$17.98 (as of September 18, 2026 22:40 GMT -04:00 - More infoProduct prices and availability are accurate as of the date/time indicated and are subject to change. Any price and availability information displayed on [relevant Amazon Site(s), as applicable] at the time of purchase will apply to the purchase of this product.)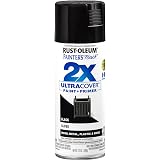
Now retrieving an image set.
Rust-Oleum Painter's Touch 2X Ultra Cover Spray Paint, Gloss Black | Indoor and Outdoor Surfaces (Metal, Wood, Plastic), Fast Dry, Durable, Sprays from Any Angle, Comfort Tip, Oil Based
$5.98 (as of September 18, 2026 22:40 GMT -04:00 - More infoProduct prices and availability are accurate as of the date/time indicated and are subject to change. Any price and availability information displayed on [relevant Amazon Site(s), as applicable] at the time of purchase will apply to the purchase of this product.)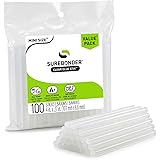
Now retrieving an image set.
Surebonder Clear, All Purpose, All Temp., Mini Size Hot Glue Sticks 0.27 in. Diameter, 4 in. Length -100 Pack
$5.97 (as of September 18, 2026 22:40 GMT -04:00 - More infoProduct prices and availability are accurate as of the date/time indicated and are subject to change. Any price and availability information displayed on [relevant Amazon Site(s), as applicable] at the time of purchase will apply to the purchase of this product.)
Now retrieving an image set.
Crayola Construction Paper Bulk Pack (480 Sheets) – 10 Assorted Colors, 9x12, Teacher School Supplies & Classroom Must Haves, Card Making Craft Supplies, Art Paper
$11.76 (as of September 18, 2026 22:40 GMT -04:00 - More infoProduct prices and availability are accurate as of the date/time indicated and are subject to change. Any price and availability information displayed on [relevant Amazon Site(s), as applicable] at the time of purchase will apply to the purchase of this product.)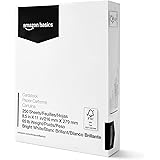
Now retrieving an image set.
Amazon Basics Cardstock Paper, 8.5" x 11", 65 lb/176 gsm, 96 Bright White, 250 Sheets
$10.63 (as of September 18, 2026 22:40 GMT -04:00 - More infoProduct prices and availability are accurate as of the date/time indicated and are subject to change. Any price and availability information displayed on [relevant Amazon Site(s), as applicable] at the time of purchase will apply to the purchase of this product.)
Now retrieving an image set.