
Turkey craft ideas for preschoolers with templates work best when the templates use bold outlines, large body parts, and a limited number of pieces that young children can trace, cut, arrange, and glue. Prepare a body, head, beak, wattle, feet, and several broad feathers, then choose whether children will practice cutting or receive the difficult shapes precut. Paper plates, cardstock, craft sticks, and folded paper each produce a different finished turkey without requiring complicated construction. Use washable glue, child-size scissors, and plain paper decorations rather than tiny accessories that create choking or cleanup concerns. A successful activity preserves choices such as feather colors and facial expressions instead of expecting every turkey to look identical.
How to Prepare Preschool-Friendly Turkey Templates
A useful preschool turkey template has large shapes, thick borders, and an obvious assembly order. The body can be a wide oval, while a smaller circle or rounded shape forms the head. Add a triangle beak, one curved wattle, two simple feet, and five or six broad feathers. Narrow toes, tiny eyes, and intricate feather edges may look appealing on a screen, but they turn a manageable cutting activity into an adult rescue job.
Match the template to the skill being practiced. Children who are beginning to use scissors benefit from straight lines, gentle curves, and shapes at least large enough to hold with the helping hand. A teacher or caregiver can precut the head, feet, and wattle while leaving broad feathers for the child to cut. Children with steadier control can cut the complete outline, although the parts should still be spaced apart so scissors can move around each one.
Printing on regular copy paper is economical and easy to cut, but the finished turkey may bend after glue is added. Cardstock produces sturdier pieces and works well for puppets or standing displays, though its resistance makes turning corners harder for small hands. A practical compromise is to print the pattern on ordinary paper, cut out the master shapes, and trace them onto construction paper. That approach adds a tracing step and lets several children share one reusable template.
Scale also changes the difficulty. A full-page body with half-page feathers is suitable for a group display or for children still developing hand control. Smaller pieces fit greeting cards but demand more accurate cutting and gluing. Before distributing materials, assemble one plain sample without correcting the template. If the feet disappear behind the body, the head covers the beak, or the feathers leave no area for glue, adjust the pattern rather than expecting children to solve a design flaw.
A compact preparation checklist keeps the activity focused:
- Print test: Confirm that the page is set to actual size unless deliberate scaling is needed.
- Cutting check: Remove decorative details that create sharp turns or tiny scraps.
- Assembly check: Mark where feathers overlap the back of the body.
- Supply check: Set out washable glue, crayons, blunt-tip scissors, and a scrap tray.
Families comparing Turkey craft ideas for preschoolers with templates should prioritize patterns that children can alter. A template should provide workable structure, not prescribe every color, mark, and expression.
Six Turkey Builds That Use the Same Basic Shapes
One set of turkey shapes can support several distinct projects, which reduces preparation while preserving variety. The simplest version is a flat collage: children place the feathers in a fan, glue the body over their lower ends, and add the facial pieces last. It is the most forgiving choice because misplaced parts can still read as a turkey, and the wide surface gives children room for dots, lines, or drawn textures.
Paper Plate and Name-Feather Turkeys
For a paper plate turkey, use half of a plate as the body and attach template feathers along the curved edge. A full plate often leaves the head visually lost in a large empty area, while a half plate creates a clearer silhouette and uses less glue. Paint is optional; crayons or washable markers avoid drying time. If plates have a coated surface, test the chosen adhesive because glue sticks may release after drying.
A name-feather turkey turns each feather into one letter of a child’s name. Short names can use wider feathers, while longer names may wrap around both sides of the body. The literacy element remains developmentally appropriate when adults write dotted letters for tracing or invite children to copy from a name card. Requiring independent spelling can shift attention away from cutting and arranging, particularly in a mixed-age preschool group.
Puppets, Folded Cards, and Texture Collages
A craft-stick puppet uses a cardstock body with the feathers glued behind it and a wide craft stick attached vertically. Secure the stick with tape as well as glue if the puppet will be used immediately; wet adhesive alone may slide during play. Adults should inspect craft sticks for splinters and avoid miniature sticks that are awkward to grip.
For a folded turkey card, place the body so one edge aligns with the fold and arrange feathers across the front. The inside can hold a dictated message, a child’s drawing, or the name of someone the child appreciates. Keep the writing prompt optional and concrete. Preschoolers may have more to say than they can write, so adult transcription preserves their language without turning the project into a handwriting test.
A texture turkey replaces colored feathers with wide pieces cut from tissue paper, corrugated cardboard, felt, or clean paper packaging. Use only materials that lie reasonably flat; bulky pom-poms and loose feathers can obscure the template and detach during handling. A sixth option is a standing turkey made from two matching cardstock bodies joined around a folded base. This version is better for an adult-assisted centerpiece than an independent first scissor project because matching and balancing the pieces require precision.
Choose a build according to what happens after the activity. Flat collages suit bulletin boards, cards travel well, puppets encourage storytelling, and standing turkeys work for table displays. Trying to combine all four purposes usually produces too many steps for one preschool session.
A Classroom-Ready Cutting and Assembly Sequence
A predictable sequence prevents children from gluing pieces before they understand where those pieces belong. Begin by showing the unassembled template rather than only a polished model. Name each shape and briefly compare it with the corresponding turkey feature: feathers form a fan behind the body, the beak points outward, and the feet extend below. A finished sample is useful for orientation, but presenting it as the only acceptable result encourages copying rather than visual decision-making.
Prepare materials in shallow trays or separate piles. Give each child only the parts needed for the current stage, especially when the pattern includes several similar feathers. Too many loose pieces are easily swept onto the floor or glued in the wrong layer. For a group of twelve, an adult might distribute bodies and crayons first, bring out scissors for the feather stage, and add glue only after children have arranged the pieces dry.
- Decorate before assembly. Color the body and feathers while they are flat and easy to hold.
- Cut the broad pieces first. Feathers and the body provide a warm-up before the smaller facial shapes.
- Arrange without glue. Place feathers behind the body and check that their colors and edges remain visible.
- Glue from back to front. Attach feathers, add the body, then finish with the head, beak, wattle, eyes, and feet.
- Label and dry flat. Write the child’s name on the reverse and move the work to a protected drying area.
Glue quantity is a frequent source of failure. A large puddle wrinkles copy paper, lengthens drying time, and lets pieces drift out of position. Demonstrate small dots or a thin line near the edge that will overlap. Glue sticks reduce wetness and work well for lightweight paper, while liquid school glue holds textured materials more reliably. Pouring liquid glue into small shared dishes and applying it with a cotton swab can provide better control than squeezing a full bottle.
Signs that the process is appropriately challenging include children turning the paper with their helping hand, making several independent cuts, and rearranging feathers before committing to a layout. Repeated tearing, abandoned cutting, or constant requests for an adult to hold every piece indicate that the pattern or material is too demanding. Enlarge the template, precut the tight curves, or divide the project across two short sessions rather than completing it for the child.
A structured version of Turkey craft ideas for preschoolers with templates still needs room for variation. Offer two or three body colors, let children decide the feather order, and invite them to draw eyes if they can. Those limited choices keep supply management realistic while making the finished work recognizably theirs.
Safety, Common Problems, and Useful Adaptations
Safe material choices should reflect the children’s ages and the way the finished turkeys will be used. Blunt-tip child scissors, washable coloring tools, and nontoxic school glue are practical defaults under adult supervision. Small adhesive eyes, sequins, beads, and other loose decorations are poor choices where children may mouth materials or younger siblings can reach the project. Drawn or paper eyes provide the same visual feature without creating detachable hard pieces.
Template crafts sometimes fail because adults confuse neatness with successful participation. Correcting every tilted feather or uneven cut removes the motor practice the activity was meant to offer. Intervene when a child cannot use the material safely, cannot identify the next step, or is becoming frustrated—not merely because the turkey is asymmetrical. A preschooler’s visible cut marks and unusual color combinations are evidence of authorship rather than defects.
Adaptations should change access without removing all meaningful decisions. For a child who tires during cutting, provide precut small parts but leave two large feathers to cut. For limited hand strength, use lighter paper, spring-assisted child scissors where appropriately supervised, or tearable tissue shapes. Children who dislike sticky textures can apply glue with a craft swab or use a glue stick. A child who benefits from visual sequencing can follow a row of sample parts arranged in assembly order instead of relying on repeated verbal directions.
Group timing deserves similar adjustment. A detailed puppet with twelve feathers may be manageable at home with one adult but inefficient at a busy classroom table. Reducing the number of feathers to five makes the turkey recognizable while shortening cutting, counting, and drying time. Conversely, children who finish quickly can add patterns to each feather, draw a habitat, or dictate a short turkey story rather than receiving extra tiny pieces.
Check the finished work before sending it home. Loose parts signal too little adhesive, adhesive applied to the wrong face, or insufficient drying time. Buckled paper indicates excess liquid glue. Feathers hidden completely behind the body suggest that the overlap area was unclear. These observations are useful for improving the next set of templates: widen glue tabs, simplify close curves, add light placement marks, or switch the base to cardstock.
Storage also affects whether a reusable template remains useful. Keep master shapes flat in a labeled envelope, and retain one uncolored assembly sample rather than only a highly decorated model. Educators gathering more Turkey craft ideas for preschoolers with templates can reuse the same master for color matching, counting feathers, name recognition, or storytelling without redesigning the core pieces.
Frequently Asked Questions
What shapes should a preschool turkey template include?
Use a large oval body, a smaller head, broad feather shapes, a triangle beak, a curved wattle, and two simple feet. Thick outlines and generous glue areas make the parts easier to cut and assemble.
Should turkey templates be printed on paper or cardstock?
Copy paper is easier for beginning cutters, while cardstock is better for puppets and freestanding displays. A paper template can also serve as a tracing pattern for colored construction paper.
How can adults make the activity easier without doing it for the child?
Precut the smallest curved pieces, enlarge the pattern, and offer one stage at a time. Leave broad feathers, coloring choices, and final placement decisions to the child.
What can replace small googly eyes on a preschool turkey?
Children can draw eyes with washable markers or glue on large paper circles. Both choices avoid small detachable decorations and allow different expressions.
How long should a preschool turkey project take?
A simple collage can fit a short activity period, while cutting, decorating, and assembling a detailed version may work better across two sessions. Watch for fatigue rather than enforcing a fixed completion time.
Conclusion
Strong turkey templates reduce frustration without removing the child’s role in making the project. Begin with large, clearly separated shapes, test the assembly yourself, and decide which parts match the group’s current cutting ability. Choose a flat collage, plate design, card, puppet, texture project, or standing display according to the available time and what will happen to the finished piece.
Set out materials in stages, let children arrange parts before gluing, and treat uneven cuts as part of the work. If paper tears, glue puddles, or most children need constant assistance, simplify the outlines or precut only the difficult details. Save the successful master shapes in a labeled envelope after the activity. The same template can then support another project through new colors, names, counting prompts, or dictated stories without adding unnecessary complexity.
Now retrieving an image set.
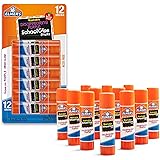
Elmer's Disappearing Purple School Glue Sticks, Washable, 6 Grams, 12 Count - Arts & Crafts, Poster, Projects, Back to School, #1 Teacher Brand
$4.59 (as of September 18, 2026 22:40 GMT -04:00 - More infoProduct prices and availability are accurate as of the date/time indicated and are subject to change. Any price and availability information displayed on [relevant Amazon Site(s), as applicable] at the time of purchase will apply to the purchase of this product.)
Now retrieving an image set.
Rust-Oleum Painter's Touch 2X Ultra Cover Spray Paint, Gloss Black | Indoor and Outdoor Surfaces (Metal, Wood, Plastic), Fast Dry, Durable, Sprays from Any Angle, Comfort Tip, Oil Based
$5.98 (as of September 18, 2026 22:40 GMT -04:00 - More infoProduct prices and availability are accurate as of the date/time indicated and are subject to change. Any price and availability information displayed on [relevant Amazon Site(s), as applicable] at the time of purchase will apply to the purchase of this product.)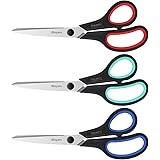
Now retrieving an image set.
iBayam 8.5" Heavy Duty Scissors All Purpose for Office School Crafts Sewing | 3-Pack, Ultra-Sharp 2.5mm Stainless Blades, Comfort Grip Handles, Left & Right Handed – Teacher Desk & Classroom Must-Have
$9.99 (as of September 18, 2026 22:40 GMT -04:00 - More infoProduct prices and availability are accurate as of the date/time indicated and are subject to change. Any price and availability information displayed on [relevant Amazon Site(s), as applicable] at the time of purchase will apply to the purchase of this product.)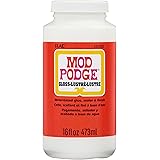
Now retrieving an image set.
Mod Podge Gloss Sealer, Glue & Finish: All-in-One Craft Solution- Quick Dry, Easy Clean, for Wood, Paper, Fabric & More. Non-Toxic - Craft with Confidence, Made in USA, 16 oz., Pack of 1
$7.99 (as of September 18, 2026 22:40 GMT -04:00 - More infoProduct prices and availability are accurate as of the date/time indicated and are subject to change. Any price and availability information displayed on [relevant Amazon Site(s), as applicable] at the time of purchase will apply to the purchase of this product.)
Now retrieving an image set.
Krylon Fusion All-In-One, Matte, Black, 12 oz
$6.98 (as of September 18, 2026 22:40 GMT -04:00 - More infoProduct prices and availability are accurate as of the date/time indicated and are subject to change. Any price and availability information displayed on [relevant Amazon Site(s), as applicable] at the time of purchase will apply to the purchase of this product.)
Now retrieving an image set.