
Materials and Preschool-Safe Preparation
A successful turtle activity begins with pieces that match preschool hand control. Young children can usually spread glue, press broad shapes into place, and make bold marks more comfortably than they can cut narrow curves. Preparing the difficult parts in advance preserves meaningful choices without turning the project into a cutting test.
For each turtle, set out one plain paper plate, five large green paper pieces for the head and limbs, one small triangular tail, washable coloring materials, and child-safe glue. A black marker can be reserved for an adult to add an eye or mouth if needed. Construction paper is easier to handle than tissue paper for body parts because it stays flat when glue is applied. Cardstock is stronger but may be frustrating for children who are expected to cut it.
Choose the decorating medium according to the available time. Washable tempera paint covers a plate quickly and produces a vivid shell, but it requires drying space and can buckle thin plates if applied heavily. Broad crayons or washable markers allow immediate assembly and suit a short table activity. Glue sticks produce less moisture than liquid glue, although liquid school glue generally holds textured paper pieces more securely.
Prepare the head as a wide oval, four legs as rounded rectangles or simple flipper shapes, and the tail as a broad triangle. Pieces should be large enough to remain visible beneath the rim. If children will practice cutting, provide straight strips or gently curved shapes rather than asking them to cut six precise body parts independently. Adults should handle staplers, craft knives, and any cutting that exceeds a child’s demonstrated scissor control.
Check the complete supply tray before inviting children to the table:
- Base: one uncoated or lightly coated paper plate
- Body: one head, four legs, and one tail
- Decoration: washable paint, crayons, markers, or large paper scraps
- Assembly: child-safe glue and a labeled drying area
- Cleanup: damp cloths, table covering, and paint shirts if needed
A common preparation mistake is supplying small sequins, loose beads, or tiny adhesive eyes because they appear convenient for facial details. These pieces are hard for preschool fingers to control and may present a choking concern, particularly in mixed-age spaces. A drawn eye or a large paper circle provides the same visual cue with fewer complications. For a streamlined material reference, keep the Paper plate turtle craft for preschool children supply list beside the preparation area.
Step-by-Step Turtle Assembly
Decorate the plate before attaching the turtle’s body so children can turn the shell freely and reach the entire surface. Place the plate upside down, with the raised side facing upward. That curved surface reads as a shell and leaves the underside available for hiding the glued ends of the head, legs, and tail.
Begin with a base color or leave the plate white and build a pattern directly on it. If paint is used, apply a thin layer with a broad brush or sponge. Thick puddles take longer to dry, soften the plate, and may cause paper decorations to slide. A thin coat is working when the color covers most of the surface without collecting around the rim. Set painted plates aside until they no longer feel tacky.
- Make the shell: Color the raised side of the plate, then add a simple pattern with dots, loops, lines, or large paper patches.
- Arrange the body: Turn the plate over and position the head at one side, the tail opposite it, and two legs along each remaining side.
- Check placement: Turn the plate right side up briefly. Confirm that every part extends beyond the rim and resembles a turtle.
- Glue the pieces: Return the plate to its underside and glue the inner end of each paper shape beneath the rim.
- Add the face: Draw one visible eye and a small mouth, or attach a large paper eye after the head is secure.
- Let it rest: Place the turtle flat until the glue has set enough that the limbs do not shift when lifted.
The arrangement check prevents the most frequent assembly failure: gluing pieces on top of the shell or placing both sets of legs too close to the head. Preschoolers do not need anatomically exact spacing, but they benefit from comparing opposite sides. An adult might ask, “Where could the tail go if the head is here?” rather than silently correcting the layout.
Give only the assistance needed for the next action. Holding the plate steady while a child presses a leg is different from assembling the whole animal for them. If liquid glue is repeatedly flooding the paper, pour a small amount into a shallow lid and let the child apply it with a cotton swab or short brush. This makes the amount visible and easier to control.
The project is ready to move when the attached parts remain in place during a gentle lift. If a limb droops, return the turtle to a flat surface and add a small amount of glue beneath its hidden end. Avoid repeatedly bending wet paper to test it; damp fibers tear more easily than dry ones.
Shell Patterns Preschoolers Can Make
Shell decoration should offer a clear choice without demanding exact imitation. A real turtle shell contains visible sections and markings, but a preschool version does not need scientific precision. Large repeated elements let children explore visual pattern while still producing individual work.
Dots are the simplest option for children who are developing controlled pressing motions. They can stamp circles with a sponge dauber, fingertip, or cardboard tube. Wide rings made with crayons require more directional control, while torn-paper patches add a pinch-and-release task. For children comfortable with drawing, divide the shell loosely into broad sections and place one mark inside each area.
Limit the table to two or three pattern choices at once. A tray containing paint, stamps, collage paper, stickers, markers, and glitter can shift attention from designing the shell to sampling every material. A focused choice—such as green paint with yellow dots or torn green paper on a brown plate—makes the process easier to follow and reduces waiting for shared tools.
Pattern language can be added without converting the craft into a worksheet. Invite a child to alternate two colors around the rim, repeat a dot-and-line sequence, or count four large shell patches. If the sequence changes, describe what is visible rather than declaring the design wrong. “You started with green and yellow, then chose two green marks” gives the child useful vocabulary and leaves ownership of the artwork intact.
Real turtle observation can strengthen the activity when images are available. Children may notice that turtles have shells, heads, tails, and four limbs, while shell color and markings vary. Avoid telling children that every turtle is green or that a turtle can leave its shell like clothing. The shell is part of a turtle’s body. A brief picture comparison provides enough factual grounding without making a preschool art session dependent on memorizing species.
Watch for two signs that the decorating plan is too demanding: children repeatedly ask an adult to make the marks, or they abandon the plate after struggling to copy a model. Replace a detailed sample with two simpler examples and demonstrate one motion on scrap paper. A finished adult turtle can unintentionally become a standard children believe they must reproduce. Process photographs or partially completed samples show the sequence more clearly.
For mixed abilities, offer the same Paper plate turtle craft for preschool children with different tools rather than assigning a visibly separate project. One child might use a thick crayon, another a sponge stamp, and another torn paper. Each option changes the motor demand while keeping the shared turtle theme recognizable.
Managing a Classroom or Group Activity
Group success depends more on material flow than on identical finished turtles. Paint, glue, and loose body pieces create different bottlenecks, so separating decorating from assembly prevents children from handling wet plates while searching for a missing tail. Set up one area for shell work, one drying location, and one assembly tray with complete sets of body parts.
For a small group, distribute one plate at a time and keep paint containers in the center. For a larger preschool class, run the activity as a station with only the number of children the table can comfortably hold. A crowded table increases spilled paint and accidental mixing of pieces. Names should go on the underside before decoration, especially when several green plates will look similar on a drying rack.
Timing changes with the chosen medium. Marker or crayon turtles can often be assembled during the same sitting. Painted shells may need a second session, particularly if children use generous amounts. Trying to accelerate drying with extra handling usually produces fingerprints, smears, and detached collage pieces. If the schedule allows only one short session, use dry coloring tools or provide plates painted earlier by the children during a separate open-art period.
Adult language can keep the station organized while preserving choice. Give one instruction at a time: decorate the shell, place it on the drying tray, then wash hands. During assembly, ask children to lay out all six body pieces before opening the glue. This quick inventory catches shortages and gives the child a visual plan. The Paper plate turtle craft for preschool children sequence can also be displayed with simple photographs for children who follow visual cues more readily than spoken directions.
Finished work should show variation. Uneven legs, off-center eyes, and unexpected shell colors reflect preschool decision-making rather than project failure. Intervention is justified when glue is unsafe or excessive, a tool is being misused, or the construction cannot hold together. Cosmetic correction is rarely necessary. If every turtle looks exactly like the adult model, the preparation may have removed too many child-led decisions.
Use the completed turtles in a way that respects their fragile construction. They can be placed on a low display shelf, attached to a bulletin board after drying, or used briefly for a slow “turtle walk” storytelling activity. They are not durable puppets, and repeated bending will loosen paper limbs. Photographing three or four different shells can also support a later conversation about colors, repeated marks, and how classmates made different choices from the same materials.
Frequently Asked Questions
Which side of the paper plate should face up?
Place the plate upside down so its raised underside forms the turtle’s rounded shell. Glue the head, legs, and tail beneath the rim.
Can preschoolers cut the turtle pieces themselves?
Children with suitable scissor control can cut broad strips or simple rounded shapes. Adults should pre-cut tight curves and prepare pieces for children who are not ready to cut independently.
What can replace paint for a low-mess version?
Use broad crayons, washable markers, dot stickers, or large torn-paper patches. Crayons and markers also allow the turtle to be assembled immediately.
How do I stop the legs from falling off?
Glue a generous portion of each leg beneath the rim, press it flat, and leave the turtle on a level surface until dry. Avoid lifting it to check too soon.
What can children learn from this turtle activity?
The activity can reinforce body-part placement, color and shape words, repeated patterns, counting, glue control, and arranging pieces before assembly.
Conclusion
Prepare the difficult cuts, keep decorations large, and choose paint only when the schedule includes drying time. Those decisions leave preschoolers free to handle the parts of the activity that carry the most value: choosing shell marks, arranging the turtle’s body, controlling glue, and explaining their design.
Before starting, make one child-sized test turtle with the exact plate, paper, and adhesive planned for the group. That quick check reveals whether the limbs are visible, the glue holds, and the shell surface accepts the selected coloring material. During the activity, treat secure construction and safe tool use as the firm boundaries while allowing colors, patterns, and placement to vary. A sturdy, recognizable turtle made through genuine child choices is a better outcome than a polished copy assembled mostly by an adult.
Now retrieving an image set.
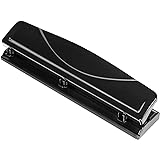
Amazon Basics 3 Hole Punch, 10 Sheet Capacity, Black, Easy-Clean Tray
$9.52 (as of September 18, 2026 22:40 GMT -04:00 - More infoProduct prices and availability are accurate as of the date/time indicated and are subject to change. Any price and availability information displayed on [relevant Amazon Site(s), as applicable] at the time of purchase will apply to the purchase of this product.)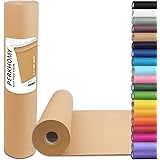
Now retrieving an image set.
PerkHomy Brown Kraft Paper Roll 17.5" x 1,200" (100') for Gift Wrapping Bulletin Board Craft Art Bouquet Flower Packing Valentines Easel Moving Shipping Floor Poster Covering Table 70GSM 50LB
$7.49 (as of September 18, 2026 22:40 GMT -04:00 - More infoProduct prices and availability are accurate as of the date/time indicated and are subject to change. Any price and availability information displayed on [relevant Amazon Site(s), as applicable] at the time of purchase will apply to the purchase of this product.)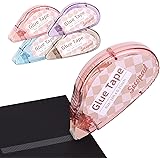
Now retrieving an image set.
Secopad Scrapbook Tape, Glue Tape for Crafts, 4 Pack, Light-Colored Shell | 0.3IN x 26FT, Sticky & Safe, Double Sided Tape for Crafts, Scrapbooking Junk Journaling Supplies, For School Office Teachers
$6.99 (as of September 18, 2026 22:40 GMT -04:00 - More infoProduct prices and availability are accurate as of the date/time indicated and are subject to change. Any price and availability information displayed on [relevant Amazon Site(s), as applicable] at the time of purchase will apply to the purchase of this product.)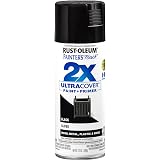
Now retrieving an image set.
Rust-Oleum Painter's Touch 2X Ultra Cover Spray Paint, Gloss Black | Indoor and Outdoor Surfaces (Metal, Wood, Plastic), Fast Dry, Durable, Sprays from Any Angle, Comfort Tip, Oil Based
$5.98 (as of September 18, 2026 22:40 GMT -04:00 - More infoProduct prices and availability are accurate as of the date/time indicated and are subject to change. Any price and availability information displayed on [relevant Amazon Site(s), as applicable] at the time of purchase will apply to the purchase of this product.)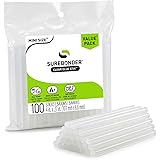
Now retrieving an image set.
Surebonder Clear, All Purpose, All Temp., Mini Size Hot Glue Sticks 0.27 in. Diameter, 4 in. Length -100 Pack
$5.97 (as of September 18, 2026 22:40 GMT -04:00 - More infoProduct prices and availability are accurate as of the date/time indicated and are subject to change. Any price and availability information displayed on [relevant Amazon Site(s), as applicable] at the time of purchase will apply to the purchase of this product.)
Now retrieving an image set.