
Arts and crafts with paper for preschool groups work best when each activity uses large pieces, limited choices, washable adhesive, and one manageable skill such as tearing, folding, gluing, or beginner cutting. Prepare shared supplies in shallow trays, show a finished example without requiring children to copy it, and divide longer creations into short stages. Tissue paper, construction paper, cardstock, and paper plates behave differently, so match the paper to the task and children’s hand control. Avoid tiny decorations, crowded supply tables, and adult-prepared pieces that remove meaningful participation. A successful group session produces varied results, steady engagement, and manageable cleanup rather than identical displays.
Choosing Paper Activities for a Preschool Group
A workable group activity matches the children’s current hand skills, the available adult supervision, and the time they can remain at the table. A project that succeeds with one child may stall with ten children if everyone needs help cutting the same shape or opening a glue bottle. Before selecting an activity, identify the action children will perform most often. Tearing and pressing are accessible starting points, while tracing, accordion folding, and cutting around curves demand more coordination.
Paper type changes how difficult that action feels. Construction paper is easy to grip and suitable for broad shapes, although repeated handling can soften it. Cardstock stays flat under heavier collage pieces but resists folding and can frustrate children using beginner scissors. Tissue paper tears with little force and creates translucent layers, yet it sticks to wet fingers and can become unmanageable if glue is spread too heavily. Paper plates provide a firm base for masks, faces, and circular designs, but adults should check that the rims are not unusually stiff before children attempt to cut them.
Choose one main process and no more than two supporting processes. A torn-paper garden might ask children to tear colored strips, place them, and glue them down. Adding tracing, detailed cutting, hole punching, and stringing would turn a focused activity into a sequence of adult interventions. For mixed-age groups, keep the shared theme but adjust the challenge: younger preschoolers can tear petals, while children with stronger hand control can snip fringe or fold stems.
Group suitability also depends on whether the work can pause safely. Wet painted paper, loose glitter, and structures that collapse when moved create bottlenecks during transitions. Flat collages and folded forms are easier to label, dry, and store. The collection of Arts and crafts with paper for preschool groups should therefore be filtered by room logistics as carefully as by appearance.
A common mistake is judging success by resemblance to an adult sample. Preschool work naturally includes uneven cuts, unexpected placement, and changing plans. The stronger sign is purposeful participation: children select pieces, repeat the featured motion, make visible decisions, and can explain some part of what they created. If adults complete most of the cutting or assembly, the display may look polished while offering children little practice.
Eight Activities Organized by Skill
Activities become easier to select when they are grouped by the physical action children will practice rather than by a decorative theme. The following options can be adapted to seasons, stories, classroom topics, or children’s interests without changing their basic setup.
Tearing and Layering
1. Torn-paper color fields: Give each child a sturdy background and two or three colors of construction paper. Children tear pieces and overlap them to fill as much or as little of the page as they choose. Broad glue lines applied with a glue stick or a small brush are easier to manage than dots placed under every scrap.
2. Tissue-paper windows: Place a sheet of clear self-adhesive covering material sticky-side up and secure its corners to the table. Children lay tissue pieces across the surface before an adult seals it with a second sheet. This removes liquid glue from the process. Closely supervise access to the covering material and handle any trimming yourself.
Gluing and Arranging
3. Shape neighborhoods: Offer large paper rectangles, squares, triangles, and circles for children to arrange as buildings, vehicles, signs, or invented objects. Keep the shapes open-ended rather than assigning one correct picture. Pre-cut shapes are appropriate here because composition, not scissor practice, is the main task.
4. Paper-plate faces: Children choose broad facial features, yarn-sized paper strips, and drawn details to create people or imaginary characters. Avoid tiny eyes or decorations that may be unsuitable around children who still mouth objects. Drawing eyes directly on the plate is both safer and more expressive than supplying small plastic pieces.
Folding and Cutting
5. Folded fan paintings: Children decorate lightweight paper with crayons, then make wide back-and-forth folds with adult modeling. Perfectly even folds are unnecessary. Stapling should be completed by an adult away from children, or the base can be secured with tape.
6. Fringe creatures: Draw a bold stopping line across a wide paper strip. Children cut repeatedly from one edge toward that line, creating fringe that can become fur, grass, feathers, or tentacles. This is more achievable than cutting out detailed outlines because each snip starts at an open edge.
Building and Collaborative Work
7. Rolled-paper towers: Children roll sheets around wide cardboard tubes, tape the seam, and arrange the resulting cylinders on a flat base. Adults should avoid making the rolls too narrow because tight rolling requires more finger control. The construction may be temporary; testing balance is part of the activity rather than a failure.
8. Group paper garden: Each child contributes one large flower, leaf, insect, or invented plant to a shared background. Assign table space rather than prescribing identical components. This model works well when attendance varies because every contribution remains complete on its own.
For a first group session, select one of the tearing or arranging options. Folding and construction introduce more waiting, demonstration, and repair. Repeating an activity with different colors or subject matter is often more productive than constantly introducing new techniques; familiarity lets children take greater ownership during later sessions.
Preparing Supplies and Managing the Table
Efficient preparation reduces waiting without removing the decisions that make the activity meaningful. Cut background sheets, test adhesives, and portion shared paper before children arrive, but leave the central arranging, tearing, drawing, or cutting to them. A preschooler does not need unlimited access to every color at once. Three or four visible choices usually create variation while keeping the table usable.
Set up one tray for each working area rather than placing a single supply pile in the center of a large table. Children reaching across wet work can drag sleeves through glue or scatter pieces onto the floor. A tray might hold paper, two glue sticks, crayons, and one pair of scissors per seated child. Place finished-work labels and a drying surface nearby so an adult does not have to leave the group repeatedly.
Use the following compact check before the session begins:
- Test the paper: Confirm that children can tear, fold, or cut the selected weight.
- Limit adhesive: Choose washable, age-appropriate glue and demonstrate a short swipe rather than coating the page.
- Inspect tools: Use child-sized scissors in good condition; dull blades can fold paper instead of cutting it.
- Remove small loose items: Match every component to the ages, supervision needs, and mouthing behavior within the group.
- Plan storage: Reserve flat drying space and mark names before wet work makes handling difficult.
Timing should account for arrival, demonstration, active work, and cleanup rather than treating the entire block as production time. A brief demonstration is usually enough: show how to use the tool, where finished work goes, and what to do when help is needed. Demonstrating every decorative decision can cause children to wait for permission before continuing.
Suppose twelve children are making fringe creatures with two adults. Giving every child a long, detailed outline would generate continuous requests to turn corners and repair torn sections. Wide rectangular bodies and straight fringe cuts allow both adults to monitor scissor handling instead. Children can add identity through color, drawn features, and fringe length. The simpler base improves independence without making the finished pieces uniform.
Signs that the setup is failing include a queue for one tool, repeated requests for adult assembly, glue soaking through the base, or children abandoning work before making a choice. Adjust immediately by removing a difficult stage, adding duplicate tools, or offering a sturdier backing. Additional planning for Arts and crafts with paper for preschool groups should focus on these operational details rather than adding more decorations.
Supporting Independence Without Controlling the Result
Adult support is most useful when it protects access to the process rather than correcting the appearance of the work. Describe the next physical action—such as holding the paper near the cutting area—instead of moving a child’s hand to produce a cleaner line. If a child requests help, ask which part feels difficult and provide the smallest useful adjustment. Rotating the paper, starting a slit, or holding a loose corner may be enough.
A finished model can clarify how materials connect, but it also creates an unintended standard. Present it as one possible outcome and include visible alternatives when practical. For a shape collage, an adult might place the same three shapes in two different arrangements, then return the pieces to the tray. Children see the joining method without receiving a picture they are expected to reproduce.
Language can preserve ownership. Comments such as “You overlapped the blue pieces” or “That paper changed shape when you tore it” draw attention to observable choices and material behavior. Questions should be used sparingly; a stream of requests to name colors, count pieces, or explain a picture can interrupt concentration. Some children narrate while working, while others communicate through repeated actions and placement.
Mixed abilities require multiple ways to participate in the same group task. A child who finds scissors tiring can tear paper or choose where an adult-cut strip belongs. Another child may cut several strips but decline to glue them. These are meaningful roles when the child controls decisions. By contrast, hand-over-hand assistance should not be the routine route to completing a predetermined product. If nearly every child needs sustained physical guidance, the activity is mismatched to the group.
Evaluate the session after cleanup. Look for children who could reach supplies, understand the main action, remain engaged for a reasonable portion of the activity, and stop without their work being treated as incomplete. Notice whether the same children received most of the adult help. Also inspect the results: variation suggests children made decisions, while nearly identical pages may indicate that directions were too narrow.
The most useful next step is often a small revision rather than a replacement activity. If tissue paper clung to hands, switch from liquid glue to an adhesive surface. If cutting caused fatigue, shorten the cut lines or begin with edge snips. If children finished immediately, add an optional background or construction challenge rather than requiring more decoration from everyone. This responsive approach makes paper work sustainable across repeated preschool group sessions.
Frequently Asked Questions
Which paper is easiest for preschoolers to cut?
Standard construction paper is usually easier to control than thin tissue paper or heavy cardstock. Test it with the actual child-sized scissors, because poor blades can make suitable paper fold or tear.
How many supplies should be placed at each table?
Provide enough core tools to prevent long waits, but limit decorative choices to a few visible options. Small duplicate trays are easier for a group to reach than one crowded central container.
Should preschool paper activities have a finished example?
A sample can demonstrate joining or folding, but it should be presented as one possibility. Emphasize the process and allow different colors, arrangements, proportions, and interpretations.
What can replace glitter in a low-mess activity?
Use torn tissue, paper confetti made with a hole punch by an adult, metallic crayons, or shiny paper shapes. Choose piece sizes appropriate for the children and the level of supervision available.
How can adults help a child who struggles with scissors?
Offer short straight cuts from an open edge, demonstrate thumb-up positioning, and let the child rotate the paper. Tearing or arranging adult-cut shapes can preserve creative control when cutting becomes tiring.
Conclusion
Successful preschool paper sessions are built around a clear physical action, accessible supplies, and enough flexibility for children to make visible choices. Begin with tearing, arranging, or short edge cuts before introducing precise folds and multi-part construction. Test paper and tools together, distribute supplies in small trays, and remove stages that create queues for adult help.
During the activity, assist with access rather than redesigning children’s work. Uneven edges, unexpected combinations, and temporary structures show experimentation, not poor execution. Afterward, use engagement, independence, material flow, and variation among finished pieces to judge the plan. Repeat a promising activity with one practical adjustment—such as firmer backing, shorter cut lines, or less adhesive—so the group can build familiarity without losing creative ownership.

Now retrieving an image set.
Amazon Basics Cardstock Paper, 8.5" x 11", 65 lb/176 gsm, 96 Bright White, 250 Sheets
$10.63 (as of September 18, 2026 22:40 GMT -04:00 - More infoProduct prices and availability are accurate as of the date/time indicated and are subject to change. Any price and availability information displayed on [relevant Amazon Site(s), as applicable] at the time of purchase will apply to the purchase of this product.)
Now retrieving an image set.
100% Pure Tea Tree Essential Oil for Skin & Diffuser - 4 Fl Oz | 100% Pure Tea Tree Oil for Blemish-Prone Skin & Flaky Scalp, suits Oily & Combination Skin, Daily Face Wash & Scalp Care
$9.99 (as of September 18, 2026 22:40 GMT -04:00 - More infoProduct prices and availability are accurate as of the date/time indicated and are subject to change. Any price and availability information displayed on [relevant Amazon Site(s), as applicable] at the time of purchase will apply to the purchase of this product.)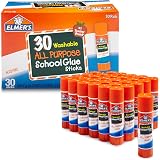
Now retrieving an image set.
Elmer's All Purpose School Glue Sticks, Acid-Free and Washable, Clear, 7 Grams, 30 Count - Craft Projects, Poster, Classroom Supplies, #1 Teacher Brand
$10.99 (as of September 18, 2026 22:40 GMT -04:00 - More infoProduct prices and availability are accurate as of the date/time indicated and are subject to change. Any price and availability information displayed on [relevant Amazon Site(s), as applicable] at the time of purchase will apply to the purchase of this product.)
Now retrieving an image set.
Mod Podge Gloss Sealer, Glue & Finish: All-in-One Craft Solution- Quick Dry, Easy Clean, for Wood, Paper, Fabric & More. Non-Toxic - Craft with Confidence, Made in USA, 16 oz., Pack of 1
$7.99 (as of September 18, 2026 22:40 GMT -04:00 - More infoProduct prices and availability are accurate as of the date/time indicated and are subject to change. Any price and availability information displayed on [relevant Amazon Site(s), as applicable] at the time of purchase will apply to the purchase of this product.)
Now retrieving an image set.
Krylon Fusion All-In-One, Matte, Black, 12 oz
$6.98 (as of September 18, 2026 22:40 GMT -04:00 - More infoProduct prices and availability are accurate as of the date/time indicated and are subject to change. Any price and availability information displayed on [relevant Amazon Site(s), as applicable] at the time of purchase will apply to the purchase of this product.)
Now retrieving an image set.