
Children’s craft ideas organized by material are easiest to choose when paper, fabric, clay, natural objects, and recycled finds are matched to a child’s cutting ability, attention span, and tolerance for mess. Paper suits quick folding and collage, fabric supports threading and texture work, while clay allows three-dimensional modeling. Leaves, twigs, cartons, and tubes encourage children to adapt irregular shapes rather than follow a fixed kit. Check every item for sharp edges, choking hazards, allergens, and unsuitable adhesives before use. A successful activity uses a small selection of compatible materials, leaves room for individual choices, and can be completed within the time available.
Paper and Cardboard Ideas for Cutting, Folding, and Building
Paper is most useful when its weight matches the action a child needs to perform. Printer paper folds easily but collapses under heavy decorations, construction paper holds collage pieces without becoming too rigid, and corrugated cardboard makes a better base for structures. Choosing by function prevents the familiar frustration of a mask that droops, a folded animal that will not crease, or a cardboard model that ordinary glue cannot hold.
For a low-preparation activity, cut colored paper into broad strips and let children weave them through slits in a contrasting sheet. Wide strips and widely spaced openings suit developing hand control; narrower strips create a more demanding pattern. Another option is a torn-paper landscape made from overlapping scraps. Tearing removes the precision demanded by scissors while still requiring decisions about shape, position, and color. Older children can turn cereal-box card into standing animals by adding slotted legs rather than relying on taped supports.
Cardboard construction works best when adults distinguish decoration from structure. Tape, folded tabs, and interlocking slots carry weight more reliably than a thick puddle of school glue. A child building a small house from a shipping box might use masking tape at the corners, paper fasteners for a moving door, and glue only for windows or surface details. If joints keep separating, the likely problem is not a lack of glue; the surfaces may be coated, bent under tension, or too heavy for the adhesive.
A compact paper station can contain blunt-tip scissors, washable glue, removable tape, crayons, hole punches, and scraps sorted roughly by thickness. Avoid presenting every decoration at once. Too many sequins, stickers, and patterned sheets can shift attention from making decisions to attaching items randomly. A limited palette—such as three paper colors and one drawing tool—often produces more deliberate work without forcing every result to look alike.
Adult preparation should reduce hazards without completing the interesting work. Pre-cutting heavy cardboard or making starter holes can be appropriate, while leaving children to arrange, connect, and decorate preserves ownership. For more ways to plan Children’s craft ideas organized by material, first separate flexible sheets from structural board; they behave differently even though both belong in the paper bin.
Fabric, Yarn, and Soft-Material Projects
Textiles introduce resistance, texture, and flexible connections that paper cannot provide. Felt is an approachable starting point because its edges do not unravel, while woven cotton is better for learning about fraying, folding, and joining. Yarn can be wrapped, threaded, knotted, or used as hair and hanging loops. The main constraint is that soft pieces move during assembly, so children may need clips, a cardboard backing, or temporary placement marks.
A felt face board is a reusable project for younger children. Cut a large head shape and supply simple eyes, mouths, eyebrows, and hair pieces that can be rearranged without glue. The activity remains open-ended while avoiding the permanence that sometimes upsets a child who changes an expression. For a take-home version, children can glue their final arrangement to card. Large components are preferable when small loose pieces could be mouthed.
Children ready for threading can make a yarn-wrapped initial or simple loom. A cardboard letter with shallow notches keeps yarn from slipping off its edges. A basic loom can be made by cutting evenly spaced notches at opposite ends of sturdy card, stretching yarn between them, and weaving ribbon or fabric strips over and under. If the card bows, the warp threads are too tight. If the weaving bunches inward, each row is being pulled rather than laid gently across the width.
Needles require a decision based on the child and the textile, not an age label alone. A large plastic tapestry needle paired with plastic canvas or loosely woven burlap is easier to control than a small needle pushed through dense cloth. An adult should remain nearby, count tools before and after the session, and store needles separately. No-sew alternatives include tying fleece strips, lacing pre-punched felt, or securing fabric with washable glue, although glued fabric usually needs more drying time than paper.
Loose fibers deserve their own safety check. Long cords can tangle, and small buttons, beads, bells, or pom-poms may be unsuitable for children who still mouth objects. Fabric scraps should also be clean and free of pins or staples. A common mistake is treating a mixed sewing box as a ready-made children’s supply bin; it may contain broken needles, sharp fasteners, or decorative pieces that detach easily.
Clay, Dough, and Moldable-Material Activities
Moldable media let children revise a form repeatedly before deciding it is finished. Soft modeling dough responds to squeezing and rolling with little setup, air-dry clay retains finer marks and hardens for display, and reusable modeling compounds suit repeated play rather than permanent objects. These options are not interchangeable: a material selected for permanence may demand longer drying, gentler handling, and more protected work space.
Begin with actions rather than a sample children are expected to copy. Rolling spheres, pinching bowls, flattening slabs, joining coils, and pressing textures reveal how the material behaves. Those actions can become miniature food, an animal, a tile, or an invented object. A useful small project is a texture medallion: flatten a thick disc, press in a leaf vein or textured tool, add a hanging hole while soft, and allow it to dry according to the product directions.
Joining is where many clay projects fail. Two thick pieces pressed together lightly may separate as the object dries. Air-dry clay generally benefits from broad contact surfaces and careful blending at the seam, but the maker should follow the specific product instructions because formulas vary. Very thick forms may dry unevenly or crack, whereas thin projections such as ears and tails break easily. A compact shape with details pressed into the surface is usually sturdier than a figure supported by narrow legs.
Water should be controlled rather than offered as an unlimited repair tool. Excess water turns surfaces slippery, weakens fine details, and creates a muddy work area. Keep a damp sponge nearby for fingers and use only a small amount where the product permits it. If cracks appear during modeling, compressing and smoothing the clay is often more useful than repeatedly wetting it.
Food utensils and craft tools should remain separate unless a material is explicitly intended for food preparation. Read labels for age guidance, ingredients, ventilation, skin-contact instructions, and cleanup. Homemade dough can simplify ingredient awareness, but it may still contain salt, wheat, coloring, or other substances relevant to allergies and ingestion. “Non-toxic” does not mean edible, nor does it remove the need for supervision.
Signs of a well-matched clay activity include sustained manipulation, forms that remain manageable, and enough time for cleanup before attention fades. Warning signs include constant requests for adult repairs, pieces collapsing under their own weight, or children waiting while one person controls the tools. In that situation, switch to flatter relief tiles or shared texture tools rather than pushing ahead with complex sculpture.
Natural and Recycled Materials Worth Saving
Natural and reclaimed objects are valuable because their shapes suggest possibilities instead of prescribing a finished result. A forked twig can become antlers, a seedpod can form a boat, and a cardboard tube can serve as a tower, creature body, or marble-run support. Irregularity is part of the creative task, but collected and discarded items need closer inspection than packaged paper or felt.
Clean, dry leaves work well for rubbings, prints, crowns, and collage. Flat stones can become pattern pieces or story characters when decorated with suitable washable paint or markers. Twigs can frame a small weaving, while pinecones can hold tucked paper shapes without much adhesive. Collection should be permitted, modest, and limited to fallen items; children should not pull living plants or disturb nests and wildlife habitat.
Recycled packaging expands building options at little additional cost. Tubes, small boxes, paper bags, egg cartons, clean lids, and corrugated inserts can be sorted by form rather than by their former use. A “round parts” tray and a “flat building pieces” tray are more helpful during construction than a jumble labeled recycling. Food containers should be washed and fully dried, and packaging that held household chemicals, raw meat, medicine, or unknown substances should not become a children’s craft item.
Inspection is non-negotiable. Remove staples, tape fragments, plastic film, sharp metal rims, splinters, dirt, and loose components. Natural materials may carry mold, insects, irritating sap, or allergens. Painted or weathered salvaged wood is a poor choice when its coating and history are unknown. An adult should discard questionable finds rather than assume that “natural” or “reused” means harmless.
A practical project combines only a few categories: use a cardboard rectangle as a base, arrange twigs as a maze, and add a paper ball to navigate through it. Alternatively, attach leaves and seedpods to a paper animal outline. Combining one reliable foundation with a few unpredictable objects gives children creative freedom without making every joint difficult. The mistake to avoid is filling a table with unrelated finds and expecting a coherent activity to emerge.
Storage also affects whether reuse remains useful. Keep only clean objects with a plausible function, set quantity limits, and recycle excess pieces before bins overflow. The material-based approach in Children’s craft ideas organized by material works best when children can see and return each category without emptying the entire collection.
Choosing Materials by Age, Time, and Cleanup
The best material is the one a child can manipulate meaningfully within the available session. Chronological age offers a rough clue, but observed skills are more useful: notice whether the child can open scissors, control glue, resist mouthing pieces, follow drying instructions, and tolerate a project that cannot be finished immediately. A simpler material with genuine choices is preferable to an impressive activity completed mostly by an adult.
Use this short planning check before setting out supplies:
- Define the main action: Choose cutting, weaving, molding, printing, or building rather than combining every technique.
- Match the resistance: Offer paper that cuts cleanly, fabric that accepts the chosen needle, or clay soft enough for the child’s hands.
- Check every risk: Look for small parts, sharp edges, long cords, allergens, stains, fumes, and tools requiring direct supervision.
- Budget drying and cleanup: Reserve protected space for wet work and finish messy steps before the session ends.
- Prepare a recovery option: Keep tape for weak cardboard joints, spare backing for torn paper, or a tray for unfinished clay.
Time changes the sensible choice. A 20-minute window favors torn-paper collage, leaf rubbing, felt arrangement, or yarn wrapping. Air-dry sculpture may fit only if the session includes a designated drying location and a later opportunity to decorate. For groups, avoid a process that requires every child to wait for one glue gun, specialty punch, or adult-operated tool. Bottlenecks shorten making time and encourage rushed handling.
Cleanup should be designed into the project rather than treated as an afterthought. Trays contain rolling beads and clay crumbs, washable table covers define work zones, and shallow supply dishes reduce spills. Put scrap paper, reusable offcuts, and trash in separate containers so children can participate in sorting. A material is failing the setting when cleanup exceeds the activity, stains cannot be managed, or the room lacks safe drying and storage space.
Choice should remain bounded. Offering two base colors, three texture tools, or a choice between collage and drawing gives meaningful control without overwhelming the table. A model can demonstrate a connection method, but it should not become the standard every child must reproduce. If all finished pieces look identical, adults probably made too many design decisions; if nothing stays together, the material or joining method needs adjustment.
A well-run session ends with usable supplies returned, tools counted, wet pieces labeled, and children able to explain a decision they made. Use Children’s craft ideas organized by material as a selection system, then narrow the setup according to skill, space, supervision, and time.
Frequently Asked Questions
Which craft material is easiest for a beginner?
Construction paper is a practical first choice because children can tear, fold, draw on, tape, and glue it with minimal setup. Match scissors and small decorations to the child’s abilities and supervision needs.
How many materials should be offered at once?
One base material, one joining method, and two or three decorative choices are usually enough. A limited selection makes decisions manageable while still allowing different results.
Can household recyclables be used safely?
Use only clean, dry packaging with a known history. Remove staples, films, sharp edges, and loose caps, and exclude containers associated with chemicals, medicine, raw meat, or unknown substances.
What should I do when a child loses interest midway?
Reduce the number of steps or offer a stopping point, such as saving an unfinished structure on a labeled tray. Repeated adult rescue often signals that the material or project duration is too demanding.
Are non-toxic craft products safe to eat?
No. Non-toxic labeling does not mean a product is food. Follow the package instructions, supervise use, and consider ingredients or allergens when children may put their hands or materials in their mouths.
Further Reading
Authoritative Sources
- U.S. Consumer Product Safety Commission: Toy Safety
cpsc.govProvides official safety information relevant to selecting age-appropriate tools, components, and play materials
- Art and Creative Materials Institute
acmiart.orgExplains the organization’s product-evaluation and labeling program for art and creative materials
- U.S. Environmental Protection Agency: Reducing and Reusing Basics
epa.govOffers practical context for responsible reuse, waste reduction, and decisions about recyclable household materials
- HealthyChildren.org: Choking Prevention
healthychildren.orgHelps caregivers assess small craft components that may present choking risks to young children
Conclusion
Organizing ideas by paper, textiles, moldable media, natural objects, and reusable packaging makes project planning more precise. Select the material according to what the child will actually do with it, then test whether the joining method, session length, and cleanup plan fit the setting. Paper and felt suit quick experimentation, clay needs drying and structural judgment, while collected objects require careful inspection before they reach the table. Begin with one main action and a restrained supply selection rather than a crowded assortment. Before the activity, remove hazards, prepare a place for unfinished work, and decide which steps genuinely require adult help. Afterward, note where children worked independently and where tools or connections failed; those observations provide a better basis for the next project than age labels or an idealized sample.
Now retrieving an image set.
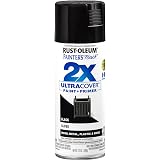
Rust-Oleum Painter's Touch 2X Ultra Cover Spray Paint, Gloss Black | Indoor and Outdoor Surfaces (Metal, Wood, Plastic), Fast Dry, Durable, Sprays from Any Angle, Comfort Tip, Oil Based
$5.98 (as of September 18, 2026 22:40 GMT -04:00 - More infoProduct prices and availability are accurate as of the date/time indicated and are subject to change. Any price and availability information displayed on [relevant Amazon Site(s), as applicable] at the time of purchase will apply to the purchase of this product.)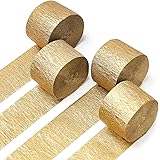
Now retrieving an image set.
PartyWoo Gold Crepe Paper Streamers 4pcs 328 FT Gold Streamers | Wedding Birthday Baby Shower Engagement Anniversary New Year Eve Graduation Bridal Shower Party Decorations
$6.99 (as of September 18, 2026 22:40 GMT -04:00 - More infoProduct prices and availability are accurate as of the date/time indicated and are subject to change. Any price and availability information displayed on [relevant Amazon Site(s), as applicable] at the time of purchase will apply to the purchase of this product.)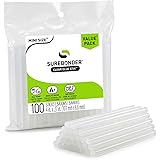
Now retrieving an image set.
Surebonder Clear, All Purpose, All Temp., Mini Size Hot Glue Sticks 0.27 in. Diameter, 4 in. Length -100 Pack
$5.97 (as of September 18, 2026 22:40 GMT -04:00 - More infoProduct prices and availability are accurate as of the date/time indicated and are subject to change. Any price and availability information displayed on [relevant Amazon Site(s), as applicable] at the time of purchase will apply to the purchase of this product.)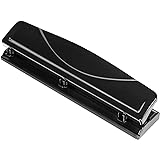
Now retrieving an image set.
Amazon Basics 3 Hole Punch, 10 Sheet Capacity, Black, Easy-Clean Tray
$9.52 (as of September 18, 2026 22:40 GMT -04:00 - More infoProduct prices and availability are accurate as of the date/time indicated and are subject to change. Any price and availability information displayed on [relevant Amazon Site(s), as applicable] at the time of purchase will apply to the purchase of this product.)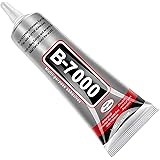
Now retrieving an image set.
B7000 Jewelry Glue for Making, FITTDYHE 1PCS 50ML/1.69 fl oz Clear Adhesive for Rhinestone, Fabric, Multipurpose Super B-7000 for Phone Repair, Nail Art, Wood, Glass, Charms
$5.99 (as of September 18, 2026 22:40 GMT -04:00 - More infoProduct prices and availability are accurate as of the date/time indicated and are subject to change. Any price and availability information displayed on [relevant Amazon Site(s), as applicable] at the time of purchase will apply to the purchase of this product.)
Now retrieving an image set.