
Children’s craft box storage and project planning work best when supplies are sorted by function, hazardous or messy items are secured, and each planned activity has a separate project kit. Use shallow labeled containers for frequently handled materials, keep paper flat, and place child-safe basics where children can return them without unpacking the entire box. Before scheduling an activity, confirm the required supplies, preparation time, drying time, cleanup needs, and suitable age range. Avoid filling one large container with unrelated pieces; buried materials become hard to inventory, while leaking glue, dried markers, and unfinished work can damage otherwise usable supplies.
Build a Craft Box Around How Supplies Are Used
A useful craft box reflects the way a child selects, carries, and puts away materials. Sorting only by color may look orderly, but it often separates items that are used together and creates extra searching. Functional groups are usually more practical: drawing tools, adhesives, cutting tools, paper, decorative pieces, modeling materials, and unfinished projects. A child making a greeting card can then retrieve the drawing container, paper folder, and adhesive tray rather than opening every compartment.
Begin by emptying the existing box onto a wipeable surface. Discard dried markers, hardened glue, broken crayons too small to hold comfortably, and scraps that are too damaged for a likely activity. Check paint, dough, and glue containers for leaking lids or changes in texture. Keep reusable offcuts, but give them a defined limit, such as one shallow envelope or tray. An unlimited scrap collection eventually hides the full sheets and usable shapes it was meant to preserve.
Next, divide supplies according to access. Everyday child-managed items might include washable crayons, blunt-tip scissors appropriate for the child, glue sticks, stickers, and modest amounts of paper. Adult-controlled materials may include a hot-glue tool, craft knife, strong adhesive, aerosol product, sharp wire, small magnets, or tiny pieces that are unsuitable for younger children. Storage location must follow the needs of the youngest child who can reach the area, not merely the age of the child for whom the box was assembled.
A compact priority order keeps the setup workable:
- Secure hazards first: remove or lock away sharp, hot, toxic, choking-size, and difficult-to-clean items as appropriate.
- Protect vulnerable stock: keep paper flat, lids closed, and liquids upright.
- Make common supplies visible: use simple labels or pictures that match the child’s reading ability.
- Limit quantities: place a working amount in the box and store refills separately.
Quantity limits are especially useful with sequins, beads, pom-poms, and stickers. Giving a child the entire supply may increase spills and make project choices harder. A small cup or divided tray provides enough variety while keeping the reserve intact. The goal of Children’s craft box storage and project planning is not to display every item at once; it is to make an appropriate selection easy to find and realistic to return.
Choose Containers That Protect Materials and Children
Container shape matters more than a perfectly matched set. Shallow boxes expose their contents without requiring a child to dig through several layers. Clear sides help with inventory, while opaque containers can reduce visual distraction in a busy room. If a box is stored on a shelf, measure the available width, depth, and height before buying organizers, and include clearance for handles and hinged lids.
Loose supplies need different forms of protection. Paper stays usable longer in a rigid folder, document case, or horizontal tray where corners are not crushed. Markers should be stored according to their manufacturer’s directions; regardless of orientation, every cap needs to be secured before the container closes. Liquid glue and paint belong upright in a washable bin that can contain a small leak. Modeling dough needs an airtight inner container rather than reliance on the outer craft box lid.
Small divided organizers are effective for beads, buttons, foam shapes, and googly eyes, but only when their latches remain closed during carrying. Test a compartment box over a table before trusting it to a child: close it, gently tilt it, and check whether pieces migrate under the dividers. A zip pouch may be safer than a brittle hinged case for a frequently transported kit, although pouches provide less protection against crushing.
Labels should describe what belongs in the space rather than every item currently inside it. “Drawing” remains accurate when colored pencils replace worn crayons; a label listing six exact products soon becomes outdated. Pairing a word with a simple picture gives pre-readers a usable return cue. Place the label where it can be seen while the container is open, because cleanup decisions happen before the lid is shut.
Portability introduces a tradeoff. One large handled box is convenient to move but becomes heavy and difficult to inspect. Several smaller modules are easier to share and replace, yet individual containers can be misplaced. A strong compromise is a light outer tote holding three or four removable groups. Keep dense objects, such as a hole punch or a large modeling-clay pack, near the bottom so the tote is less likely to tip.
A storage system is failing when children must empty it to reach routine supplies, lids will not close without pressure, or cleanup consistently requires an adult to identify every compartment. Change the container or reduce the inventory rather than blaming the child for a layout that exceeds their reach, strength, or sorting skills.
Turn Project Ideas Into Ready-to-Use Kits
Project planning becomes more reliable when an idea is converted into a material list and a sequence before craft time begins. A photo or finished example rarely reveals setup details such as cutting templates, protecting the table, waiting for paint to dry, or reserving space for wet work. Write down the base material, joining method, decorating supplies, tools, preparation tasks, and expected pause points.
For example, a cardboard animal activity might require a cereal-box panel, washable paint, a brush, glue, paper features, and scissors. The adult may need to flatten and cut the cardboard beforehand. If the paint must dry before features are attached, the activity is better treated as two short sessions than one long sitting. Trying to compress both stages often leads to sliding pieces, smeared surfaces, and frustration that has little to do with the child’s crafting ability.
Place project-specific materials in a paper bag, shallow bin, or reusable pouch, then add a note naming any shared tools that should not remain inside. Do not prepackage wet products with absorbent paper for extended storage, and do not put sharp adult tools into a child-accessible kit. A project kit should reduce preparation, not bypass safe supervision or product directions.
A Pre-Project Readiness Check
- Are all required pieces present in usable quantities?
- Does any cutting, measuring, hole punching, or surface protection need advance preparation?
- Can the child perform the main steps with an appropriate level of assistance?
- Is there enough time for construction, drying, and cleanup?
- Where will wet work and unfinished pieces remain undisturbed?
Plan around the available session rather than choosing by appearance alone. A 20-minute window suits collage, drawing, stamping, or assembly from prepared parts. Painting a box, building a layered structure, or working with glue that needs a firm bond may require a longer block or a planned stopping point. For siblings or a group, add enough shared tools to avoid a bottleneck; one glue bottle for four children can turn a simple activity into a waiting exercise.
Keep no more than a few ready kits in active rotation. Too many prepared activities tie up versatile supplies and make children feel they must follow an adult’s queue. Leave open-ended materials available alongside planned kits. The strongest Children’s craft box storage and project planning setup supports both a scheduled build and spontaneous experimentation without allowing one to consume all the stock needed by the other.
Maintain the Box Without Constant Reorganizing
Maintenance should happen at natural checkpoints rather than through frequent complete makeovers. A two-minute reset after each session handles open caps, damp brushes, loose scraps, and tools left on the table. A deeper review is useful when a project ends, a school break begins, or the box becomes difficult to close. Reorganizing every week can make locations unpredictable and discourage children from learning the system.
Assign unfinished work its own tray or wide envelope. Mixing half-built pieces into supply compartments damages the project and blocks access to reusable materials. Add the child’s name and, when helpful, the next action: “attach wings after paint dries.” If no one wants to continue after an agreed period, recover clean reusable pieces and recycle or discard the rest where appropriate. An unfinished-project limit—such as one tray per child—prevents the storage area from becoming a long-term archive.
Inventory by checking failure-prone items, not counting every pom-pom. Test markers, inspect glue levels, confirm that scissors work, look for damaged paintbrush bristles, and note which paper sizes are running low. Refill only what supports upcoming activities or frequent independent use. Bulk purchasing may reduce the unit price, but it wastes money when liquids dry out, paper warps in poor storage, or children outgrow the material before it is used.
Children can take part in maintenance when the tasks are observable. “Return every item to the correct category” is abstract for a young child; “put crayons in this cup and paper in this folder” is clear. A photograph of the correctly packed box can help when several removable bins fit in one tote. Adults should still handle inspection for leaks, damaged tools, age suitability, and products that require controlled access.
Signs the system is working include faster setup, fewer duplicate purchases, intact paper, closed caps, and cleanup that can be completed with limited prompting. Warning signs include mystery bags, overflowing scraps, sticky container bottoms, missing tool pairs, or planned activities repeatedly canceled because one critical material cannot be found. Respond to the specific failure. Add a leak tray for liquids, reduce categories if sorting is too complex, or create a visible “needs replacement” note instead of rebuilding the entire arrangement.
Seasonal materials deserve temporary modules rather than permanent prime space. Move holiday colors, nature collections, or special embellishments into the active box when a related project is scheduled, then return leftovers to a labeled reserve. This keeps everyday choices manageable while preserving less frequently used stock. For more ways to coordinate access and preparation, revisit Children’s craft box storage and project planning whenever the child’s skills, interests, or work area changes.
Frequently Asked Questions
What should go in a basic children’s craft box?
A practical basic box can hold washable drawing tools, child-appropriate scissors, glue sticks, assorted paper, stickers, and a small quantity of collage pieces. Match every item to the child’s age, abilities, supervision, and the product instructions.
How should small craft pieces be stored?
Use a latching divided case, sealed pouch, or small containers inside a larger bin. Keep choking-size pieces inaccessible to young children and test portable organizers to ensure pieces cannot slip between compartments.
How many projects should be planned at once?
Two or three ready projects are usually easier to manage than a large queue. This preserves general supplies for open-ended use and reduces the chance that prepared pieces will be lost or damaged.
Where should unfinished crafts be kept?
Use a dedicated flat tray, drying rack, or labeled envelope away from loose supplies. Include a note about the next step so the activity can resume without reconstructing the original plan.
How often should a craft box be cleaned out?
Do a brief reset after use and inspect the full box when it becomes crowded, difficult to close, or stocked with unreliable materials. Check caps, leaks, broken tools, scraps, and unfinished work rather than following an arbitrary schedule.
Conclusion
A dependable craft box is easy to inspect, safe for its location, and simple enough for a child to help restore. Begin by removing unusable stock and separating adult-controlled tools from everyday materials. Protect paper and liquids with containers suited to their behavior, then keep working quantities smaller than the reserve.
For upcoming activities, prepare only a few kits and check supplies, advance cutting, session length, drying space, and cleanup before craft time. Watch how the system performs: searching, spills, crushed work, and repeated adult intervention reveal layout problems that labels alone cannot fix. Adjust the failed part instead of repeatedly reorganizing everything. A short post-project reset and a defined place for unfinished work will preserve more supplies—and make the next activity genuinely ready to begin.

Now retrieving an image set.
Amazon Basics Clear Thermal Laminating Sheets for Documents and Photos, 9 x 11.5-Inch, 2.8 mil, 200-Pack
$17.99 (as of September 18, 2026 22:40 GMT -04:00 - More infoProduct prices and availability are accurate as of the date/time indicated and are subject to change. Any price and availability information displayed on [relevant Amazon Site(s), as applicable] at the time of purchase will apply to the purchase of this product.)
Now retrieving an image set.
Mod Podge Gloss Sealer, Glue & Finish: All-in-One Craft Solution- Quick Dry, Easy Clean, for Wood, Paper, Fabric & More. Non-Toxic - Craft with Confidence, Made in USA, 16 oz., Pack of 1
$7.99 (as of September 18, 2026 22:40 GMT -04:00 - More infoProduct prices and availability are accurate as of the date/time indicated and are subject to change. Any price and availability information displayed on [relevant Amazon Site(s), as applicable] at the time of purchase will apply to the purchase of this product.)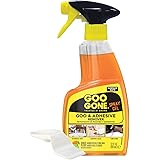
Now retrieving an image set.
Goo Gone Adhesive Remover Spray Gel 12 Oz with Scraper, Surface Safe | Citrus Cleaning Power for Hard Surfaces, Carpet & Fabric, Removes Glue, Stickers, Tape Residue, Grease, Gum & Wax, Drip Free
$17.98 (as of September 18, 2026 22:40 GMT -04:00 - More infoProduct prices and availability are accurate as of the date/time indicated and are subject to change. Any price and availability information displayed on [relevant Amazon Site(s), as applicable] at the time of purchase will apply to the purchase of this product.)
Now retrieving an image set.
100% Pure Tea Tree Essential Oil for Skin & Diffuser - 4 Fl Oz | 100% Pure Tea Tree Oil for Blemish-Prone Skin & Flaky Scalp, suits Oily & Combination Skin, Daily Face Wash & Scalp Care
$9.99 (as of September 18, 2026 22:40 GMT -04:00 - More infoProduct prices and availability are accurate as of the date/time indicated and are subject to change. Any price and availability information displayed on [relevant Amazon Site(s), as applicable] at the time of purchase will apply to the purchase of this product.)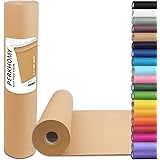
Now retrieving an image set.
PerkHomy Brown Kraft Paper Roll 17.5" x 1,200" (100') for Gift Wrapping Bulletin Board Craft Art Bouquet Flower Packing Valentines Easel Moving Shipping Floor Poster Covering Table 70GSM 50LB
$7.49 (as of September 18, 2026 22:40 GMT -04:00 - More infoProduct prices and availability are accurate as of the date/time indicated and are subject to change. Any price and availability information displayed on [relevant Amazon Site(s), as applicable] at the time of purchase will apply to the purchase of this product.)
Now retrieving an image set.