Fall crafts for kids using natural materials work best when clean, dry leaves, twigs, seeds, and pinecones are matched to simple techniques such as printing, weaving, arranging, and wrapping. Collect only loose materials where gathering is permitted, reject anything moldy, sharp, or insect-damaged, and dry damp finds before bringing them indoors. Flat leaves suit rubbings and prints, flexible twigs form weaving frames, and dry seeds add controlled texture to collages. Adults should supervise collection, handle hot glue or pruning tools, and choose larger pieces for children who may still put small objects in their mouths.
Collecting and Preparing Natural Materials Safely
A useful collection begins with fallen, identifiable, physically sound materials rather than everything children can carry home. Look for intact leaves, firm pinecones, smooth bark fragments, dry seedpods, and twigs without thorns or splintered ends. Skip mushrooms, berries, animal remains, poison ivy, unfamiliar plant sap, and anything carrying visible eggs, webs, mold, or damp decay. Public parks, nature preserves, school grounds, and private property may restrict collecting, so obtain permission and follow posted rules.
Gathering close to home reduces another concern: transporting insects or plant diseases in firewood, bark, branches, and other untreated plant matter. Keep collected items local, take only a modest amount, and leave living plants attached. A shallow basket or paper bag is better than a sealed plastic bag for a fall walk because air circulation limits condensation. Children can sort finds outdoors into groups such as flat, flexible, textured, and structural; that classification immediately suggests which pieces will print, bend, decorate, or support weight.
Preparation affects both durability and indoor cleanliness. Shake materials outdoors, inspect crevices, and wipe firm surfaces with a barely damp cloth when needed. Spread damp leaves and twigs in a single layer until fully dry. To flatten leaves, place them between plain absorbent paper under several heavy books; replace the paper if it becomes moist. Drying preserves shape better than gluing fresh leaves, which often curl, discolor, or trap moisture beneath the adhesive.
Match the objects to the child’s age and habits. Seeds, acorns, and tiny cones are inappropriate for children who mouth objects, while brittle twigs can snap into sharp points. Wash hands after handling outdoor finds, particularly before eating. Adults should trim rough branches and operate hot-glue tools; children can use washable school glue, paper tape, yarn, or low-tack masking tape instead. Baking, microwaving, bleaching, or spraying collected objects is not a universal safety solution and may create odors, fire risk, or damaged materials.
A compact preparation check keeps the activity manageable:
- Permission: Collect only where removal is allowed.
- Condition: Reject wet, moldy, thorny, sharp, or inhabited pieces.
- Dryness: Air-dry finds completely before storage or gluing.
- Scale: Remove choking-size objects when younger children participate.
- Storage: Use labeled paper bags or open trays rather than damp sealed containers.
Leaf Prints, Rubbings, and Layered Pictures
Leaves offer three distinct effects: veins create texture, silhouettes create recognizable shapes, and overlapping colors create depth. Broad, freshly fallen leaves that remain pliable are easiest to print. Dry, crumbly specimens are better reserved for supervised collage fragments because pressure from a crayon or paint roller can break them apart. A mixed tray of maple-like lobes, narrow blades, and rounded leaves gives children meaningful shape choices without requiring a complicated template.
Choose the Technique by Leaf Condition
For a rubbing, place the leaf vein-side up beneath ordinary paper, hold the paper still, and sweep the side of an unwrapped crayon across it. Light pressure reveals the vein network more clearly than hard scribbling. If the image looks patchy, the usual problem is movement or paper that is too thick—not a lack of force. Tape the paper corners to the table and try a thinner sheet before replacing the leaf.
For printing, apply a thin layer of washable tempera paint to the vein side with a sponge or brush. Press the painted surface onto sturdy paper, cover it with scrap paper, and rub gently before lifting from the stem. Heavy paint fills the small channels and produces a solid blob; a nearly dry, even coat retains more detail. Printing is messier than rubbing but captures stronger color, while rubbing is faster, quieter, and easier for a mixed-age group.
Layered leaf pictures turn imperfect impressions into intentional scenes. Two pointed leaves can become fox ears, narrow leaves can suggest feathers, and overlapping circles of small leaves can form a tree canopy. Rather than deciding what every shape must represent, invite the child to rotate pieces before gluing. That pause develops composition and prevents the common mistake of attaching the first arrangement before checking spacing.
Pressed-leaf collage requires a flexible adhesive film. Brush a modest amount of white school glue onto the paper rather than soaking the leaf itself, then place a clean sheet over the arrangement and weight it while it dries. Thick glue ridges can wrinkle paper and make leaf edges curl. For more options related to Fall crafts for kids using natural materials, compare printing, rubbing, and collage by setup time: rubbings suit a short activity, prints need a washable work surface, and collages benefit from overnight pressing.
Twig Weaving and Small Nature Structures
Twig weaving works when the frame is rigid and the weaving material is flexible. Choose four straight twigs of similar thickness, overlap their ends into a square, and secure each corner with yarn crossed in both directions. An adult can reinforce the back with glue after the yarn is tied. Uneven twigs are usable, but a severely twisted frame makes the strands slide toward one side and frustrates beginners.
Wrap yarn across the frame in parallel lines to create a simple loom. Children can weave ribbon, grasses, strips of colored paper, or soft yarn over and under those lines. Natural grasses should be dry and free of sharp seed heads. Beginners usually succeed with a wide spacing and thick yarn because each over-under movement remains visible. Older children can use closer lines, change colors, or insert one flat leaf at a time. Pulling every row tightly may bow the frame, so the finished surface should feel secure without becoming drum-tight.
A child who is not ready for repeated weaving can make a wrapped twig wand or color-study stick instead. Wind yarn around one smooth branch, changing color at natural bumps or knots. This alternative practices hand control without requiring the child to remember an alternating sequence. Signs the method is working include a frame that remains roughly square, rows that stay separated, and materials that can be adjusted without tearing. Sliding knots, curved sides, and bunched rows signal excessive tension or loose corner bindings.
Twigs also support small freestanding constructions, but balance matters more than adhesive. A triangle made from three similar sticks is more stable than a tall square tower. Children can test a structure first with reusable modeling dough at the joints, then decide whether it deserves permanent binding. This trial stage makes cause and effect visible: a wide base resists tipping, matched lengths distribute weight, and diagonal braces reduce wobble.
A common failure is expecting liquid school glue to hold round, heavy sticks at tiny contact points. Yarn binding, paper tape, or modeling dough provides immediate support while glue dries. Hot glue sets faster but belongs in adult hands and can still release from dusty bark. For classroom or sibling groups, prepare one tray of short smooth twigs and one tray of yarn lengths in advance; the controlled selection prevents oversized, unsafe structures while preserving design choice.
Pinecone, Seed, and Acorn Creations
Pinecones, seeds, and acorns add strong texture, but each material needs a different attachment method. Pinecones are bulky and irregular, so they work well as standing figures, paint dabbers, or printing rollers. Seeds and acorn caps are better for flat mosaics and repeating borders. Whole acorns are heavier than they appear and may roll away from a weak glue joint, especially when attached to vertical cardboard.
For a pinecone creature, place the cone on the table first and identify its naturally stable side. Add paper ears, yarn, or large leaf wings while keeping the base clear. A small mound of reusable dough can stabilize the cone during assembly. Avoid pushing tiny decorations deep between scales, where they are difficult to retrieve and may create a choking risk around younger children. If the cone rocks after completion, remove weight from the upper section rather than adding more glue underneath.
A seed mosaic begins with a bold shape drawn on cardboard. Apply glue to one small area at a time and press in dry pumpkin seeds, sunflower seed shells, or other clean, familiar craft-safe pieces. Sorting by size or color before gluing produces deliberate patterns and keeps loose seeds from covering the entire workspace. Cardboard tolerates moisture better than thin printer paper. The activity is suitable only when children can reliably keep small parts away from the mouth, nose, and ears.
Acorn caps can become textured flower centers, miniature bowls in a pretend woodland scene, or stamped circles when dipped lightly in paint. Their shallow form adheres more reliably than a whole acorn. If caps pop off, sand or glue is not necessarily the answer; the cardboard may be bending, the cap may be dusty, or too much glue may be creating a slippery layer. Wipe the base, use a small adhesive dot, and let the piece dry flat without handling.
Durability should match the intended use. A temporary tabletop arrangement can remain unglued and be returned outdoors where appropriate, while a hanging decoration needs a firm cardboard backing and secure attachment points. Natural pieces continue to dry and may change color or loosen over time, so these projects are better treated as seasonal creations than permanent keepsakes. Photographing a delicate arrangement preserves the design without coating it in unnecessary sealants. Related Fall crafts for kids using natural materials can also combine seed patterns with leaf silhouettes, provided small-part precautions remain appropriate for everyone at the table.
Frequently Asked Questions
Do leaves need to be dried before children use them?
Dry leaves before gluing or storing them because trapped moisture encourages curling, staining, and decay. Slightly pliable fallen leaves can be used immediately for printing, then discarded or dried afterward.
What glue works best on pinecones and twigs?
Yarn, paper tape, or modeling dough often holds irregular pieces better during assembly. White school glue suits lightweight additions, while an adult may use hot glue when a fast, stronger joint is necessary.
How can natural materials be checked for insects?
Shake finds outdoors and inspect bark seams, pinecone scales, holes, webs, eggs, and moving insects. Reject inhabited or damaged pieces rather than trying to treat them indoors.
Which nature activity is easiest for preschoolers?
Leaf rubbings with large crayons and broad leaves require fewer small parts than seed mosaics. Secure the paper, supervise collection, and remove brittle or sharp objects.
How should leftover natural craft materials be stored?
Store only fully dry materials in labeled paper bags, shallow boxes, or open trays. Discard anything that develops moisture, odor, mold, insect activity, or excessive brittleness.
Conclusion
The strongest autumn nature projects begin with selective collecting rather than an overflowing basket. Choose permitted, fallen materials; inspect and dry them; then match their physical qualities to the activity. Flat veined leaves reward light printing or rubbing, flexible strands belong in a stable twig frame, and bulky cones need balanced designs rather than excessive glue. Small seeds and acorn pieces require closer supervision and a firm backing.
Set out one technique and a limited material tray first, then add choices as children understand how the pieces behave. Watch for curling leaves, bowing frames, sliding joints, or damp storage—each is a useful signal to adjust pressure, tension, adhesive, or drying time. A careful setup leaves more room for children to arrange, test, revise, and make the collected textures their own.
Now retrieving an image set.
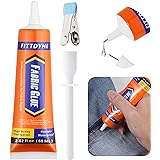
FITTDYHE Fabric Glue Permanent, 60 ML Washable Clear Clothing Glue, Super Fabric Glue for Rhinestones, Patches, Clothes, Denim, Leather, Polyester, Fabrics, Doll Repair, Flannel, Cotton
$9.99 (as of October 21, 2026 23:20 GMT -04:00 - More infoProduct prices and availability are accurate as of the date/time indicated and are subject to change. Any price and availability information displayed on [relevant Amazon Site(s), as applicable] at the time of purchase will apply to the purchase of this product.)
Now retrieving an image set.
Handcraft Blends Peppermint Essential Oil - Huge 4 Fl Oz | Steam Distilled, Premium Grade for Diffuser, Aromatherapy, Skin, Massage, Candle & Soap Making Fragrance
$8.99 (as of October 21, 2026 23:20 GMT -04:00 - More infoProduct prices and availability are accurate as of the date/time indicated and are subject to change. Any price and availability information displayed on [relevant Amazon Site(s), as applicable] at the time of purchase will apply to the purchase of this product.)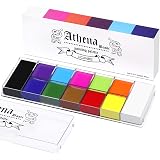
Now retrieving an image set.
UCANBE Athena Basic Face Body Paint Oil Palette, 12 Color Large Black White Professional Face Painting Makeup Kit, Facepaint Pallet for Halloween SFX Party Art Stage Costume Cosplay Clown Goth Make Up
$16.99 (as of October 21, 2026 23:20 GMT -04:00 - More infoProduct prices and availability are accurate as of the date/time indicated and are subject to change. Any price and availability information displayed on [relevant Amazon Site(s), as applicable] at the time of purchase will apply to the purchase of this product.)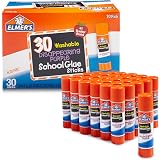
Now retrieving an image set.
Elmer's Disappearing Purple School Glue Sticks, Washable, 7 Grams, 30 Count - Posters, Back to School, Bulk Pack for Classrooms, #1 Teacher Brand
$9.97 (as of October 21, 2026 23:20 GMT -04:00 - More infoProduct prices and availability are accurate as of the date/time indicated and are subject to change. Any price and availability information displayed on [relevant Amazon Site(s), as applicable] at the time of purchase will apply to the purchase of this product.)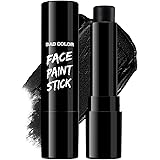
Now retrieving an image set.
BADCOLOR Black Cream-Blendable Face Body Paint Stick for Adults Children Eye Black Softball Football Baseball Sports , Non-Toxic Hypoallergenic for Halloween SFX Makeup Cosplay Joker Costume Parties
$5.99 (as of October 21, 2026 23:20 GMT -04:00 - More infoProduct prices and availability are accurate as of the date/time indicated and are subject to change. Any price and availability information displayed on [relevant Amazon Site(s), as applicable] at the time of purchase will apply to the purchase of this product.)
Now retrieving an image set.