
Felt sheets for children’s no-sew crafts work best when the material is firm enough to hold its shape, easy for the child to cut, and compatible with the chosen adhesive. Stiff synthetic felt suits flat ornaments, masks, and structured pieces, while softer felt bends more naturally for finger puppets and rolled forms. Adults should match the cutting tool to the child’s ability, avoid loose decorations that could become choking hazards, and test glue on a scrap before assembly. Clean edges, secure bonds, and pieces that remain flat after drying indicate that the felt, adhesive, and design are working together.
Choosing Felt That Matches the Project
Felt thickness and firmness determine whether a finished piece stands, folds, drapes, or collapses. A sheet that feels substantial and returns to a flat position after being bent is useful for crowns, masks, bookmarks, hanging shapes, and play-food pieces. Softer sheets are better for finger puppets, rolled flowers, pouches, and other forms that need to curve. Choosing by color alone often produces a frustrating mismatch between the material and the intended shape.
Most inexpensive children’s felt is synthetic, commonly made with polyester or a blended fiber. It is widely available, comes in bright colors, and usually tolerates repeated handling. Wool or wool-blend felt tends to have a denser surface and refined appearance, but it costs more and may be unnecessary for a short classroom activity. Adhesive-backed sheets save assembly time, although their release liners and exposed sticky edges can be awkward for young children. Standard sheets paired with a separate adhesive give an adult more control over where the bond occurs.
Surface density matters as much as thickness. Hold a sheet toward a light source and look for thin areas or visible gaps between fibers. Sparse felt may stretch around narrow cuts, allow wet glue to soak through, and show the color of a darker layer beneath it. Dense felt accepts small details more cleanly. For a face on an animal puppet, for example, compact white and black felt will retain round eye shapes better than a loose, fuzzy sheet.
Check the project’s largest unsupported area before buying a pack. A broad mask needs more body than a two-inch leaf glued onto a greeting card. If the available felt is too soft, bonding two layers can add structure, but it also creates thicker edges and increases drying time. Cardstock can reinforce a flat piece, although it reduces flexibility and may crease if the project is bent. A small sample build reveals these tradeoffs before multiple children begin.
Color packs are practical only when their usable shades match the activity. A large assortment can contain several colors that remain untouched, while individual sheets allow deliberate selection of backgrounds, details, and high-contrast accents. For more focused comparisons of sheet formats and uses, the collection on Felt sheets for children’s no-sew crafts can help connect material choice to the planned form. The most reliable purchase is not the largest pack; it is the felt that bends, cuts, and layers as the design requires.
Cutting Felt Without Frayed or Distorted Shapes
Accurate felt cutting depends on controlling both the fabric and the cutting path. Felt compresses under fingers and can shift as scissors open and close, so tracing a detailed template does not guarantee a clean result. Broad curves, thick stems, and rounded corners are more forgiving than narrow points or intricate notches. Designs for beginning cutters should use generous shapes rather than miniature details that demand adult-level control.
Sharp scissors sized for the user generally make a cleaner cut than dull blades that push fibers ahead of the edge. Children’s safety scissors vary widely: some cut paper well but chew through felt, while others handle thin synthetic sheets adequately. Test the exact scissors and felt together. If the blades require repeated sawing, leave fuzzy ridges, or make the child pull forcefully, an adult should cut that part or select a simpler outline. Tool supervision should reflect the child’s maturity and the scissors being used, not merely the age printed on a package.
Templates can be traced with washable fabric-marking tools, tailor’s chalk, or another marker tested on a scrap. Ordinary pen may bleed through pale felt or remain visible along the edge. Place the template on the back of the sheet and reverse asymmetrical shapes when necessary. A left-facing bird traced on the back will face right after it is turned over, a small planning detail that prevents mismatched pairs.
A practical cutting sequence keeps the sheet stable:
- Rough-cut around the template. Separate the working area from the full sheet while leaving a margin.
- Trim long edges before tight curves. Removing excess material prevents it from catching on the scissors.
- Rotate the felt, not the cutting hand. Small rotations create smoother arcs and reduce jagged corrections.
- Cut interior openings last. An adult can fold or gently pinch the center to start an opening without slicing from an outside edge.
Small decorative pieces introduce another choice: cut felt details or draw them. A child may spend more time struggling with tiny pupils, scales, or spots than assembling the main form. Fabric markers can replace very small cutouts when the felt accepts ink without feathering. Larger tactile features remain worthwhile because children can position, remove, and rearrange them before gluing.
Signs of a workable cutting plan include edges made in one continuous pass, shapes that lie flat afterward, and details wide enough to handle without stretching. Frequent blade jams, distorted points, and scraps stuck in the hinge show that the material, tool, or template needs adjustment. Simplifying the outline usually improves the child’s experience more than repeatedly correcting the same difficult cut.
Matching Adhesives to Felt and Child Skill
Felt bonds securely only when the adhesive reaches enough fibers without saturating the sheet. Too little glue grips the fuzzy surface but releases when the piece bends. Too much travels through thin felt, creates dark wet patches, and leaves a stiff halo after drying. The useful amount is usually a thin, even application concentrated away from visible edges.
White school glue is accessible and easy to clean while wet, making it suitable for supervised children’s activities. It works best on broad, flat overlaps that can remain undisturbed during drying. Because it contains water, it may curl thin pieces or require a longer wait before the project can be handled. A glue stick creates less mess, but some formulas coat only the upper fibers and fail under repeated flexing. It is more dependable for light decorations on a flat base than for puppet seams or wearable items.
Fabric adhesive may produce a stronger, more flexible connection, depending on the product and materials, but adults must read and follow its label for ventilation, cleanup, skin contact, age guidance, and curing time. Hot glue sets quickly and can anchor thick layers, yet the burn risk makes application an adult task. It can also form hard lumps under thin felt. Self-adhesive felt avoids liquid glue, although once two sticky surfaces touch, repositioning may be difficult.
Match the adhesive to how the object will be used. A flat seasonal picture needs only enough hold to survive display. A finger puppet is squeezed and flexed repeatedly, so its side seams need a continuous bond with room left for the finger opening. A mask adds movement, warmth, and tension from an elastic strap; reinforced attachment points are more important than gluing every decorative edge.
Before children assemble the final design, create a small test joint with the same felt layers. Let it dry for the full period stated on the adhesive label, then bend and gently pull the overlap. Peeling at the corners suggests incomplete coverage or poor compatibility. A rigid, soaked patch signals excess adhesive. A useful bond remains attached during ordinary handling without making the surrounding felt excessively hard.
Set up glue portions according to the activity rather than giving every child a full bottle. A shallow dish with a craft stick allows controlled spreading over larger pieces, while a fine-tip bottle suits dots and short lines. Protect the table and separate wet assemblies so they do not bond to one another. The adhesive notes within Felt sheets for children’s no-sew crafts are most useful when considered alongside sheet density, overlap width, and expected handling.
Planning Safe, Durable No-Sew Builds
A successful no-sew activity separates child-led choices from tasks that require adult control. Children can arrange colors, place large features, trace uncomplicated forms, and press safe adhesive joints. Adults can prepare difficult cuts, operate hot tools if such tools are used, read product labels, and inspect components that may loosen. This division preserves creative participation without treating every step as equally suitable for every child.
Loose parts deserve particular attention when younger children or siblings are present. Tiny felt circles, beads, buttons, pom-poms, magnets, elastic pieces, and plastic eyes can become choking or ingestion hazards. Felt does not make an attached object safer merely by covering it. For projects intended for young children, large felt features drawn with fabric marker or securely bonded broad shapes are often more appropriate than small three-dimensional decorations. Magnets and button-style batteries should not be incorporated casually into children’s projects.
Build order affects both appearance and durability. Lay out every layer before opening the glue, then work from the largest base shapes toward the smallest surface details. For a woodland finger puppet, join the front and back body pieces first while preserving the lower opening. Add the muzzle and ears after confirming that the body fits, then finish with eyes and markings. Gluing the face first may look efficient, but misalignment during seam assembly can leave features tilted or hidden.
Use a compact pre-build check before distributing materials:
- Scale: Can the child grasp and position each part without crushing or losing it?
- Tool fit: Do the selected scissors cut this specific felt cleanly?
- Bond area: Are overlaps broad enough for the chosen adhesive?
- Use stress: Will the object hang, bend, stretch, or be worn?
- Drying space: Can each piece remain flat and untouched until cured?
Durability should be judged against the project’s purpose. A collage made for one display session does not need the same reinforcement as a play item expected to survive repeated use. Adding multiple backing layers to every design wastes material and may make cutting harder. Reinforce only stress points: the top hole of a hanging ornament, the strap area of a mask, or the joined edge of a puppet.
Inspect the result after drying rather than assuming a clear adhesive is secure. Lift corners gently, check whether attached decorations rotate, and confirm that openings remain usable. Wrinkling, persistent tackiness, strong residual odor, or adhesive transfer to fingers means the item should not yet enter play. If a seam fails, remove loose glue where possible and rebuild with a wider overlap instead of repeatedly adding glue to the exposed edge. Planning resources for Felt sheets for children’s no-sew crafts should support this test-and-adjust process rather than encouraging a single material for every design.
Frequently Asked Questions
What type of felt is easiest for children to cut?
Firm, evenly dense synthetic felt is often easier to control than very soft or fuzzy felt. Test it with the child’s actual scissors because some safety scissors cut paper but struggle with fabric.
Can a glue stick hold felt pieces together?
A glue stick may hold lightweight details on a flat project, but it is less reliable for flexible seams, wearable pieces, or objects handled repeatedly. Make a scrap test and let it dry fully before deciding.
How can felt shapes be traced without visible pen marks?
Trace on the back with a fabric-marking tool or chalk that has been tested on a scrap. Reverse asymmetrical templates so the finished shape faces the intended direction.
Why does felt curl after gluing?
Thin felt may curl when it absorbs moisture from liquid glue or when glue is applied unevenly. Use a thinner coat, keep the piece flat while drying, or choose denser felt.
Are adhesive-backed felt sheets suitable for children?
They can simplify flat projects, but the sticky surfaces may be difficult to reposition and release liners create extra waste. Adults should still check product guidance and supervise small pieces.
Conclusion
Choose felt according to the object’s movement, structure, and expected use rather than treating every sheet as interchangeable. Dense, firm material favors crisp flat forms; softer material serves designs that must curve. Test the child’s scissors, simplify outlines that distort during cutting, and make a sample adhesive joint before preparing a group activity. Large parts and broad overlaps generally produce cleaner, safer, more durable results than miniature decorations and narrow seams.
Lay out the complete design before gluing, reserve higher-risk tools and difficult cuts for an adult, and allow the stated curing time. After drying, check corners, stress points, openings, and attached details. If the piece curls, peels, or becomes rigid, adjust the glue amount, overlap, or felt density on the next build instead of adding more material without diagnosing the problem.
Now retrieving an image set.
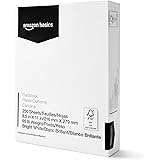
Amazon Basics Cardstock Paper, 8.5" x 11", 65 lb/176 gsm, 96 Bright White, 250 Sheets
$10.63 (as of October 21, 2026 23:20 GMT -04:00 - More infoProduct prices and availability are accurate as of the date/time indicated and are subject to change. Any price and availability information displayed on [relevant Amazon Site(s), as applicable] at the time of purchase will apply to the purchase of this product.)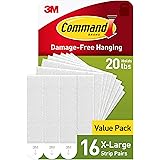
Now retrieving an image set.
Command 20 lb X-Large Picture Hanging Strips, 16 Pairs White Command Strips Heavy Duty Picture Hanger
$10.39 (as of October 21, 2026 23:20 GMT -04:00 - More infoProduct prices and availability are accurate as of the date/time indicated and are subject to change. Any price and availability information displayed on [relevant Amazon Site(s), as applicable] at the time of purchase will apply to the purchase of this product.)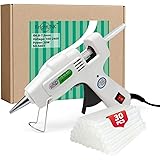
Now retrieving an image set.
Krightlink Mini Hot Glue Gun Kit with 30 Glue Sticks 20w Fast Preheating | 20w Hot Melt High Temp hot glue gun, Anti-Drop Precision Nozzle, for School Crafts DIY Arts, Quick Home Repairs-White
$8.54 (as of October 21, 2026 23:20 GMT -04:00 - More infoProduct prices and availability are accurate as of the date/time indicated and are subject to change. Any price and availability information displayed on [relevant Amazon Site(s), as applicable] at the time of purchase will apply to the purchase of this product.)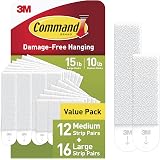
Now retrieving an image set.
Command 15 & 10 lb Assorted Picture Hanging Strips, 28 Pairs, SIOC | White Picture Hanging Strips, Damage-Free Wall Hangers for Frames, No Tools Required, Ideal for Decorating Apartments, Dorms
$13.99 (as of October 21, 2026 23:20 GMT -04:00 - More infoProduct prices and availability are accurate as of the date/time indicated and are subject to change. Any price and availability information displayed on [relevant Amazon Site(s), as applicable] at the time of purchase will apply to the purchase of this product.)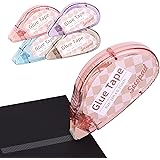
Now retrieving an image set.
Secopad Scrapbook Tape, Glue Tape for Crafts, 4 Pack, Light-Colored Shell | 0.3IN x 26FT, Sticky & Safe, Double Sided Tape for Crafts, Scrapbooking Junk Journaling Supplies, For School Office Teachers
$7.99 (as of October 21, 2026 23:20 GMT -04:00 - More infoProduct prices and availability are accurate as of the date/time indicated and are subject to change. Any price and availability information displayed on [relevant Amazon Site(s), as applicable] at the time of purchase will apply to the purchase of this product.)
Now retrieving an image set.