
Effective craft paper storage sorts supplies first by sheet size, then by color or paper type, while keeping frequently used stock within a child’s reach. Use shallow horizontal trays for construction paper, upright file holders for cardstock and specialty sheets, and labeled scrap folders for reusable offcuts. Store tissue paper flat or loosely folded so it does not become crushed, and separate adhesive-backed or glitter paper to prevent transfer onto clean sheets. A workable system should protect corners, make quantities visible, and give every sheet a clear return location without requiring children to interpret complicated labels.
Choose a Sorting System That Matches How Paper Is Used
The most useful sorting order is based on the decisions a child makes before beginning a project. Sheet size usually belongs at the top of the system because full-size paper, small sheets, and scraps need different containers. Within each size, divide the stock by color, paper type, or intended use according to the collection’s size. A small home supply may need only three groups: plain drawing paper, colored paper, and specialty paper. A classroom or busy family craft area may benefit from separate locations for construction paper, cardstock, tissue paper, patterned sheets, and reusable scraps.
Color sorting works well when children frequently choose paper by appearance. Broad color families are easier to maintain than highly specific shades. Red and pink can share a tray, for example, unless both are used often enough to justify separate spaces. A rainbow of individual compartments looks orderly when freshly arranged, but it becomes inefficient if several sections are nearly empty while another overflows. The storage should reflect actual inventory rather than an idealized display.
Sorting by paper type is more useful when materials behave differently during a project. Cardstock is stiff enough for cards and structures, tissue paper is delicate, and adhesive-backed sheets need their release liners protected. Combining these materials merely because they share a color can lead to bent cardstock, wrinkled tissue, and adhesive residue on ordinary sheets. Children may also pull out an entire mixed stack while searching for one suitable piece.
A practical test is to watch how paper is selected and returned during two or three craft sessions. If children repeatedly ask where small pieces belong, the scrap categories are unclear. If they remove several trays to reach white drawing paper, the most-used stock is in the wrong position. If sheets migrate between compartments, labels may describe distinctions that users do not recognize.
Use this priority order when setting up Craft paper storage ideas for sorting supplies:
- Separate incompatible sizes: full sheets, half sheets, and scraps.
- Protect distinct materials: keep tissue, glitter, adhesive-backed, and heavyweight stock apart.
- Divide common paper by color: use only as many color groups as users can maintain.
- Place high-use groups first: reserve the easiest positions for everyday stock.
The common mistake is creating too many categories before testing the system. Fine sorting increases the number of decisions required during cleanup. Begin with broad groups and split one only when it consistently becomes crowded or difficult to search. A successful arrangement is not the one with the most labels; it is the one that still looks understandable after children have used it independently.
Select Containers That Protect Each Paper Type
Container orientation should match the paper’s stiffness, quantity, and susceptibility to damage. Horizontal trays support flexible construction paper across the entire sheet and make each color group easy to lift. Upright magazine files or file boxes use shelf space efficiently, but thin sheets can slump, curl, or slide beneath dividers. Vertical storage works better for cardstock, paper pads, and smaller quantities held inside rigid folders.
For standard sheets, shallow stackable trays provide better access than one deep bin. A deep container hides lower colors and encourages users to place new paper on top without sorting it. Separate trays limit the weight pressing on bottom sheets and allow one category to be removed without disturbing the rest. The tradeoff is footprint: a bank of trays needs more shelf width or height than a single box. Where space is tight, group several colors in each tray and add sturdy dividers rather than choosing a deep mixed pile.
Portable lidded cases are useful when supplies move between a closet and a table. Look for an interior slightly larger than the biggest sheet being stored; a close-fitting container can catch corners whenever paper is returned. Clear sides reveal stock levels, although transparency does not replace a front-facing label. Opaque boxes may look calmer in a shared room but require clearer identification and regular inventory checks.
Delicate materials need different treatment. Tissue paper lasts longer when laid flat in a wide drawer or loosely folded along existing creases. Forcing it into an upright file creates collapsed edges that are difficult for young hands to separate. Glitter paper should be isolated in a sleeve, folder, or closed case because loose particles can transfer to drawing paper. Adhesive-backed foam and paper should remain flat with liners intact; tightly rolling them can lift the liner at the edges.
Oversized sheets present another constraint. Rolling poster paper saves floor area, but a roll retains a curve that can interfere with tracing, cutting, or gluing. Flat under-bed boxes, wide art portfolios, or shallow map-style drawers preserve a usable surface. If vertical storage is the only option, place large sheets between two rigid boards inside a portfolio so the lower corners do not buckle.
A weak assumption is that any container labeled for documents will fit craft paper safely. Interior dimensions, lid lips, handles, and tapered walls can reduce usable space. Measure the largest sheets and compare that measurement with the container’s inside dimensions, not its exterior listing. The right fit leaves enough clearance for a child to return paper without folding an edge.
Build an Accessible Paper Station for Children
A child-accessible paper station places everyday choices at a comfortable height while keeping fragile, messy, or limited materials under adult control. Construction paper, drawing sheets, and a modest scrap selection can occupy open trays on a low shelf. Glitter stock, specialty cardstock, and large reserves can sit higher or behind a door. This arrangement preserves independence without exposing the entire inventory during every activity.
Labels should communicate even when a child is not yet reading confidently. Pair a short word with a color swatch, paper sample, or simple image. A red strip on the front of a tray is more direct than a decorative label printed in tiny type. Put labels on the fixed shelf position as well as removable bins; otherwise, children know what a bin contains but not where it should be returned.
Open storage and closed storage solve different problems. Open trays shorten setup and cleanup because children can see where sheets belong. They also expose paper to dust, sunlight, spills, and casual pulling. Closed cases protect inventory and make a multiuse room look tidier, but lids and latches add steps. A useful compromise is an open working supply backed by a closed reserve. Refill the working trays rather than placing a full package within reach.
Consider a family craft table where two children regularly make collages. One wide scrap bin appears convenient, yet it quickly fills with narrow strips, crumpled tissue, and pieces too small to use. Replacing it with three shallow folders—plain scraps, colored scraps, and specialty scraps—makes suitable pieces visible without spreading everything across the floor. A separate discard envelope beside the station gives unusable fragments an obvious destination.
Accessibility also requires safe placement. Heavy paper cases belong on low, stable shelving rather than above a child’s head. Avoid stacking freestanding trays higher than their design permits, and do not position paper directly beside water cups, washable paint, or glue storage that may leak. Paper near a sunny window may fade unevenly, while supplies in a damp basement or humid closet may curl or develop musty odors. A dry interior wall is generally a better location.
Signs that the station is working are observable: children find a sheet without unloading multiple bins, return unused pieces to the correct location, and complete cleanup without repeated directions. Warning signs include folded corners near an undersized opening, piles forming beside full trays, and specialty sheets disappearing into common stock. Adjust the physical setup before adding more rules. More detailed Craft paper storage ideas for sorting supplies will not compensate for a shelf that is difficult to reach or a container that is awkward to open.
Control Scraps, Overfilling, and Long-Term Clutter
Scrap control depends on a minimum usable size and a firm capacity limit. Without both, saved offcuts gradually consume the space intended for full sheets. Choose a threshold related to the crafts commonly made. A household that uses paper punches may retain smaller pieces than one focused on folded cards. As a simple physical rule, keep only pieces that lie flat and fit fully inside the designated scrap folder or tray.
Shape affects usefulness as much as area. A clean rectangular offcut is easier to draw on, fold, or cut again than a larger piece with many narrow projections. Long strips may deserve their own envelope if they are often used for borders, paper chains, or weaving. Wrinkled tissue and glue-marked pieces generally create more searching than value. Saving every fragment may seem economical, but an overfilled bin makes the genuinely useful material harder to find.
Apply a one-container limit to each scrap category. When a folder will not close or a tray rises above its fill line, sort that category before adding another container. Lay the contents on a table, remove damaged pieces, align usable rectangles, and return only what fits without compression. This capacity rule is easier to enforce than a schedule because the storage itself signals when action is needed.
Full-sheet inventory needs similar boundaries. Bent corners often indicate that a tray is packed too tightly, not that users are careless. Difficult removal creates friction against neighboring sheets, and returning one sheet may buckle several others. Leave enough space for fingers to lift a small stack cleanly. Keep unopened packages in reserve rather than forcing them into working trays.
A brief monthly check is sufficient for many home craft areas, while a classroom station may need attention more often. Look for fading labels, mixed sizes, warped stock, adhesive liners lifting, and trays that are consistently empty or crowded. Empty compartments can be consolidated. A frequently overflowing color deserves a larger tray or a nearby reserve. These changes should follow actual use rather than symmetry.
The most common failure is treating organization as a single cleanup event. Paper quantities and project preferences change, so fixed categories eventually stop matching the collection. Another mistake is buying containers before measuring sheets, shelf openings, and available depth. Test the proposed arrangement with sturdy folders, clean boxes, or existing trays first. Once the categories prove useful, replace temporary pieces selectively. That approach directs the budget toward storage that solves an observed problem rather than adding another layer of containers.
Frequently Asked Questions
Is it better to store craft paper vertically or horizontally?
Store flexible construction paper and tissue paper horizontally to reduce slumping and creases. Vertical files suit cardstock, paper pads, and smaller groups supported by rigid folders.
How should craft paper scraps be organized?
Separate scraps into a few useful groups, such as plain, colored, and specialty paper. Set a minimum usable size and keep each group within one shallow folder or tray.
What is the best way to label paper storage for young children?
Combine a short word with a matching color swatch or sample of the material. Label both the removable container and its shelf position so children can return it correctly.
How can oversized craft paper be stored without curling?
Use a flat portfolio, wide shallow drawer, or under-bed case. If sheets must stand vertically, support them between rigid boards rather than rolling them.
How often should a craft paper station be reorganized?
Check it when trays become difficult to close, scraps exceed their container, or children repeatedly misfile sheets. A quick monthly review works for many home collections.
Conclusion
Start by separating full sheets, smaller stock, and reusable scraps, then create only the color or material divisions that match actual crafting habits. Choose trays, files, and cases according to paper stiffness and interior dimensions rather than appearance alone. Everyday sheets should be visible and reachable, while delicate or messy materials need protected storage and closer supervision.
Before buying a complete organizer, test the arrangement with containers already available. Watch where paper bends, where piles form, and which labels children understand without help. Set a fixed capacity for scraps and working stock so crowding becomes an instruction to edit or refill, not a reason to add another miscellaneous bin. A modest system that users can reset after each project will protect more paper and require less maintenance than an elaborate arrangement with too many categories.
Now retrieving an image set.
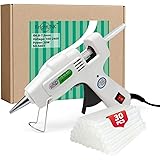
Krightlink Mini Hot Glue Gun Kit with 30 Glue Sticks 20w Fast Preheating | 20w Hot Melt High Temp hot glue gun, Anti-Drop Precision Nozzle, for School Crafts DIY Arts, Quick Home Repairs-White
$8.54 (as of October 21, 2026 23:20 GMT -04:00 - More infoProduct prices and availability are accurate as of the date/time indicated and are subject to change. Any price and availability information displayed on [relevant Amazon Site(s), as applicable] at the time of purchase will apply to the purchase of this product.)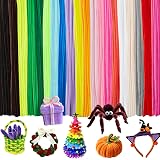
Now retrieving an image set.
200 Pcs Pipe Cleaners Craft Bulk, 20 Colors Pipe Cleaner, Chenille Stems | Kids Toys & Games Gifts for Ages 5-7, Craft Supplies for Projects Creative DIY Room Decor, Halloween Christmas Decorations
$5.99 (as of October 21, 2026 23:20 GMT -04:00 - More infoProduct prices and availability are accurate as of the date/time indicated and are subject to change. Any price and availability information displayed on [relevant Amazon Site(s), as applicable] at the time of purchase will apply to the purchase of this product.)
Now retrieving an image set.
UCANBE Face Body Paint Set-Athena Painting Palette,10 Professional Artist Brush,Large Deep Pan Ideal for Halloween Cosplay Party SFX Arty Stage Makeup
$23.99 (as of October 21, 2026 23:20 GMT -04:00 - More infoProduct prices and availability are accurate as of the date/time indicated and are subject to change. Any price and availability information displayed on [relevant Amazon Site(s), as applicable] at the time of purchase will apply to the purchase of this product.)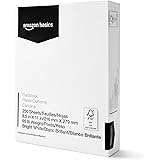
Now retrieving an image set.
Amazon Basics Cardstock Paper, 8.5" x 11", 65 lb/176 gsm, 96 Bright White, 250 Sheets
$10.63 (as of October 21, 2026 23:20 GMT -04:00 - More infoProduct prices and availability are accurate as of the date/time indicated and are subject to change. Any price and availability information displayed on [relevant Amazon Site(s), as applicable] at the time of purchase will apply to the purchase of this product.)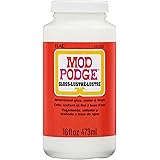
Now retrieving an image set.
Mod Podge Gloss Sealer, Glue & Finish: All-in-One Craft Solution- Quick Dry, Easy Clean, for Wood, Paper, Fabric & More. Non-Toxic - Craft with Confidence, Made in USA, 16 oz., Pack of 1
$7.99 (as of October 21, 2026 23:20 GMT -04:00 - More infoProduct prices and availability are accurate as of the date/time indicated and are subject to change. Any price and availability information displayed on [relevant Amazon Site(s), as applicable] at the time of purchase will apply to the purchase of this product.)
Now retrieving an image set.